Introduction
Welcome to the world of Windows 10, an operating system known for its powerful features and user-friendly interface. As you go about your daily digital activities, you might not be aware that your computer creates temporary files to facilitate various processes. These files serve as temporary placeholders and are typically generated during software installations, system updates, and web browsing sessions.
Temporary files are essential for smooth system operations, but they can also accumulate over time and take up valuable storage space on your hard drive. This can slow down your computer’s performance and lead to storage issues. To optimize your Windows 10 experience, it’s crucial to regularly delete these temporary files.
In this article, we’ll explore different methods to help you efficiently delete temporary files in Windows 10. Whether you prefer a manual approach or want to automate the process, we’ve got you covered. By the end, you’ll be equipped with the knowledge to keep your system running smoothly and maintain your computer’s performance at its peak.
What are temporary files?
Temporary files are an integral part of the Windows operating system and are created by various applications to store data temporarily. These files serve as placeholders while the system performs tasks such as installing or updating software, browsing the internet, or running programs. Once these tasks are completed, the temporary files are no longer needed and can be safely deleted.
The purpose of temporary files is to facilitate smooth operations and enhance system performance. For example, when you install software on your computer, temporary files are created to hold necessary installation data. These files ensure that the installation process runs smoothly and that all required components are accessible. Similarly, when you browse the internet, temporary files known as cache files are created to store website data, such as images and scripts, for faster loading times upon subsequent visits.
Temporary files can be found in various locations on your computer, depending on the applications and tasks performed. They are often stored in dedicated temporary folders, such as the Windows Temp folder, the browser cache folder, or application-specific temporary folders.
Although temporary files are useful during their respective tasks, they can accumulate over time and occupy significant amounts of disk space. This can lead to decreased system performance, slower application launch times, and limited storage capacity. Regularly deleting temporary files is essential to free up disk space, improve system performance, and maintain a clutter-free computer environment.
Now that you have an understanding of what temporary files are and why they are created, let’s explore various methods to delete these files from your Windows 10 computer.
Why should you delete temporary files?
Deleting temporary files from your Windows 10 computer is crucial for several reasons. Let’s explore the key benefits of regularly cleaning up these files:
1. Free up disk space: Temporary files can accumulate over time and take up a significant amount of disk space. By deleting these files, you can free up valuable storage space, allowing your computer to run faster and more efficiently. This is especially important if you have a smaller storage capacity or if your disk is nearing its maximum capacity.
2. Improve system performance: When temporary files accumulate, they can impact system performance, causing slow application launches, increased startup times, and overall sluggishness. By removing these files, you can help optimize your system’s performance and enhance its speed and responsiveness.
3. Maintain privacy and security: Temporary files can contain sensitive information, such as browsing history, passwords, and other personal data. If these files are not deleted, they may pose a potential security risk if someone gains unauthorized access to your computer. Regularly clearing temporary files helps protect your privacy and mitigate the risk of data breaches.
4. Resolve software conflicts: In some cases, temporary files can interfere with software installations or updates, leading to compatibility issues or software conflicts. By deleting these temporary files, you can ensure a clean environment for software installations, reducing the likelihood of errors or conflicts.
5. Enhance browsing experience: Temporary files created by web browsers, known as cache files, are designed to improve the loading speed of websites you visit frequently. However, if these files are not cleared periodically, they can accumulate and potentially cause browser performance issues. Deleting temporary files, including browser cache files, can help ensure a smooth and seamless browsing experience.
By deleting temporary files regularly, you can optimize your Windows 10 computer’s performance, free up valuable disk space, and maintain a secure and efficient computing environment.
How to delete temporary files manually
Deleting temporary files manually involves navigating to the temporary file locations and deleting the files yourself. This method provides more control over which files you delete and allows you to review the files before removing them. Here’s a step-by-step guide on how to delete temporary files manually in Windows 10:
Step 1: Open the Run dialog box: Press the Windows key + R on your keyboard to open the Run dialog box.
Step 2: Type “temp” and press Enter: In the Run dialog box, type “temp” (without quotes) and press Enter. This will open the Windows Temp folder in Windows Explorer.
Step 3: Select all temporary files: In the Windows Temp folder, press Ctrl + A to select all the files and folders. Alternatively, you can individually select the files and folders you want to delete.
Step 4: Delete the selected files: Once you have selected the temporary files, right-click on the selected items and choose “Delete” from the context menu. Confirm the action if prompted.
After following these steps, the selected temporary files will be permanently deleted from your computer. It’s important to note that deleting files from the Windows Temp folder will not cause any issues as these files are meant to be temporary and are safe to remove.
Note: Deleting temporary files manually only removes files from the Windows Temp folder. To fully remove temporary files from other locations, such as the browser cache or application-specific temporary folders, you’ll need to follow similar steps specific to those locations.
Now that you know how to delete temporary files manually, you can regularly perform this task to keep your Windows 10 computer running smoothly and efficiently.
Step 1: Open the Run dialog box
The first step to manually delete temporary files in Windows 10 is to open the Run dialog box. The Run dialog box provides a quick and convenient way to execute commands and access various Windows tools and applications. Here’s how you can open the Run dialog box:
Method 1: Using the keyboard shortcut
Press the Windows key + R simultaneously on your keyboard. The Windows key is typically located between the left Ctrl and Alt keys.
Method 2: Using the Start menu
Click on the Windows Start menu icon located in the lower-left corner of your screen. Type “Run” (without quotes) in the search bar. From the search results, click on the “Run” desktop app to open the dialog box.
After successfully opening the Run dialog box, you are ready to proceed to the next step in the process of deleting temporary files manually.
Note: If you encounter any issues opening the Run dialog box, ensure that you have administrative privileges on your Windows 10 computer. Some commands and tools may require administrative rights for execution.
Now that you’ve opened the Run dialog box, let’s move on to the next step of deleting temporary files in Windows 10.
Step 2: Type “temp” and press Enter
After opening the Run dialog box, the next step in manually deleting temporary files in Windows 10 is to type “temp” in the text field and press Enter. This command will open the Windows Temp folder, which is where temporary files are stored. Here’s how to proceed:
Step 2a: Type “temp” in the Run dialog box: In the Run dialog box, you will see a text field. This is where you can enter commands or file paths. Type “temp” (without quotes) in the text field.
Step 2b: Press Enter: Once you have entered “temp” in the text field, press the Enter key on your keyboard or click the “OK” button. This action will execute the command, and Windows will open the Windows Temp folder.
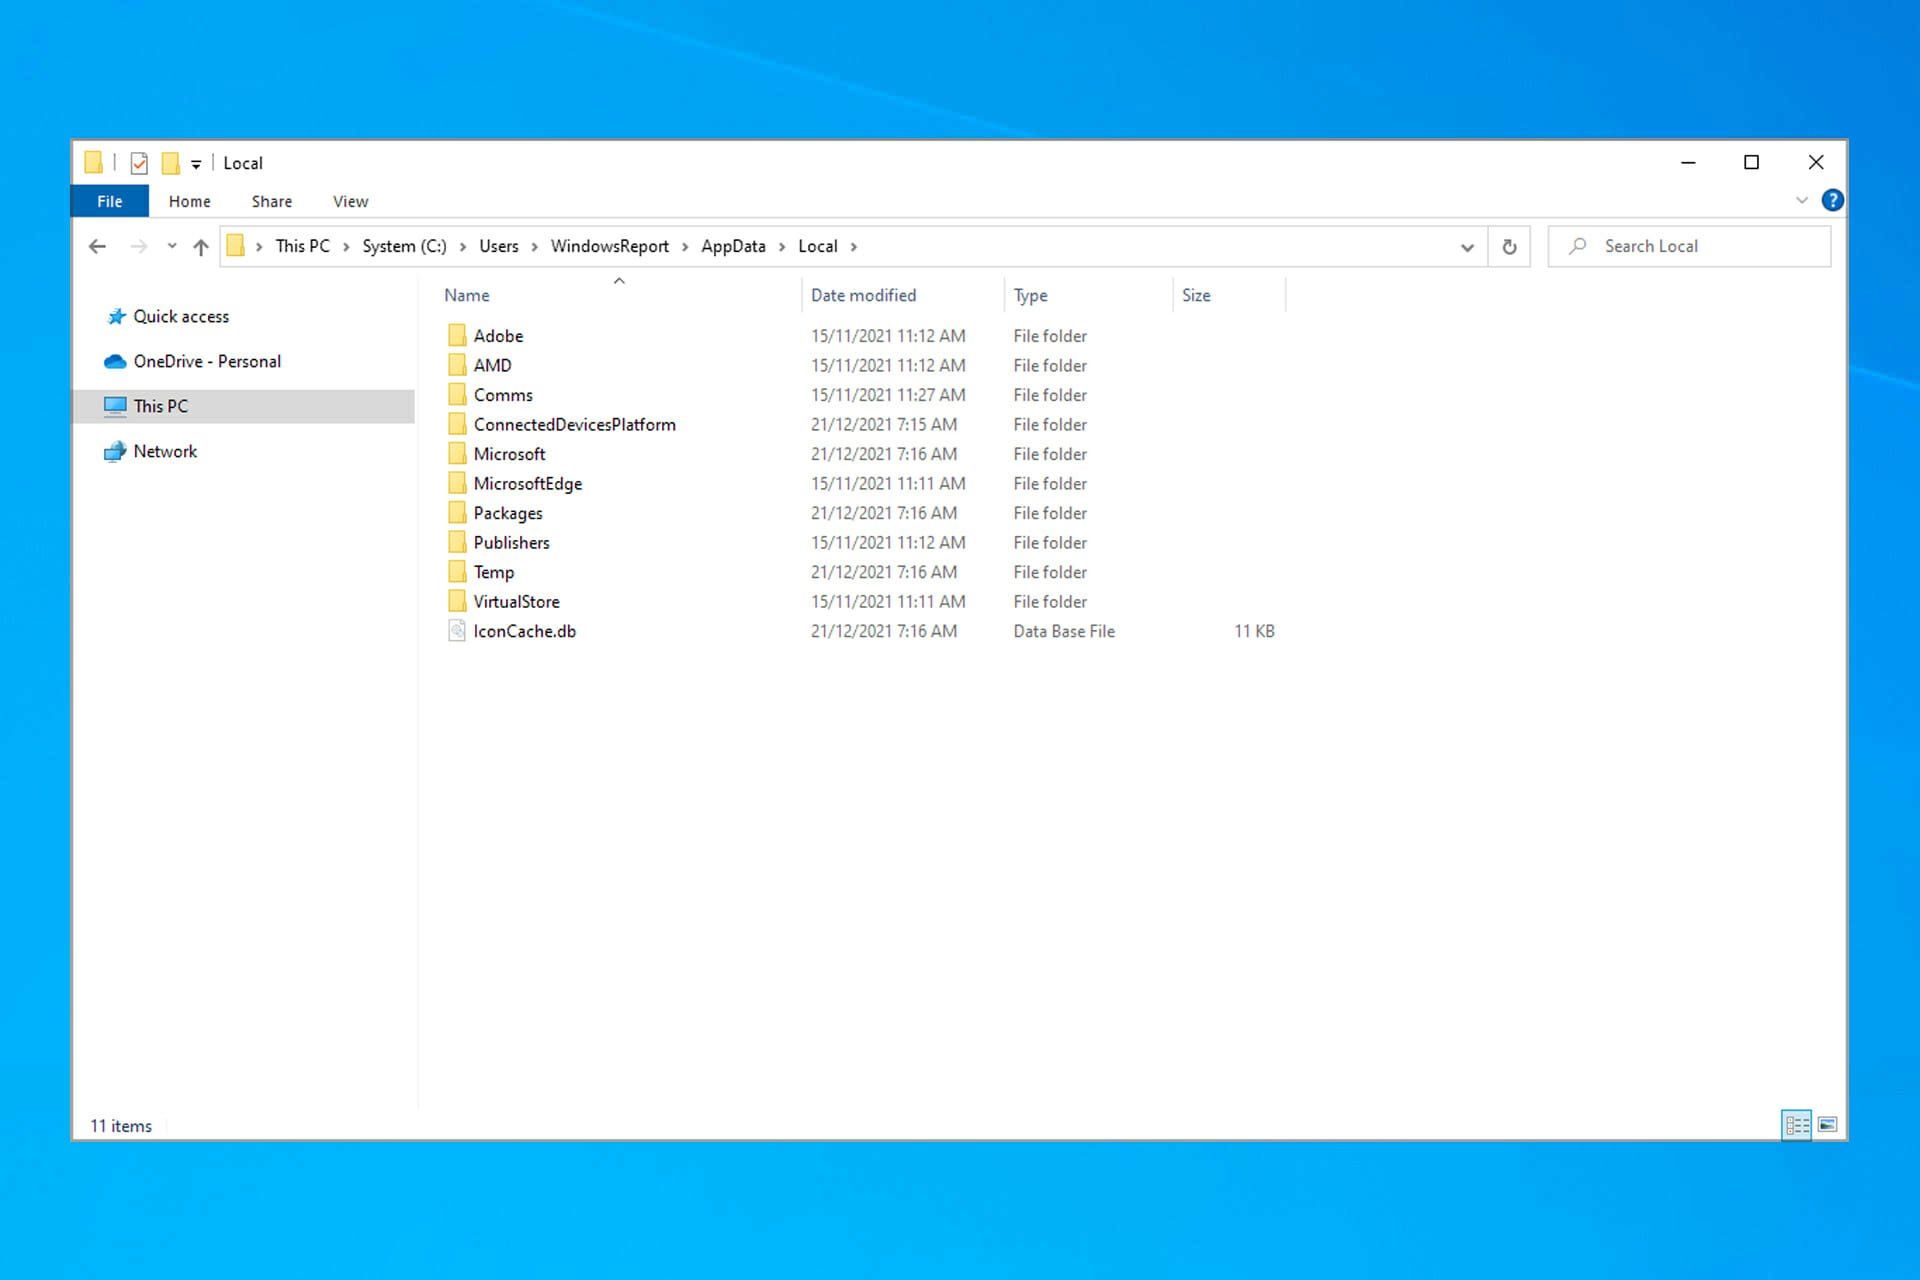
Upon successfully executing the command, a File Explorer window will open, displaying the contents of the Windows Temp folder. This folder contains various temporary files generated by different applications and processes on your computer.
Note: The Windows Temp folder might contain a large number of files and folders, so it may take a moment to load all the items. Be patient while File Explorer displays the contents of the folder.
Now that you have successfully opened the Windows Temp folder, you are ready to proceed to the next step of manually deleting temporary files in Windows 10.
Step 3: Select all temporary files
Once you have opened the Windows Temp folder, the next step in manually deleting temporary files in Windows 10 is to select all the files and folders present in the folder. This will allow you to delete all the temporary files in one go. Follow these steps to select all temporary files:
Step 3a: Use Ctrl + A: With the Windows Temp folder open, you can use the keyboard shortcut Ctrl + A. Press and hold the Ctrl key on your keyboard and simultaneously press the letter A. This will select all the files and folders in the folder.
Step 3b: Use the mouse: Alternatively, you can also use your mouse to manually select all the temporary files. Click on any file or folder within the Windows Temp folder, then press Ctrl + A. This will select all the files and folders present.
After following either of these methods, you will see that all temporary files and folders in the Windows Temp folder are now highlighted, indicating that they have been selected.
Note: It is important to exercise caution when selecting all temporary files, as you do not want to accidentally select and delete important system files. Double-check your selections to ensure that only temporary files are selected.
Now that you have successfully selected all the temporary files in the Windows Temp folder, you are ready to proceed to the next step of manually deleting these files from your Windows 10 computer.
Step 4: Delete the selected files
After selecting all the temporary files in the Windows Temp folder, the final step in manually deleting temporary files in Windows 10 is to permanently remove these files from your computer. Here’s how you can delete the selected files:
Step 4a: Right-click on the selected items: With all the temporary files and folders still selected, right-click on any of the selected items. This will open a context menu with various options.
Step 4b: Choose “Delete” from the context menu: From the context menu that appears, locate and click on the “Delete” option. This action will initiate the deletion process for the selected temporary files.
Step 4c: Confirm the action if prompted: Depending on your Windows 10 settings, you may be prompted to confirm the deletion of the selected files. If prompted, review the confirmation dialog box and click “Yes” or “OK” to proceed with the deletion. Be sure to carefully review the files you are deleting to avoid mistakenly removing any important files.
After confirming the deletion, Windows will proceed to remove the selected temporary files from your computer. The files will be permanently deleted and will no longer occupy space on your hard drive.
Note: Deleting temporary files is a safe process as these files are meant to be temporary and can be safely removed. However, it is always recommended to review the files you are deleting and exercise caution to avoid accidentally deleting important files.
Now that you have successfully deleted the selected temporary files, you have manually cleared out temporary files from your Windows 10 computer, freeing up valuable storage space and improving system performance.
How to delete temporary files using Disk Cleanup
If you prefer a more streamlined and automated approach to deleting temporary files in Windows 10, you can utilize the built-in Disk Cleanup tool. Disk Cleanup is designed to help you reclaim disk space by removing unnecessary files, including temporary files. Follow these steps to delete temporary files using Disk Cleanup:
Step 1: Open Disk Cleanup: Click on the “Start” button in the bottom-left corner of your screen and type “Disk Cleanup” in the search bar. From the search results, select the “Disk Cleanup” app to open it.
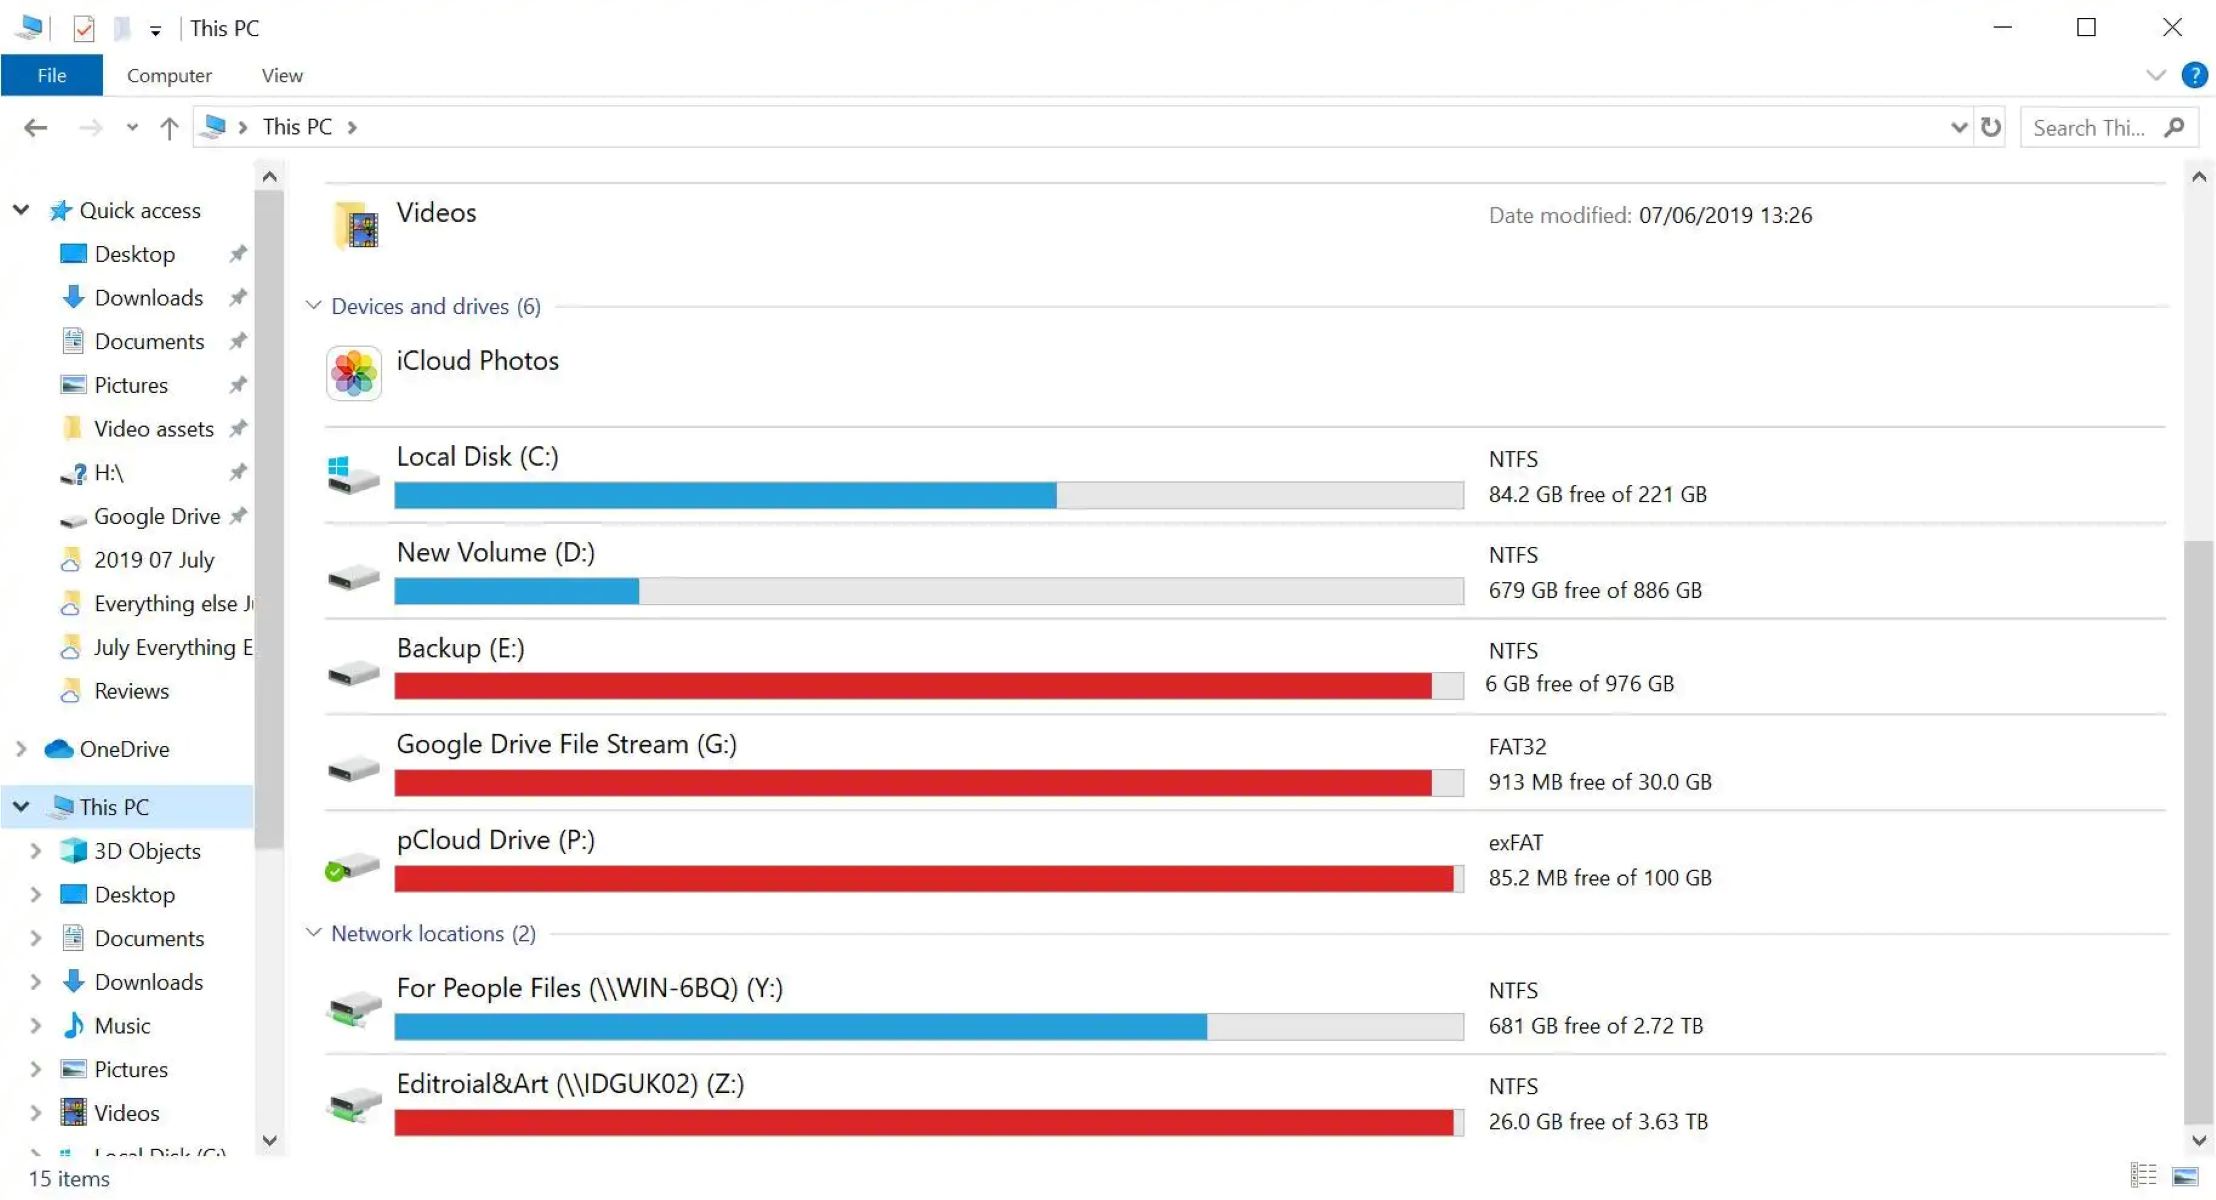
Step 2: Select the drive to clean up: In the Disk Cleanup window, you will see a list of available drives on your computer. Select the drive where your Windows 10 operating system is installed. This is typically the “C:” drive.
Step 3: Select “Temporary files” from the list: After selecting the drive, click on the “OK” button. The Disk Cleanup tool will analyze the drive and present you with a list of file types that can be cleaned up. Scroll down and locate the “Temporary files” option in the list. Check the box next to this option to select it.
Step 4: Start the cleanup process: Once you have selected the “Temporary files” option, click on the “OK” button. A confirmation dialog box will appear, asking if you want to permanently delete these files. Review the information and click on the “Delete Files” button to start the cleanup process.
Disk Cleanup will now proceed to remove the selected temporary files from your Windows 10 computer. The tool will search for other unnecessary files as well, such as system files, recycle bin contents, and more, allowing you to free up additional disk space in the process.
Note: The time it takes to complete the cleanup process depends on the size of the selected temporary files and other unnecessary files found on your computer. Be patient and do not interrupt the process.
Using Disk Cleanup to delete temporary files provides a convenient way to automate the cleanup process and reclaim disk space on your Windows 10 computer. Make sure to utilize this feature regularly to maintain a clutter-free and optimized system.
Step 1: Open Disk Cleanup
To delete temporary files using Disk Cleanup in Windows 10, the first step is to open the Disk Cleanup tool. Disk Cleanup is a built-in utility that helps you remove unnecessary files from your computer, including temporary files. Here’s how you can open Disk Cleanup:
Step 1a: Click on the “Start” button: Located in the bottom-left corner of your screen, the “Start” button is represented by the Windows logo. Click on the “Start” button to open the Start menu.
Step 1b: Search for Disk Cleanup: In the Start menu, you will see a search bar. Type “Disk Cleanup” (without quotes) in the search bar.
Step 1c: Select the Disk Cleanup app: As you type “Disk Cleanup,” you will see search results appearing below the search bar. Look for and select the “Disk Cleanup” app from the search results. It is usually listed as “Disk Cleanup” or “Cleanmgr.”
Step 1d: Choose the drive to clean up: Once you open the Disk Cleanup tool, it will prompt you to select the drive you want to clean up. This is typically the drive where your Windows 10 operating system is installed, which is typically labeled as the “C:” drive. Select the appropriate drive and click on the “OK” button.
After completing these steps, you will have successfully opened the Disk Cleanup tool and are ready to proceed to the next steps to delete temporary files and free up disk space on your Windows 10 computer.
Note: Depending on your Windows 10 setup, you may need administrative privileges to access and use the Disk Cleanup tool. Make sure you have the necessary permissions before proceeding.
Now that you have opened Disk Cleanup, let’s move on to the next step in deleting temporary files using this tool.
Step 2: Select the drive to clean up
After opening the Disk Cleanup tool in Windows 10, the next step is to select the drive that you want to clean up. Disk Cleanup allows you to choose a specific drive or partition on your computer to scan for unnecessary files, including temporary files. Here’s how to proceed:
Step 2a: Disk Selection: Once the Disk Cleanup tool is open, you will see a window titled “Disk Cleanup.” The window will display a list of drives available on your computer.
Step 2b: Choose the drive: Identify the drive where you want to clean up temporary files. It is typically the drive where your Windows operating system is installed, often labeled as the “C:” drive. Select that drive by clicking on it once.
Step 2c: Initiate the cleanup process: After selecting the drive, click on the “OK” button to proceed to the next step.
By following these steps, you have chosen the specific drive or partition that you want to clean up using Disk Cleanup. This will help ensure that the tool targets the correct location and scans for temporary files in the desired drive.
Note: If you have multiple drives or partitions on your computer, you can run Disk Cleanup on each drive separately to remove temporary files and optimize storage space.
Now that you have successfully selected the drive to clean up, proceed to the next step in using Disk Cleanup to delete temporary files in Windows 10.
Step 3: Select “Temporary files” from the list
After choosing the drive to clean up in the Disk Cleanup tool, the next step is to select the “Temporary files” option from the list of files that can be cleaned up. Disk Cleanup provides a comprehensive list of file types that can be safely removed to free up disk space. Here’s how to proceed:
Step 3a: Review the file types: Once you have selected the drive, Disk Cleanup will analyze the selected drive and present you with a list of file types that can be cleaned up. This list will include various categories such as Temporary Internet Files, System error memory dump files, Windows Error Reporting files, and more.
Step 3b: Select “Temporary files”: Scroll through the list and locate the “Temporary files” option. This option typically includes files that are no longer needed and can be safely deleted to recover disk space. Check the box next to “Temporary files” to select this option.
Step 3c: Review other file types if desired: If you wish to clean up other file types in addition to temporary files, you can review the list and select additional options. However, be cautious not to select options that could result in the loss of important or personal data.
By selecting the “Temporary files” option, you ensure that Disk Cleanup will specifically target and remove unnecessary temporary files from your selected drive.
Note: It is generally safe to delete temporary files as they are meant to be temporary and their removal should not adversely affect your system. However, exercise caution when selecting other file types to avoid unintended deletion of important files.
Now that you have successfully selected the “Temporary files” option, you are ready to proceed to the next step in using Disk Cleanup to delete temporary files from your Windows 10 computer.
Step 4: Start the cleanup process
After selecting the “Temporary files” option in the Disk Cleanup tool, the final step is to initiate the cleanup process. By doing so, Disk Cleanup will scan for and remove the selected temporary files from your Windows 10 computer. Here’s how to proceed:
Step 4a: Click on the “OK” button: Once you have selected the “Temporary files” option, click on the “OK” button located at the bottom right corner of the Disk Cleanup window. This will initiate the cleanup process.
Step 4b: Confirmation dialog box: After clicking “OK,” a confirmation dialog box will appear, displaying a summary of the cleanup action. This dialog box may also inform you about the approximate amount of disk space that will be freed up by deleting the temporary files. Review the information to ensure accuracy.
Step 4c: Confirm file deletion: If you are satisfied with the summary, click on the “Delete Files” button to confirm and start the cleanup process. Disk Cleanup will now scan your selected drive for temporary files and remove them, freeing up valuable disk space.
Step 4d: Wait for the process to complete: The time it takes to complete the cleanup process depends on the amount of temporary files that need to be removed and the speed of your computer. Be patient and allow Disk Cleanup to finish its job. During the process, Disk Cleanup may display a progress window or dialog box.
Once the cleanup process is complete, Disk Cleanup will close, and you will have successfully deleted the temporary files from your Windows 10 computer. By removing these unnecessary files, you can regain valuable disk space and potentially improve the performance of your system.
Note: It is advisable to run Disk Cleanup periodically to keep your computer optimized and free from unnecessary temporary files and other unneeded data.
Now that you have started the cleanup process using Disk Cleanup, you can enjoy the benefits of a cleaner and more efficient Windows 10 computer.
How to automatically delete temporary files
If you want a hands-off approach to dealing with temporary files in Windows 10, you can set up automatic deletion. By enabling this feature, Windows 10 will automatically remove temporary files that are no longer needed, saving you the hassle of manually deleting them. Here’s how you can set up automatic deletion of temporary files:
Step 1: Open the Settings app: Click on the Start button in the bottom-left corner of your screen, and then click on the gear-shaped icon to open the Settings app.
Step 2: Go to the “Storage” section: In the Settings app, locate and click on the “System” category. From the options on the left, click on “Storage” to open the storage settings.
Step 3: Click on “Temporary files”: In the Storage settings, you will see various categories related to storage usage on your computer. Scroll down and click on “Temporary files.”
Step 4: Enable the “Delete temporary files that my apps aren’t using” option: In the Temporary files settings, you will find an option titled “Delete temporary files that my apps aren’t using.” Enable the toggle switch for this option to activate automatic deletion of unused temporary files.
Once you have completed these steps, Windows 10 will automatically delete temporary files that are no longer in use by your installed applications. This feature helps keep your system clean and optimized without manual intervention.
Note: It is important to note that enabling the automatic deletion of temporary files will only remove files that are not in use by your apps. Temporary files that are actively being used by apps or processes will not be deleted. Additionally, some temporary files may not be eligible for automatic deletion due to their nature or importance to certain applications.
With automatic deletion of temporary files enabled, you can enjoy a hassle-free experience with a cleaner and more efficient Windows 10 computer.
Step 1: Open the Settings app
The first step to automatically delete temporary files in Windows 10 is to open the Settings app. The Settings app serves as a centralized hub for managing various aspects of your Windows 10 computer. Here’s how you can open the Settings app:
Step 1a: Click on the Start button: Located in the bottom-left corner of your screen, the Start button is represented by the Windows logo. Click on the Start button to open the Start menu.
Step 1b: Locate the Settings app: In the Start menu, you will see a list of frequently used and pinned applications. Look for and click on the “Settings” app. The icon resembles a gear or cogwheel. The Settings app can also be accessed by pressing the Windows key + I on your keyboard.
Step 1c: Open the Settings app: After clicking on the “Settings” app icon, the Settings app window will open, displaying various categories and options.
The Settings app provides a user-friendly interface for managing and customizing your Windows 10 settings. From here, you can control various aspects of your computer, including storage, updates, privacy, and more.
Note: Depending on your Windows 10 setup, you may need administrative privileges to access certain settings in the Settings app. Ensure that you have the necessary permissions to proceed with the automatic deletion of temporary files.
Now that you have successfully opened the Settings app, you can proceed to the next step in configuring automatic deletion of temporary files in Windows 10.
Step 2: Go to the “Storage” section
Once you have opened the Settings app in Windows 10, the next step towards configuring automatic deletion of temporary files is to navigate to the “Storage” section. The Storage settings allow you to manage and customize the storage options on your computer. Here’s how you can go to the “Storage” section:
Step 2a: Locate the “System” category: In the Settings app window, you will see different categories listed. Look for and click on the “System” category. It is usually represented by an icon resembling a computer monitor.
Step 2b: Select the “Storage” option: Within the “System” category, you will see a list of options related to system settings. Scroll down and click on the “Storage” option. The icon for “Storage” typically resembles a hard drive or an SD card.
Step 2c: Open the “Storage” settings: By clicking on the “Storage” option, you will be directed to the Storage settings section, which allows you to manage various storage-related aspects of your Windows 10 computer.
Within the “Storage” section, you will find information about the storage capacity of your drives, as well as options to manage storage usage, configure storage sense, and more. It serves as a central location to control and optimize your computer’s storage settings.
Note: The availability and options within the “Storage” section may vary depending on your specific Windows 10 version and device configuration. However, the general approach to accessing the “Storage” section remains the same.
Now that you have successfully navigated to the “Storage” section in the Settings app, you can proceed to the next step in enabling automatic deletion of temporary files in Windows 10.
Step 3: Click on “Temporary files”
After accessing the “Storage” section in the Settings app, the next step in configuring automatic deletion of temporary files is to click on the “Temporary files” option. This option allows you to specify the settings for managing temporary files on your Windows 10 computer. Here’s how to proceed:
Step 3a: Scroll down to find the “Temporary files” section: In the Storage settings, you will see different categories related to storage usage on your computer. Scroll down until you find the “Temporary files” section. This section provides options to manage temporary files and free up disk space.
Step 3b: Click on “Temporary files”: Once you have located the “Temporary files” section, click on it to access the settings associated with managing temporary files on your Windows 10 computer.
By clicking on the “Temporary files” option, you will be presented with a list of customization options that allow you to control the automatic removal of temporary files.
Note: If you don’t see the “Temporary files” option, it may indicate that there are no significant temporary files present on your computer at the moment. Keep in mind that temporary files are generated over time as you use your computer, and they will be available for deletion when they accumulate.
Now that you have successfully clicked on the “Temporary files” option, you are ready for the next step in configuring the automatic deletion of temporary files in Windows 10.
Step 4: Enable the “Delete temporary files that my apps aren’t using” option
After accessing the “Temporary files” settings in the Storage section of the Settings app, the final step in configuring the automatic deletion of temporary files in Windows 10 is to enable the “Delete temporary files that my apps aren’t using” option. By enabling this option, Windows 10 will automatically remove temporary files that are no longer in use by your installed applications. Here’s how to proceed:
Step 4a: Locate the “Delete temporary files that my apps aren’t using” option: In the Temporary files settings, you will find an option with the label “Delete temporary files that my apps aren’t using.” It is accompanied by a description explaining that Windows will automatically delete temporary files to free up disk space.
Step 4b: Enable the toggle switch: To activate automatic deletion of unused temporary files, toggle the switch next to the “Delete temporary files that my apps aren’t using” option to the “On” position. This will enable Windows 10 to automatically delete these files.
Once you have enabled this option, Windows will periodically scan for unused temporary files and remove them to reclaim disk space. This helps to keep your system running smoothly and optimally without the need for manual intervention.
Note: Automatic deletion of temporary files will only target files that are not in use by your installed apps. Temporary files actively being used by apps or processes will not be deleted. Additionally, certain temporary files may not be eligible for automatic deletion due to their nature or importance to specific applications.
By enabling the “Delete temporary files that my apps aren’t using” option, you can enjoy the benefits of automatic management of temporary files and ensure that your Windows 10 computer stays clean and optimized.
Conclusion
The accumulation of temporary files can have a negative impact on the performance and storage capacity of your Windows 10 computer. However, by regularly deleting these files, you can maintain an optimized system and ensure a smooth computing experience.
In this guide, we explored different methods to delete temporary files in Windows 10. Manually deleting temporary files gives you more control and allows you to review the files before removing them. With the manual method, you can open the Run dialog box, navigate to the Windows Temp folder, select the files, and delete them.
If you prefer a more streamlined approach, you can use the built-in Disk Cleanup tool. Disk Cleanup allows you to select the drive, choose “Temporary files” from the list, and initiate the cleanup process. This tool is a convenient way to delete temporary files and free up disk space quickly.
For those who want a hands-free approach, enabling the automatic deletion of temporary files is the way to go. By accessing the Storage settings, finding the “Temporary files” option, and enabling the “Delete temporary files that my apps aren’t using” option, Windows 10 will automatically manage and remove unnecessary temporary files on your behalf.
Regularly deleting temporary files, whether manually or automatically, is essential to maintain a clean and efficient Windows 10 computer. It helps free up valuable storage space, improve system performance, and ensure the privacy and security of your data.
Take the time to implement these steps and incorporate them into your routine maintenance practices. By doing so, you can ensure that your Windows 10 computer is always running at its best and optimized for peak performance.