Introduction
Welcome to the world of Amazon Music, where you can enjoy millions of songs right at your fingertips. With the Amazon Music app, you have the power to discover, stream, and download your favorite music for offline listening. However, as you explore and expand your music library, you might find yourself needing to make some space on your device by deleting downloaded songs. In this guide, we will walk you through the simple steps to delete downloaded songs on Amazon Music.
Whether you are using Amazon Music on your smartphone, tablet, or computer, the process of removing downloaded songs remains quite straightforward. By following these easy steps, you can efficiently manage your downloaded music and free up some precious storage on your device.
So, if you’re ready to declutter your music library and remove those songs you no longer need offline access to, let’s get started with the step-by-step instructions to delete downloaded songs on Amazon Music.
Step 1: Open the Amazon Music app
The first step to deleting downloaded songs on Amazon Music is to open the app on your device. Whether you’re using a smartphone, tablet, or computer, make sure you have the Amazon Music app installed and logged into your account.
If you’re using a smartphone or tablet, locate the Amazon Music app icon on your home screen or in your app drawer. Tap on it to open the app.
On a computer, you can access Amazon Music by visiting the Amazon Music website and logging into your account. Alternatively, you can use the Amazon Music desktop application if you have it installed.
Once you have successfully opened the Amazon Music app, you will be greeted with the familiar interface where you can browse, search, and access your music library. Ensure that you are connected to the internet for the app to sync and display the most up-to-date information about your downloaded songs.
Now that you have the Amazon Music app open and ready, let’s move on to the next step and navigate to the “Downloads” section.
Step 2: Navigate to the “Downloads” section
Once you have successfully opened the Amazon Music app, the next step is to navigate to the “Downloads” section. This is where you will find all the songs that you have downloaded for offline listening.
In the app’s interface, look for the menu or navigation bar, usually located at the bottom of the screen on smartphones and tablets, or at the top of the screen on computers. Tap or click on the “Downloads” option to access the dedicated section for your downloaded songs.
Within the “Downloads” section, you will find a list of all the songs that are currently stored on your device for offline playback. This includes both individual songs and any albums or playlists you have downloaded.
The “Downloads” section provides an organized view of your downloaded music, allowing you to easily manage and delete songs as needed. It is important to note that removing a song from the “Downloads” section does not delete it from your Amazon Music library, it simply removes its offline availability.
Now that you have successfully navigated to the “Downloads” section, let’s continue to the next step and learn how to find the specific song you want to delete.
Step 3: Find the song you want to delete
Once you are in the “Downloads” section of the Amazon Music app, you need to locate the specific song that you want to delete from your device. Here’s how you can find it:
1. Scroll through the list: If you have a small number of downloaded songs, you can scroll through the list manually to find the song you want to delete. Swipe up or down on your device’s screen or use the scroll bar on your computer to navigate through the list.
2. Sort or filter the list: To make it easier to find the song, you can use sorting or filtering options available in the app. Depending on the app version, you may be able to sort the list by title, artist, album, or recently added. You can also filter the list based on specific criteria, such as genre or playlist.
3. Search for the song: If you know the title or artist of the song you want to delete, you can utilize the search function within the app. Look for the search bar, usually located at the top of the screen, and enter the relevant keywords. The app will display the matching results, making it easier for you to locate the song.
By following these methods, you should be able to find the specific song you want to delete from your downloaded list in the Amazon Music app. Once you have found it, proceed to the next step to initiate the deletion process.
Step 4: Tap the three-dot menu icon next to the song
After successfully locating the song you want to delete from your downloaded list in the Amazon Music app, it’s time to initiate the deletion process. Here’s what you need to do:
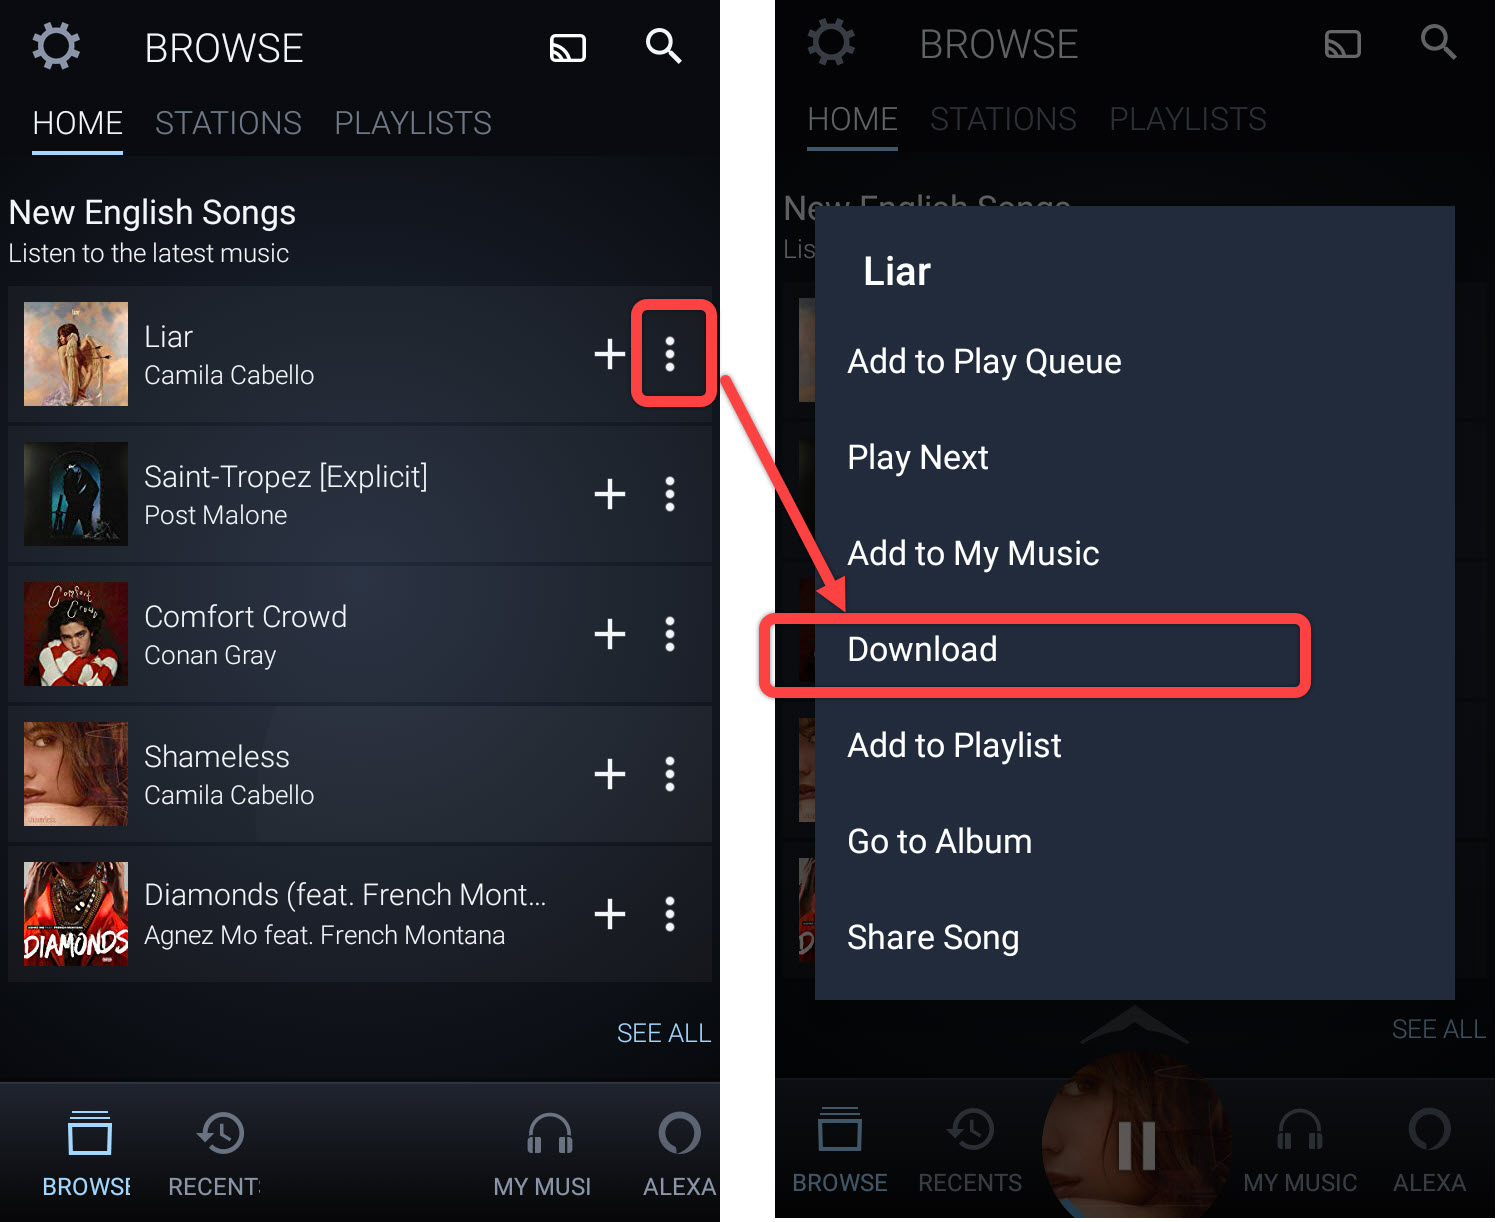
1. Look for the three-dot menu icon: Next to each song in the downloaded list, you will find a three-dot menu icon. This icon represents additional options and actions that you can perform on the song. Tap or click on this icon to open the menu.
2. Access the song’s options: Once you tap on the three-dot menu icon, a menu will appear displaying various options for the selected song. These options may include “Play,” “Add to Playlist,” “Share,” and more. It is important to note that the available options may vary depending on the version of the app and the device you are using.
By tapping the three-dot menu icon, you have unlocked a range of actions that you can take with the song, including the ability to delete it from your downloaded list. Now, in the next step, we will explore the option to remove the song from your device.
Step 5: Select “Remove from device”
Once you have accessed the options menu for the song you want to delete from your downloaded list in the Amazon Music app, the next step is to choose the “Remove from device” option. Here’s how you can do it:
1. Locate the “Remove from device” option: Within the options menu, scroll through the list of available actions and look for the “Remove from device” option. This option is specifically designed to remove the selected song from your device while keeping it available in your Amazon Music library.
2. Tap or click on “Remove from device”: Once you have located the “Remove from device” option, tap or click on it to initiate the deletion process. This action will remove the downloaded version of the song from your device, freeing up storage space, while still keeping it accessible for online streaming.
After selecting the “Remove from device” option, you may notice a brief loading or processing screen, indicating that the removal is in progress. Depending on the size of the song and your device’s performance, the process may take a few seconds.
Now that you have successfully selected the “Remove from device” option, you have effectively deleted the song from your downloaded list in the Amazon Music app. However, the song will still be available in your music library for online streaming.
Repeat these steps for any other songs that you want to delete from your downloaded list. Once you have finished removing the desired songs, you can proceed to the next step to confirm the deletion.
Step 6: Confirm the deletion
After selecting the “Remove from device” option for the song you want to delete from your downloaded list in the Amazon Music app, the final step is to confirm the deletion. Here’s what you need to do:
1. Look for the confirmation prompt: Once you have chosen to remove the song from your device, a confirmation prompt will typically appear on the screen. This prompt will ask you to confirm your decision and ensure that you indeed want to delete the song.
2. Confirm the deletion: Read the confirmation prompt carefully and make sure you are deleting the correct song. If you are certain about your decision, tap or click on the “Confirm” or “Delete” button to proceed with the deletion.
By confirming the deletion, you are affirming that you want to remove the downloaded version of the song from your device. Once the deletion is confirmed, the app will take the necessary steps to remove the song file, freeing up storage space on your device.
It’s important to note that confirming the deletion of a song only removes the downloaded version from your device. The song will still be available in your Amazon Music library for online streaming, allowing you to access it anytime you have an internet connection.
Repeat the confirmation process for any other songs you have selected for deletion. Once you have completed the confirmation step for all the desired songs, you can proceed to the next step to review the deletion process.
Step 7: Repeat for any other songs you want to delete
If you have multiple songs that you want to delete from your downloaded list in the Amazon Music app, you can easily repeat the deletion process for each song. Here’s how:
1. Go back to the downloaded list: After confirming the deletion of a song, you will be taken back to the downloaded list in the Amazon Music app. From here, you can proceed to locate and select the next song you want to delete.
2. Follow the previous steps: Repeat steps 4 to 6 for each additional song you wish to remove from your device. This includes tapping the three-dot menu icon next to the song, selecting “Remove from device”, and confirming the deletion.
By repeating these steps, you can efficiently delete multiple songs from your downloaded list. Take your time to go through the list and remove any songs that you no longer need offline access to. This will help you manage your device’s storage and ensure that you have space for new downloads.
It’s important to note that while deleting the downloaded versions of songs, the original songs will still be available in your Amazon Music library for streaming. Removing a song from the downloaded list does not delete it from your overall music collection.
Once you have finished deleting all the desired songs from your downloaded list, you can move forward knowing that you have successfully managed your downloaded music on the Amazon Music app.
Conclusion
Congratulations! You have reached the end of our guide on how to delete downloaded songs on Amazon Music. By following the simple steps outlined in this article, you can efficiently manage your downloaded music library and free up valuable storage space on your device.
We started by opening the Amazon Music app and navigating to the “Downloads” section, where all your downloaded songs are stored. Then, we learned how to find the specific song you wanted to delete by scrolling through the list or utilizing sorting, filtering, and search options.
Next, we tapped the three-dot menu icon next to the song and selected the “Remove from device” option to initiate the deletion process. We confirmed the deletion and repeated the steps for any other songs we wanted to delete.
Remember, deleting a song from the downloaded list only removes the offline version, and the song remains in your Amazon Music library for online streaming.
Now that you have successfully mastered the art of deleting downloaded songs on Amazon Music, you can enjoy a clutter-free music collection and a more organized listening experience.
Thank you for choosing Amazon Music, and we hope this guide has been helpful to you. Happy listening!