Introduction
Welcome to the world of website development! One of the key features of any website is its ability to allow users to create accounts, login, and access personalized content. In this article, we will explore how to create a login and registration page in PHP, a widely used programming language for web development.
Having a login and registration system is essential for websites that wish to provide a personalized experience to their users. This system allows users to create their own accounts, securely login, and access their individual profile information. It also offers website owners the ability to manage user registrations, authenticate users, and provide personalized content to different user groups.
To build a login and registration page, there are several key steps involved. First, we need to set up the project environment, including installing a local development server and an integrated development environment (IDE) for coding. Second, we’ll create a database to store user information securely. Next, we’ll design the login and registration form using HTML and CSS. After that, we’ll validate user input to ensure that it conforms to the required format and check for any errors.
Once the form is set up, we’ll connect it to the database using PHP to store and retrieve user information. We’ll handle user registration, ensuring that new users are added to the database securely. Finally, we’ll implement the login functionality, allowing users to authenticate themselves and gain access to their personalized content.
By following these steps, you’ll be able to create a fully functional login and registration page in PHP. So, let’s dive in and get started on our web development journey!
Prerequisites
Before we begin creating the login and registration page in PHP, there are a few prerequisites you should have in place:
- Web Server: You will need a local development server such as Apache or XAMPP installed on your computer to run PHP scripts locally.
- PHP: Make sure you have PHP installed on your local server. You can download the latest version of PHP from the official PHP website.
- Database: You will need a database management system such as MySQL or PostgreSQL installed to create and manage databases.
- HTML and CSS: A basic understanding of HTML and CSS will be helpful in designing and styling the login and registration form.
- Text Editor or IDE: You will need a text editor or an integrated development environment (IDE) to write your PHP code. Some popular options include Sublime Text, Visual Studio Code, and PhpStorm.
Having these prerequisites in place will ensure a smooth and efficient development process. If you don’t have any of these prerequisites installed, you can easily find installation guides and resources online for your specific operating system.
Once you have all the necessary software installed, you’re ready to move on to the next step: setting up the project and creating the database.
Step 1: Setting up the project
Before we dive into creating the login and registration page, let’s start by setting up our project environment. Here are the steps to do so:
- Install a local development server: To run PHP scripts locally, we need to install a web server. Popular options include Apache, Nginx, or XAMPP, which includes both Apache and MySQL.
- Install an integrated development environment (IDE): While you can use a simple text editor to write PHP code, using an IDE can greatly enhance your development experience. Some popular PHP IDEs include PhpStorm, Visual Studio Code, and Sublime Text.
- Create a project folder: Create a new folder on your computer to keep all your project files organized. This folder will serve as the root directory of your project.
- Set up the server configuration: Configure your local development server to point to the project folder as the document root. This ensures that the server knows where to find and load your PHP files when they are requested.
- Verify the setup: Open a web browser and enter “localhost” or “127.0.0.1” in the address bar. If you see the default web server page or a similar message, it means your server is correctly set up.
Once you have completed these steps, you are ready to move on to the next step: creating the database for our login and registration system. Make sure to take note of the web server configuration details, such as the server address and port number, as we will need them to connect our PHP scripts to the server.
Step 2: Creating the database
Now that we have our project environment set up, we can proceed to create the database for our login and registration system. Follow these steps to create the database:
- Choose a database management system: Popular options include MySQL, PostgreSQL, and SQLite. Select the one that best suits your needs and install it on your local development server.
- Open the database management system console: Launch the console or interface for your chosen database management system. This could be a command-line tool, a graphical user interface, or a web-based interface.
- Create a new database: Use the appropriate command or option to create a new database. Give it a suitable name, such as “useraccounts” or “login_system”.
- Create a table: Within the newly created database, define a table to store user account information. The table should have columns for relevant user information such as username, email, password, and any additional fields you may require.
- Define column attributes: Specify the data types and other attributes for each column. For example, the password column should be set to a hashed string using a secure hashing algorithm like bcrypt.
- Set primary key and constraints: Designate a primary key column to uniquely identify each record. You can also set constraints such as unique constraints on certain columns to ensure data integrity.
Once you have completed these steps, your database will be ready to store user account information securely. You can now move on to the next step: creating the login and registration form using HTML and CSS.
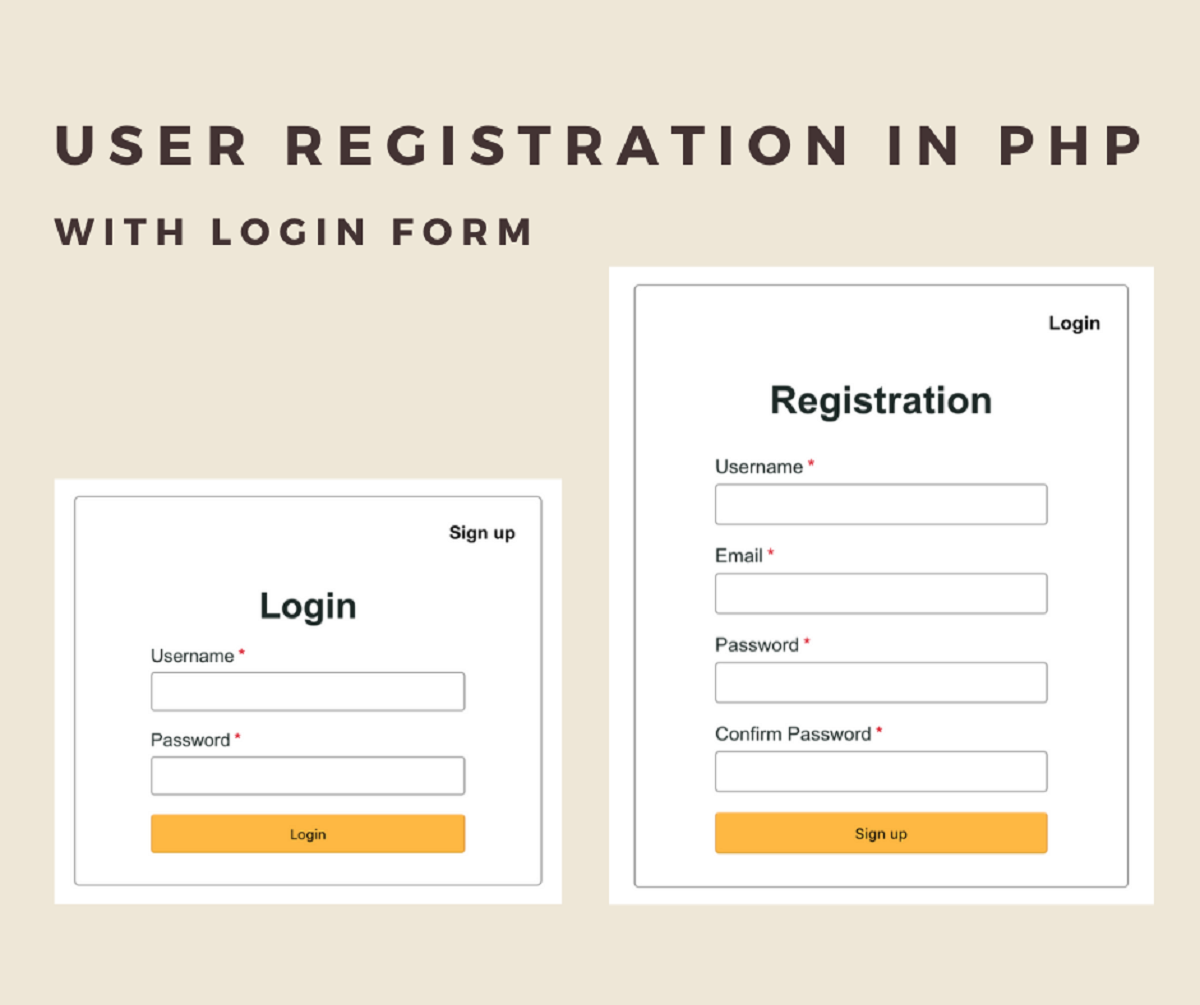
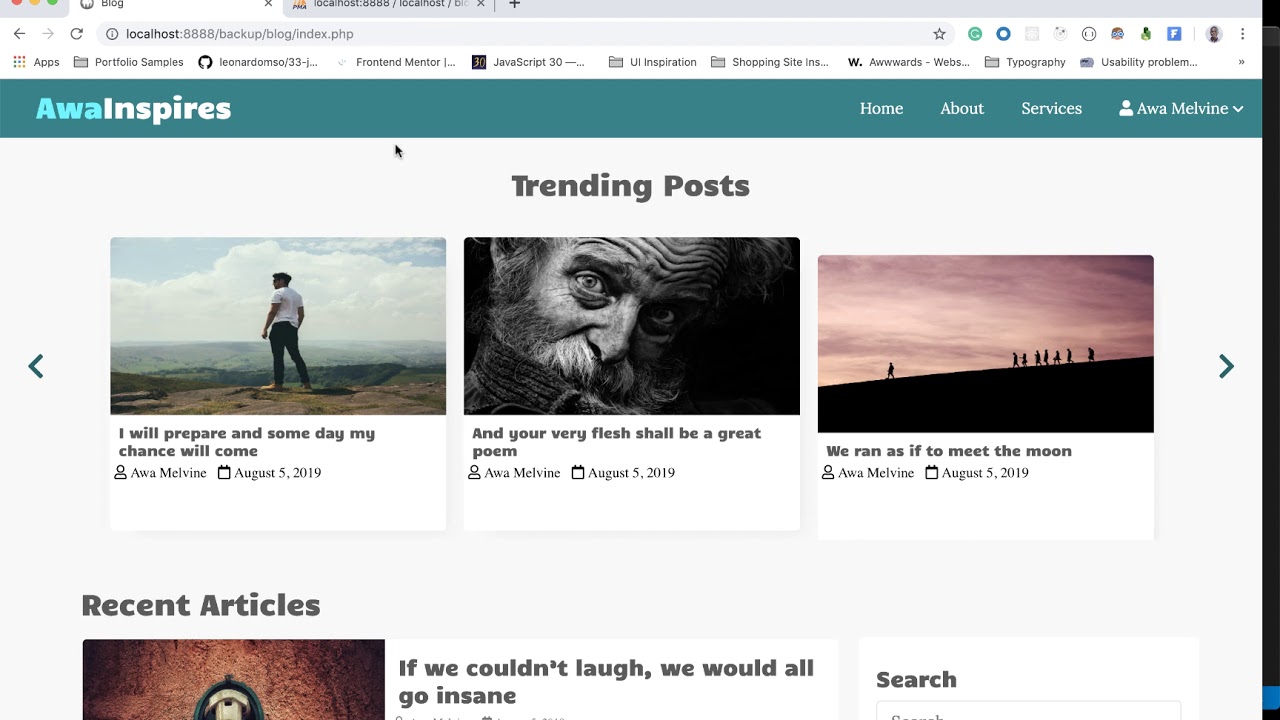
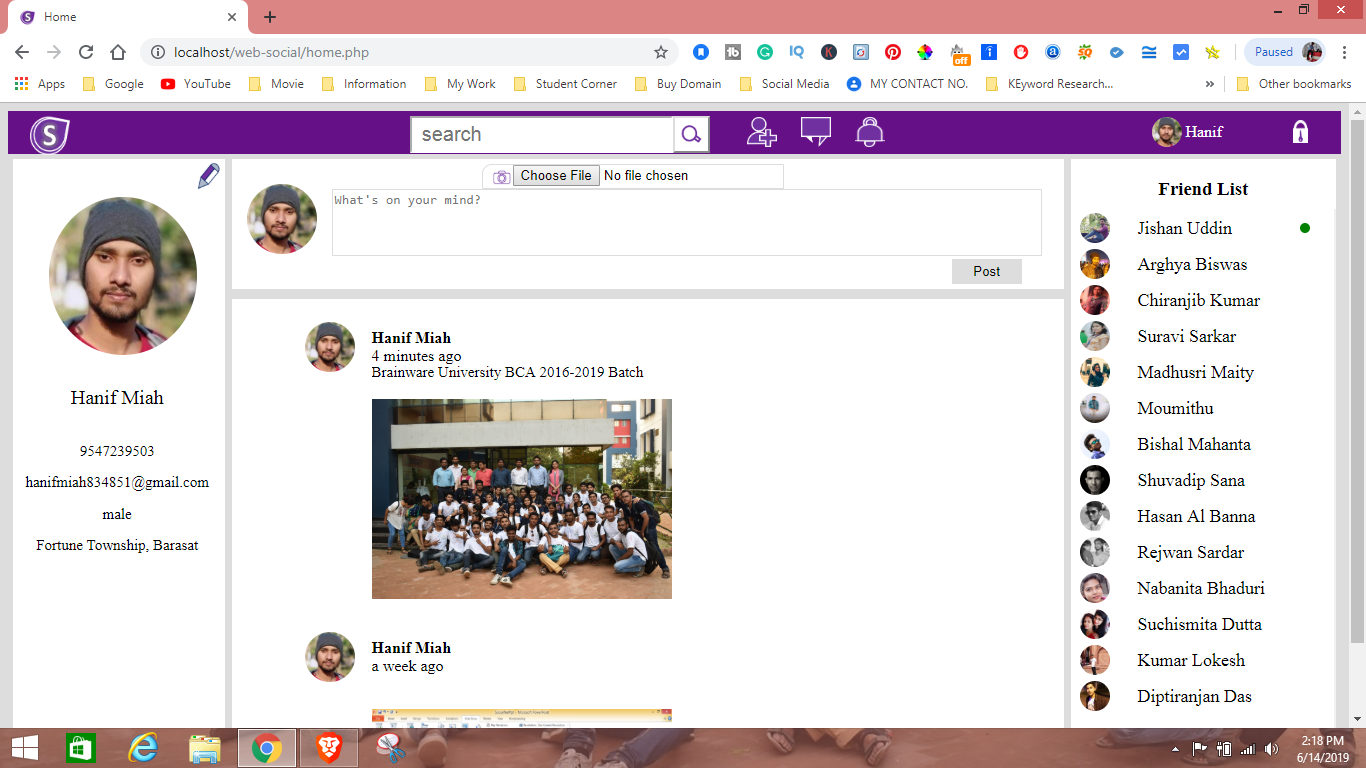
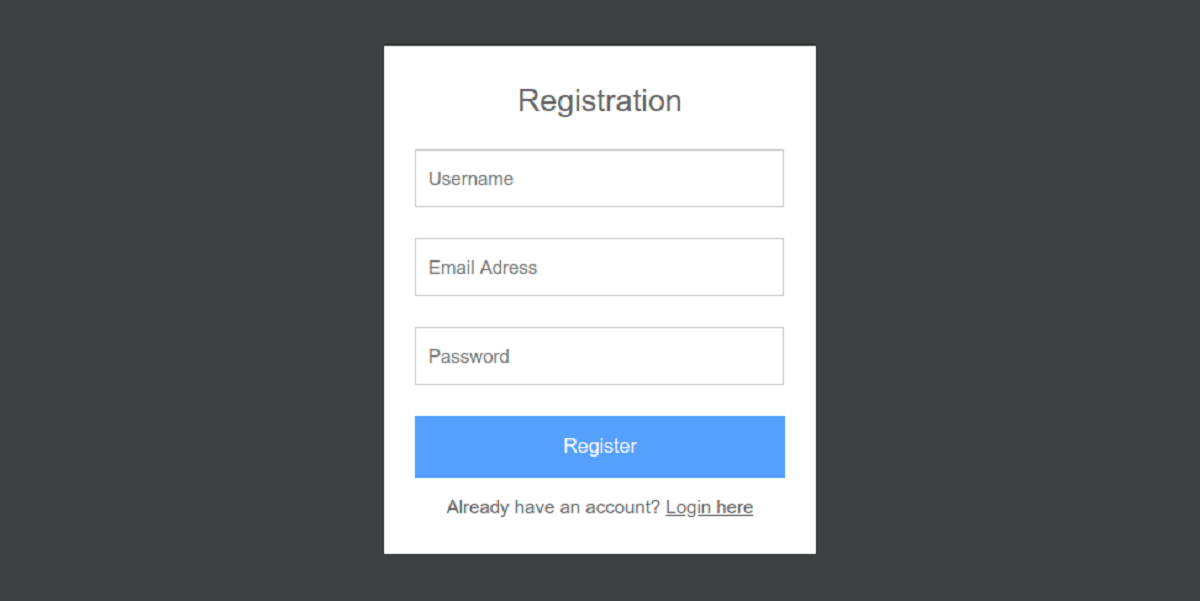
Step 3: Creating the login and registration form
With our project environment and database set up, it’s time to create the login and registration form. This form will allow users to enter their credentials and register for a new account. Follow these steps to create the form:
- Create a new HTML file: Open your text editor or IDE and create a new file with a .html extension.
- Add the form structure: Begin by adding the HTML form element, including the necessary attributes such as method=”POST” and action=”process.php” (or any other PHP script where we will handle the form submission).
- Add form fields: Within the form element, add the appropriate input fields for the login and registration form. Include fields such as username, email, password, and any additional fields you require.
- Add labels and placeholders: Label each input field with a descriptive label element and use placeholders to provide hints or examples of expected input.
- Add submit button: Include a submit button to allow users to submit the form for processing.
Once you have completed these steps, you will have a basic login and registration form. You can customize the form’s appearance using CSS to make it more visually appealing and user-friendly. This includes styling the form elements, adding background colors, adjusting the layout, and incorporating appropriate fonts and colors.
Remember to keep the design simple, intuitive, and responsive, ensuring that the form is accessible on different devices and screen sizes. Additionally, consider implementing form validation to ensure that users enter the required information correctly.
Now that the form is ready, we can move on to the next step: validating the user input to ensure data integrity and security.
Step 4: Validating user input
Validating user input is crucial to ensure the integrity and security of the data entered into the login and registration form. By validating the input, we can prevent any malicious or incorrect data from being stored in our database. Follow these steps to validate user input:
- Server-side validation: Implement server-side validation using PHP to check if the required fields are not empty. Perform checks for the correct format of input, such as valid email addresses or strong passwords.
- Client-side validation: Enhance the user experience by implementing client-side validation using JavaScript. This can help catch simple errors in real-time, such as missing fields or incorrect formats, before the form is submitted.
- Sanitization: Use sanitization techniques to remove any potentially harmful or unwanted characters from user input. This helps prevent SQL injection and other forms of malicious attacks.
- Error messages: Display meaningful error messages to the user if their input fails validation. These messages should clearly indicate what went wrong and provide guidance on how to fix the issue.
Remember, client-side validation should never be relied upon as the sole method of validation since it can be bypassed. Server-side validation is essential as it provides an extra layer of security and ensures the integrity of the data stored in the database.
By performing thorough validation on user input, we can help maintain the quality and security of the information stored in our login and registration system. Now that we have validated the user input, we can proceed to connect the form to the database for storing and retrieving user information.
Step 5: Connecting the form to the database
Now that we have validated the user input, we need to connect the login and registration form to the database. This will allow us to store and retrieve user information securely. Follow these steps to establish the database connection:
- Database configuration: Set up the necessary database configuration constants, such as the database host, username, password, and database name. These details will be used to establish the connection with the database.
- Connect to the database: Use PHP’s database connection functions, such as mysqli_connect() or PDO, to establish a connection with the database. Pass in the database configuration constants to authenticate and connect to the correct database.
- Handle connection errors: Check if the connection to the database was successful. If not, display an error message and handle the situation accordingly, such as redirecting the user to an error page or terminating the script.
Once the connection is established, we can proceed to handle user registration and login actions. This involves inserting new user information into the database when users register and retrieving user information from the database when they login.
Remember to handle the connection securely and protect sensitive information, such as the database credentials, by storing them in a separate configuration file outside the web root directory.
With the database connection established, we are now ready to move on to the next step: handling user registration in our login and registration system.
Step 6: Handling user registration
Now that the login and registration form is connected to the database, we can focus on handling user registrations. User registration involves securely storing the user’s information in the database so that they can access their account later. Follow these steps to handle user registration:
- Retrieve user input: Retrieve the user input from the registration form, including the username, email, and password.
- Validate the input: Perform validation on the user input to ensure that it meets the required criteria, such as checking if the email is in the correct format or if the password meets the strength requirements.
- Hash the password: Use a secure hashing algorithm, such as bcrypt, to hash the user’s password. This adds an extra layer of security by storing the password as a hash instead of plaintext.
- Insert data into the database: Using SQL queries, insert the user’s information into the designated table in the database. Include the hashed password, username, email, and any other necessary fields.
- Handle registration success or failure: Check if the user registration was successful. If so, you can redirect the user to a success page or send a confirmation email. If there were any errors, display an error message and allow the user to try again.
By carefully handling user registration and implementing security measures such as password hashing, we can ensure the safe and reliable storage of user information in our login and registration system. Now that we have successfully handled user registration, let’s move on to the final step: handling user login.
Step 7: Handling user login
In the final step of creating our login and registration system, we will focus on handling user login. This allows users who have already registered to authenticate themselves and access personalized content. Follow these steps to handle user login:
- Retrieve user input: Retrieve the user’s login credentials from the login form, typically the username or email and password.
- Validate the input: Validate the user’s input to ensure that the required fields are not empty.
- Check user credentials: Use SQL queries to retrieve the user’s information from the database based on their username or email. Once retrieved, compare the password they entered with the stored hashed password to authenticate them.
- Grant access or display error: If the user’s credentials match, grant them access to the relevant content or redirect them to a dashboard. If the credentials do not match, display an error message indicating that the login was unsuccessful.
Remember to handle user sessions securely by creating a session variable that identifies the user and allows them to navigate between different pages while remaining authenticated. This session variable can be stored in a server-side session or a secure cookie.
By effectively handling user login, we can provide a seamless and secure authentication process for our users. With this step complete, we have successfully created a login and registration page in PHP.
Feel free to enhance the login functionality further by adding features such as password recovery, account activation through email verification, or implementing two-factor authentication for added security.
Now that we have covered all the necessary steps, you are well-equipped to create your own login and registration page in PHP. Happy coding!
Conclusion
Congratulations! By following the steps outlined in this article, you have successfully created a login and registration page in PHP. This essential feature allows users to create accounts, securely login, and access personalized content on your website.
We started by setting up the project environment, ensuring that we had a local development server and an integrated development environment (IDE) in place. Next, we created the necessary database to store and retrieve user information securely.
With the database set up, we proceeded to create the login and registration form using HTML and CSS. We added form fields, labels, placeholders, and a submit button to create an intuitive and visually appealing form. We also implemented validation techniques to ensure that user input is correct and secure.
After validating user input, we connected the login and registration form to the database. This allowed us to store the user’s information securely so that they can access their account later. We handled user registration, inserting their information into the database, and addressed any errors that occurred during the process.
Finally, we tackled the user login functionality, allowing users to authenticate themselves and gain access to their personalized content. We verified the user’s credentials, granted access upon successful login, and displayed appropriate error messages in case of login failures.
Remember to always prioritize the security of user data by implementing measures such as hashing passwords, validating input, and storing sensitive information securely.
By following these steps, you have gained valuable insights into how to create a robust and user-friendly login and registration page using PHP. You can now apply this knowledge to build more sophisticated login systems or expand the functionality of existing systems.
Keep exploring and experimenting with different features and techniques to enhance your web development skills. This is just the beginning of your journey as a PHP developer. Good luck!