Introduction
Welcome to our guide on how to create a social networking website using PHP. Social networking websites have become an integral part of our digital lives, connecting people from all around the world and providing a platform for communication, collaboration, and sharing. By creating your own social networking website, you can bring people together and create a thriving online community.
In this tutorial, we will guide you through the process of developing a social networking website from scratch using PHP, one of the most widely used programming languages for web development. With PHP’s versatility and power, you will be able to create a feature-rich and dynamic social networking platform that meets the needs and expectations of your users.
Throughout this tutorial, we will cover essential topics such as user registration, login systems, user profiles, friend requests, news feeds, privacy settings, and more. By following our step-by-step instructions, even if you have limited programming knowledge, you will be able to build your very own social networking website.
Whether you want to create a niche community for a specific interest group, connect professionals in a certain industry, or build a platform for friends and family to stay connected, this tutorial is a valuable resource for turning your vision into reality.
Before we dive into the development process, let’s take a look at the requirements and the setup process to ensure that you have everything you need to get started.
Requirements
Before you begin creating your social networking website using PHP, make sure you have the following requirements in place:
- Web Hosting: You will need a web hosting provider that supports PHP and MySQL. Look for a reliable hosting service that offers the necessary space and bandwidth for your website.
- Domain Name: Choose a unique and memorable domain name for your website. This is the address that users will use to access your social networking platform.
- PHP: Install PHP on your server if it is not already available. Make sure you have the latest version of PHP installed to ensure compatibility with the latest features and security patches.
- MySQL: Set up a MySQL database to store user information, posts, and other data related to your social networking website. You will need administrative access to create and manage the database.
- Text Editor: Choose a reliable text editor or integrated development environment (IDE) for writing your PHP code. Some popular options include Visual Studio Code, Sublime Text, and PHPStorm.
- Web Browser: Use a modern web browser like Google Chrome, Mozilla Firefox, or Microsoft Edge for testing and debugging your website. This will help ensure that your site functions properly for users.
- Code Versioning: Implement a code versioning system, such as Git, to track changes and collaborate with other developers if necessary. This will help maintain a clean and organized development workflow.
- Responsive Design: Consider implementing a responsive design for your social networking website to ensure that it adapts well to different screen sizes and devices. This will enhance the user experience and make your site accessible to a wider audience.
- Security Measures: Implement security measures such as input validation, password hashing, and protection against common web vulnerabilities like SQL injections and cross-site scripting (XSS) attacks. This will help safeguard your users’ data and protect your website from potential threats.
With these requirements in place, you are well-prepared to create your social networking website using PHP. In the next section, we will guide you through the process of setting up the development environment.
Setting up the Development Environment
Before you can start developing your social networking website using PHP, you need to set up your development environment. Follow these steps to get started:
- Install a Local Server Environment: To develop and test your website locally, you will need to set up a local server environment on your computer. You can use tools such as XAMPP, WAMP, or MAMP, which provide an all-in-one package including a web server, PHP, and MySQL.
- Download and Install PHP: If PHP is not included in your chosen local server environment package, you will need to download and install PHP separately. Visit the official PHP website (php.net) and download the latest stable release that is compatible with your operating system.
- Set up a MySQL Database: Access your local server environment and open the phpMyAdmin tool. Create a new database for your social networking website. Take note of the database name, username, and password, as you will need these credentials during the development process.
- Create a Project Directory: Choose a location on your computer where you want to store your project files. Create a new directory and give it a meaningful name. This will serve as the root directory for your social networking website.
- Install a Text Editor or IDE: Choose a text editor or integrated development environment (IDE) to write your PHP code. Some popular choices include Visual Studio Code, Sublime Text, and PHPStorm. Install your preferred editor and configure it according to your preferences.
- Clone or Download a PHP Social Networking Template: To kickstart your website development, you can find ready-made PHP social networking templates available online. Alternatively, you can clone an open-source project from platforms like GitHub. Choose a template that suits your requirements and clone or download it to your project directory.
Once you have completed these steps, you will have a fully functional local development environment ready to begin building your social networking website using PHP. In the next section, we will dive into creating the database structure for your website.
Creating the Database
Now that you have set up your development environment, it’s time to create the database for your social networking website. The database will store all the necessary information for user registration, profiles, posts, and other features. Follow these steps to create the database:
- Open phpMyAdmin: Access your local server environment and open the phpMyAdmin tool. This tool provides a user-friendly interface for managing MySQL databases.
- Create a New Database: In the phpMyAdmin interface, click on the “Databases” tab and enter a suitable name for your database. Click on the “Create” button to create the new database.
- Create Tables: Within the newly created database, click on the “SQL” tab. Here, you can enter SQL queries to create the necessary tables for your social networking website.
- Design the Database Structure: Plan the structure of your database and determine the tables you will need. Some essential tables may include “users” for storing user information, “posts” for storing user posts and updates, “friends” for managing friend relationships, and “comments” for storing user comments on posts.
- Write SQL Queries: Write SQL queries to create the tables according to your database structure design. Use CREATE TABLE statements along with appropriate column definitions for each table.
- Define Relationships: Establish relationships between tables using foreign keys. For example, in the “friends” table, you can use foreign keys to associate users with their friends.
- Execute SQL Queries: Once you have written the SQL queries, copy and paste them into the SQL tab in phpMyAdmin. Click on the “Go” button to execute the queries and create the tables in your database.
- Verify Table Creation: After executing the queries, verify that the tables have been created successfully by browsing the “Tables” tab in phpMyAdmin. You should see all the tables listed under your database.
With the database created and the required tables set up, you are now ready to start building the functionality of your social networking website. The next section will guide you through developing the user registration system.
Building the User Registration System
The user registration system is a crucial component of any social networking website. It allows new users to create accounts and join your online community. Follow these steps to build the user registration system for your social networking website:
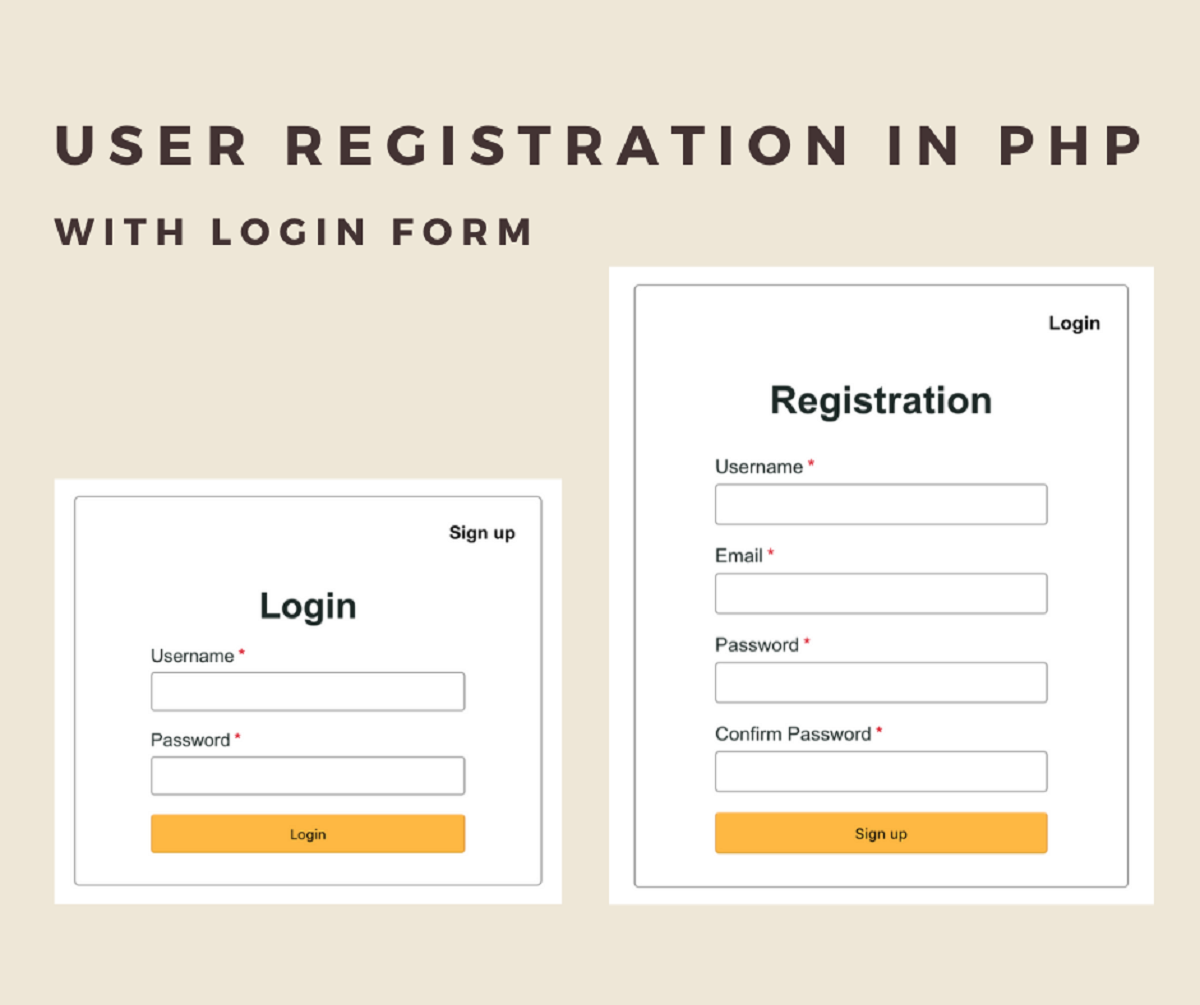
- Create a Registration Form: Design a user-friendly registration form where users can enter their necessary information, such as username, email address, password, and any additional details you require.
- Sanitize and Validate User Inputs: Implement input validation to ensure that user-provided data is clean and secure. Sanitize user inputs to prevent potential security vulnerabilities, such as SQL injections or cross-site scripting (XSS) attacks.
- Write PHP Code for Registration: Handle form submission and process the user input in a PHP script. Connect to the database and insert the user’s information into the “users” table.
- Password Hashing and Security: Hash the user’s password using a secure hashing algorithm, such as bcrypt or Argon2, to ensure the security of user credentials. Store the hashed password in the database.
- Email Verification: Implement an email verification system to authenticate new user accounts. Send a verification email to the user’s provided email address with a unique token or link. Upon verification, mark the user’s account as activated in the database.
- Error Handling and Validation Feedback: Implement error handling to provide informative feedback to users in case of validation errors or other issues during the registration process. Display appropriate error messages and highlight the fields that require correction.
- User Experience Enhancements: Consider adding features to enhance the user registration experience, such as password strength validation, username availability check, or CAPTCHA to prevent automated bot registrations.
- Success Message and Redirection: Upon successful registration, display a success message to the user and redirect them to the login page or directly log them into their new account.
By following these steps, you can create a robust and secure user registration system for your social networking website. In the next section, we will cover the implementation of the user login system to allow registered users to access their accounts.
Creating the User Login System
The user login system is a crucial aspect of any social networking website as it allows registered users to access their accounts and interact with the platform. Follow these steps to create the user login system for your social networking website:
- Create a Login Form: Design a login form where users can enter their username or email address and password to access their accounts.
- Sanitize and Validate User Inputs: Implement input sanitization and validation to ensure the security and integrity of user-provided data.
- Write PHP Code for Login: Handle form submission and process the user input in a PHP script. Retrieve the user’s information from the database based on the provided username or email address.
- Password Verification: Compare the user-provided password with the hashed password stored in the database. Use a secure hashing algorithm, such as bcrypt or Argon2, to ensure password security.
- Session Management: Upon successful login, create a session for the user to maintain their authenticated state throughout their browsing session on the website.
- Redirect to User Profile: After successful login, redirect the user to their profile page or the homepage of the social networking website.
- Error Handling and Validation Feedback: Implement error handling to provide informative feedback to users in case of login errors, such as incorrect credentials or account inactivity.
- Remember Me Functionality: Consider implementing a “Remember Me” feature that allows users to stay logged in even after their browsing session ends. Use secure techniques such as token-based authentication or long-lived cookies to maintain the user’s session.
- Password Reset: Provide a password reset functionality that allows users to regain access to their accounts in case they forget their password. Implement a process that includes email verification and password reassignment.
By following these steps, you can create a robust and secure user login system for your social networking website. This will ensure that registered users can easily access their accounts and enjoy seamless interaction with your platform. In the next section, we will cover the implementation of user profiles to allow users to customize and display their information on the website.
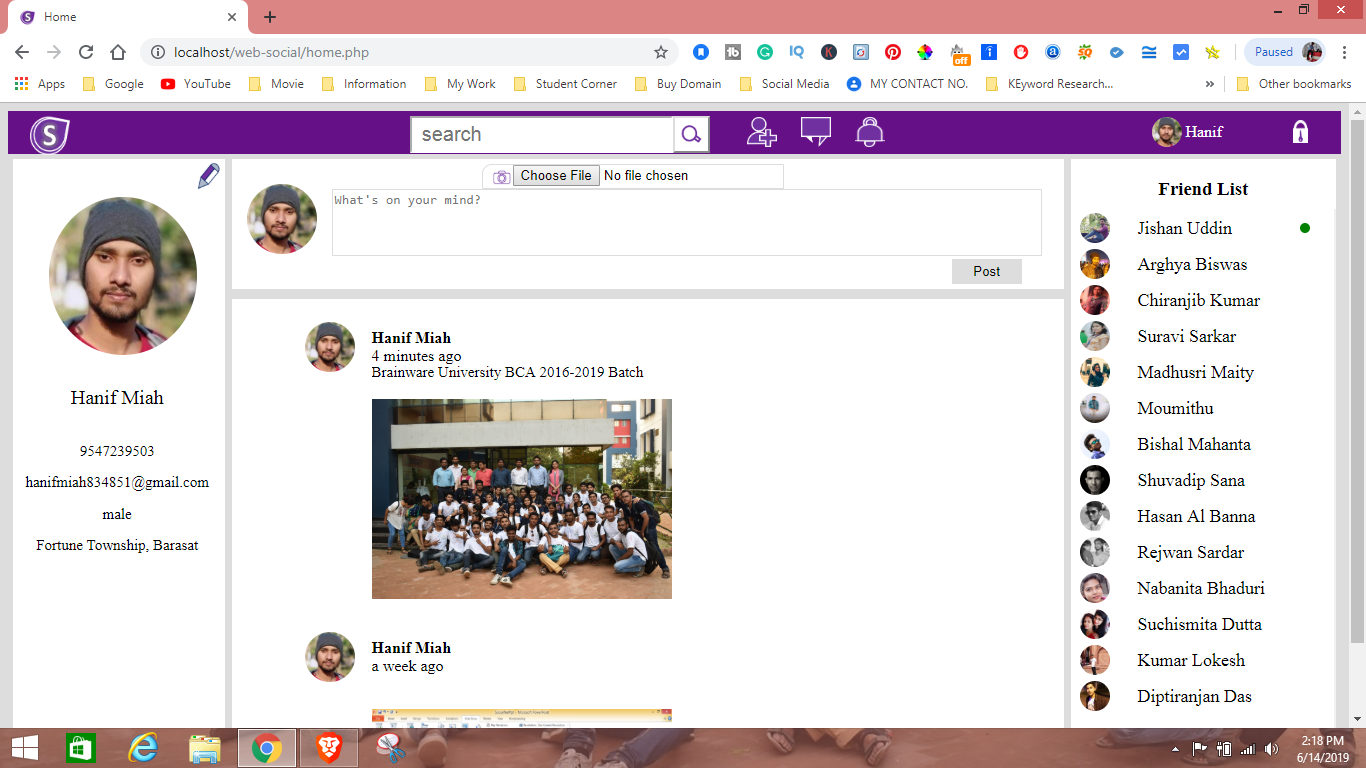
Implementing User Profile Functionality
User profiles play a vital role in a social networking website as they allow users to personalize their presence and showcase their information to others. Follow these steps to implement user profile functionality for your social networking website:
- Create a Profile Page: Design a profile page template where users can view and edit their profile information. This page should display basic user details, such as username, profile picture, bio, and any other relevant information you want to include.
- Retrieve User Information: Write PHP code to retrieve the user’s information from the database based on their logged-in session or a user ID parameter in the URL.
- Display User Information: Display the retrieved user information on the profile page using HTML and CSS. Use appropriate formatting and styling to present the information in an appealing manner.
- Edit Profile Information: Implement functionality that allows users to edit their profile information, such as updating their profile picture, changing their bio, or modifying their contact details.
- Validate and Update Profile Information: Implement validation checks to ensure that user-provided information is valid before updating it in the database. Sanitize user inputs to prevent potential security vulnerabilities.
- Upload and Manage Profile Picture: Allow users to upload or change their profile picture. Implement image upload functionality and validate the uploaded image to ensure it meets the specified requirements, such as size or file format.
- Privacy Settings: Implement privacy settings that allow users to control the visibility of their profile information. Provide options for users to choose who can view their profile and what information is visible to different user groups.
- Add Friends and Followers: Implement functionality that allows users to add friends or followers to their network. Display the user’s friends or followers on their profile page and provide options for accepting or declining friend requests.
- Customize Profile Design: Provide users with options to customize the design and layout of their profile page. Allow users to choose colors, themes, or add custom CSS to make their profile page unique.
By following these steps, you can successfully implement user profile functionality for your social networking website. Users will be able to create and customize their profiles, share information, and connect with other users. In the next section, we will cover the implementation of the friend request feature to allow users to connect and establish relationships on your platform.
Adding Friend Request Feature
The friend request feature is an essential aspect of a social networking website, as it allows users to connect and establish relationships with other users. Follow these steps to add the friend request feature to your social networking website:
- Create a Friend Request Model: Design a database table or structure to store friend requests. Include relevant fields such as the sender’s ID, recipient’s ID, status, and timestamps.
- Add Friend Request Buttons: Add buttons or links on user profiles or search results to send friend requests. Implement functionality that triggers a request to be sent to the recipient when the sender clicks the button.
- Handle Friend Request Acceptance: Implement functionality that allows users to accept or decline friend requests they receive. Add appropriate buttons or links to accept or decline requests on the user’s profile or notification area.
- Update Friend Request Status: Update the status of a friend request in the database when it is accepted or declined. Implement logic to determine the proper action based on the user’s response.
- Display Friend Requests: Provide a notification area or a dedicated page where users can see pending friend requests. Display the sender’s name, profile picture, and any additional relevant information.
- Create Friends List: Implement functionality to maintain a list of a user’s friends. Update this list when a friend request is accepted, and update it as friends are added or removed from the user’s network.
- Show Friends on User Profiles: Display a user’s friends on their profile page. Showcase their profile pictures or names to showcase their social connections.
- Manage Friend Requests Privacy: Allow users to control the privacy settings of their friend requests. Provide options to hide or limit friend requests from specific users or user groups.
- Send Notifications: Implement notifications to inform users about incoming friend requests. Use notifications, such as a badge count or a notification center, to alert users of pending requests.
- Display Mutual Friends: Show mutual friends between users on their respective profile pages. This feature can help users discover common connections and enhance their networking experience.
By following these steps, you can add the friend request feature to your social networking website. This will allow users to connect with others and build their social circles. In the next section, we will cover the implementation of the news feed functionality to provide users with updates and content from their network.
Implementing News Feed Functionality
The news feed functionality is a key component of a social networking website, as it allows users to stay updated with the latest posts, activities, and content from their network. Follow these steps to implement the news feed functionality for your social networking website:
- Create a News Feed Model: Design a database structure or schema to store posts and updates from users. Include necessary fields such as the post’s ID, author’s ID, content, timestamps, and any other relevant information.
- Display News Feed: Create a dedicated page or section where users can view their news feed. Fetch and display posts from users they follow, ordered by most recent.
- Create Post Form: Design a form that allows users to compose and share posts. Include features such as text input, image upload, and additional media attachments to enhance the user experience.
- Handle Post Submission: Implement functionality to process and store user-submitted posts in the database. Sanitize and validate user input to prevent potential vulnerabilities and ensure the integrity of the posted content.
- Include Post Privacy: Add privacy settings to posts to allow users to choose who can view their posts. Provide options for public, friends-only, or custom settings based on user preferences.
- Implement Post Likes and Comments: Allow users to like and comment on posts to encourage engagement and interaction. Store likes and comments in the database and display them alongside the post content.
- Show User Activity: Display user activity on the news feed, including updates such as new friendships, profile picture changes, or other notable actions. This feature helps users stay informed about the activities of their network.
- Include Post Sharing: Implement functionality to allow users to share posts from their news feed with their own followers or specific groups of users. Include sharing options such as sharing on other social media platforms or via email.
- Filter and Sort News Feed: Provide options for users to filter their news feed based on different criteria, such as most recent posts, popular posts, or posts from specific groups or users.
- Implement Infinite Scrolling: Enhance the user experience by implementing infinite scrolling on the news feed page. Load additional posts automatically as the user scrolls down, providing a seamless browsing experience.
By following these steps, you can successfully implement news feed functionality on your social networking website. This allows users to stay connected, informed, and engaged with the content shared by their network. In the next section, we will cover the implementation of privacy settings to give users control over the visibility of their information and activities.
Adding Privacy Settings
Privacy settings are essential for a social networking website as they give users control over the visibility and accessibility of their information and activities. Follow these steps to add privacy settings to your social networking website:
- User Profile Privacy: Implement options for users to control the visibility of their profile information. Allow users to choose whether their profile is public or only visible to friends, specific groups, or a customized audience.
- Post Privacy: Provide options for users to set the privacy level of their posts. Users should be able to choose whether a post is public, visible to friends only, or restricted to specific groups or individual users.
- Friend List Privacy: Allow users to choose who can view their friend list. Provide options to make the friend list public or visible only to friends, specific groups, or a customized audience.
- Activity Visibility: Implement settings to control the visibility of a user’s activity, such as their likes, comments, or shared posts. Allow users to choose whether their activity is visible to everyone, friends only, or a customized audience.
- Blocking and Reporting: Add functionality that allows users to block or report other users. Implement mechanisms to handle blocked users and ensure that blocked users cannot access or interact with the user who blocked them.
- Notification Settings: Provide options for users to customize their notification settings. Allow users to choose which types of activities or updates trigger notifications and how they receive such notifications, whether via email, push notifications, or within the website.
- Data and Account Deletion: Allow users to delete their account and associated data if they choose to leave the platform. Provide a secure and straightforward process for account deletion, ensuring that user data is permanently removed from the system.
- Terms of Service and Privacy Policy: Display clear terms of service and privacy policy to users. Inform them about how their data is collected, stored, and used on the social networking website.
- Consent and Opt-out Options: Obtain user consent for data processing activities and provide the option to opt out of certain data collection or usage practices, such as targeted advertising or data sharing with third parties.
- Educate Users: Provide clear and concise information to users about the privacy settings and how they can be used effectively. Help users understand the implications of their privacy choices and guide them in making informed decisions to protect their privacy.
By following these steps, you can implement privacy settings that give users control over their information and activities on your social networking website. This helps create a safer and more personalized user experience. In the next section, we will conclude the guide and summarize the key points.
Conclusion
Congratulations! You have successfully learned how to create a social networking website using PHP. Throughout this guide, we covered various essential aspects of building a social networking platform, including requirements, development environment setup, database creation, user registration and login systems, user profiles, friend requests, news feed functionality, privacy settings, and more.
By following the step-by-step instructions provided in each section, you were able to implement the necessary features to create a fully functional social networking website. From allowing users to register and create profiles, to connecting with friends, sharing posts, and customizing privacy settings, you have built a platform that fosters communication, collaboration, and interaction.
Remember, the process of developing a social networking website is an ongoing journey. You can continue to enhance and expand your website’s features, improve its design, and optimize its performance to provide the best experience for your users. Stay up to date with the latest web development practices, security measures, and user experience trends to ensure that your website remains relevant and engaging.
We hope this guide has been valuable in equipping you with the knowledge and skills needed to create your own social networking website. Remember to test your website thoroughly, optimize its performance, and ensure the privacy and security of your users’ data. With dedication and continuous improvement, your social networking website can become a thriving online community.
Now it’s time to unleash your creativity and take your social networking website to new heights. Start connecting people, fostering relationships, and making a positive impact in the digital world!