Introduction
Migrating a virtual machine (VM) to a different computer can be a daunting task, especially if you’re new to the world of virtualization. Whether you’re upgrading your hardware, transferring your VM to a colleague, or simply want to make a backup, knowing how to copy a virtual machine to another computer using VirtualBox can save you time and effort.
VirtualBox, an open-source virtualization software, provides a seamless way to create and manage virtual machines. With its user-friendly interface and extensive features, VirtualBox is a popular choice for developers, testers, and enthusiasts.
In this step-by-step guide, we’ll walk you through the process of copying your virtual machine to another computer using VirtualBox. We’ll cover the necessary prerequisites, exporting the virtual machine, importing it onto the new computer, and setting it up for smooth operation. Additionally, we’ll provide troubleshooting tips to address any challenges along the way.
By the end of this guide, you’ll have the knowledge and skills to confidently transfer your virtual machine to any computer running VirtualBox. Let’s get started!
Prerequisites
Before you begin the process of copying your virtual machine to another computer, ensure that you have the following prerequisites in place:
- VirtualBox Installed: Ensure that VirtualBox is installed on both the source and destination computers. You can download VirtualBox from the official website and follow the installation instructions specific to your operating system.
- Virtual Machine: You should have a virtual machine set up and running on the source computer. This includes installing the necessary operating system and any desired applications within the virtual machine.
- Storage Space: Make sure you have enough storage space on both the source and destination computers to accommodate the virtual machine and its associated files.
- Network Connection: If you plan to transfer the virtual machine over a network, ensure that both the source and destination computers have a stable network connection.
- Backup: It’s always a good practice to create a backup of your virtual machine before initiating any transfer process. This ensures that you have a fallback option in case any unexpected issues arise.
Having these prerequisites in place will help ensure a smooth and successful transfer of your virtual machine to another computer using VirtualBox. Once you have everything ready, you can proceed with the export and import steps to copy your virtual machine.
Step 1: Exporting the Virtual Machine
The first step in copying your virtual machine to another computer is exporting it from the source computer using VirtualBox’s export feature. Follow these steps to successfully export your virtual machine:
- Open VirtualBox on the source computer and ensure that the virtual machine you want to copy is powered off.
- Select the virtual machine from the list on the left-hand side of the VirtualBox window.
- Click on the “File” menu and choose “Export Appliance” or use the shortcut keys Ctrl+E.
- A new window will appear with the list of virtual machines available for export. Select the virtual machine you want to copy and click “Next”.
- Choose the export options as per your requirements, such as the location to save the exported virtual machine, the file format, and any other desired settings.
- Click “Next” and review the summary of the export settings. If everything looks correct, click “Export” to begin the export process.
- Wait for VirtualBox to complete the export process. This may take some time, depending on the size of your virtual machine and your computer’s performance.
- Once the export is complete, you will see a notification confirming the successful export of your virtual machine.
Congratulations! You have successfully exported your virtual machine from the source computer. The exported virtual machine will be saved as an .ova file, which contains all the necessary virtual machine files and configurations.
In the next step, we will import this exported virtual machine onto the new computer and proceed with the necessary setup.
Step 2: Importing the Virtual Machine
Now that you have successfully exported your virtual machine from the source computer, the next step is to import it onto the new computer using VirtualBox. Follow these steps to import the virtual machine:
- Open VirtualBox on the destination computer and ensure that the VirtualBox application is installed and running.
- Click on the “File” menu and choose “Import Appliance” or use the shortcut keys Ctrl+I.
- In the import window, click on the folder icon to browse for the .ova file that you exported from the source computer. Select the file and click “Open”.
- Review the import settings, such as the name and system configuration of the imported virtual machine. You can make any necessary adjustments at this point.
- Click “Import” to begin the import process. VirtualBox will unpack the .ova file and create a new virtual machine based on the exported settings.
- Wait for VirtualBox to complete the import process. The duration may vary depending on the size of the virtual machine and the performance of your computer.
- Once the import is complete, you will see a notification confirming the successful import of the virtual machine.
Great! You have successfully imported the virtual machine onto the new computer. The imported virtual machine will appear in the VirtualBox window, ready for further configuration and setup.
In the next step, we will guide you through the necessary steps to set up the virtual machine on the new computer for smooth operation.
Step 3: Setting Up the Virtual Machine on the New Computer
After successfully importing the virtual machine onto the new computer, you need to perform a few setup steps to ensure its smooth operation. Follow these instructions to set up the virtual machine on the new computer:
- Open VirtualBox on the new computer and make sure the imported virtual machine is selected in the VirtualBox window.
- Click on the “Settings” button to access the virtual machine’s settings.
- In the settings window, review and adjust configurations as needed, such as the allocated memory, number of CPU cores, network adapters, and any other desired settings.
- Click on the “Storage” tab and ensure that the correct virtual hard disk file is attached to the virtual machine.
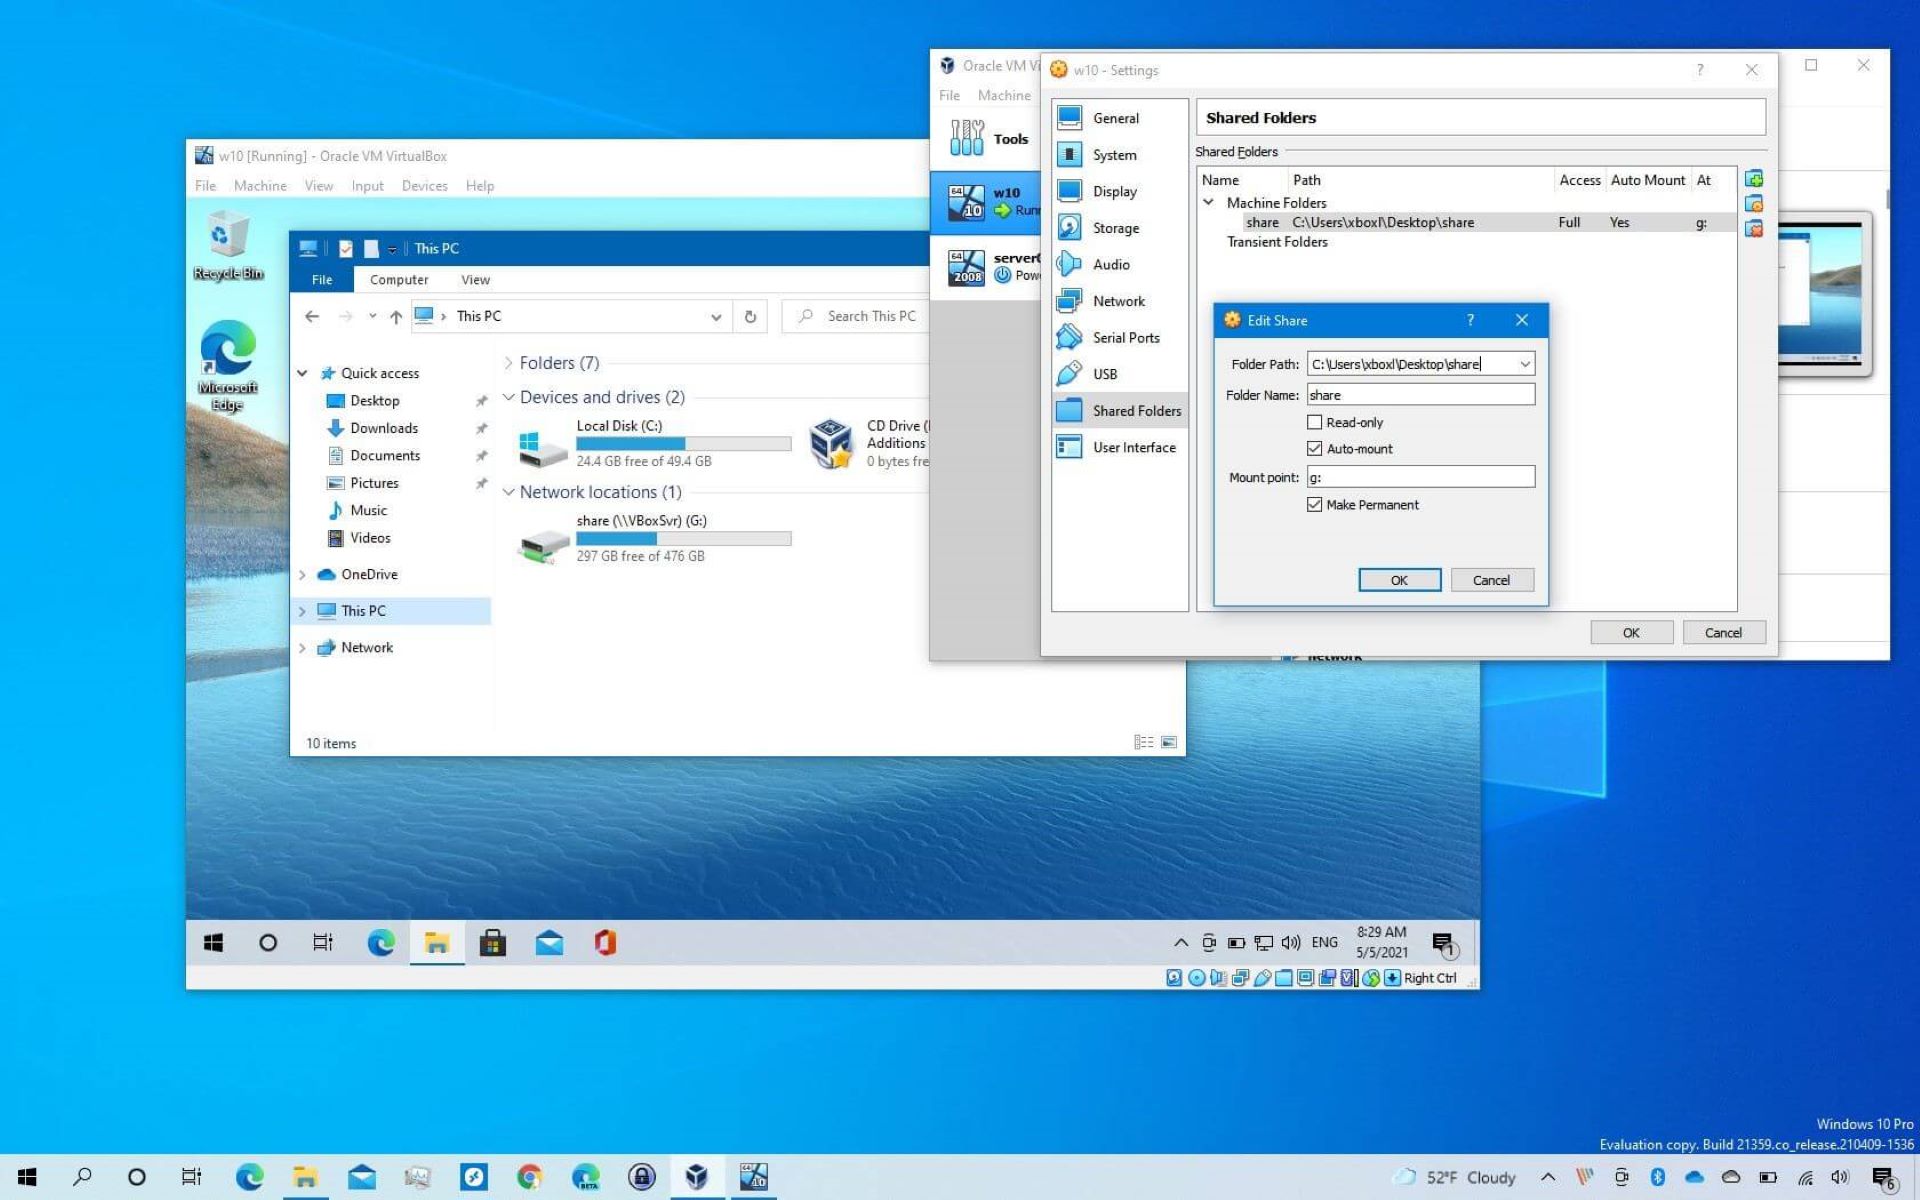
- If you had any shared folders on the source computer, set up the shared folders on the new computer by going to the “Shared Folders” tab.
- Review the other tabs in the settings window, such as “Display”, “Audio”, and “USB”, to configure desired options.
- Once you have reviewed and adjusted the settings, click “OK” to save the changes.
- Start the virtual machine by clicking the “Start” button in the VirtualBox window. The virtual machine should now boot up and be ready for use.
Congratulations! You have successfully set up the virtual machine on the new computer. You can now use the virtual machine as you would on the source computer, running applications, accessing files, and performing other tasks within the virtual environment.
In the next step, we will provide troubleshooting tips and offer additional guidance to address any challenges you may encounter during the process.
Step 4: Troubleshooting and Tips
While the process of copying a virtual machine to another computer using VirtualBox is generally straightforward, you may encounter some challenges along the way. Here are some troubleshooting tips and additional guidance to help you overcome any potential issues:
- File and Folder Paths: If your virtual machine relies on specific file or folder paths, ensure that they are consistent between the source and destination computers. If needed, adjust the paths in the virtual machine settings to match the new computer’s file system.
- Hardware Compatibility: In rare cases, the new computer’s hardware may not be fully compatible with the virtual machine. If you experience any issues, try adjusting the virtual machine settings, such as the allocated memory or CPU cores, to match the capabilities of the new computer.
- Network Configuration: If your virtual machine relies on network connectivity, verify that the network settings are properly configured on the new computer. Check the network adapter settings in the virtual machine’s settings and ensure that it is connected to the appropriate network interface.
- Missing Drivers: If you notice any missing drivers or unsupported hardware within the virtual machine, make sure to install the necessary drivers within the virtual machine itself to ensure proper functionality.
- Snapshot Considerations: If your virtual machine has snapshots, be aware that exporting and importing the virtual machine will not include the snapshots. You will need to manually recreate the snapshots on the new computer if desired.
- Backup Validation: After the import process, it is recommended to take a backup of the imported virtual machine on the new computer. This provides an additional layer of security in case any unexpected issues occur during the setup or usage of the virtual machine.
By following these troubleshooting tips and taking note of the additional guidance, you can overcome any potential challenges while copying your virtual machine to another computer using VirtualBox. Remember to refer to the official VirtualBox documentation or seek assistance from the user community if you encounter any specific issues that are not covered here.
Now that you’re equipped with these troubleshooting tips and additional guidance, you should have a smooth experience in transferring and setting up your virtual machine on the new computer.
Conclusion
Congratulations on successfully copying your virtual machine to another computer using VirtualBox! By following the step-by-step guide outlined in this article, you have learned how to export the virtual machine from the source computer, import it onto the new computer, and set it up for smooth operation. Additionally, you have gained troubleshooting tips and additional guidance to address any challenges you may encounter along the way.
Copying a virtual machine to another computer can be a valuable skill, whether you’re upgrading your hardware, sharing a virtual machine with a colleague, or creating backups for safety. VirtualBox provides a user-friendly and powerful platform for managing virtual machines, making the process more accessible to users of all levels of expertise.
Remember to ensure that you have the necessary prerequisites in place, such as VirtualBox installed on both computers, sufficient storage space, a stable network connection, and a backup of your virtual machine. By following the proper steps, you can successfully export, import, and set up your virtual machine on a new computer.
If you encounter any issues or have specific requirements, refer to the official VirtualBox documentation or seek assistance from the user community. Sharing knowledge and troubleshooting experiences can further enhance your virtualization skills.
With your virtual machine successfully copied to another computer, you can now enjoy the benefits of running your applications, testing software, or exploring new environments within the virtual environment. Leveraging the power of virtualization opens up a world of possibilities and flexibility.
Thank you for following this guide. We hope it has been informative and helped you in your virtual machine copying journey. Keep exploring and experimenting with virtualization technology to further enhance your computing experience.