Introduction
With the rapid advancement of technology, smart TVs have become a staple in many households. These cutting-edge devices offer a world of entertainment with access to streaming services, online content, and interactive applications. However, to unlock the full potential of your smart TV, you need to connect it to the internet.
Connecting your smart TV to the internet opens up a whole new realm of possibilities. You can stream your favorite shows and movies, browse the web, play games, and even control your TV with voice commands. Whether you have a Wi-Fi-enabled smart TV or prefer a wired Ethernet connection, this guide will walk you through the steps to get your smart TV online.
In this article, we will explore various methods to connect your smart TV to the internet. We will discuss how to connect your smart TV to Wi-Fi, how to set up an Ethernet connection, and offer troubleshooting tips for common connection issues. You will also learn how to enhance your smart TV’s internet speed, enable smart TV apps and streaming services, update your smart TV’s firmware, and ensure the security of your internet connection.
By the end of this guide, you will have the knowledge and tools to enjoy a seamless and connected experience on your smart TV. So, let’s dive in and get your smart TV connected to the internet!
Check Your Smart TV’s Internet Capabilities
Before connecting your smart TV to the internet, it’s essential to ensure that your TV has the necessary internet capabilities. Most modern smart TVs come with built-in Wi-Fi and Ethernet connectivity options, but it’s crucial to double-check.
Start by checking the user manual or specifications of your smart TV. Look for terms like “Wi-Fi enabled,” “Wireless LAN,” or “Ethernet port.” This information will confirm whether your TV has the necessary hardware to connect to the internet.
If your smart TV does not have built-in Wi-Fi capabilities, don’t worry. You can still connect it to the internet using an Ethernet cable. Many smart TVs have an Ethernet port on the back, allowing you to establish a wired connection for a more stable and reliable internet connection.
It’s worth noting that some older smart TVs may not have internet capabilities at all. In this case, you may need to invest in additional devices, such as a streaming media player or a smart Blu-ray player, to connect to streaming services and online content.
Once you have determined that your smart TV has internet capabilities, you’re ready to move on to the next steps of connecting it to the internet. Whether you opt for a wireless or wired connection, the following sections will guide you through the process, ensuring that you can enjoy all the benefits of a connected smart TV experience.
Connect Your Smart TV to Wi-Fi
Wireless connectivity is a convenient option for connecting your smart TV to the internet. Before you begin, ensure that you have the following items: a Wi-Fi network name (SSID) and password. Once you have these, follow the steps below to connect your smart TV to Wi-Fi.
- On your smart TV remote, locate the “Menu” or “Settings” button. Press it to access the TV’s menu.
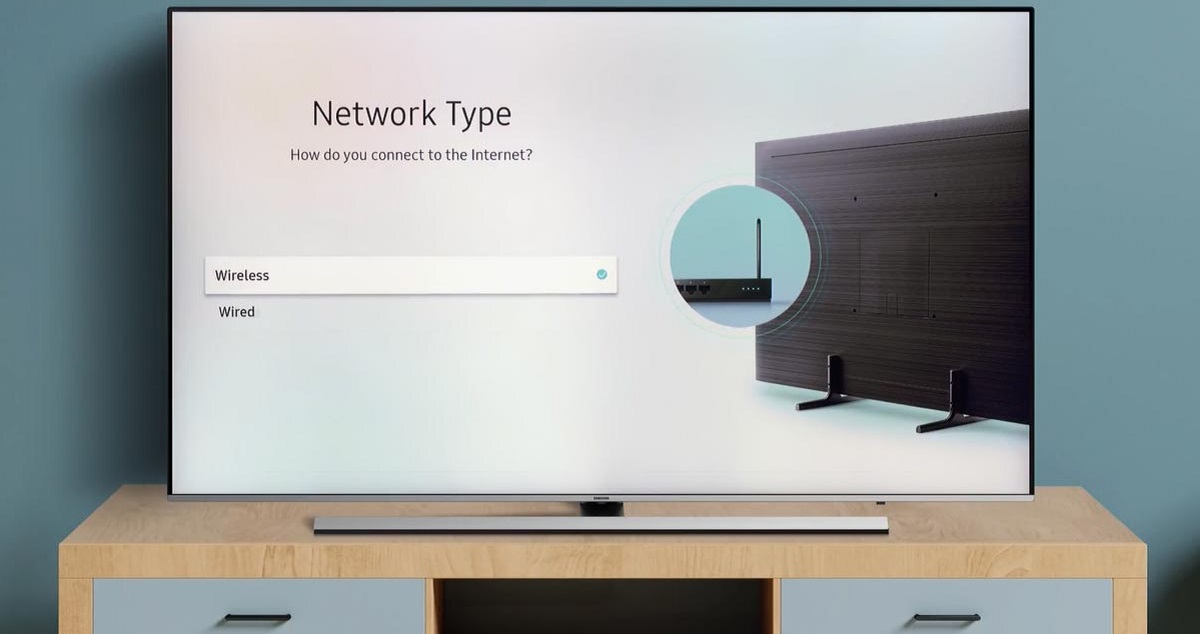
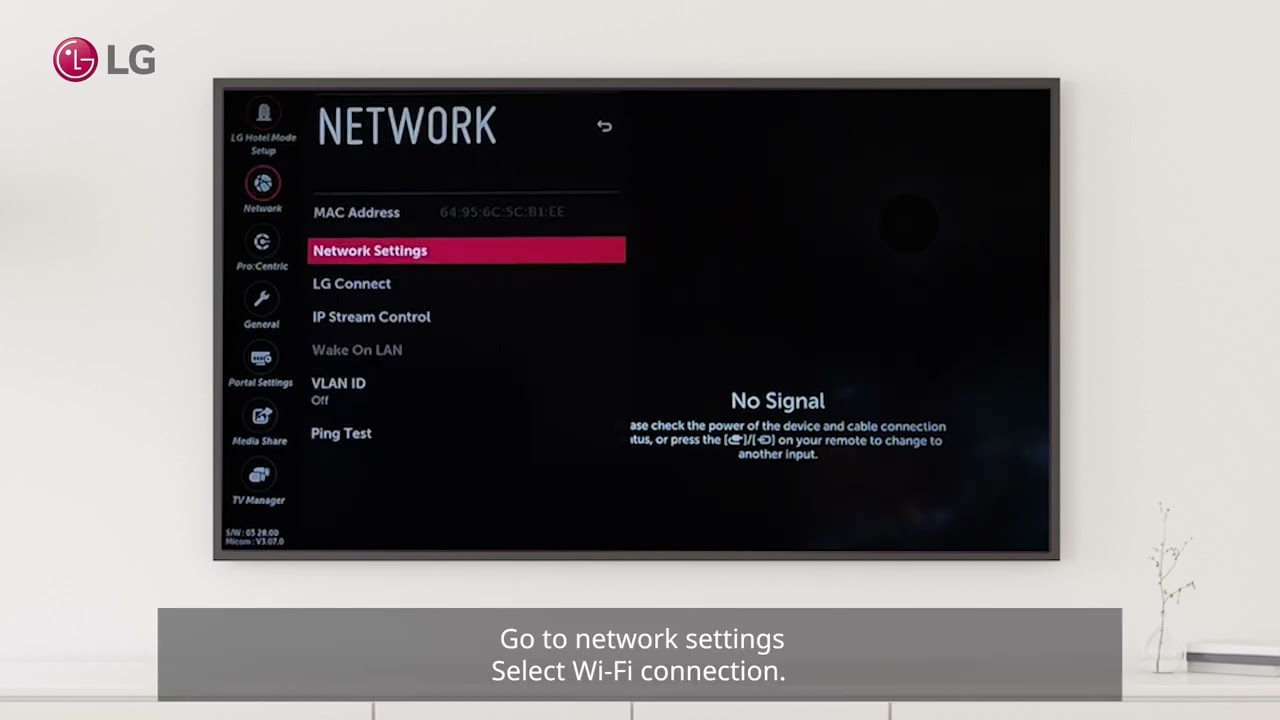
- Navigate to the “Network” or “Network Settings” option using the arrow keys on your remote.
- Select “Wireless” or “Wi-Fi” from the available options.
- Your smart TV will scan for available Wi-Fi networks. Once the list appears, select your desired network.
- If prompted, enter the Wi-Fi password using the on-screen keyboard. Take care to enter the password correctly, as it is case-sensitive.
- Once you’ve entered the password, select “Connect” or “Join” to connect your smart TV to the Wi-Fi network.
After a successful connection, your smart TV will display a confirmation message or an icon indicating a successful Wi-Fi connection. At this point, you should be able to access the internet, stream online content, and use smart TV apps. If you encounter any issues, recheck that you entered the correct Wi-Fi password, or try restarting your router and smart TV.
It’s worth noting that the placement of your Wi-Fi router can affect the signal strength and connection stability. For optimal performance, ensure that your smart TV is within a reasonable distance from the router and minimizes obstructions such as walls or other electronic devices. This will help ensure a strong and reliable Wi-Fi connection for your smart TV.
With your smart TV now connected to Wi-Fi, you are one step closer to enjoying a world of entertainment at your fingertips. In the next section, we will explore how to connect your smart TV to the internet using an Ethernet connection for those who prefer a wired setup.
Connect Your Smart TV to Ethernet
If you prefer a wired connection or your smart TV does not have built-in Wi-Fi capabilities, you can use an Ethernet cable to connect it to the internet. An Ethernet connection offers a more stable and reliable network connection, which is especially beneficial for streaming high-quality content or online gaming. Follow the steps below to connect your smart TV to the internet using an Ethernet cable:
- Locate the Ethernet port on your smart TV. It is usually located on the back or side of the TV, and it looks similar to a phone jack but slightly larger.
- Connect one end of the Ethernet cable to the Ethernet port on your smart TV.
- Connect the other end of the cable to an available Ethernet port on your router or modem.
- Once the cable is securely connected, your smart TV should automatically detect the wired connection.
In some cases, you may need to adjust the network settings on your smart TV to recognize the Ethernet connection. To do this, follow these additional steps:
- On your smart TV remote, navigate to the “Menu” or “Settings” option.
- Go to the “Network” or “Network Settings” section.
- Select “Wired” or “Ethernet” as the network connection type.
- Allow your smart TV a few moments to establish the connection with the Ethernet cable.
Once the Ethernet connection is established, your smart TV will have access to the internet. You can now enjoy a seamless streaming experience with improved network stability. However, keep in mind that a wired connection restricts the mobility of your smart TV, so ensure that your TV is positioned within reach of the Ethernet cable.
Whether you choose a wireless Wi-Fi connection or a wired Ethernet connection, the important thing is that your smart TV is now connected to the internet. In the next section, we will discuss how to set up your internet connection to ensure smooth and uninterrupted access to online content and services.
Set Up Your Internet Connection
Once you have connected your smart TV to either Wi-Fi or Ethernet, it’s time to set up your internet connection. The process may vary slightly depending on the make and model of your smart TV, but the general steps are as follows:
- Open the menu or settings on your smart TV by pressing the corresponding button on your remote.
- Navigate to the “Network” or “Network Settings” section.
- Choose the “Internet” or “Internet Connection” option.
- Select the connection type you are using, whether it is Wi-Fi or Ethernet.
- If you are using Wi-Fi, you may be prompted to enter your Wi-Fi password or select your network from a list of available options. Follow the on-screen instructions to complete the setup.
- If you are using an Ethernet connection, the setup process is usually automatic once the connection is established.
- Once the internet connection is set up, your smart TV should display a confirmation message or an icon indicating a successful connection.
It’s important to note that some smart TVs have advanced network settings that allow you to customize and optimize your internet connection. For example, you may have options to adjust IP settings, DNS settings, or enable features like DHCP. These settings are typically found in the “Advanced” or “Advanced Network” options within the network settings menu. However, it is recommended to leave these settings at their default values unless you have a specific need or troubleshooting requirement.
After setting up your internet connection, it’s a good idea to perform a quick internet speed test on your smart TV. This will give you an idea of the download and upload speeds you are getting, which can help you troubleshoot any performance issues or determine if your internet connection meets the requirements for streaming high-quality content.
With your internet connection properly set up, you are now ready to explore the multitude of entertainment options available on your smart TV. In the next section, we will discuss troubleshooting common connection issues that you may encounter along the way.
Troubleshooting Common Connection Issues
While connecting your smart TV to the internet may seem straightforward, you might encounter occasional hiccups or problems. Here are some common connection issues you may face and troubleshooting steps to resolve them:
- Weak Wi-Fi signal: If you experience a weak Wi-Fi signal on your smart TV, try moving your router closer to the TV or use a Wi-Fi extender to boost the signal strength.
- Slow internet speed: If you notice slow internet speed on your smart TV, ensure there are no bandwidth-intensive activities happening on other devices connected to the same network. You can also try rebooting your router or contacting your internet service provider for assistance.
- No internet connection: If your smart TV is not connecting to the internet at all, check if your router is working properly and if other devices can connect. Restart your router, verify the Wi-Fi password, or reset the network connection settings on your smart TV if necessary.
- Interference from other devices: Electronic devices like cordless phones, microwave ovens, or Bluetooth devices can interfere with Wi-Fi signals. Keep your smart TV away from such devices or try changing the Wi-Fi channel on your router to reduce interference.
- Outdated firmware: Check if there are any available firmware updates for your smart TV. Outdated firmware can cause connectivity issues, so it’s essential to keep your smart TV’s software up to date.
- Restart your smart TV: Sometimes a simple restart can resolve connectivity issues. Turn off your TV, unplug it from the power source, wait for a few minutes, and then plug it back in and turn it on again.
- Contact customer support: If you’ve tried these troubleshooting steps and are still having issues, contact customer support for your smart TV brand. They can provide specific guidance or assist you in resolving any persistent connection problems.
By following these troubleshooting steps, you can overcome common connection issues and ensure a smooth and uninterrupted smart TV experience. However, if you encounter more complex or persistent problems, don’t hesitate to seek assistance from the manufacturer or a professional technician.
Now that we’ve addressed possible connection issues, let’s move on to optimizing your smart TV’s internet speed and performance in the next section.
Enhancing Your Smart TV’s Internet Speed
Having a fast and stable internet connection is crucial for a smooth streaming experience on your smart TV. Here are some tips to enhance your smart TV’s internet speed:
- Use a wired connection: If possible, connect your smart TV directly to your router using an Ethernet cable. This will provide a more stable and reliable internet connection compared to Wi-Fi.
- Position your router strategically: Ensure that your router is placed in a central location, away from obstructions like walls or other electronic devices. This will help to maximize the Wi-Fi signal strength and coverage in your home.
- Reduce Wi-Fi interference: Other electronic devices like cordless phones or microwave ovens can interfere with your Wi-Fi signal. Keep your smart TV and router away from such devices or use Wi-Fi channels that are less crowded.
- Limit background activities: If you notice buffering or slow streaming, make sure there are no other devices on your network consuming a significant amount of bandwidth. Pause or stop downloads, uploads, or any other background activities on other devices to free up bandwidth for your smart TV.
- Upgrade your internet plan: If you consistently experience slow internet speeds, consider upgrading your internet plan with your service provider. A higher speed plan can provide a more seamless streaming experience on your smart TV.
- Optimize video streaming quality: Streaming services often provide options to adjust video quality. Lowering the video quality can reduce buffering and enhance your smart TV’s streaming performance, especially if your internet speed is limited.
- Keep your firmware updated: Regularly check for firmware updates for your smart TV. These updates can improve performance, fix bugs, and enhance the overall stability of your device’s internet connection.
By following these tips, you can optimize your smart TV’s internet speed and enhance your streaming experience. However, it’s important to note that the speed and performance will still be subject to your internet service provider’s capabilities and the quality of your Wi-Fi or Ethernet connection.
In the next section, we will explore how to enable smart TV apps and streaming services to unlock a vast world of entertainment options on your device.
Enable Smart TV Apps and Streaming Services
One of the major advantages of a smart TV is its ability to access a variety of apps and streaming services. Enabling and setting up these apps on your smart TV allows you to enjoy a wide range of entertainment options. Here’s how you can enable smart TV apps and streaming services:
- Access the app store: On your smart TV, locate and open the app store. The name and location of the app store may vary depending on the brand and operating system of your smart TV.
- Browse available apps: Once you’re in the app store, explore the selection of apps and streaming services that are available for your smart TV. Popular options often include Netflix, Hulu, Amazon Prime Video, Disney+, and many more.
- Select and install apps: Choose the apps and streaming services you want to access on your smart TV and select the “Install” or “Download” button. The app will then be downloaded and installed onto your smart TV.
- Create or sign in to accounts: For certain streaming services and apps, you may need to create an account or sign in if you already have one. Follow the on-screen prompts to create an account or enter your login credentials to access your preferred content.
- Organize your apps: Once you have installed your desired apps, you can usually rearrange their positions on the smart TV’s home screen. Arrange them according to your preference so that your most frequently used apps are easily accessible.
- Update apps: Regularly check for updates in the app store to keep your apps and streaming services up to date. Updates often bring new features, bug fixes, and performance improvements.
By enabling and setting up smart TV apps and streaming services, you can access a vast array of content, including movies, TV shows, music, games, and more. The availability of apps and services may vary depending on your geographical location and the compatibility of your smart TV with certain platforms.
With your smart TV apps and streaming services enabled, you’re well on your way to enjoying an immersive entertainment experience right from your living room. In the next section, we will discuss the importance of keeping your smart TV’s firmware up to date.
Update Your Smart TV’s Firmware
Keeping your smart TV’s firmware up to date is essential to ensure optimal performance, security, and access to the latest features. Firmware updates are released by manufacturers to fix bugs, address compatibility issues, and enhance overall functionality. Here’s how you can update your smart TV’s firmware:
- Check for updates: Access the menu or settings on your smart TV and navigate to the “System” or “About” section. Look for an option to “Check for Updates” or “Software Update”.
- Start the update process: If an update is available, follow the on-screen instructions to start the update process. Your smart TV may need to restart during the update, so make sure you don’t interrupt the process.
- Internet connection: Your smart TV will need an active internet connection to download and install the firmware update. Ensure that your smart TV is connected to Wi-Fi or Ethernet.
- Automatic updates: Some smart TVs have an option to enable automatic firmware updates. If available, consider enabling this feature to ensure that your TV stays up to date without manual intervention.
- Offline updates: In certain cases, firmware updates may not be available over the internet or your smart TV may not have built-in update functionality. In such situations, you may need to visit the manufacturer’s website, download the latest firmware version onto a USB drive, and follow specific instructions provided by the manufacturer to update your smart TV.
- Ensure power stability: It’s crucial to have a stable power supply during the firmware update process. Avoid turning off your smart TV or unplugging it while the update is in progress, as this can lead to firmware corruption.
Regularly updating your smart TV’s firmware not only improves its performance but also enhances security by patching any vulnerabilities. It’s recommended to check for firmware updates periodically to ensure that you are benefiting from the latest advancements and bug fixes provided by the manufacturer.
In the next section, we will discuss how to stay secure on your smart TV’s internet connection to protect your privacy and prevent unauthorized access.
Stay Secure on Your Smart TV’s Internet Connection
Protecting your smart TV’s internet connection is crucial to safeguard your privacy and prevent unauthorized access to your device. Here are some important security measures to implement on your smart TV:
- Secure your Wi-Fi network: Set a strong password for your Wi-Fi network to prevent unauthorized access. Use a combination of letters, numbers, and special characters for a more secure password.
- Update your router’s firmware: Just like your smart TV, regularly updating your router’s firmware is vital to patch any security vulnerabilities. Check your router manufacturer’s website for firmware updates.
- Enable network encryption: Ensure that your Wi-Fi network uses WPA2 or WPA3 encryption protocols. This adds an extra layer of security by encrypting the data transmitted between your smart TV and the router.
- Disable unnecessary connections: If your smart TV has Bluetooth or other wireless connectivity features that you don’t use, consider disabling them. This prevents potential vulnerabilities and unauthorized access.
- Be cautious with app installations: Only download and install apps from trusted sources, such as the official app store for your smart TV. Avoid downloading apps from unknown or unverified sources, as they may contain malware.
- Keep your smart TV’s firmware up to date: Regularly update your smart TV’s firmware to ensure that security patches are applied. Manufacturers often release firmware updates to address vulnerabilities and enhance security.
- Use a virtual private network (VPN): If you want an additional layer of privacy and security, consider using a VPN service on your smart TV. A VPN encrypts your internet connection and masks your IP address, making it more challenging for cybercriminals to track your online activities.
- Exercise caution with personal information: When using apps or interacting with online services on your smart TV, be mindful of the personal information you share. Only provide information to reputable and trusted sources.
- Regularly monitor your smart TV: Keep an eye out for any unusual behavior or activity on your smart TV. If you notice anything suspicious, such as unauthorized apps or changes in settings, perform a thorough scan for malware or contact the manufacturer’s support for assistance.
By implementing these security measures, you can protect your smart TV’s internet connection and reduce the risk of privacy breaches or cyber threats. It’s important to remember that smart TVs are connected devices, and taking steps to ensure their security is essential in today’s digital age.
Now that you have a grasp of how to stay secure on your smart TV’s internet connection, let’s wrap up this guide.
Conclusion
Congratulations! You’ve learned how to connect your smart TV to the internet and optimize your viewing experience. By following the steps outlined in this guide, you can enjoy seamless streaming, access a wide range of apps and services, and stay secure on your smart TV’s internet connection.
Start by checking your smart TV’s internet capabilities and connecting it to either Wi-Fi or Ethernet, depending on your preference. Then, set up your internet connection and troubleshoot common connection issues that may arise. Enhance your smart TV’s internet speed by optimizing your Wi-Fi signal, reducing interference, and managing bandwidth usage.
Enable smart TV apps and streaming services to unlock a world of entertainment options. Stay up to date with firmware updates to ensure optimal performance and security. Protect your smart TV’s internet connection by securing your Wi-Fi network, enabling network encryption, and being cautious with app installations.
Remember to regularly monitor and update your smart TV’s firmware, exercise caution with personal information, and stay vigilant against potential security threats. By implementing these measures, you can enjoy a safe and immersive smart TV experience.
Whether you’re binge-watching your favorite shows, streaming movies, or enjoying interactive games, your smart TV is now ready to deliver endless entertainment right to your living room. So sit back, relax, and enjoy the wonders of a connected smart TV experience!