Introduction
Setting up wireless internet on your LG Smart TV allows you to enjoy a wide range of online entertainment and streaming services right on your television screen. With a stable Wi-Fi connection, you can access popular apps like Netflix, YouTube, and Hulu, as well as browse the web and stay connected with friends and family through social media platforms.
Having wireless internet connectivity on your LG Smart TV eliminates the need for cumbersome Ethernet cables and provides the flexibility to place your TV anywhere in the room without worrying about the availability of a wired connection. The process of setting up wireless internet on your LG Smart TV is relatively simple and requires minimal technical knowledge.
In this article, we will guide you through the step-by-step process of connecting your LG Smart TV to the wireless internet in order to unlock a world of digital entertainment options. We will cover everything from checking your TV’s compatibility with Wi-Fi connectivity to accessing the network settings and connecting to your home Wi-Fi network. By the end of this guide, you’ll be able to enjoy seamless wireless internet access on your LG Smart TV.
Before we dive into the steps for setting up wireless internet on your LG Smart TV, it’s essential to ensure that your TV is compatible with Wi-Fi connectivity. While most recent LG Smart TVs come with built-in Wi-Fi capabilities, it’s always a good idea to double-check before proceeding. Consult your TV’s user manual or visit the LG website to confirm that your model supports wireless internet connectivity.
Step 1: Check your TV’s compatibility
Before you can set up wireless internet on your LG Smart TV, it’s crucial to ensure that your TV model supports Wi-Fi connectivity. While most modern LG Smart TVs are equipped with built-in Wi-Fi capabilities, it’s always a good idea to double-check to avoid any surprises.
To determine if your TV is compatible with Wi-Fi, consult the user manual that came with your television. If you can’t find the manual, don’t worry. You can easily find the information you need on the LG website. Simply visit the LG support page, enter the model number of your TV, and look for specifications or features that mention Wi-Fi connectivity.
If your TV is older or does not have built-in Wi-Fi, you may still be able to connect it to the internet wirelessly using an external device. LG offers Wi-Fi USB adapters that can be plugged into the USB port of your TV to enable wireless connectivity. However, keep in mind that these adapters may not be compatible with all LG models, so it’s important to check compatibility before making a purchase.
Once you have confirmed that your LG Smart TV is compatible with Wi-Fi, you’re ready to move on to the next step of the setup process. In the following steps, we will guide you through the process of connecting your TV to your home wireless network, allowing you to enjoy a seamless internet connection and access a variety of online entertainment options.
Step 2: Connect your TV to your wireless router
To establish a wireless internet connection on your LG Smart TV, you need to connect it to your home’s wireless router. This step ensures that your TV can communicate with your router and access the internet wirelessly.
First, locate your wireless router and ensure that it is powered on and functioning properly. Look for the router’s network name (also called the SSID) and password. These details are usually printed on a sticker on the router itself. If you cannot find this information, consult the router’s user manual or contact your internet service provider for assistance.
Next, turn on your LG Smart TV and use the remote control to navigate to the settings menu. The exact steps to access the settings may vary depending on your TV model, but typically there will be a dedicated settings button on the remote control or an option in the home menu. Look for the gear or cogwheel icon to indicate the settings menu.
Within the settings menu, locate the Network or Wi-Fi section. This is where you will configure the wireless connection for your TV. Select the option to connect to a wireless network or to add a new network, depending on the menu options available on your specific TV model.
Your LG Smart TV will now display a list of available wireless networks. Look for your router’s network name (SSID) in the list and select it to proceed. If your network name is not listed, ensure that your router is within range and functioning properly.
If your router’s network name is hidden or not broadcasting, you may need to manually enter the network information. Select the option to manually enter the network name and password, and follow the on-screen instructions to input the required details.
Once you have selected your network, your LG Smart TV will attempt to establish a connection. This process may take a few moments. If there is a password associated with your wireless network, you will be prompted to enter it. Use the on-screen keyboard or your remote control to enter the password accurately. Be mindful of uppercase and lowercase letters as passwords are case-sensitive.
After successfully entering the password, your LG Smart TV will attempt to connect to the wireless router. If the connection is successful, you will see a confirmation message on the screen. Congratulations! Your TV is now connected to your wireless router, and you are one step closer to enjoying wireless internet access on your LG Smart TV.
In the next step, we will guide you through the process of accessing the network settings on your LG Smart TV to ensure that the connection is properly configured and ready to use.
Step 3: Access the network settings on your TV
Now that you have connected your LG Smart TV to your wireless router, it’s important to access the network settings on your TV to ensure that the connection is properly configured. This step will allow you to verify the network settings and make any necessary adjustments to ensure a stable and reliable wireless internet connection.
Start by turning on your LG Smart TV and using the remote control to navigate to the home screen or main menu. Look for the settings or setup option, usually represented by a gear or cogwheel icon. Select this option to access the settings menu.
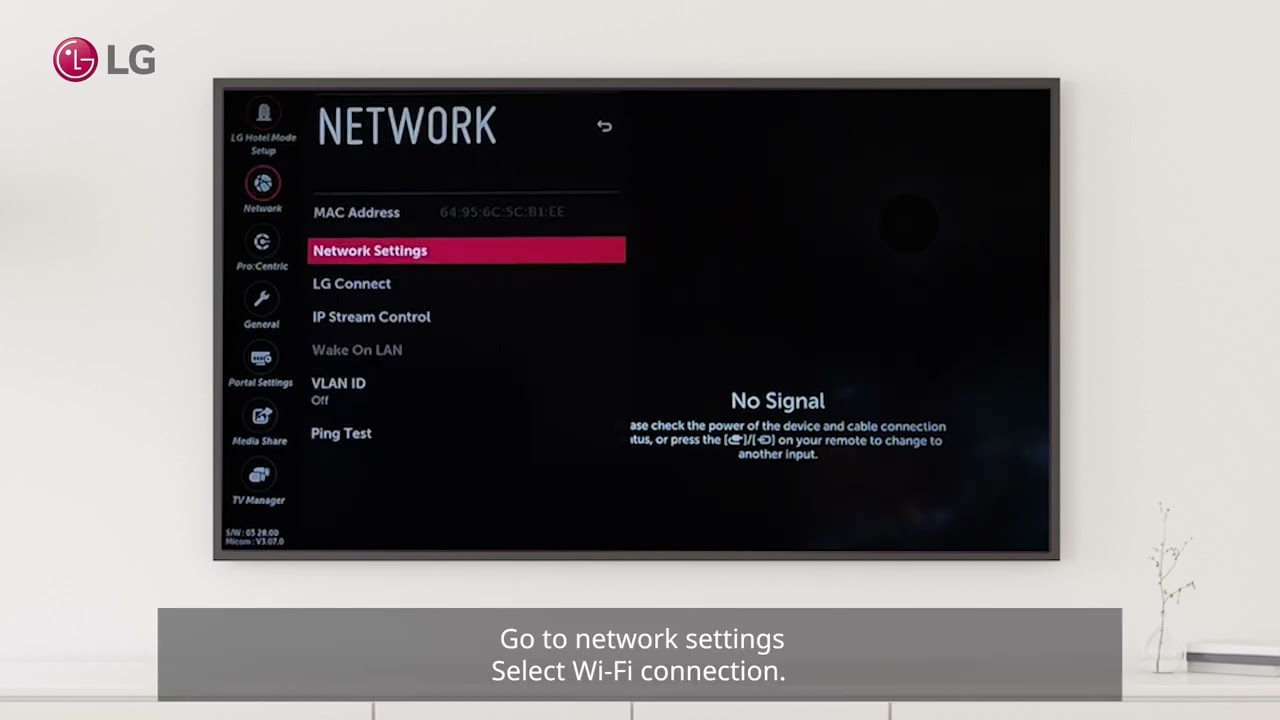
Within the settings menu, search for the network or connectivity section. Depending on your TV model, this section may be labeled as “Network Settings,” “Wi-Fi Settings,” or something similar. Select the appropriate option to proceed.
Once you are in the network settings menu, you will see information about the Wi-Fi connection status, including the network name (SSID), signal strength, and IP address. Take note of these details as they can be helpful if you encounter any connectivity issues in the future.
In this menu, you may find additional options to customize your network settings. Some common options include:
- Network mode: This allows you to choose between automatic and manual network configuration. In most cases, automatic configuration is recommended as it will automatically detect and connect to the network settings provided by your router.
- IP settings: This option determines whether your TV obtains an IP address automatically from your router (DHCP) or uses a static IP address. Unless you have specific network requirements, it is generally recommended to use the DHCP setting.
- Proxy settings: If you are using a proxy server, you can enter the necessary details in this section. Otherwise, you can leave it blank.
- DNS settings: These settings determine how your TV resolves domain names to IP addresses. In most cases, the default settings provided by your router should suffice.
Take a moment to review the network settings and ensure that they are correctly configured. If you need to make any changes, navigate the menu using the remote control and select the appropriate options. Follow the on-screen instructions to update the settings accordingly.
Once you have reviewed and adjusted the network settings to your preference, save the changes and exit the settings menu. Your LG Smart TV is now properly configured to use the wireless internet connection. In the next step, we will guide you through the process of scanning for available wireless networks.
Step 4: Scan for wireless networks
After accessing the network settings on your LG Smart TV and ensuring that the connection is properly configured, it’s time to scan for available wireless networks. This step allows your TV to detect and display a list of nearby Wi-Fi networks that you can connect to.
Start by turning on your LG Smart TV and using the remote control to navigate to the network settings menu. This can usually be accessed through the settings or setup option on the home screen or main menu. Select the network or Wi-Fi settings to proceed.
Once you are in the network settings menu, look for the option to scan for wireless networks. This option is typically labeled as “Scan” or “Search for networks.” Select this option to initiate the scanning process.
Your LG Smart TV will now scan for available wireless networks within range. This process may take a few moments, so be patient. As the TV scans for networks, it will display a list of the networks it detects on the screen. The list will include the network names (SSIDs) of the available Wi-Fi networks.
Take a moment to review the list of detected networks. The networks will likely be listed alongside important information such as the signal strength, network security (indicated by WEP, WPA, or WPA2), and whether the network is hidden (not broadcasting its SSID).
If your home network is listed in the scan results, select it from the list. If it is not listed, ensure that your router is powered on and within range of the TV. If your network is hidden, select the option to manually enter a network name and password, and follow the on-screen instructions to input the necessary details.
If you are unsure which network to connect to, refer to the network name (SSID) and password information provided by your internet service provider or look for a network with a familiar name that matches your home Wi-Fi network.
Once you have selected the network you want to connect to, your LG Smart TV will attempt to establish a connection to the selected network. If the connection is successful, you will see a confirmation message on the screen. Congratulations! Your TV is now connected to your chosen Wi-Fi network.
In the next step, we will guide you through the process of entering your network password to authenticate the connection. This step ensures that your LG Smart TV can securely connect to your Wi-Fi network and access the internet.
Step 5: Select your Wi-Fi network
Now that you have scanned for available wireless networks on your LG Smart TV, it’s time to select your Wi-Fi network from the list of detected networks. This step is crucial for establishing a secure and stable connection between your TV and your home Wi-Fi network.
After the scanning process is complete, your LG Smart TV will display a list of available networks on the screen. Scan through the list and locate your Wi-Fi network. The network names (SSIDs) will be displayed along with important information such as signal strength and network security.
Select your Wi-Fi network from the list by using the remote control. Use the arrow keys to navigate through the options and the “OK” or “Enter” button to make a selection. If your network is not listed, ensure that your router is powered on and within range of the TV. If your Wi-Fi network is hidden or has a different name, select the option to manually enter the name and password and follow the on-screen prompts to input the necessary details.
When you select your Wi-Fi network, your LG Smart TV will attempt to establish a connection with the chosen network. This process may take a few moments as the TV communicates with your router to authenticate and verify the connection. During this process, you may see a loading or connecting message on the screen.
If your Wi-Fi network is password-protected, your TV will prompt you to enter the network password. Use the remote control or the on-screen keyboard to input the password accurately. Take note that passwords are case-sensitive, so ensure that you enter both uppercase and lowercase letters correctly.
Once you have entered the network password, your LG Smart TV will attempt to connect to your Wi-Fi network. If the password is correct and the connection is successful, you will see a confirmation message on the screen. Congratulations! Your TV is now connected to your Wi-Fi network and ready to access the internet.
In the next step, we will guide you through the process of connecting to the Wi-Fi network and verifying the internet connection on your LG Smart TV. This step ensures that your TV can securely access online services and enjoy a seamless internet experience.
Step 6: Enter Your Network Password
Now that you have selected your Wi-Fi network on your LG Smart TV, it’s time to enter your network password. This step ensures that your TV securely connects to your Wi-Fi network and allows you to access the internet without any issues.
When you selected your Wi-Fi network in the previous step, your LG Smart TV will prompt you to enter the network password. This is the password that you set up for your Wi-Fi network when you initially configured your router or provided by your internet service provider.
Using your remote control or the on-screen keyboard, carefully enter your network password into the appropriate field. Be mindful of uppercase and lowercase letters, as Wi-Fi passwords are case-sensitive. Take note that some TV models may display asterisks or dots instead of the actual characters for security purposes.
Double-check that you have entered the password correctly and review it before proceeding. If you make a mistake, use the arrow keys on your remote control to navigate to the incorrect character and use the delete or backspace button to erase it. Then, enter the correct character and continue until the entire password is entered correctly.
After entering your network password, select the “OK,” “Enter,” or similar button on your remote control to confirm your entry. Your LG Smart TV will now attempt to connect to your Wi-Fi network using the provided password.
During this process, your TV will communicate with your router to authenticate and establish a secure connection. This may take a few moments, so be patient. You may see a loading or connecting message on the screen as the connection process takes place.
If the network password you entered is correct and the connection is successful, your LG Smart TV will display a confirmation message on the screen. Congratulations! Your TV is now connected to your Wi-Fi network and ready to use.
In the next step, we will guide you through the process of testing the internet connection on your LG Smart TV to ensure that everything is working correctly and that you can enjoy online streaming services, browse the web, and more.
Step 7: Connect to the Wi-Fi Network
After entering your network password on your LG Smart TV, it’s time to connect to your Wi-Fi network. This step finalizes the process of establishing a secure and stable connection between your TV and the wireless network, allowing you to access the internet and enjoy online content seamlessly.
Upon entering your network password, your LG Smart TV will automatically attempt to connect to the Wi-Fi network you selected and verified. Your TV will send a connection request to your wireless router, and the router will respond by granting access to the network.
During the connection process, you may see a loading or connecting message on the screen. This is normal and indicates that your TV is communicating with the router and establishing the connection. The duration of this process can vary depending on your network and signal strength, so be patient.
Once the connection is successfully established, your LG Smart TV will display a confirmation message on the screen, indicating that it is now connected to the Wi-Fi network. This means that your TV is ready to access the internet and enjoy various online services and content.
To ensure that the connection is stable and reliable, it is recommended to keep your TV within range of your wireless router. If you experience any issues with the connection, such as slow internet speed or intermittent disconnections, try repositioning your TV or router to optimize signal strength.
Once you are connected to the Wi-Fi network, you can now enjoy a wide range of online entertainment options on your LG Smart TV. Whether it’s streaming movies and TV shows, browsing the web, or accessing social media platforms, your TV is now equipped with the ability to access the internet wirelessly.
In the next step, we will guide you through the process of testing the internet connection on your LG Smart TV to ensure that everything is functioning correctly.
Step 8: Test the internet connection on your TV
After connecting your LG Smart TV to the Wi-Fi network, it’s essential to test the internet connection to ensure that everything is working correctly. This step allows you to verify that your TV can access the internet and that you can enjoy online streaming, web browsing, and other online activities seamlessly.
To test the internet connection on your LG Smart TV, start by accessing the home screen or main menu using the remote control. Look for the internet or network settings option, which is typically represented by an icon or labeled as “Network Status” or “Internet Connection.”
Once you have accessed the internet or network settings menu, your LG Smart TV will display information about the current internet connection status. This information may include the connection type (Wi-Fi), signal strength, IP address, and DNS settings.
To test the internet connection, look for an option within the internet or network settings menu that allows you to perform a connection test or check the network status. Select this option to initiate the test.
During the connection test, your LG Smart TV will attempt to ping external servers and measure the response time. This test helps evaluate the stability and speed of your internet connection. The results will be displayed on the screen, indicating whether the connection is successful and providing information about the download and upload speeds.
If the connection test indicates that the internet connection is successful and shows satisfactory speeds, your LG Smart TV is ready to access online content. You can now enjoy streaming movies and TV shows, browse the web, and make use of various online services available on your TV.
However, if the connection test fails or indicates poor internet speeds, you may need to troubleshoot the issue. Try the following steps to improve the connection:
- Move your TV and wireless router closer together to improve signal strength.
- Restart your router by unplugging it from the power source and waiting for a few seconds before plugging it back in.
- Check for any firmware updates for your router and install them if available.
- Ensure that your internet service subscription is active and paid for.
- Contact your internet service provider for assistance if you continue to experience connection problems.
By testing the internet connection on your LG Smart TV, you can ensure that you have a reliable and stable connection, allowing you to make the most of the online features and services available. Now you can sit back, relax, and enjoy a seamless online experience directly on your TV.
Conclusion
Congratulations! You have successfully set up wireless internet on your LG Smart TV. By following the step-by-step guide provided in this article, you have connected your TV to your home Wi-Fi network, enabling you to access a wide range of online entertainment and streaming services right on your television screen.
Setting up wireless internet on your LG Smart TV offers numerous benefits. You no longer have to rely on Ethernet cables or worry about the limitations of a wired connection. With a stable Wi-Fi connection, you can enjoy seamless streaming of your favorite movies and TV shows, browse the internet, and stay connected with friends and family through social media platforms.
During the setup process, you ensured that your LG Smart TV was compatible with Wi-Fi connectivity, connected it to your wireless router, accessed the network settings, scanned for available networks, selected your Wi-Fi network, entered your network password, and tested the internet connection. These steps have allowed you to establish a secure and reliable connection between your TV and your Wi-Fi network.
If you encounter any issues with your wireless internet connection in the future, refer back to this guide for troubleshooting tips. Remember to keep your TV within range of your router for the best signal strength and, if needed, consider repositioning your router or TV to optimize your connection.
Enjoy the convenience and entertainment that wireless internet brings to your LG Smart TV. Explore a world of online content, stream your favorite movies and TV shows, and stay connected with the digital world, all from the comfort of your living room. Get ready to enhance your TV viewing experience with seamless wireless internet access.
Thank you for following this guide, and we hope you have a fantastic time exploring the exciting possibilities of your LG Smart TV with wireless internet connectivity.