Introduction
When you use your Chromebook to search the web, Chrome keeps a record of your search history. This can be a convenient feature as it allows you to quickly access your past searches or revisit websites you’ve previously visited. However, there may be times when you want to clear your search history for privacy reasons or to start with a clean slate.
In this article, we will explore how to clear your search history on Chromebook. Whether you’re using the Chrome browser or your Google account settings, there are options available to help you remove your search history. We will also discuss how to use the Incognito mode for private browsing, and provide some additional tips for managing your search history effectively.
Clearing your search history is a simple yet important step in maintaining your online privacy. By removing your search history, you can ensure that your browsing habits and personal information are not stored on your Chromebook. Whether you’re using a shared device or simply want to keep your online activities private, clearing your search history can help protect your data.
In the following sections, we will guide you through the different options available to clear your search history on Chromebook. Whether you prefer using the Chrome browser or your Google account settings, you can choose the method that suits you best.
What is Search History and Why Clear it?
Your search history is a record of all the searches you’ve made while using your Chromebook. Every time you type a query into the search bar or visit a website, Chrome saves this information in its memory. This history can include web pages you’ve visited, search terms you’ve used, and even specific content you’ve interacted with.
While search history can be helpful for quickly finding websites you’ve visited in the past or remembering search terms you’ve previously used, there are times when you may want to clear this information. Here are a few reasons why you might want to clear your search history:
- Privacy: Clearing your search history is an essential step in safeguarding your privacy. By removing your search history, you prevent others from accessing your browsing habits or personal information.
- Security: If you’re using a shared Chromebook or are concerned about someone else discovering your search history, clearing it can help protect your security. It ensures that sensitive information, such as financial or personal details, does not remain stored on the device.
- Speed: Over time, a large search history can slow down your Chromebook. Clearing your search history can free up memory and improve the overall performance of your device.
- Cleanliness: Clearing your search history gives you a fresh start, allowing you to begin with a clean browsing slate. It can be particularly useful if you’re starting a new project or want to maintain a clutter-free browsing experience.
By clearing your search history, you have control over the information you share and store on your Chromebook. It can help protect your privacy, enhance your online security, and optimize the performance of your device. In the next sections, we will explore different methods you can use to clear your search history on Chromebook.
Clearing Your Search History on Chromebook
Clearing your search history on a Chromebook is a straightforward process. There are a few different options to choose from, depending on your preference and the level of privacy you desire. Here are the three main methods to clear your search history:
- Option 1: Clearing Search History from Chrome Browser
- Open the Chrome browser on your Chromebook.
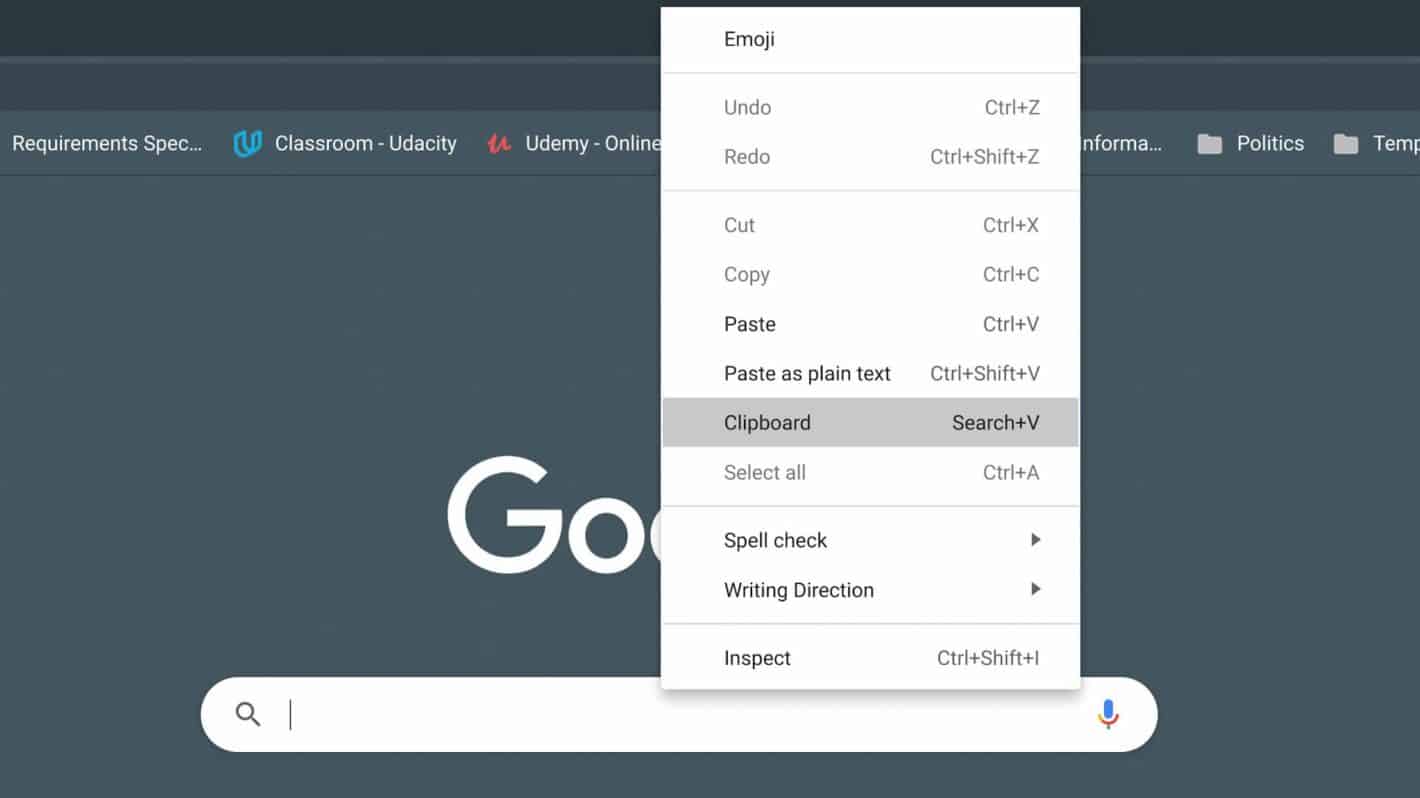
- Click on the three vertical dots in the top-right corner to open the menu.
- Select “History” from the drop-down menu.
- Click on “Clear browsing data” on the left side.
- Choose the time range you want to clear. For example, you can clear the last hour, the last 24 hours, or select a custom range.
- Make sure the “Browsing history” option is selected (you can also choose to clear other data like cookies or cached images if desired).
- Click on “Clear data” to remove your search history.
- Option 2: Clearing Search History from Google Account
- Go to the “My Activity” page on your Chromebook or any device with internet access.
- Sign in to your Google account if prompted.
- Click on the three horizontal lines (also known as the “hamburger menu”) in the top-left corner of the page to open the menu.
- Select “Delete activity by” from the menu.
- Choose the time range you want to delete, or select “All time” to remove your entire search history.
- Click on “Delete” to confirm.
- Option 3: Using Incognito Mode for Private Browsing
- Open the Chrome browser on your Chromebook.
- Click on the three vertical dots in the top-right corner to open the menu.
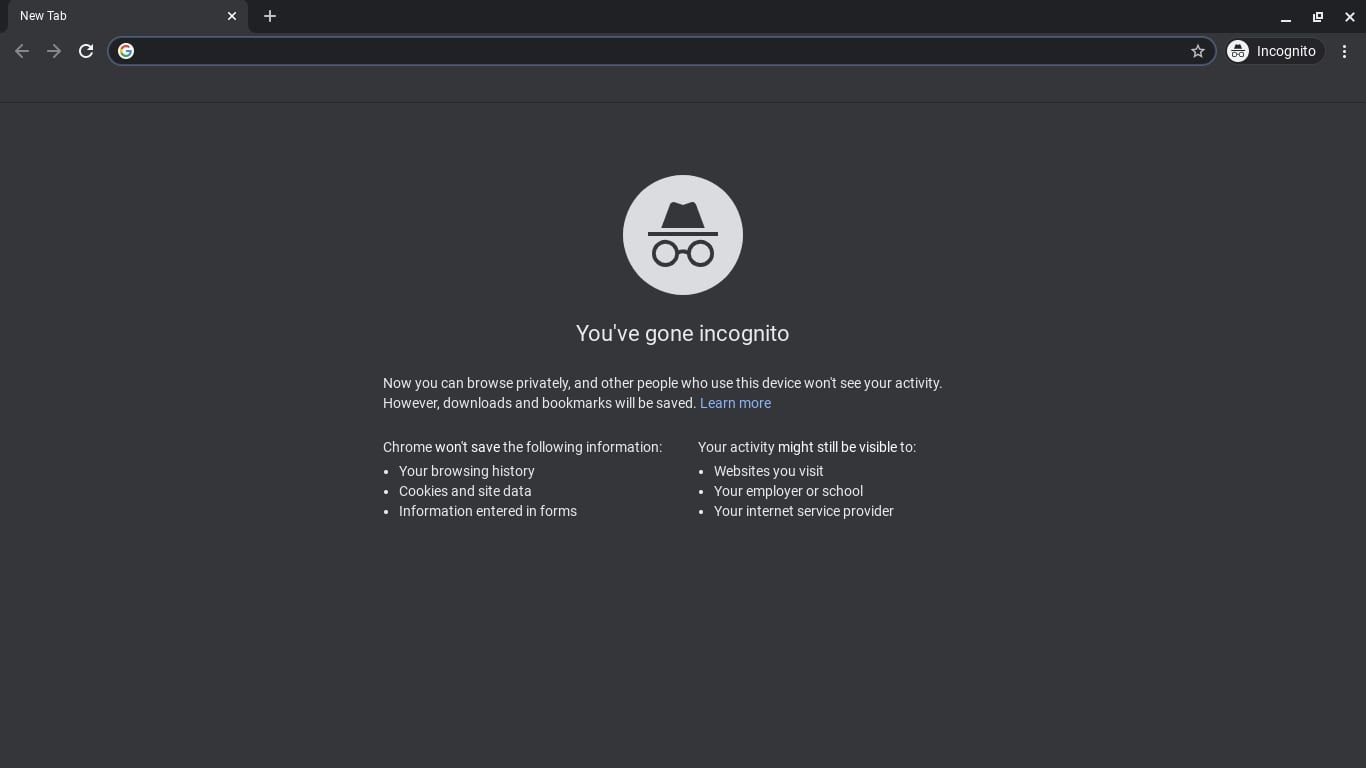
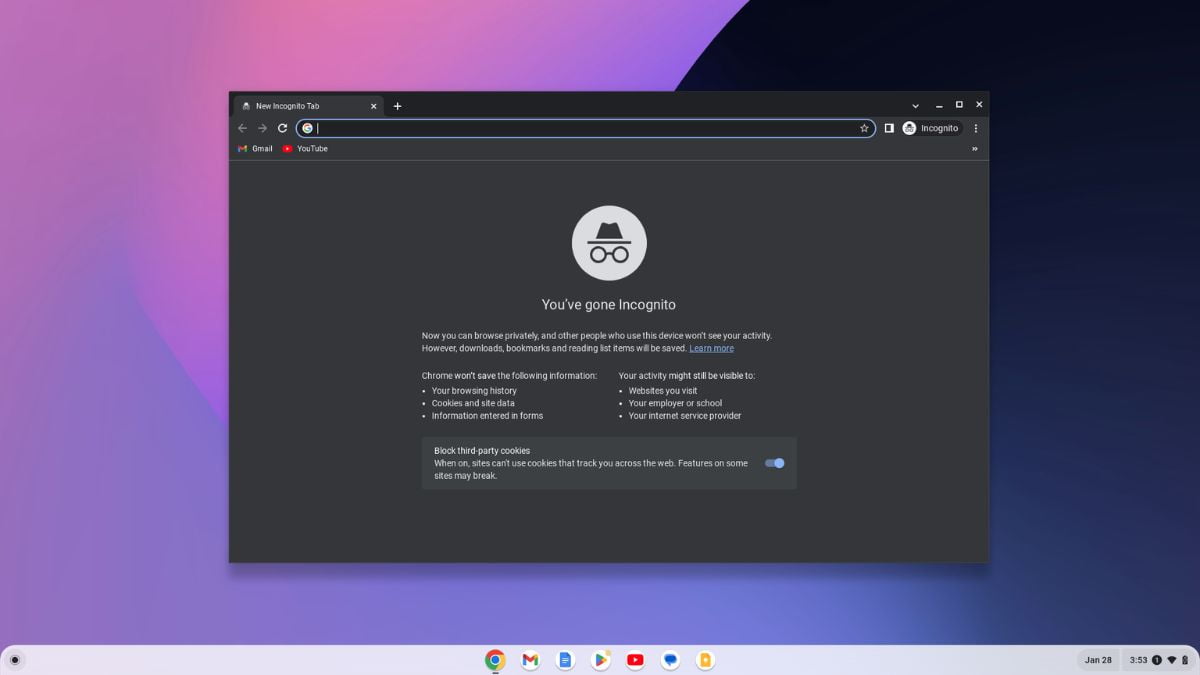
- Select “New Incognito window” from the drop-down menu.
- A new window will open with the Incognito icon in the top-left corner. You can now browse privately without recording any search history.
If you want to remove your search history from the Chrome browser itself, follow these steps:
If you want to clear your search history from your Google account, which may be synced across multiple devices, you can do so by following these steps:
If you want to browse without leaving a trace of your search history, you can use the Incognito mode in the Chrome browser. When using Incognito mode, your search history and other browsing data are not stored on your Chromebook. To open an Incognito window, follow these steps:
Choose the method that suits your needs and preferences to clear your search history on Chromebook. Remember that clearing your search history regularly can help protect your privacy and keep your browsing experience fresh and efficient.
Option 1: Clearing Search History from Chrome Browser
If you prefer to remove your search history directly from the Chrome browser on your Chromebook, you can follow these simple steps:
- Open the Chrome browser on your Chromebook.
- Click on the three vertical dots located in the top-right corner of the browser window. This will open the Chrome menu.
- From the drop-down menu, select “History”.
- A new tab will open, showing your browsing history.
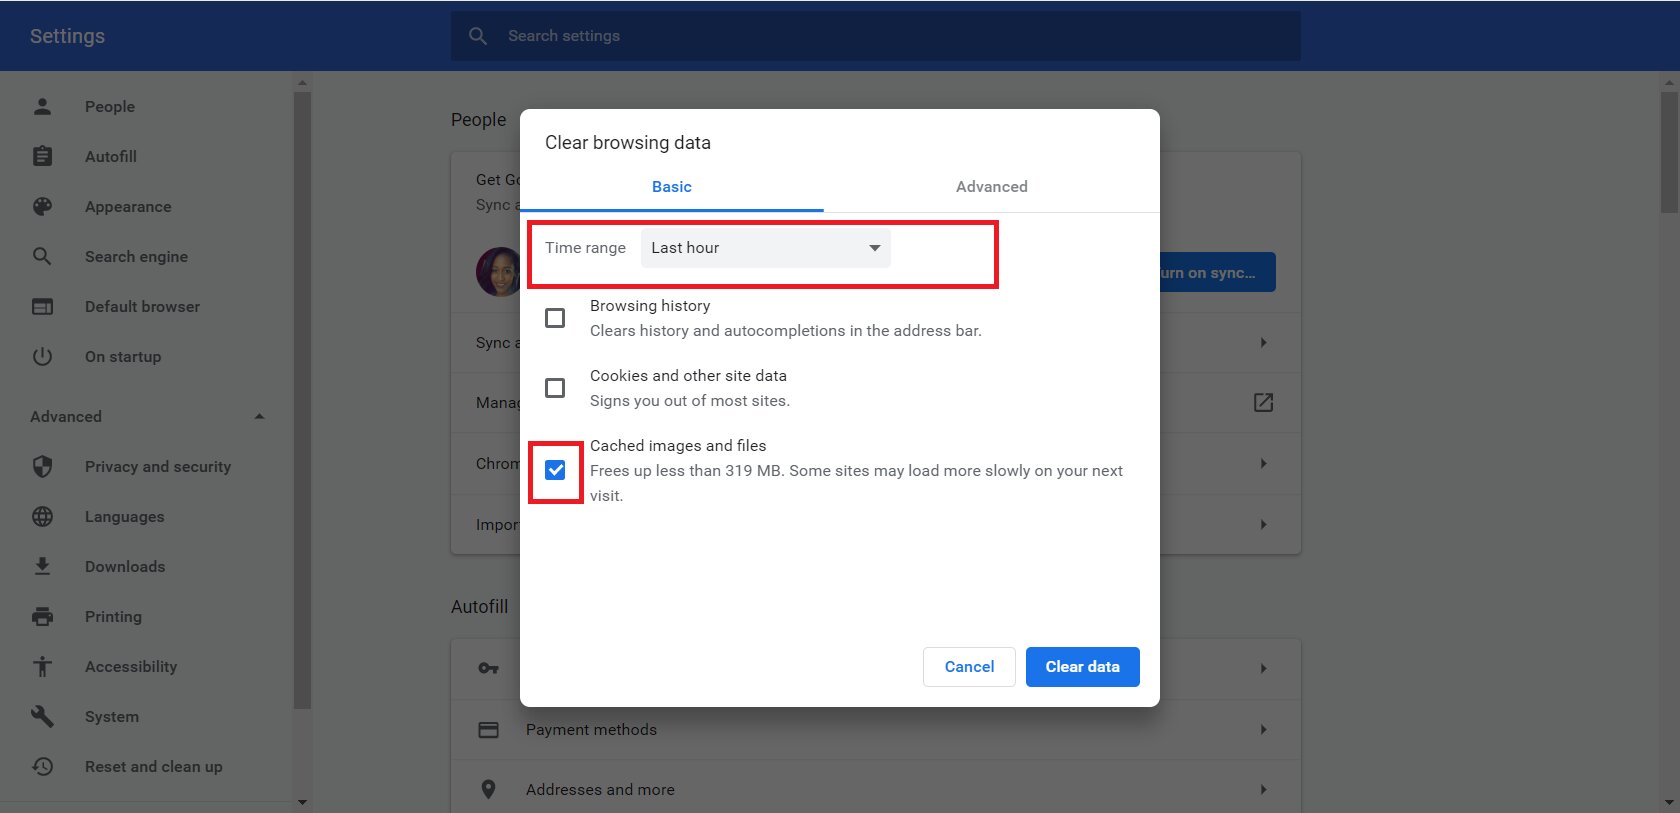
- On the left side of the page, you will see the option “Clear browsing data”. Click on it.
- A pop-up window will appear, giving you various options for clearing your browsing data.
- Choose the time range for which you want to clear your search history. You can select options like “Last hour”, “Last 24 hours”, “Last 7 days”, or you can select a custom range.
- Make sure that the checkbox next to “Browsing history” is ticked. You can also choose to clear other data like cookies or cached images by ticking their respective checkboxes.
- Review the other options available in the pop-up window and customize them according to your preference.
- Once you’re ready, click on the “Clear data” button.
After completing these steps, the Chrome browser will remove your selected browsing data, including your search history within the specified time range. Be aware that this action is permanent and cannot be undone, so make sure you are selecting the appropriate time range and data options before clearing your search history.
By regularly clearing your search history from the Chrome browser, you can maintain your privacy and keep your browsing experience clean and optimized. It is recommended to periodically clear your search history, especially if you are using a shared Chromebook or if you want to keep your browsing habits confidential.
Option 2: Clearing Search History from Google Account
If you want to take a more comprehensive approach to clearing your search history, you can remove it from your Google account. This ensures that your search history is not only cleared from your Chromebook but also from other devices that are synced with your Google account. Follow these steps to clear your search history from your Google account:
- Open the Chrome browser on your Chromebook or any device with internet access.
- Ensure that you are signed in to your Google account. If not, click on the profile icon in the top-right corner of the browser window and sign in with your Google credentials.
- Once signed in, click on the “My Account” or “My Google Account” option. This will take you to your account settings.
- In your account settings, find and click on the “Data & personalization” tab. This tab contains various options for managing your privacy and data.
- Under the “Data & personalization” tab, scroll down until you find the section titled “Activity and timeline”. Click on “My Activity”.
- You will be taken to the “My Activity” page, which displays a chronological list of your online activities.
- Click on the three horizontal lines, also known as the “hamburger menu”, located in the top-left corner of the page. This will open a menu with several options.
- Select “Delete activity by” from the menu.
- You will now see a range of options to delete your activity. Choose the time range for which you want to delete your search history. You can select options like “Last hour”, “Last 24 hours”, “Last 7 days”, or you can select “All time” to remove your entire search history.
- Review the other options available on this page and customize them according to your preference, such as deleting activity from specific Google services.
- Once you have configured the settings, click on the “Delete” button to permanently remove your selected search history.
By following these steps, you can clear your search history not only from your Chromebook but also from your Google account. This ensures that your search history is no longer linked to your account and cannot be accessed by anyone using your account.
Clearing your search history from your Google account is a good practice to maintain your privacy and ensure that your online activities are not stored and associated with your account. This method is especially useful if you use multiple devices or if you want to clear your search history across all your Google-associated devices.
Option 3: Using Incognito Mode for Private Browsing
If you want to browse the web without leaving any traces of your search history on your Chromebook, using the Incognito mode is the ideal option. When you open a new Incognito window, your browsing activity is not saved, including your search history and cookies. Here’s how you can use the Incognito mode for private browsing:
- Open the Chrome browser on your Chromebook.
- Click on the three vertical dots located in the top-right corner of the browser window. This will open the Chrome menu.
- From the drop-down menu, select “New Incognito window”. Alternatively, you can use the shortcut keys
Ctrl + Shift + Nto open a new Incognito window. - A new Incognito window will open, with a darkened browser interface and the Incognito icon displayed in the top-left corner.
- Now, any web pages you visit in the Incognito window will not be recorded in your browsing or search history.
- You can freely browse, search, and access websites without worrying about leaving behind any traces.
- Once you have finished browsing in Incognito mode, simply close the Incognito window.
Using the Incognito mode is an effective way to maintain your privacy and keep your search history confidential. Keep in mind that although your search history is not recorded during the session, your activity may still be visible to your internet service provider and websites you visit, so exercise caution when entering sensitive information on websites.
The Incognito mode is particularly useful when using a shared or public computer, as it prevents your browsing data from being stored on the device. It also allows you to access websites without being influenced by personalized search results or targeted advertisements based on your search history.
Remember that while Incognito mode helps conceal your browsing activity, it does not make you completely anonymous online. It is still important to use other privacy measures, such as using a VPN (Virtual Private Network) or clearing your cache and cookies, for a more comprehensive approach to online privacy.
Additional Tips for Clearing Search History
Clearing your search history not only helps protect your privacy but also ensures a more streamlined and efficient browsing experience. Here are some additional tips to consider when clearing your search history on your Chromebook:
- Regularly clear your search history: Make it a habit to clear your search history on a regular basis. By doing so, you can prevent your browsing patterns and personal information from being stored for extended periods.
- Consider clearing other browsing data: In addition to your search history, you may also want to clear other types of browsing data, such as cookies, cache, and download history. This can help improve your privacy and optimize the performance of your Chromebook.
- Use browser extensions or privacy tools: Explore browser extensions or privacy tools that can automatically clear your search history and other browsing data at regular intervals. These tools can save you time and provide an added layer of privacy protection.
- Sign out of your Google account: When you’re done using your Chromebook, consider signing out of your Google account to ensure that your search history is not visible to others who may use the device.
- Use multiple user profiles: If you share your Chromebook with others, consider creating separate user profiles. This allows each user to have their own browsing environment, including separate search history and saved data.
- Check your syncing settings: If you use multiple devices with your Google account, check your syncing settings to ensure that your search history is not being stored and synced across all devices, if that is your preference.
- Keep your Chromebook up to date: Regularly updating your Chromebook’s operating system and browser ensures that you have the latest security features and privacy enhancements, providing you with additional layers of protection.
By following these additional tips, you can enhance your privacy, maintain a clutter-free browsing experience, and ensure that your search history remains confidential. Implementing these practices can help you make the most out of your Chromebook while safeguarding your personal information.
Conclusion
Clearing your search history on your Chromebook is an essential step in maintaining your privacy and optimizing your browsing experience. Whether you choose to clear your search history from the Chrome browser, your Google account, or utilize the Incognito mode for private browsing, you have options available to keep your online activities confidential.
Clearing your search history regularly not only helps protect your privacy but also ensures that your Chromebook performs at its best. By removing unnecessary browsing data, you can free up memory and enhance the overall speed and efficiency of your device.
Additionally, it’s important to consider other measures to enhance your privacy, such as using browser extensions or privacy tools, signing out of your Google account when necessary, and keeping your Chromebook up to date with the latest security features and updates.
By following the tips and methods outlined in this article, you can confidently manage and clear your search history on your Chromebook. Remember to choose the method that best fits your preferences and needs, and take regular steps to maintain your online privacy and security.
Clearing your search history is a proactive step in taking control of your personal data and ensuring a more private browsing experience. Take the time to regularly clear your search history and implement other privacy-conscious habits to enjoy a safer and more secure online presence.