Introduction
Chromebooks have become increasingly popular due to their simplicity, affordability, and seamless integration with Google’s suite of productivity tools. However, like any other electronic device, Chromebooks are not impervious to viruses and malware. While Chromebooks are designed with built-in security features, it is important to be proactive in protecting your device from potential threats.
In this article, we will explore various ways to remove viruses from a Chromebook and restore its performance and security. Whether you’ve noticed unusual behavior on your device or suspect it may be infected, it’s crucial to take immediate action to eliminate any potential threats.
While it is relatively uncommon for Chromebooks to be infected with viruses compared to other operating systems, malicious software can still find its way onto your device through deceptive websites, unauthorized downloads, or malicious extensions. Therefore, it is essential to recognize the signs of an infection and follow the appropriate steps to remove it.
Keep in mind that prevention is always better than cure when it comes to cyber threats. Regularly updating your Chrome OS, being cautious while browsing the web, and only installing trusted extensions can significantly reduce the risk of encountering viruses and malware.
In the following sections, we will explore proven methods to remove viruses from your Chromebook and restore its security. By following these steps, you can regain control of your device and ensure a safe browsing experience.
Ways to Remove Virus from Chromebook
When it comes to removing viruses from your Chromebook, there are several effective methods you can try. It is important to note that not all viruses can be eliminated using the same approach, so it may be necessary to combine multiple methods to ensure a thorough cleanup. Here are six reliable ways to remove viruses from your Chromebook:
- Update Chrome OS: Keeping your Chromebook’s operating system up to date is crucial. Regular updates not only provide new features but also patch any security vulnerabilities that may be present.
- Remove Suspicious Extensions: Some malicious extensions can compromise your Chromebook’s security. To remove these extensions, open the Chrome browser, click on the three-dot menu in the top-right corner, select “More Tools,” and then click on “Extensions.” From there, you can identify and remove any suspicious or unfamiliar extensions.
- Clear Browsing Data: Clearing your browsing data can help remove any harmful cookies or cached content. To do this, click on the three-dot menu, select “More Tools,” then choose “Clear Browsing Data.” Be sure to select the appropriate time range and check the relevant boxes before clicking “Clear Data.”
- Run a Malware Scan: Chromebooks come with built-in security features, including a built-in antivirus scanner called Chrome Cleanup. You can access this tool by typing “chrome://settings/cleanup” into your browser’s address bar. Follow the on-screen instructions to scan and remove any malware that may be present on your Chromebook.
- Reset Chromebook to Factory Settings: If all else fails, you can reset your Chromebook to its factory settings. This will erase all of your personal data, so be sure to back up any important files beforehand. To reset, go to Chromebook settings, click on “Advanced,” then select “Reset settings” under the “Powerwash” section. Follow the prompts to complete the process.
- Enable Chromebook’s Guest Mode: If you suspect that the virus is tied to a specific user account, try using the Chromebook’s Guest Mode. Guest Mode creates a temporary session that does not have access to the user’s profile or any installed extensions. To activate Guest Mode, click on the taskbar at the bottom-right corner, then click on the profile picture and select “Browse as Guest.”
By following these steps, you can effectively remove viruses from your Chromebook and restore its security. Remember to be cautious when browsing the internet and only install trusted extensions to prevent future infections. With diligence and regular maintenance, you can enjoy a safe and secure Chromebook experience.
Update Chrome OS
Keeping your Chrome OS up to date is one of the most important steps in removing viruses from your Chromebook. Regular updates not only provide you with the latest features but also address any security vulnerabilities that may exist in the system.
To update your Chrome OS, follow these simple steps:
- Click on the time in the bottom-right corner of your screen. A pop-up window will appear.
- Select the gear-shaped icon to open the Settings menu.
- In the left-hand menu, click on “About Chrome OS.”
- Under the “About Chrome OS” section, you will see the “Check for updates” button. Click on it to search for any available updates.
- If updates are found, click on the “Restart to update” button. Your Chromebook will restart and begin installing the updates.
It is recommended to connect your Chromebook to a stable Wi-Fi network before checking for updates. This ensures a smooth and uninterrupted download process.
By updating your Chrome OS, you ensure that your device is equipped with the latest security patches and bug fixes. This helps protect your Chromebook from potential vulnerabilities that may be exploited by viruses or malware.
Additionally, staying up to date with the latest Chrome OS versions provides you with access to the most recent features and improvements, enhancing your overall user experience.
Regularly checking for updates and installing them promptly is a crucial step in maintaining the security and functionality of your Chromebook. It is good practice to enable automatic updates so that your device receives the latest updates without manual intervention.
Remember, a secure and up-to-date Chrome OS is the foundation for a virus-free Chromebook experience. By following this simple step, you are taking a proactive approach in protecting your device against potential threats and ensuring a smooth and secure browsing experience.
Remove Suspicious Extensions
Suspicious or malicious extensions can compromise the security of your Chromebook and potentially expose it to viruses and malware. It is essential to review and remove any suspicious extensions that may have been installed without your knowledge or consent.
Here’s how you can remove suspicious extensions from your Chromebook:
- Click on the three-dot menu icon located at the top-right corner of your Chrome browser window.
- From the dropdown menu, select “More Tools,” and then click on “Extensions.”
- A new tab will open, displaying a list of installed extensions on your Chromebook.
- Manually review the list of extensions and identify any that you suspect to be suspicious or unfamiliar to you.
- To remove an extension, click on the trash can icon located next to it.
- A confirmation dialog box will appear. Click on “Remove” to uninstall the extension from your Chromebook.
Once you have removed the suspicious extensions, it is a good idea to restart your Chromebook to ensure that the changes take effect.
Keep in mind that not all extensions are malicious, but some may have the potential to collect your browsing data, display unwanted ads, or compromise your online security. It is crucial to only install extensions from trusted sources and regularly review the ones you have installed on your Chromebook.
By removing suspicious extensions, you are eliminating potential sources of viruses and malware. This helps to enhance the security and performance of your Chromebook, ensuring a safer browsing experience.
Remember to periodically check your extensions and remove any that you no longer need or that you suspect may be compromising your device’s security. By maintaining a clean and trusted extensions list, you can minimize the risk of encountering viruses and malware on your Chromebook.
Clear Browsing Data
Clearing your browsing data on a regular basis is essential for maintaining the security and performance of your Chromebook. Browsing data, including cookies, cached files, and browsing history, can accumulate over time and potentially expose your device to security risks.
Follow these steps to clear your browsing data:
- Click on the three-dot menu icon in the top-right corner of your Chrome browser window.
- From the dropdown menu, select “More Tools,” and then click on “Clear Browsing Data.”
- A dialog box will appear, allowing you to choose the time range for which you want to clear your browsing data.
- Select the appropriate time range based on your preferences. If you want to clear all your browsing data, choose “All time.”
- Check the boxes next to the types of data you want to clear. This can include browsing history, cookies, cached images and files, and more.
- Click on the “Clear Data” button to initiate the clearing process.
Clearing your browsing data not only helps to protect your privacy but also ensures that any potential viruses or malware that may have been acquired through your browsing activities are removed.
It is recommended to clear your browsing data periodically, especially if you notice any unusual behavior on your Chromebook or suspect a virus infection. Additionally, clearing your browsing data can also improve the overall performance of your Chromebook by freeing up storage space and optimizing browser speed.
Remember, clearing your browsing data is a proactive measure to maintain the security and performance of your Chromebook. By regularly removing accumulated data, you can reduce the risk of encountering viruses and malware and enjoy a safer and smoother browsing experience.
Run a Malware Scan
Running a malware scan is an effective way to detect and remove any viruses or malware that may be present on your Chromebook. Chromebooks have a built-in security feature called Chrome Cleanup that can scan and eliminate malicious software.
To run a malware scan on your Chromebook, follow these steps:
- Type “chrome://settings/cleanup” into the address bar of your Chrome browser and press Enter.
- Click on the “Find” button next to the “Find and remove harmful software” section.
- The Chrome Cleanup tool will now scan your Chromebook for any suspicious software or malware.
- If any harmful software is detected, you will be prompted to remove it. Click on the “Remove” button to initiate the removal process.
It is important to note that the Chrome Cleanup tool focuses on removing software that may cause unwanted ads or modify your browsing experience. It does not provide comprehensive antivirus protection. If you suspect a more complex or severe virus infection, it is advisable to seek the assistance of professional malware removal tools or services.
Running regular malware scans is a preventive measure that helps ensure the ongoing security and performance of your Chromebook. By detecting and removing any harmful software, you can mitigate the risk of further infections or damage to your device and personal data.
Remember to periodically run malware scans, especially if you notice any unusual behavior on your Chromebook, such as frequent crashes, slow performance, or unexpected pop-up ads. Being proactive in scanning your system can help you identify and eliminate potential threats before they cause any serious harm to your device.
By running a malware scan, you are taking an essential step in maintaining the integrity of your Chromebook’s security and safeguarding your online activities.
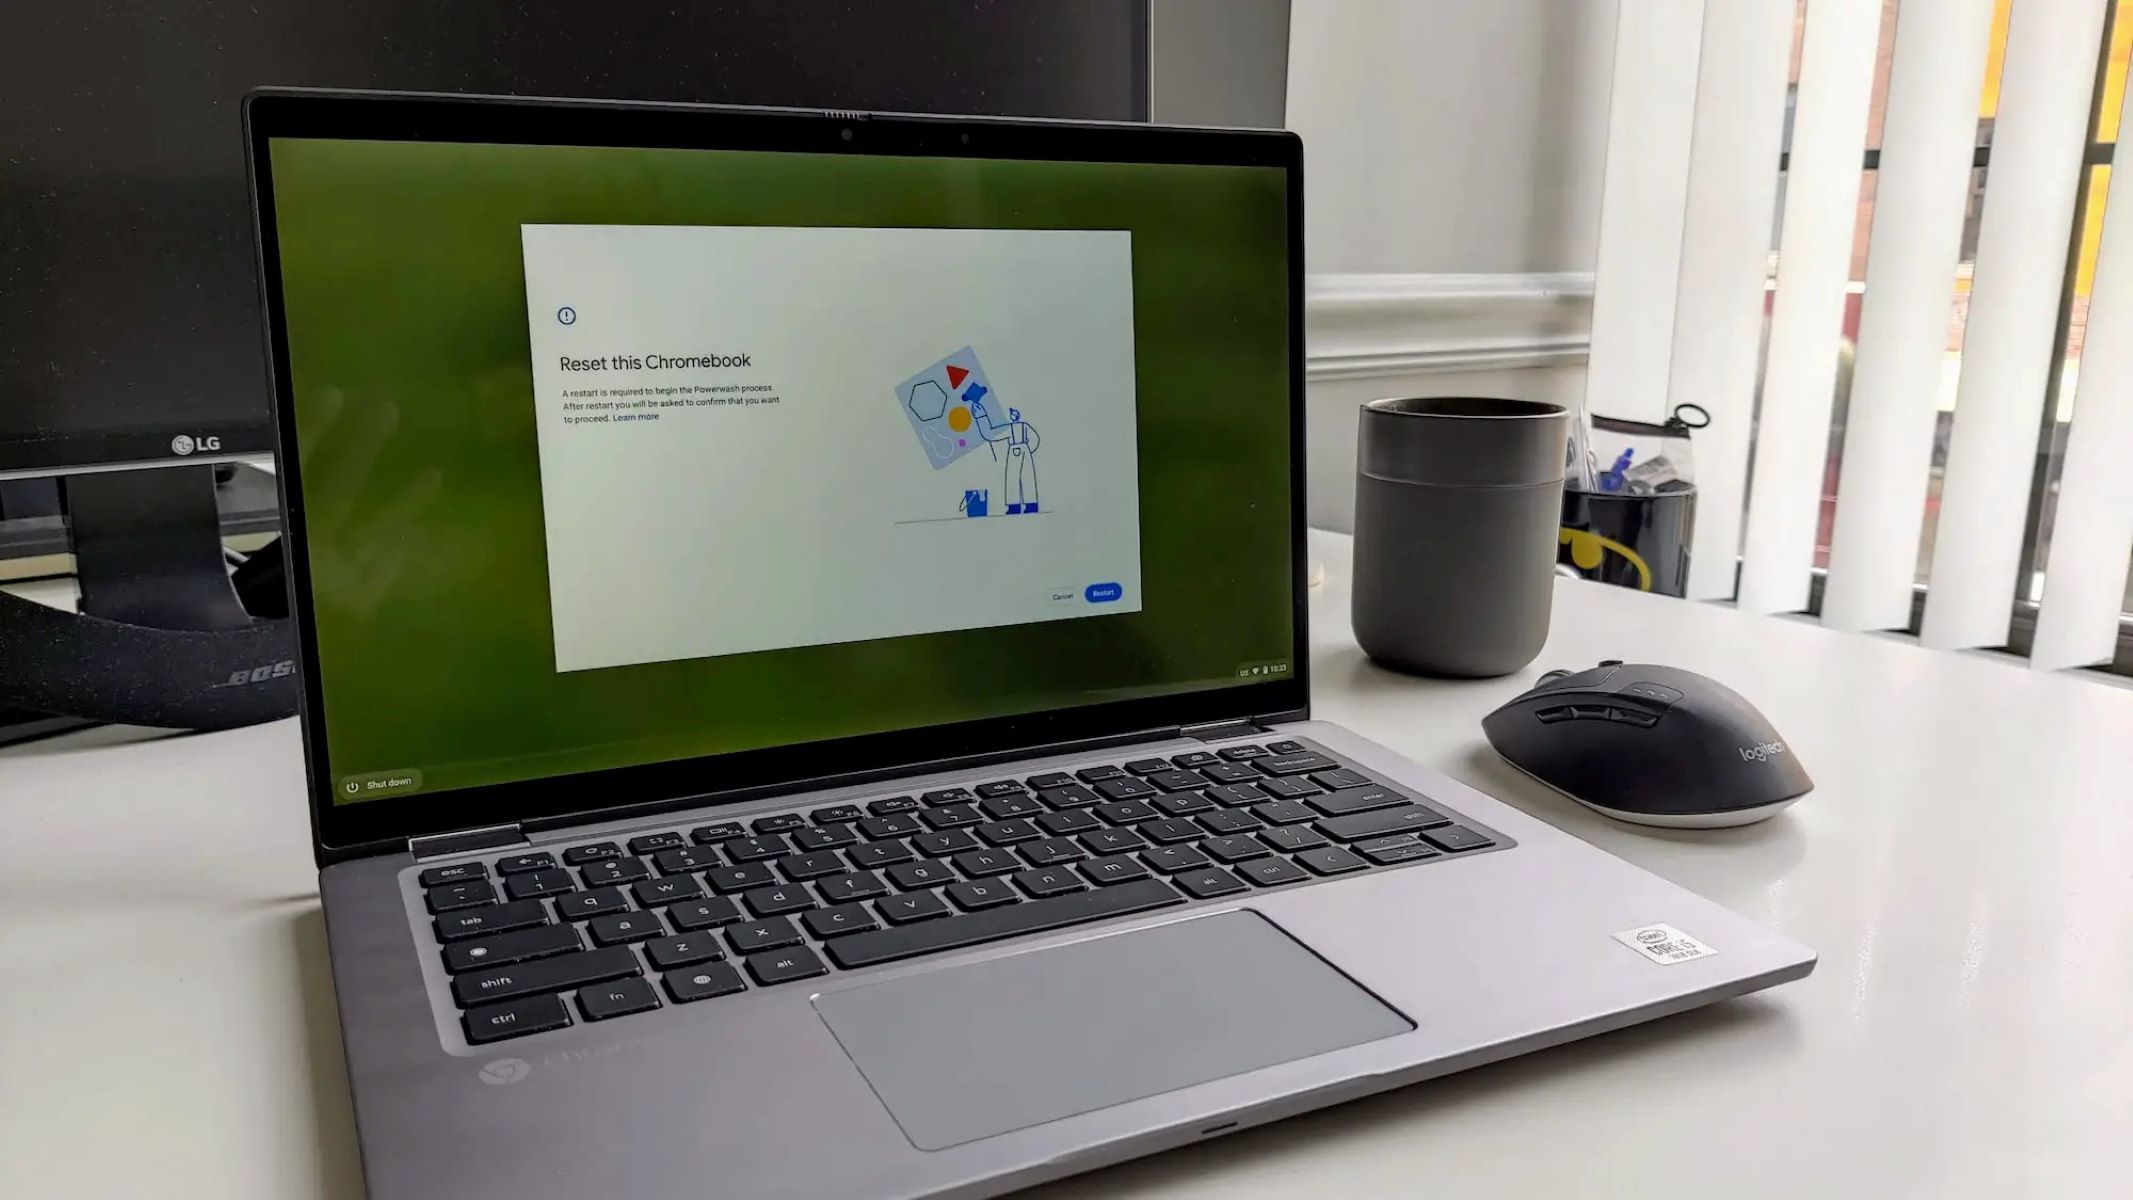
Reset Chromebook to Factory Settings
If all other methods have failed to remove the virus or malware from your Chromebook, resetting it to factory settings can provide a fresh start and eliminate any lingering threats. However, please note that performing a factory reset will erase all of your personal data, including files, settings, and installed applications. Therefore, it is crucial to back up any important files before proceeding.
Here’s how you can reset your Chromebook to factory settings:
- Click on the time in the bottom-right corner of your screen. A pop-up window will appear.
- Select the gear-shaped icon to open the Settings menu.
- In the left-hand menu, click on “Advanced.”
- Scroll down until you find the “Powerwash” section.
- Click on the “Reset settings” button located under the Powerwash section.
- A confirmation dialog box will appear, explaining that all of your data will be erased. Read through the details and click on “Reset” to initiate the process.
- Follow the on-screen instructions to complete the factory reset.
After the reset is complete, your Chromebook will be restored to its original state, as if it were brand new. You will need to go through the initial setup process again, including signing in with your Google account and reinstalling any necessary applications.
Performing a factory reset is a last resort when all other methods have been exhausted. It should only be done if you are confident that your Chromebook is infected with a persistent and harmful virus or malware.
Remember to exercise caution and only reset your Chromebook to factory settings when necessary. By doing so, you can effectively eliminate any viruses or malware that may be causing issues on your device and start with a clean slate.
Enable Chromebook’s Guest Mode
If you suspect that the virus or malware on your Chromebook is tied to a specific user account, enabling the Chromebook’s Guest Mode can help isolate and mitigate any potential threats. Guest Mode creates a temporary session that does not have access to the user’s profile or any installed extensions, providing a safer browsing environment.
To enable Chromebook’s Guest Mode, follow these steps:
- Click on the taskbar at the bottom-right corner of your screen, where you see the time, Wi-Fi, and battery icons.
- Click on the profile picture or name associated with your account.
- In the dropdown menu that appears, click on “Browse as Guest.”
Once Guest Mode is activated, your Chromebook will open a temporary session without any personalized settings, extensions, or saved data. This can help isolate the virus or malware issue and allow you to use the Chromebook without the risk of spreading the infection to your main user account.
It is important to note that any changes or activities performed in Guest Mode will not be saved when you exit. This ensures that any potential threats or malware introduced during the Guest Mode session will not have a lasting impact on your Chromebook.
Enabling Guest Mode is a handy feature when troubleshooting virus or malware-related issues. It provides a secure and isolated browsing session, allowing you to continue using your Chromebook while minimizing the risk of infecting your primary user account. Once you exit Guest Mode, you can return to your regular user account where your files and settings remain unaffected.
Remember, Guest Mode is a temporary solution and should not be used as a permanent replacement for addressing virus or malware issues. If you suspect a more serious and widespread infection, it is recommended to implement other methods such as running a malware scan or resetting your Chromebook to factory settings.
By utilizing and enabling Guest Mode, you can safely browse the internet, troubleshoot potential issues, and minimize the impact of viruses or malware on your primary user account.
Conclusion
Having a virus or malware on your Chromebook can be concerning, but it is important to remember that there are effective ways to remove these threats and restore the security of your device.
In this article, we explored several methods to remove viruses from a Chromebook. We learned the importance of keeping the Chrome OS up to date, removing suspicious extensions, clearing browsing data, running malware scans, resetting the Chromebook to factory settings, and enabling Guest Mode.
Regularly updating your Chrome OS ensures that you have the latest security patches and features, reducing the risk of encountering viruses and malware. Removing suspicious extensions helps eliminate potential sources of infection, while clearing browsing data enhances performance and removes harmful cookies and cached content.
Running a malware scan with the Chrome Cleanup tool can detect and remove any malicious software, ensuring a safer browsing experience. Resetting your Chromebook to factory settings is a comprehensive solution when all else fails, erasing all data and starting fresh.
Enabling Guest Mode is a useful feature to isolate potential threats and browse the internet securely without compromising your primary user account.
By following these methods and practicing safe browsing habits, you can effectively remove viruses from your Chromebook and maintain its security and performance.
Remember, prevention is key. Be cautious when browsing the web, only install trusted extensions, and avoid downloading files from unverified sources.
In the ever-evolving digital landscape, it is crucial to stay vigilant and proactive in protecting your Chromebook from viruses and malware. By implementing the methods discussed in this article, you can ensure a safe and enjoyable experience while using your Chromebook.