Introduction
Welcome to the world of Chromebooks and Linux! If you’re a Chromebook user, you may have wondered if it’s possible to have the flexibility and power of Linux right on your Chromebook. Well, the good news is that it is indeed possible.
A Chromebook is a budget-friendly and lightweight laptop that runs on Chrome OS, a Linux-based operating system developed by Google. Chrome OS is designed for web browsing and cloud-based applications, making Chromebooks perfect for productivity and online tasks. However, if you’re looking to do more advanced tasks and have access to a wider range of software, installing Linux on your Chromebook can be a great option.
Linux, another operating system, is renowned for its flexibility and open-source nature. With Linux, you have access to a vast selection of software, programming tools, and customization options. By installing Linux on your Chromebook, you can unlock a whole new world of possibilities, whether you’re a developer, student, or simply an enthusiast.
In this guide, we’ll walk you through the step-by-step process of getting Linux up and running on your Chromebook. Don’t worry, it’s easier than you might think. By following these instructions, you’ll be able to enjoy the best of both worlds: the simplicity and security of Chrome OS, along with the power and versatility of Linux.
Before we dive into the technical steps, let’s address an important caveat. Installing Linux on your Chromebook will require enabling Developer Mode and making changes to your device’s software. While these steps are relatively safe and reversible, it’s crucial to understand that they can void your warranty and might have some inherent risks. Proceed with caution and make sure to back up any important files before proceeding.
With that said, if you’re ready to unleash the full potential of your Chromebook, let’s get started on this exciting journey to get Linux up and running on your device.
Step 1: Enable Developer Mode
The first step to installing Linux on your Chromebook is to enable Developer Mode. Enabling this mode allows you to make changes to your device’s software and install alternative operating systems, such as Linux.
It’s important to note that enabling Developer Mode will factory reset your Chromebook, deleting all your locally stored data. Therefore, make sure to back up any important files before proceeding.
To enable Developer Mode:
- Turn off your Chromebook completely.
- Press and hold the Esc key and Refresh key (circular arrow key) on your Chromebook’s keyboard.
- While holding these keys, press the Power button to turn on your Chromebook.
- A warning screen will appear. Press Ctrl + D on your keyboard to proceed.
- Another screen will appear with a prompt asking if you want to enable Developer Mode. Press Enter to continue.
- Your Chromebook will now go through the process of enabling Developer Mode. This may take a few minutes.
- Once the process is complete, your Chromebook will reboot and display a screen showing that Developer Mode has been enabled.
Congratulations! You have successfully enabled Developer Mode on your Chromebook. From now on, whenever you turn on your device, you will see a warning screen indicating that Developer Mode is enabled.
Keep in mind that with Developer Mode enabled, it’s crucial to be cautious about the security of your device. Always make sure to only install software from trusted sources and be mindful of the potential risks associated with running in Developer Mode.
Now that Developer Mode is enabled, you’re ready to move on to the next step: installing Crouton, which will allow you to run Linux alongside Chrome OS on your Chromebook.
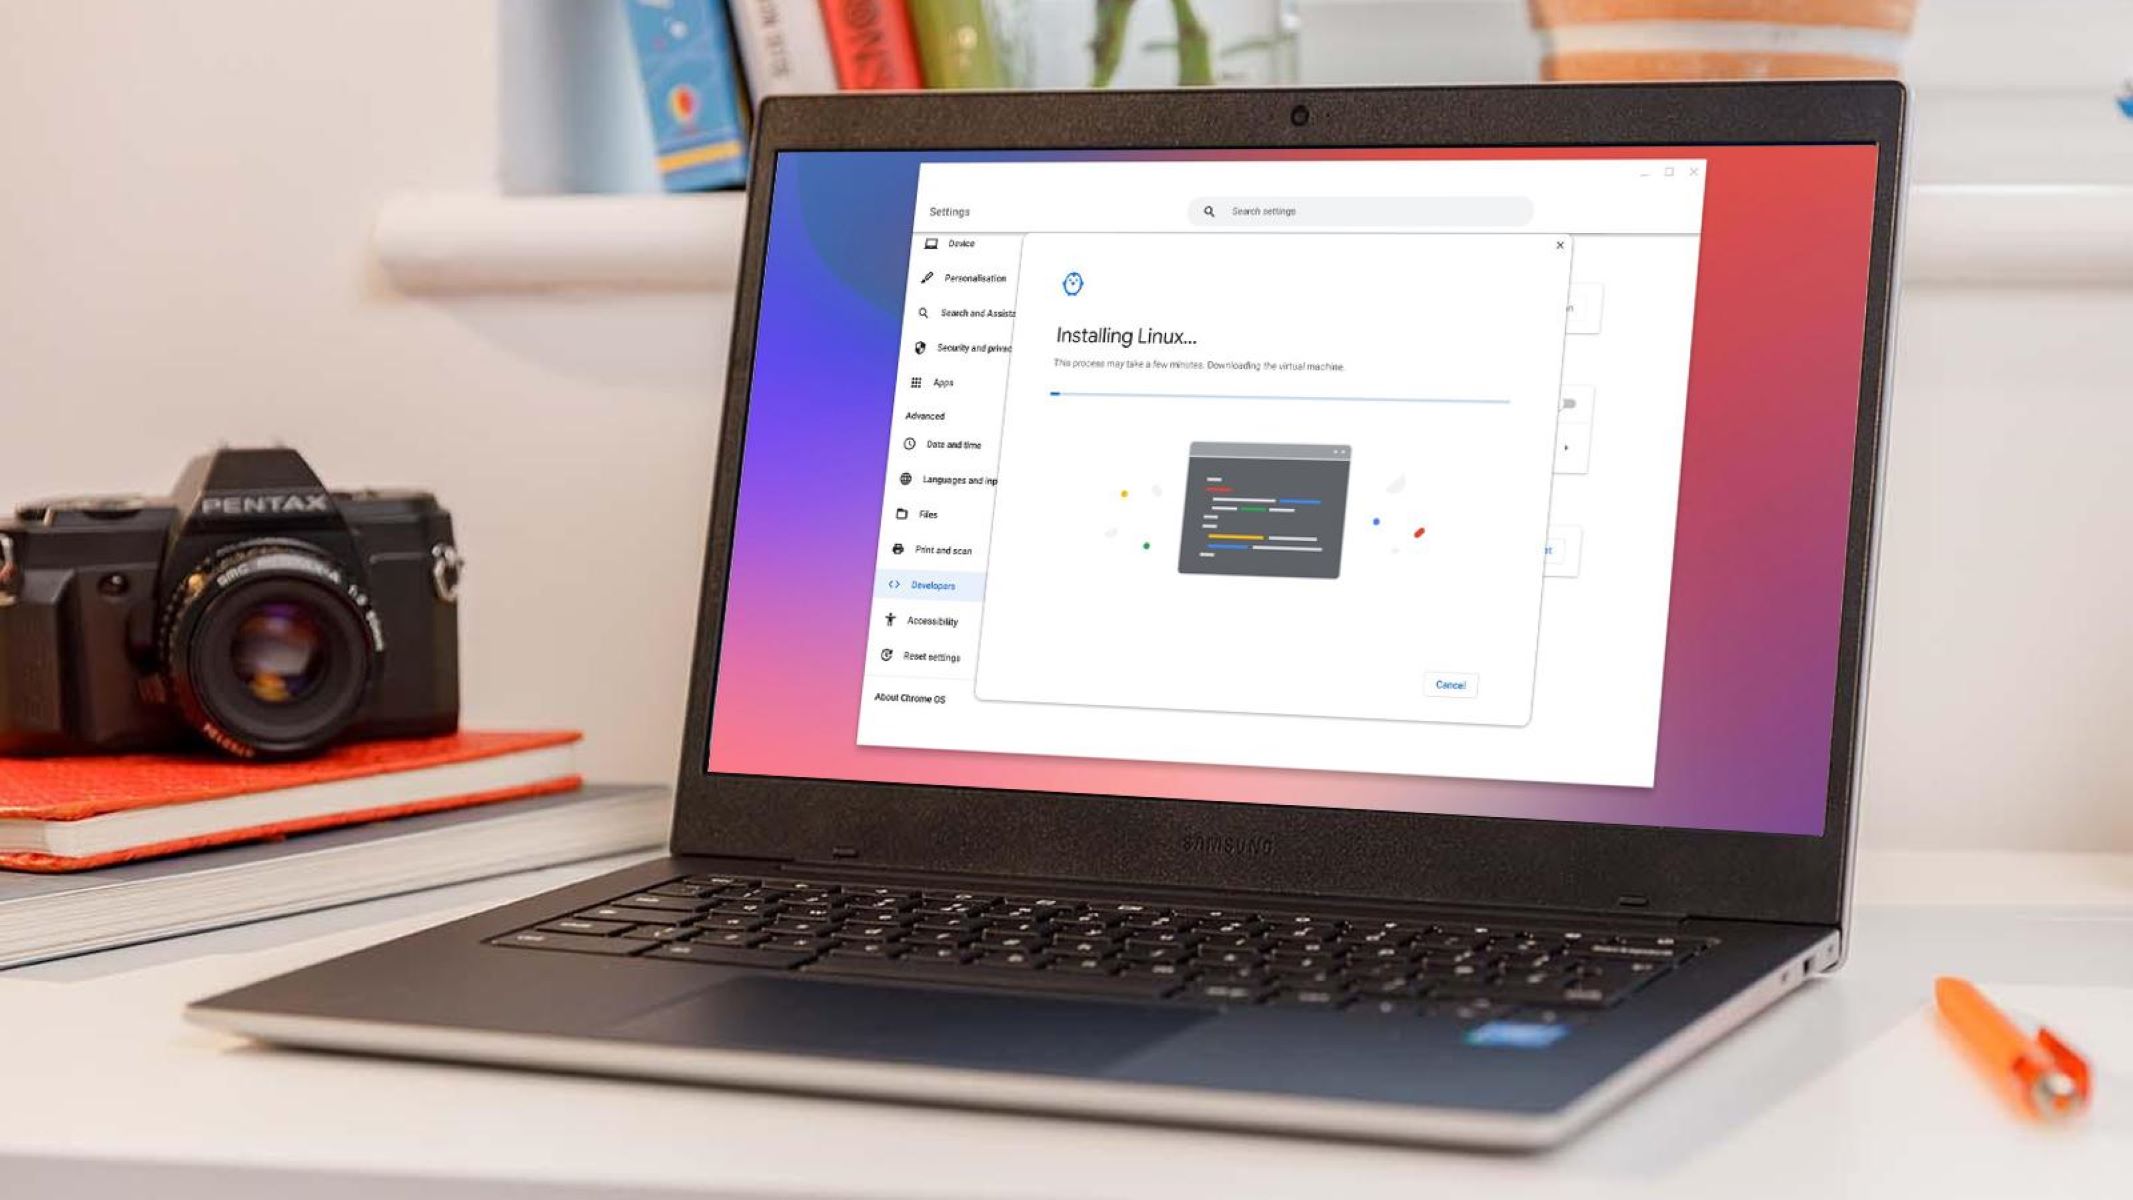
Step 2: Install Crouton
Crouton is a software tool that allows you to run Linux alongside Chrome OS on your Chromebook. It’s a convenient way to have both operating systems readily available, allowing you to switch between them seamlessly.
Here’s how you can install Crouton:
- Open your Chromebook and log in to your Chrome OS account.
- Open a new tab in the Chrome browser and navigate to the official Crouton GitHub page: https://github.com/dnschneid/crouton
- Scroll down to the README.md section and familiarize yourself with the information provided.
- Next, press Ctrl + Alt + T on your keyboard to open the Crosh shell.
- In the Crosh shell, type the following command and press Enter:
shell - Now, enter the command below to download the latest version of Crouton:
sudo curl -L -O "https://goo.gl/fd3zc" - After the download completes, verify the SHA1 checksum by entering the following command:
sudo sha1sum fd3zc - Compare the displayed checksum with the one provided on the GitHub page to ensure the file hasn’t been tampered with.
- When prompted, enter your Chromebook’s password to extract the Crouton installer.
- Finally, execute the installer by running the command:
sudo sh fd3zc
Follow the instructions provided by the installer, such as choosing the desired Linux distribution and setting a username and password for your Linux environment. Once the installation process is complete, you’ll have Crouton installed on your Chromebook.
Crouton provides various installation options, including the choice of Linux distribution such as Ubuntu or Debian, as well as the ability to install specific desktop environments. You can customize these options based on your preferences and requirements.
Now that you have Crouton installed, you’re ready to move on to the next step: downloading and installing the Linux distribution of your choice.
Step 3: Download and Install Linux Distro
Now that you have Crouton installed, it’s time to choose and download the Linux distribution you want to install on your Chromebook. There are several popular Linux distributions available, such as Ubuntu, Debian, and Kali Linux. Each distribution has its own unique features and advantages, so choose the one that best suits your needs.
Here’s how you can download and install a Linux distribution:
- Open a new tab in the Chrome browser on your Chromebook.
- Search for the official website of the Linux distribution you want to download. For example, if you want to install Ubuntu, search for “Ubuntu official website”.
- Navigate to the official website and look for the download page.
- Choose the appropriate version of the Linux distribution for your Chromebook’s architecture (most likely x86 or ARM).
- Download the ISO image file of the Linux distribution to your Chromebook.
- Once the download is complete, open a new tab in the Chrome browser and navigate to the “Downloads” folder.
- Open the “Downloads” folder and locate the ISO image file you just downloaded.
- Right-click on the ISO image file and select “Copy”.
- Open the Files app on your Chromebook and navigate to the “Linux” folder.
- Right-click inside the “Linux” folder and select “Paste” to copy the ISO image file into the folder.
Now that you have the Linux distribution downloaded and available on your Chromebook, you can proceed with the installation using Crouton. Here’s how:
- Open a terminal by pressing Ctrl + Alt + T on your keyboard.
- In the terminal, enter the following command to begin the installation process:
sudo crouton -t [desktop environment] -r [release name] - Replace “[desktop environment]” with the name of the desktop environment you want to install (e.g., unity, xfce) and “[release name]” with the name of the Linux distribution release you downloaded (e.g., trusty, focal).
- Press Enter to start the installation.
- Follow the prompts and provide any required information, such as setting up a username and password for the Linux environment.
- Once the installation is complete, you can start the Linux environment by entering the command:
sudo startxfce4(replace “xfce4” with the desktop environment you installed).
After a few moments, the Linux environment will start, and you’ll be able to enjoy the full features and functionality of your chosen Linux distribution on your Chromebook.
Congratulations! You have successfully downloaded and installed a Linux distribution on your Chromebook using Crouton. Next, we’ll move on to configuring the Linux settings to optimize your experience.
Step 4: Configure Linux Settings
After successfully installing the Linux distribution on your Chromebook using Crouton, it’s time to configure the Linux settings to customize your experience and optimize performance.
Here are some essential settings you may want to consider:
- Update packages: Open a terminal in the Linux environment by pressing Ctrl + Alt + T on your keyboard. Then, enter the following command to update the installed packages:
sudo apt-get update && sudo apt-get upgrade. This ensures that you have the latest security patches and bug fixes. - Install additional software: Linux offers a vast collection of open-source software. You can use package managers like apt or snap to install your preferred tools and applications. For example, you can install a text editor like Gedit with the command:
sudo apt-get install gedit. - Configure desktop environment: Depending on the desktop environment you installed (e.g., Unity, XFCE), you can customize aspects like themes, desktop icons, panels, and keyboard shortcuts. Explore the settings menus to personalize your Linux desktop.
- Set default applications: You may want to set your preferred default applications for web browsing, file management, email, and other tasks. Locate the relevant settings within your desktop environment or use command-line utilities to set the desired defaults.
- Enable hardware acceleration (optional): Some Linux distributions may not have hardware acceleration enabled by default, which can affect graphics performance. Consult the documentation or online forums specific to your Linux distribution for instructions on enabling hardware acceleration.
- Configure power management: Adjust the power settings in your Linux environment to optimize battery life. You can adjust settings like screen brightness, timeout durations, and power management profiles to strike a balance between performance and power consumption.
- Enable additional repositories (optional): Linux distributions often have additional software repositories that contain a wider range of applications. You can enable these repositories to access more software options. Again, refer to the documentation or community forums for instructions specific to your distribution.
Remember to explore and experiment with the available settings and options to tailor the Linux environment on your Chromebook to your liking.
Now that you’ve configured the Linux settings to your preference, you’re ready to switch seamlessly between Chrome OS and Linux on your Chromebook.
Step 5: Switch Between Chrome OS and Linux
One of the major benefits of installing Linux on your Chromebook is the ability to switch between Chrome OS and Linux with ease. Whether you need the simplicity of Chrome OS for daily tasks or the power and versatility of Linux for more advanced projects, switching between the two is a seamless process.
Here’s how you can switch between Chrome OS and Linux on your Chromebook:
- If you’re currently using Chrome OS, save any open files or work and close all applications.
- Press Ctrl + Alt + T on your keyboard to open the Crosh shell.
- In the Crosh shell, type the following command and press Enter:
shell - Now, enter the command below to switch to the Linux environment:
sudo startxfce4(replace “xfce4” with the desktop environment you installed). - The screen will flicker, and after a few moments, you will be logged into the Linux environment. You can now use Linux and access all the installed software and tools.
- To switch back to Chrome OS, log out of the Linux environment by clicking the “Log out” option in the system menu or using the keyboard shortcut Ctrl + Alt + Shift + Backspace.
- You’ll be taken back to the Chrome OS login screen. Log in with your Chrome OS account, and you’ll be back to using Chrome OS.
Switching between Chrome OS and Linux is as simple as logging in and out of each environment. This allows you to enjoy the best of both worlds on your Chromebook, whether you need the simplicity and security of Chrome OS for everyday tasks or the flexibility and power of Linux for more specialized tasks.
Remember to save your work and close any open applications before switching between the two environments to avoid any potential data loss.
Now that you know how to switch between Chrome OS and Linux, you can seamlessly transition from one environment to another depending on your needs and preferences.
Conclusion
Congratulations! You have successfully installed Linux on your Chromebook and unlocked a world of possibilities. By following the steps outlined in this guide, you’ve gained the ability to switch between Chrome OS and Linux, enjoying the simplicity of Chrome OS for everyday tasks and the power of Linux for more advanced projects.
Installing Linux on your Chromebook brings numerous benefits. You now have access to a wider range of software, programming tools, and customization options. Whether you’re a developer, student, or enthusiast, Linux provides the flexibility and versatility you need to tackle any task.
Remember that enabling Developer Mode and installing Linux on your Chromebook comes with some risks. Be cautious and backup your important files before proceeding. Additionally, always ensure you are downloading software from trusted sources and taking necessary precautions to maintain the security of your device.
Throughout this guide, we explored the step-by-step process, including enabling Developer Mode, installing Crouton, downloading and installing a Linux distribution, configuring Linux settings, and switching between Chrome OS and Linux. By following these steps, you’ve successfully transformed your Chromebook into a powerful and adaptable tool.
Now that you have Linux on your Chromebook, don’t hesitate to explore and experiment. Customize your desktop environment, install additional software, and make the most of the open-source community. Discover the vast array of possibilities and unleash your creativity.
Thank you for choosing this guide to get Linux on your Chromebook. We hope you found it informative and helpful. Embrace the power of Linux, and enjoy the seamless experience of switching between Chrome OS and Linux on your Chromebook.