Gaming: How To Install Minecraft On A Chromebook
Welcome to our gaming category! If you’re an avid gamer with a Chromebook, you might be wondering how to install Minecraft on this platform. Look no further, because we’ve got you covered! In this blog post, we will guide you through the step-by-step process of installing Minecraft on your Chromebook. So grab your Chromebook, and let’s get started!
Key Takeaways:
- Installing Minecraft on a Chromebook is possible with the help of Linux (Beta).
- You will need to enable Linux (Beta) on your Chromebook before installing Minecraft.
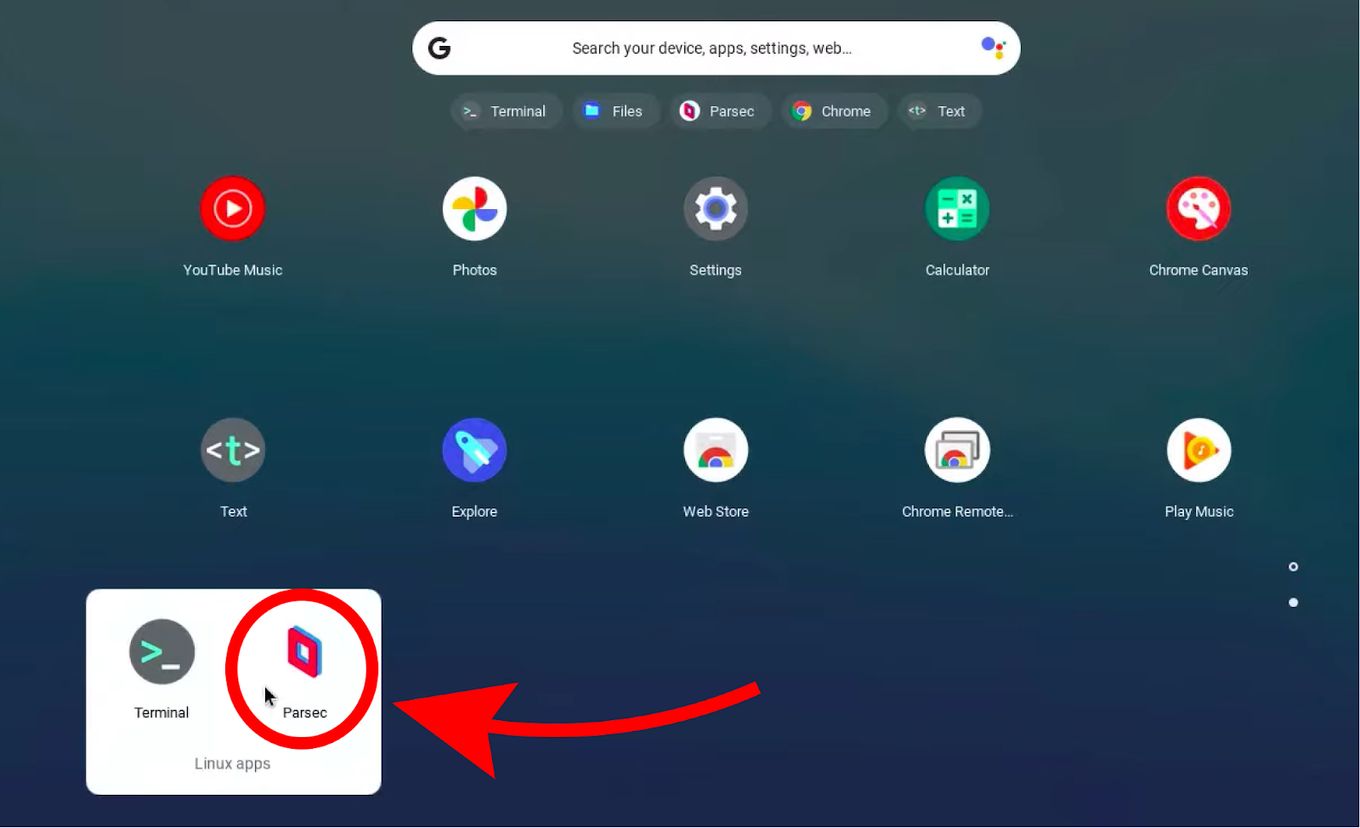
Enabling Linux (Beta)
The first step towards installing Minecraft on your Chromebook is to enable Linux (Beta). This feature allows you to run Linux applications on your Chromebook, giving you access to a whole world of possibilities, including games like Minecraft. Here’s how to enable Linux (Beta) on your Chromebook:
- Go to your Chromebook’s “Settings” by clicking on the gear-shaped icon in the bottom right corner of your screen.
- Scroll down and click on “Linux (Beta)” in the “Linux (Beta)” section.
- Click on the “Turn On” button.
- Wait for the installation process to complete.
Once you have enabled Linux (Beta) on your Chromebook, you’re ready to proceed to the next step.
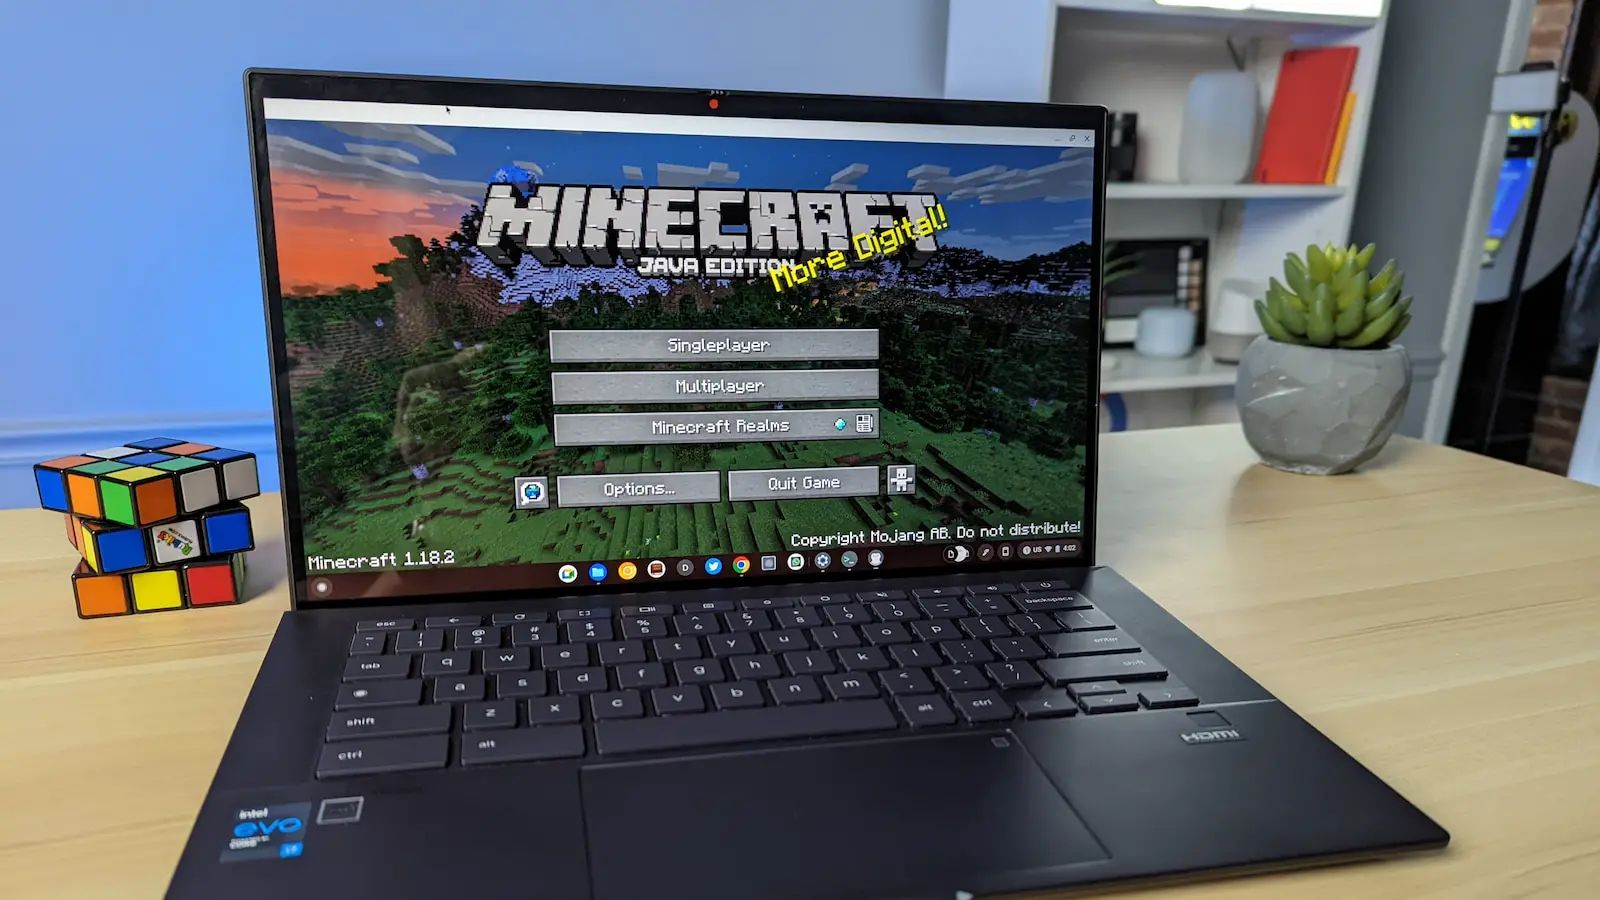
Installing Minecraft
Now that Linux (Beta) is enabled on your Chromebook, it’s time to install Minecraft. Follow these steps:
- Open the Linux Terminal by clicking on the “Terminal” icon located at the bottom of your screen, or by pressing “Ctrl + Alt + T” simultaneously.
- Type the following command in the Terminal to download Minecraft:
- Press “Enter” and wait for the installation to complete.
sudo apt-get install Minecraft
That’s it! You have successfully installed Minecraft on your Chromebook. You can now enjoy the captivating world of block-building adventures right from your Chromebook.
Key Takeaways:
- The Linux (Beta) feature on Chromebooks allows you to run a wide range of applications, including Minecraft.
- Enabling Linux (Beta) and installing Minecraft require a stable internet connection.
We hope this guide has been helpful to you in installing Minecraft on your Chromebook. Enjoy your gaming experience and let your imagination run wild in the world of Minecraft! If you have any other gaming-related questions or topics you’d like us to cover, feel free to reach out to us. Happy gaming!