Introduction
Chromebooks have gained popularity for their simplicity, security, and affordability. However, their limited hardware capabilities often leave users wanting more. One way to overcome these limitations is by running a virtual machine on a Chromebook. A virtual machine allows you to emulate another operating system within your Chromebook, giving you access to a wider range of software and tools.
In this article, we will explore different methods to get a virtual machine on a Chromebook. These methods will enable you to run different operating systems like Linux, Windows, or macOS seamlessly on your Chromebook. Whether you need a specific software that only runs on another operating system or want to experiment with different environments, setting up a virtual machine can expand the capabilities of your Chromebook.
Before we dive into the methods, let’s discuss the necessary requirements. First and foremost, you will need a Chromebook that supports running virtual machines. Not all Chromebook models are equipped with the necessary hardware capabilities, so make sure to check the specifications of your device. Additionally, you may need to update your Chromebook to the latest version of Chrome OS to ensure compatibility with virtualization software.
Furthermore, setting up a virtual machine requires a certain level of technical knowledge and comfort with the command line interface. While the methods provided below are relatively straightforward, it’s important to follow the instructions carefully and be prepared to troubleshoot any issues that may arise. Additionally, keep in mind that running a virtual machine on a Chromebook may impact its performance, so it’s advisable to have a reasonably powerful Chromebook, preferably with ample RAM and storage capacity.
Now that we have covered the basic requirements and considerations, let’s explore the different methods you can use to set up a virtual machine on your Chromebook. Each method has its own advantages and limitations, so you can choose the one that best suits your needs and technical expertise.
Requirements
Before setting up a virtual machine on your Chromebook, there are a few essential requirements you need to consider. These requirements will ensure that your Chromebook is compatible with running virtualization software and enable a smooth virtual machine experience.
The first requirement is to have a Chromebook that supports running virtual machines. Not all Chromebook models have the necessary hardware capabilities for virtualization. To check if your Chromebook is compatible, look for “Intel VT-x” or “AMD-V” in the specifications. These are the necessary virtualization technologies that need to be supported by your Chromebook’s CPU. If you are unsure, you can refer to your Chromebook’s manufacturer’s website or contact their support for more information.
It is also crucial to ensure that your Chromebook is running the latest version of Chrome OS. The virtualization features may depend on specific updates or patches provided by the Chrome OS developers. To update your Chromebook, go to the Settings menu, click on “About Chrome OS”, and select the “Check for updates” option. If an update is available, follow the instructions to install it.
Another important requirement is to have a sufficient amount of system resources. Running a virtual machine can be resource-intensive, so it is recommended to have a Chromebook with a decent amount of RAM and storage capacity. Having at least 8GB of RAM will ensure smooth performance, but if you plan on running more resource-intensive virtual machines, such as those running Windows or macOS, having 16GB or more would be ideal. As for storage, ensure that you have enough free space to accommodate the virtual machine and any software or files you plan on using within it.
Lastly, setting up a virtual machine on a Chromebook requires some technical knowledge and comfort with the command line interface. The methods outlined in this article may involve executing commands and working with developer tools. If you are new to these concepts, it might be helpful to familiarize yourself with basic command line operations before proceeding. Additionally, be prepared to troubleshoot any issues that may arise during the virtual machine setup.
By ensuring that your Chromebook meets these requirements, you will be well-prepared to set up and run a virtual machine smoothly. Now, let’s explore the different methods you can use to get a virtual machine on your Chromebook.
Method 1: Using Chrome Remote Desktop
One way to get a virtual machine on your Chromebook is by using Chrome Remote Desktop. This method allows you to access a remote desktop running another operating system from your Chromebook. Essentially, you will be using another device, such as a Windows or macOS computer, as the host machine for your virtual environment.
To set up Chrome Remote Desktop, you need to install the Chrome Remote Desktop app on both your Chromebook and the host machine. Once installed, follow these steps:
- Launch the Chrome Remote Desktop app on your Chromebook and enable remote connections.
- On the host machine, download and install the Chrome Remote Desktop Host installer.
- Launch the Chrome Remote Desktop Host on the host machine and follow the prompts to set it up.
- On your Chromebook, click on the “Generate Code” button in the Remote Assistance section of the Chrome Remote Desktop app. This will generate a unique access code.
- Share the access code with the host machine user and ask them to enter it in their Chrome Remote Desktop app.
- Once the code is entered, the host machine’s desktop will appear on your Chromebook, allowing you to interact with it.
With Chrome Remote Desktop, you can run any software or perform tasks on the host machine, as if you were using it directly. This method is particularly useful if you need to access software that is only available for Windows or macOS.
It’s worth noting that Chrome Remote Desktop requires a stable internet connection for a smooth experience. Additionally, the performance of the virtual environment may depend on the capabilities of the host machine. If the host machine has limited resources, it might impact the overall performance of the virtual machine.
Now that you know how to set up a virtual machine using Chrome Remote Desktop, let’s explore another method using Linux (Beta) and Crostini.
Method 2: Using Linux (Beta) and Crostini
Another method to get a virtual machine on your Chromebook is by using Linux (Beta) and Crostini. This method allows you to run a Linux operating system directly on your Chromebook, giving you access to a wide range of Linux software and tools.
To begin, follow these steps to enable Linux (Beta) on your Chromebook:
- Go to the Settings menu on your Chromebook.
- Scroll down and click on “Linux (Beta)” in the menu options.
- Click on the “Turn On” button to enable Linux (Beta).
- Follow the prompts to set up Linux (Beta) on your Chromebook, including creating a username and password for your Linux environment.
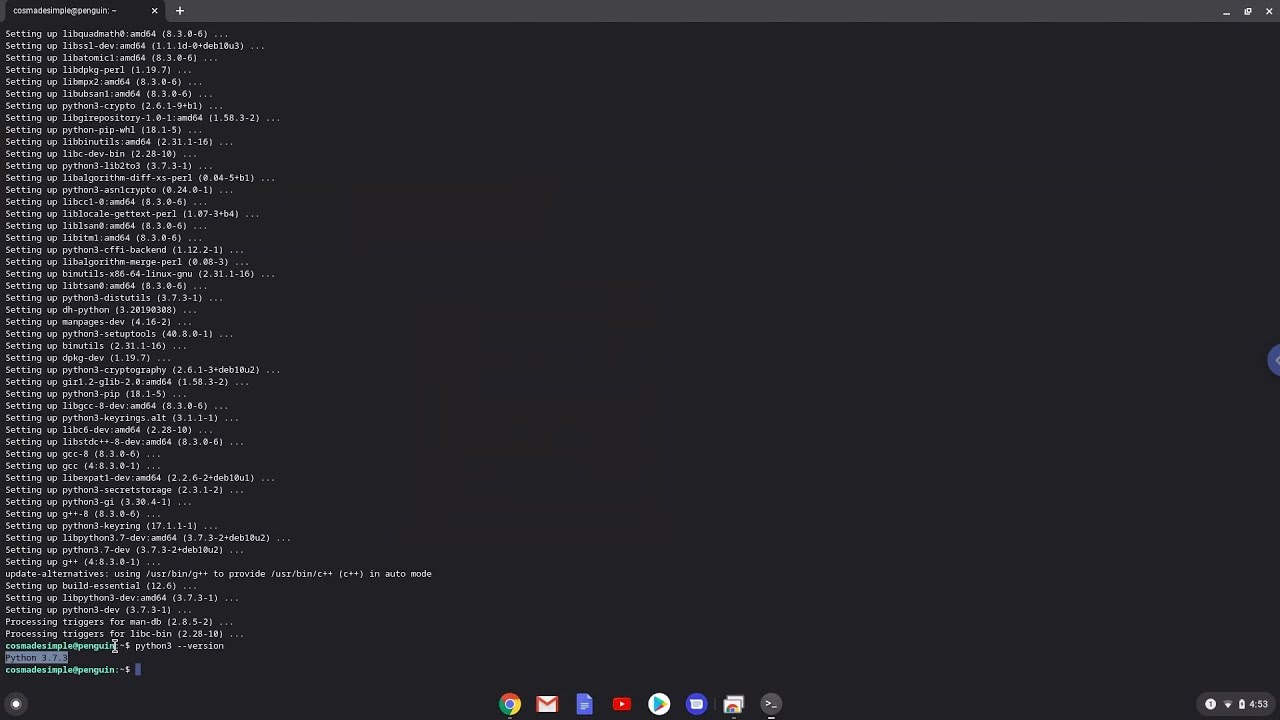
- Once the installation is complete, you will have access to a terminal window. From there, you can install and run various Linux applications and services.
Using Linux (Beta) and Crostini, you can install popular Linux distributions like Ubuntu, Debian, or Fedora. This will provide you with a full-fledged Linux environment where you can install and use software packages and tools specific to your needs. You can develop code, run server applications, or experiment with different Linux software configurations.
It’s important to note that the performance of the virtual machine depends on the capabilities of your Chromebook. Chromebooks with better processors and more RAM will offer smoother performance when running Linux applications. Additionally, keep in mind that Linux applications will consume system resources, so it’s recommended to close any unnecessary applications or browser tabs to optimize performance.
Using Linux (Beta) and Crostini is a great method for developers, programmers, and Linux enthusiasts who want to utilize Linux software on their Chromebooks. It provides a seamless integration of Linux tools within the Chrome OS environment.
Now that you understand how to set up a virtual machine using Linux (Beta) and Crostini, let’s move on to another method using Crouton.
Method 3: Using Crouton
Crouton is another method that allows you to run a virtual machine on your Chromebook. It works by creating a dual-boot environment, meaning you can switch between Chrome OS and another operating system, such as Linux, without restarting your device. Crouton stands for “Chromium OS Universal Chroot Environment.”
To set up Crouton, follow these steps:
- Enable developer mode on your Chromebook. This process may vary depending on your specific Chromebook model, so it’s recommended to check the instructions provided by the Chromebook manufacturer.
- Download the Crouton installer script from the official Crouton GitHub repository.
- Once the installer script is downloaded, press
Ctrl + Alt + Ton your Chromebook to bring up the terminal. - Type
shelland press Enter to access the Linux shell on your Chromebook. - Run the Crouton installer script by navigating to the directory where the script is located and executing
sudo sh ./[script_name].sh. Replace[script_name]with the actual name of the Crouton script file. - Follow the prompts to select the desired Linux distribution and setup options.
- Once the installation is complete, you can switch between Chrome OS and the Linux environment by pressing
Ctrl + Alt + Shift + Back/Forwardkeys.
Crouton provides a full Linux environment on your Chromebook, allowing you to install and use various Linux software and tools. It’s important to note that Crouton modifies the core system of your Chromebook and may affect its stability and security. Therefore, it’s recommended to have a backup of your important data before proceeding with the Crouton installation.
Using Crouton, you can effortlessly switch between Chrome OS and Linux, giving you the flexibility to choose the operating system that best suits your needs. However, it’s important to be aware of the potential risks and implications of modifying the core system of your Chromebook.
Now that you understand how to set up a virtual machine using Crouton, let’s move on to another method using the Virtual Machine Manager.
Method 4: Using Virtual Machine Manager
To get a virtual machine on your Chromebook, you can also utilize the Virtual Machine Manager (VMM). VMM allows you to create and manage virtual machines directly on your Chromebook using open-source virtualization technologies like KVM (Kernel-based Virtual Machine). With VMM, you can run various operating systems, including Linux distributions and even Windows.
Setting up VMM requires some technical knowledge and familiarity with using the command line interface. Here are the steps to set up a virtual machine using VMM:
- Enable developer mode on your Chromebook. The process for enabling developer mode may vary depending on the Chromebook model.
- Access the Linux shell by pressing
Ctrl + Alt + Ton your Chromebook. - Enter the command
sudo suto gain root access. - Run the command
apt-get install qemu-kvmto install the KVM virtualization software. - Install the Virtual Machine Manager by running the command
apt-get install virt-manager. - Once installed, launch the Virtual Machine Manager with the command
virt-manager. - Click on “Create New Virtual Machine” and follow the prompts to configure the virtual machine settings, such as selecting the operating system ISO and allocating system resources.
- After configuring the virtual machine, click on “Finish” to create the virtual machine.
- The Virtual Machine Manager will display the newly created virtual machine. Click on the virtual machine to start it.
With the Virtual Machine Manager, you have full control over the virtual machine’s configuration and can run a wide range of operating systems. You can allocate resources like CPU, memory, and storage according to the requirements of the virtual machine.
It’s important to note that running a virtual machine with VMM may require a Chromebook with a decent amount of RAM and processing power to ensure a smooth experience. Additionally, the performance of the virtual machine is influenced by the hardware capabilities of your Chromebook.
Now that you know how to set up a virtual machine using the Virtual Machine Manager, you have several methods to choose from based on your technical expertise and requirements. Each method offers its own advantages, so explore them to find the one that best suits your needs.
Conclusion
In this article, we explored four methods to get a virtual machine on your Chromebook. Each method offers its own unique approach and advantages, allowing you to expand the capabilities of your Chromebook and access a wider range of software and tools.
Using Chrome Remote Desktop, you can connect to a remote desktop running another operating system, providing seamless access to software that may not be available on Chrome OS. Linux (Beta) and Crostini allow you to run a Linux environment directly on your Chromebook, opening up a world of Linux applications and services. Crouton enables a dual-boot environment, letting you switch between Chrome OS and another operating system, such as Linux. Finally, with the Virtual Machine Manager, you can create and manage virtual machines on your Chromebook, allowing you to run various operating systems and allocate system resources.
However, it’s important to keep in mind the requirements and limitations of each method. Make sure to check if your Chromebook is compatible with running virtual machines and ensure you have sufficient system resources to support the virtualization process. Additionally, remember that setting up a virtual machine on a Chromebook may require a certain level of technical knowledge and comfort with the command line interface.
With these methods at your disposal, you can unlock the full potential of your Chromebook and customize your computing experience according to your needs and preferences. Whether you’re a developer, programmer, or simply someone who wants to explore different operating systems and software, setting up a virtual machine on your Chromebook can provide you with a versatile and flexible computing environment.
Now that you have a comprehensive understanding of the methods available, choose the one that aligns with your requirements, follow the instructions carefully, and embark on your virtual machine journey with your Chromebook.