Introduction
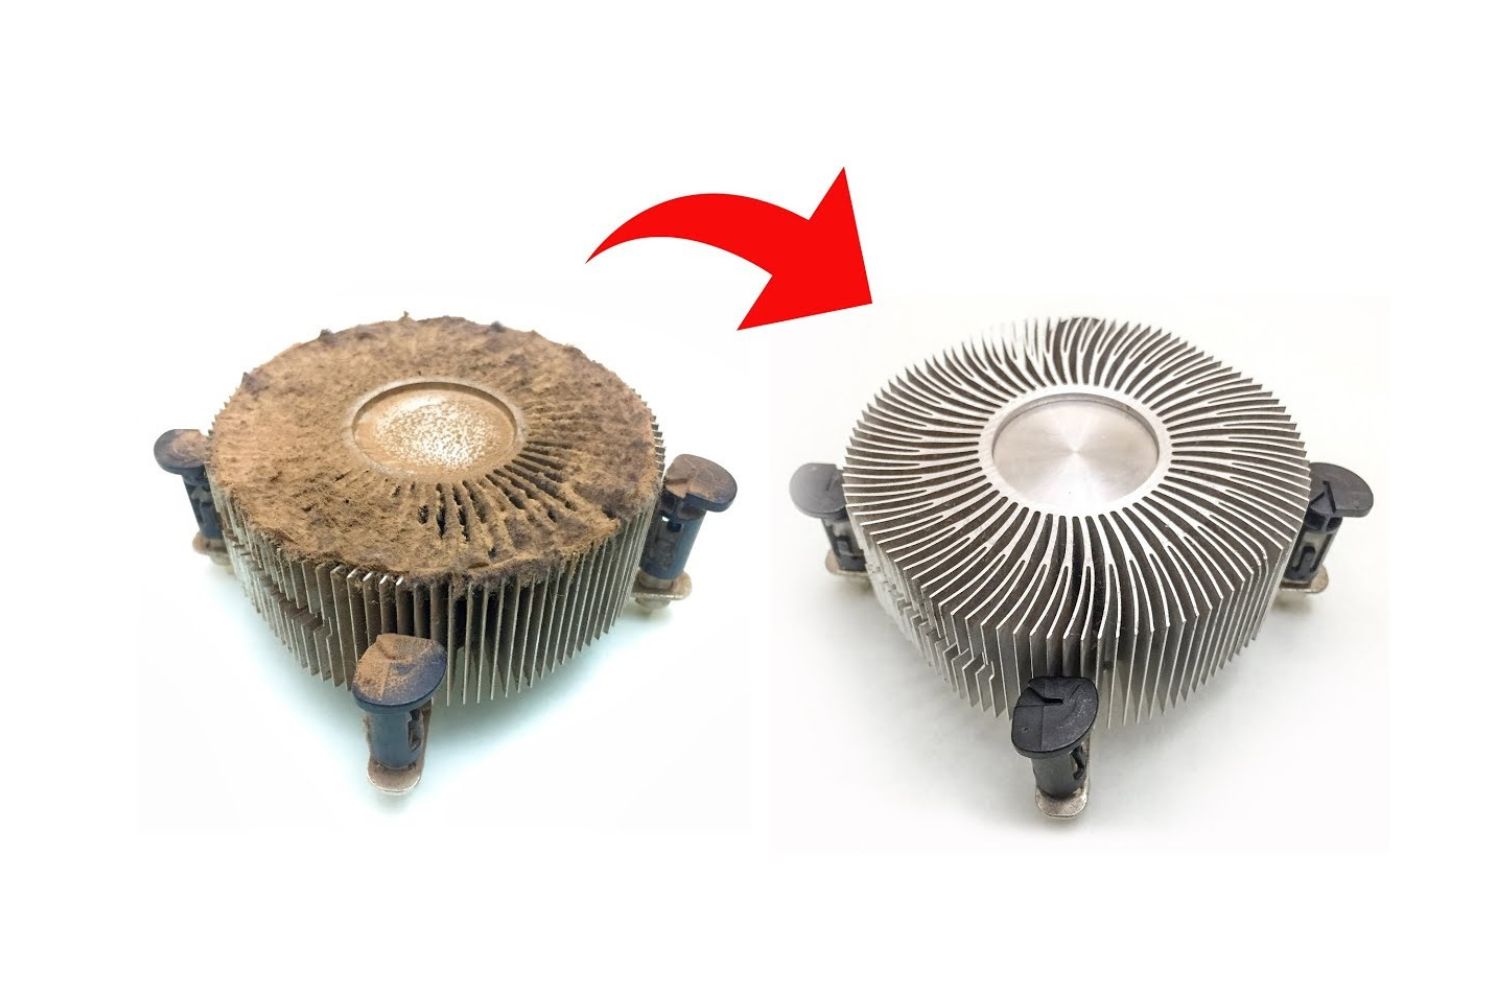
Welcome to the world of computer maintenance! One important aspect of keeping your computer running smoothly is regular cleaning of the CPU cooler. The CPU cooler is a crucial component that helps dissipate heat generated by the processor. Over time, dust and debris can accumulate on the cooler’s fins, obstructing airflow and causing the CPU to overheat. This can result in reduced performance, system instability, and even permanent damage to the processor.
Regularly cleaning your CPU cooler not only helps maintain optimal performance but also prolongs the lifespan of your computer. If you’ve noticed that your computer is running hotter than usual or experiencing frequent thermal shutdowns, it’s likely time to give your CPU cooler some well-deserved attention.
In this guide, we will walk you through the steps to clean your CPU cooler effectively and safely. Whether you are a novice or a seasoned computer enthusiast, this tutorial will equip you with the knowledge and skills needed to perform this crucial maintenance task.
Please note that before you begin, it’s crucial to read your computer’s user manual or consult with the manufacturer’s website for specific guidelines and precautions. Each computer model may have slight variations when it comes to CPU cooler removal and cleaning procedures. Additionally, ensure that you have the necessary tools and protective gear before proceeding with the cleaning process.
Are you ready to give your CPU cooler some TLC? Let’s dive into the detailed steps required to clean your CPU cooler and enjoy the benefits of a cool and high-performing computer!
Why is it important to clean your CPU cooler?
Your CPU cooler plays a vital role in maintaining the temperature of your computer’s processor, ensuring that it doesn’t overheat. Over time, dust, pet hair, and other debris can accumulate on the cooler’s fins and fan, obstructing proper airflow. This build-up of dust can lead to several issues:
- Reduced cooling efficiency: The accumulation of dust and debris impedes the flow of air through the cooler, reducing its cooling capacity. This can cause the CPU temperature to rise, leading to performance issues and potential system instability.
- Increased noise: When dust collects on the CPU cooler’s fan blades, it can cause unbalanced rotation, resulting in increased noise during operation. This can be quite annoying, especially during demanding tasks and gaming sessions.
- Risk of thermal throttling: When the temperature of the CPU surpasses a certain threshold, modern processors have built-in mechanisms to protect themselves from damage. This often involves reducing the processor’s clock speed, resulting in lower performance. Cleaning your CPU cooler can prevent excessive heat buildup and prevent thermal throttling.
- Longer lifespan: A clean CPU cooler ensures efficient heat dissipation, which puts less strain on the processor. By regularly cleaning your CPU cooler, you can extend the lifespan of your computer and potentially avoid costly repairs or upgrades.
Ignoring the cleanliness of your CPU cooler can lead to a host of problems, ranging from decreased performance to irreversible damage to your computer’s components. Therefore, regular cleaning is essential in maintaining optimal operating temperatures and ensuring the longevity of your computer system.
Stay tuned for the next section, where we will discuss the tools you’ll need to successfully clean your CPU cooler and ensure a thorough and safe cleaning process.
What you will need
Before you begin the process of cleaning your CPU cooler, it’s important to gather all the necessary tools and materials. Here’s what you’ll need:
- Compressed air: This will be your primary tool for removing dust and debris from the CPU cooler’s fins and fan. You can find compressed air in aerosol cans specifically designed for cleaning electronics and computer components.
- Soft brush: A small, soft-bristled brush will help you dislodge any stubborn dust particles that may be stuck in the cooler’s fins or fan. Ensure that the brush you use is clean and free of any hard bristles or sharp edges that could potentially damage the components.
- Cotton swabs: These will come in handy for removing any remaining dust or debris from hard-to-reach areas. Make sure to use clean and lint-free cotton swabs to avoid leaving behind any fibers or residue.
- Isopropyl alcohol (optional): If your CPU cooler’s contact surface or heat sink requires more than just a dry cleaning, you can use isopropyl alcohol to remove any thermal paste residue. This will require careful application and an understanding of safe handling practices.
- Thermal paste: If you decide to remove the CPU cooler entirely, you’ll need to reapply thermal paste to ensure proper heat transfer between the processor and the cooler. Make sure you have a high-quality thermal paste readily available.
- Anti-static wrist strap (optional): While not essential, an anti-static wrist strap can help prevent static electricity damage. If you don’t have a wrist strap, ensure that you regularly ground yourself by touching a metal object before touching any sensitive computer components.
- Screwdriver: Depending on your computer model, you may need a screwdriver to remove the CPU cooler. Check the user manual or manufacturer’s instructions to determine the type of screwdriver needed.
Once you have gathered all the necessary tools, you’re ready to embark on the cleaning journey. In the next section, we will walk you through the step-by-step process of safely removing the CPU cooler from the motherboard.
Step 1: Shutting down and unplugging your computer
Before you begin the process of cleaning your CPU cooler, it’s crucial to ensure your computer is shut down and completely powered off. This will prevent any potential risks and ensure your safety throughout the cleaning process. Follow these steps:
- Save your work: Before shutting down your computer, save any unsaved work and close all running applications. This will prevent the loss of any important data.
- Shut down your computer: Click on the “Start” button on your desktop, select “Shut down,” and confirm your choice. Wait for your computer to completely shut down. Avoid using the “Sleep” or “Hibernate” mode, as these can maintain some power to the motherboard.
- Unplug the power cord: Ensure that there is no power going to your computer by unplugging the power cord from the wall outlet or the power strip. This step is crucial to prevent any electrical accidents while working on the internal components of your computer.
- Ground yourself: Touch a metal object, such as a doorknob or the computer case, to discharge any static electricity built up in your body. This will prevent static discharge from damaging the sensitive electronic components of your computer.
By following these four simple steps, you have successfully shut down your computer and prepared it for the cleaning process. In the next step, we will guide you through the process of removing the CPU cooler from the motherboard.
Step 2: Removing the CPU cooler from the motherboard
Now that your computer is shut down and unplugged, it’s time to remove the CPU cooler from the motherboard. Follow these steps carefully:
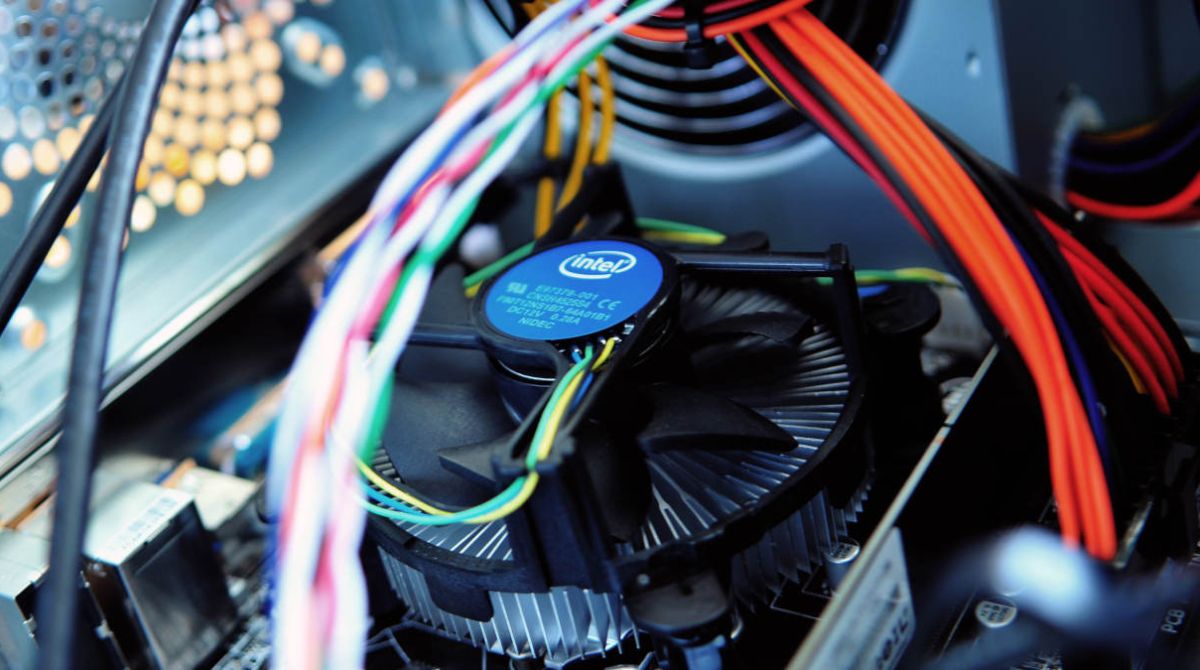
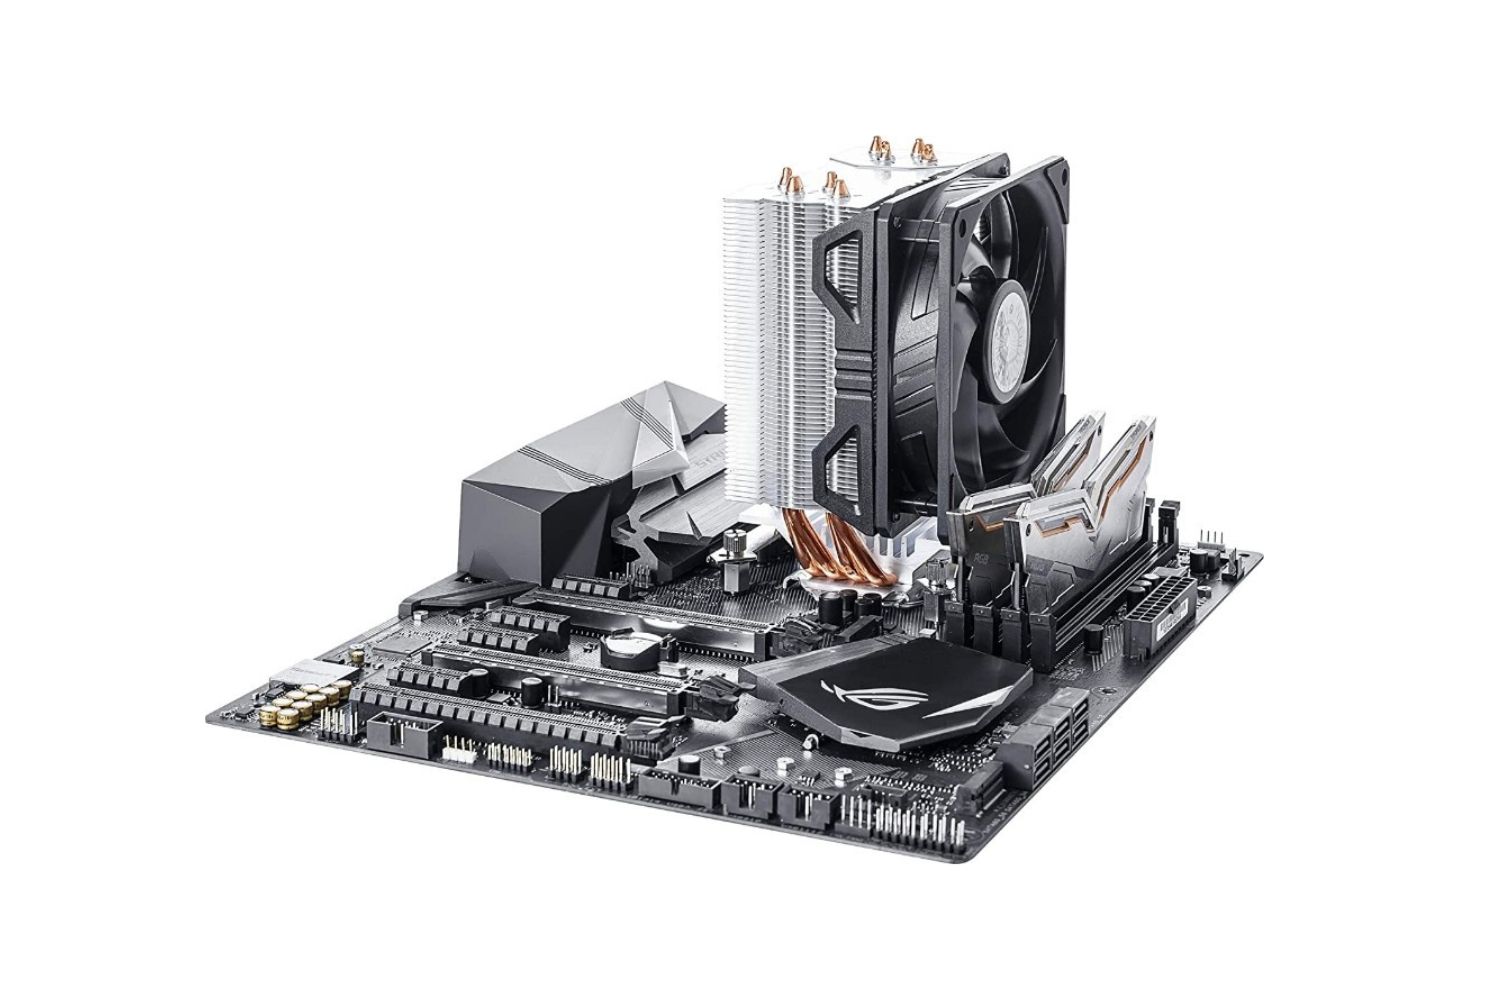
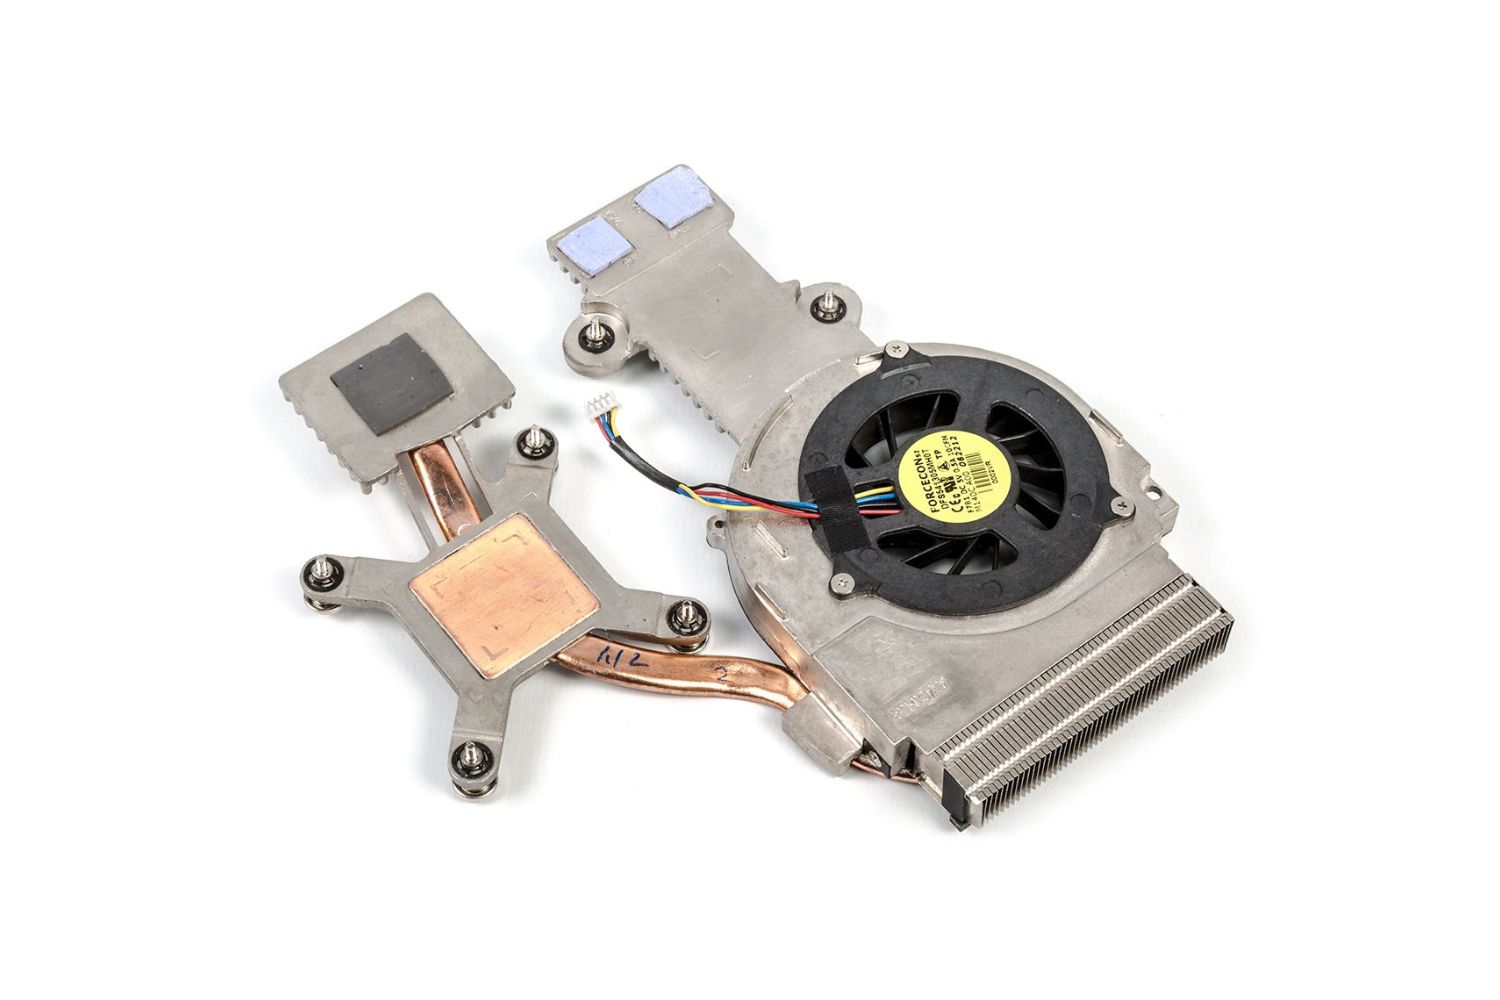
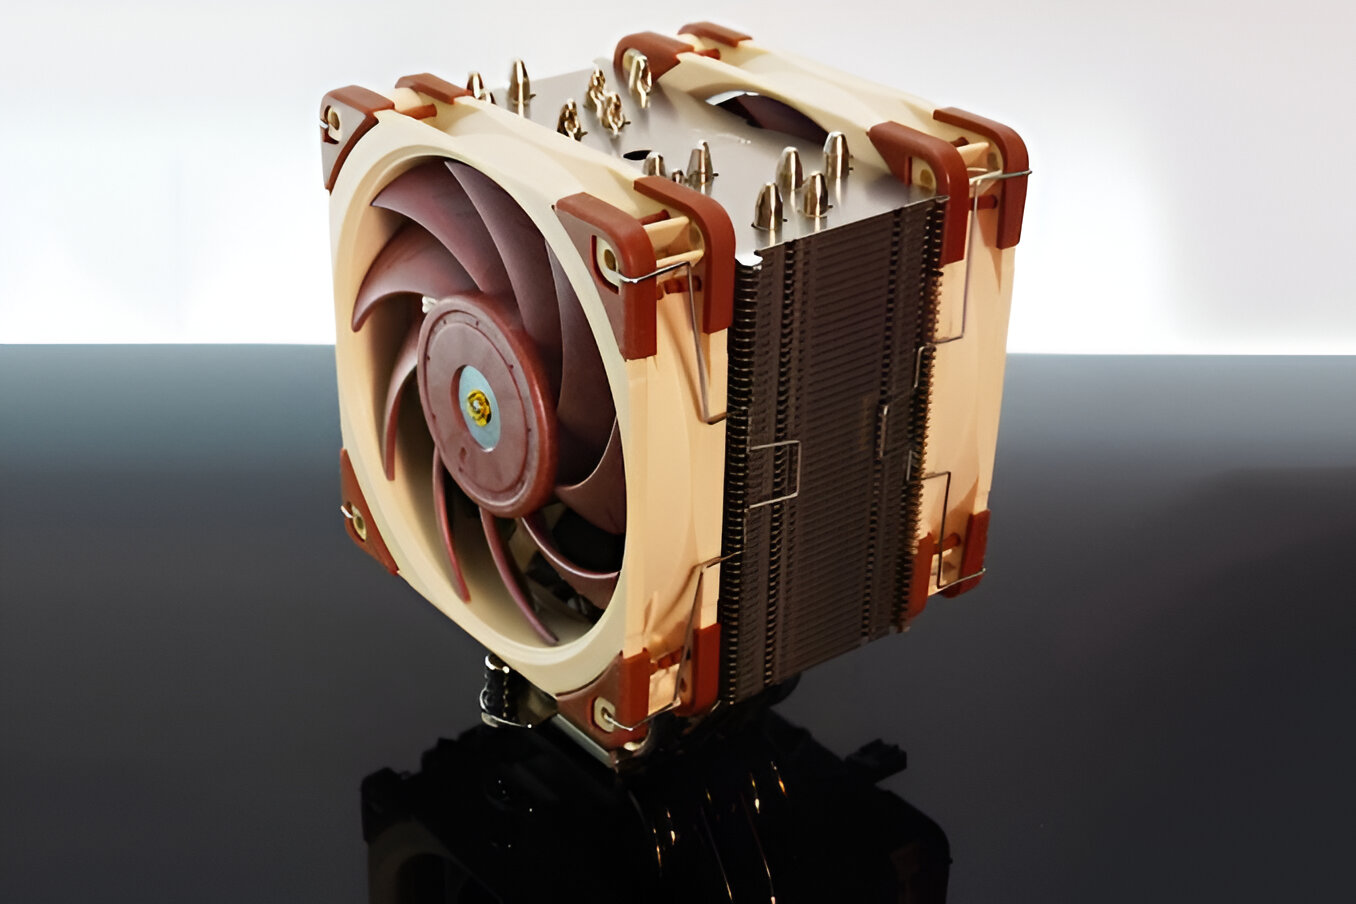
- Locate the CPU cooler: The CPU cooler is typically positioned on top of the processor, secured by screws or plastic clips. Locate the cooler by identifying a fan and a metal heat sink attached to it.
- Identify the mounting mechanism: Depending on your CPU cooler and motherboard model, the mounting mechanism may vary. It could be screws, plastic clips, or a retention bracket. Refer to your motherboard or cooler manual for specific instructions.
- Remove the mounting mechanism: Gently and carefully unscrew the screws or release the clips holding the CPU cooler in place. Be cautious to not apply excessive force, as that could damage the motherboard or the cooler itself.
- Detach the CPU cooler: Once the mounting mechanism is removed, you can carefully lift the CPU cooler off the processor. Be mindful of any resistance caused by dried thermal paste that may have hardened over time.
- Set aside the CPU cooler: Place the removed CPU cooler on a safe and clean surface. Avoid placing it on a static-prone surface or in an area where it can accumulate more dust or debris.
Remember, each motherboard and CPU cooler may have slightly different removal instructions. It’s essential to refer to the user manual or manufacturer’s instructions for your specific components to ensure a safe and proper removal process.
With the CPU cooler now removed from the motherboard, you’re ready to move on to the next step: dusting off the cooler with compressed air.
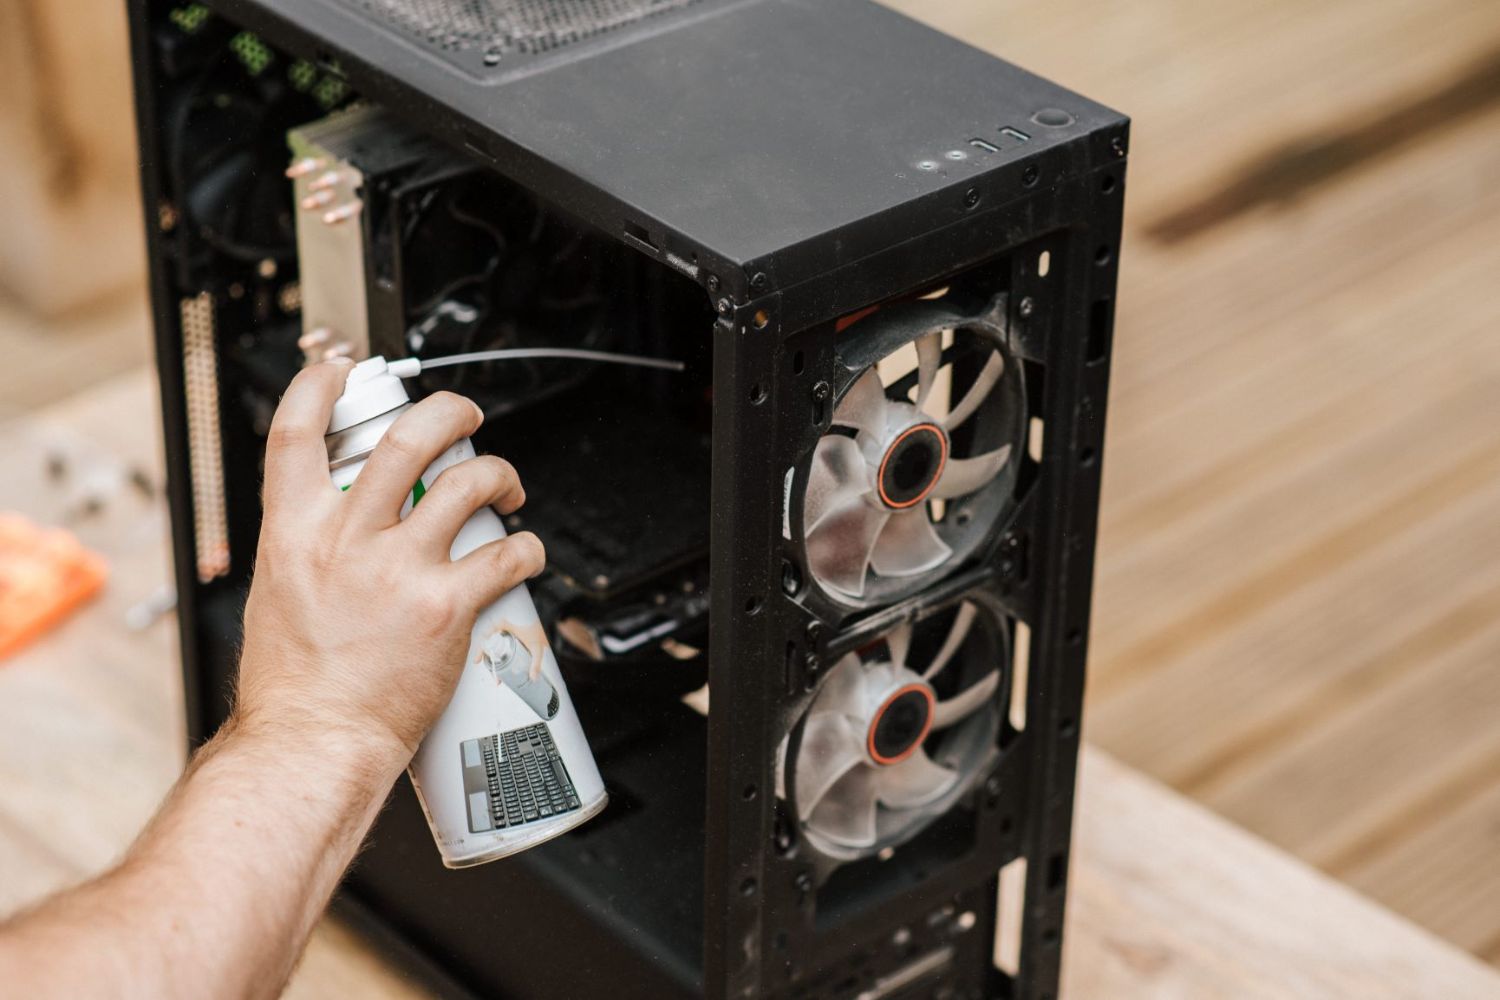
Step 3: Dusting off the cooler with compressed air
After successfully removing the CPU cooler from the motherboard, it’s time to clean off the accumulated dust and debris using compressed air. Compressed air is an effective tool for dislodging and removing stubborn particles. Follow these steps:
- Prepare the compressed air: Shake the can of compressed air gently to ensure the contents are well mixed. Make sure to hold the can upright during use.
- Position the CPU cooler: Place the removed CPU cooler on a stable surface, ensuring that the fins and fan are easily accessible for cleaning.
- Blast away the dust: Holding the can of compressed air at a 45-degree angle, direct the nozzle towards the cooler’s fins and fan. Begin blowing air in short bursts at a safe distance, ensuring that you don’t get too close to the components. The force of the air will dislodge the dust and blow it away.
- Pay attention to the fan: While blowing compressed air, focus on the fan as well. Rotate the fan manually while blowing air to remove dust from hard-to-reach areas. Take caution not to spin the fan too quickly, as this can damage the bearings.
- Check for any remaining dust: After blowing compressed air, inspect the cooler’s fins and fan for any remaining dust. If necessary, repeat the process until you’re satisfied that all visible dust has been removed.
- Allow the cooler to sit: Give the CPU cooler a few minutes to settle before you proceed to the next step. This will allow any dislodged debris to settle and prevent it from being blown back into the cooler during the cleaning process.
Cleaning the CPU cooler with compressed air helps restore optimal airflow and promotes better cooling efficiency. However, depending on the level of dust accumulation, you may need to continue using other cleaning methods to ensure a thorough cleaning. In the next step, we will discuss using a soft brush to further clean the CPU cooler.
Step 4: Cleaning the CPU cooler with a soft brush
While compressed air effectively removes loose dust and debris, there may be stubborn particles that require a more focused approach. In this step, you will use a soft brush to gently clean the CPU cooler, ensuring thorough removal of any remaining dust or debris. Follow these steps:
- Choose a soft brush: Select a small, soft-bristled brush that is suitable for cleaning delicate components. Ensure that the bristles are clean and free of any dirt or debris that could scratch or damage the components.
- Gently brush the cooler fins: Carefully brush the surface of the cooler’s fins using gentle, sweeping motions. Pay special attention to areas where dust may have accumulated, and be cautious not to bend or damage the fins.
- Clean the fan blades: If your CPU cooler has a fan, use the soft brush to clean the fan blades. Make sure to remove any dust or debris that may have collected on them. You can hold the fan blades in place with one hand while brushing to prevent them from spinning out of control.
- Inspect for remaining dust: After brushing, inspect the cooler and fan for any remaining dust or debris. If you notice any stubborn particles, you can use compressed air in short bursts to dislodge them, repeating the process as needed.
- Be cautious and gentle: Exercise caution and gentleness throughout the brushing process. Avoid applying excessive pressure that could damage the components. If you encounter any resistance or difficulties, stop and reevaluate your approach to prevent accidental damage.
Cleaning the CPU cooler with a soft brush ensures a more thorough removal of dust and debris from the fins and fan. By taking the time to carefully brush the components, you can improve the cooler’s airflow and overall cooling efficiency.
In the next step, we will discuss using cotton swabs to tackle hard-to-reach areas and remove any remaining dust or debris from the CPU cooler.
Step 5: Removing any remaining dust with a cotton swab
After using a soft brush to clean the CPU cooler, there may still be tight spaces or hard-to-reach areas where dust and debris have accumulated. In this step, you will use cotton swabs to target these areas and ensure a thorough cleaning. Follow these steps:
- Select clean cotton swabs: Choose clean, lint-free cotton swabs that will not leave any fibers or residue behind. Avoid using swabs that have been previously used or are dirty.
- Moisten the cotton swab (optional): If you encounter stubborn dirt or residue, you can lightly dampen the cotton swab with isopropyl alcohol. However, use alcohol sparingly and with caution, ensuring that it does not come into contact with sensitive components.
- Gently clean hard-to-reach areas: Use the cotton swab to carefully clean any remaining dust or debris from tight spaces, corners, or crevices. Pay close attention to areas around the CPU heatsink and any other hard-to-reach spots.
- Replace the cotton swab as needed: As you clean, you may find that the cotton swab becomes dirty or covered in dust. If this happens, replace it with a clean one to ensure effective cleaning.
- Reinspect for any remaining dust: After using cotton swabs, carefully inspect the CPU cooler, paying attention to all areas that have been cleaned. If you notice any remaining dust or debris, use compressed air in short bursts to dislodge it, repeating the process as necessary.
- Allow the CPU cooler to dry (if using alcohol): If you used isopropyl alcohol to moisten the cotton swab, allow the cooler to dry completely before proceeding to the next steps.
Using cotton swabs is an effective way to target hard-to-reach areas and ensure a thorough cleaning of the CPU cooler. By removing any remaining dust or debris, you can optimize the cooler’s performance and maintain proper airflow.
In the next step, we will discuss the importance of reapplying thermal paste before reattaching the CPU cooler to the motherboard.
Step 6: Reapplying thermal paste
After cleaning the CPU cooler, it’s important to reapply thermal paste to ensure proper heat transfer between the processor and the cooler. Thermal paste acts as a conductor, filling in microscopic gaps and imperfections, ensuring efficient heat dissipation. Follow these steps to reapply thermal paste:
- Clean off old thermal paste: Using a clean cotton swab lightly moistened with isopropyl alcohol, gently wipe away any residue of the old thermal paste from the processor and the cooler’s contact surface. Ensure that both surfaces are clean and free of any debris or residue.
- Apply a small amount of thermal paste: Squeeze a small pea-sized dot of thermal paste onto the center of the processor. The size of the dot may vary depending on the specific instructions provided with your thermal paste. Note that applying too much thermal paste can lead to inefficient heat transfer, so it’s best to err on the side of caution with a small amount.
- Spread the thermal paste (optional): If preferred, you can use a plastic card or a non-reactive material to evenly spread the thermal paste. Gently and evenly spread the paste in a thin layer, making sure it covers the entire surface of the processor. Take care not to apply too much pressure or leave any streaks or air bubbles.
- Align the cooler: Carefully align the CPU cooler with the processor, ensuring that the mounting holes or screws line up with the corresponding holes on the motherboard.
- Mount the cooler: Once aligned, gently press down on the cooler, making sure it sits flush against the processor. If necessary, secure the cooler in place using the appropriate mounting mechanism, such as screws or plastic clips, as per your particular motherboard and CPU cooler model.
Reapplying thermal paste is essential for maintaining effective heat transfer and preventing overheating. A properly applied layer of thermal paste ensures that the CPU cooler functions optimally in removing heat from the processor.
In the next step, we will guide you through the process of reattaching the CPU cooler to the motherboard, completing the cleaning and maintenance process.
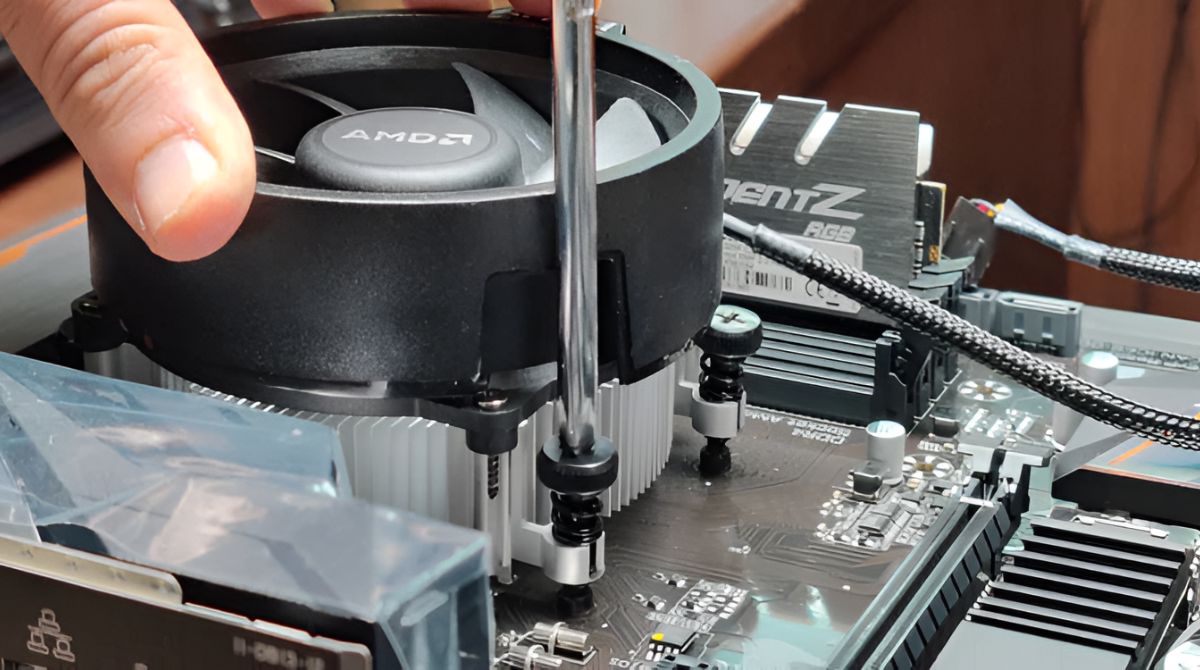
Step 7: Reattaching the CPU cooler to the motherboard
With the thermal paste applied, it’s time to securely reattach the CPU cooler to the motherboard. The proper installation of the cooler is crucial to ensure efficient heat transfer and cooling. Follow these steps to reattach the CPU cooler:
- Align the cooler: Carefully align the CPU cooler with the mounting holes or brackets on the motherboard. Ensure that the cooler is positioned correctly over the processor, with the contact surface aligned with the thermal paste.
- Secure the mounting mechanism: Depending on your CPU cooler and motherboard, you will need to use the appropriate screws, clips, or retention brackets to secure the cooler in place. Refer to your motherboard or cooler manual for specific instructions on how to properly secure the cooler.
- Tighten screws or fasteners: If screws are used to secure the CPU cooler, tighten them evenly and gradually, following a diagonal pattern. This ensures uniform pressure distribution and prevents excessive pressure on one side of the cooler.
- Double-check the connection: Once the cooler is secured, gently wiggle it to confirm that it is properly attached and doesn’t move. Ensure that all screws or fasteners are tightly secured and that there are no loose connections.
Properly reattaching the CPU cooler ensures that it remains securely in place, maintaining optimal contact with the processor for efficient heat transfer. This step is essential to prevent any potential damage or performance issues that may arise from an improperly attached cooler.
With the CPU cooler securely reattached, you’re almost done! In the next step, we will guide you through testing your computer to ensure everything is functioning properly after the cleaning process.
Step 8: Testing your computer
After completing the cleaning and reinstallation process, it’s important to test your computer to ensure that everything is functioning properly. Follow these steps to perform a basic test:
- Reconnect all cables: Double-check that all cables and connections, including the power cord, are securely reconnected.
- Power on your computer: Plug in the power cord and turn on your computer. Listen for any abnormal noises or beeps during the startup process.
- Monitor CPU temperatures: While your computer is running, use monitoring software or the BIOS interface to check the CPU temperatures. Ensure that they are within normal operating range. If you notice unusually high temperatures, it may indicate an issue with the cooler installation or the application of thermal paste.
- Run stress tests: To further test the stability and cooling performance of your computer, consider running stress tests or running resource-intensive applications for an extended period. Monitor the CPU temperatures during this time to ensure that they remain at a safe level.
- Check for any performance issues: Pay attention to any performance issues such as system crashes, freezes, or unexpected shutdowns. If you notice any abnormalities, it may indicate a problem with the CPU cooler or another component.
- Monitor your computer’s performance: Keep an eye on your computer’s overall performance, including the speed and responsiveness of applications. If you notice any degradation in performance, it may be worth investigating further.
By performing these tests, you can ensure that your computer is running optimally after the CPU cooler cleaning process. If you encounter any issues or abnormalities, it may be necessary to revisit the steps and double-check the installation of the CPU cooler.
Congratulations! You have successfully cleaned and reinstalled your CPU cooler, optimizing the cooling performance and ensuring your computer’s longevity. Regular maintenance and cleaning of the CPU cooler can help prevent overheating and maximize the performance of your system.
Conclusion
Cleaning your CPU cooler is an essential maintenance task that can significantly impact the performance and lifespan of your computer. By removing built-up dust and debris, you can restore optimal cooling efficiency, prevent overheating, and avoid potential damage to your processor.
In this guide, we have walked you through the step-by-step process of cleaning your CPU cooler. From shutting down and unplugging your computer to reattaching the cooler and testing your system, each step has been carefully outlined to ensure a thorough and safe cleaning process.
By following these steps and using the recommended tools and materials, you can effectively clean your CPU cooler and maintain a cool and high-performing computer.
Remember to consult your computer’s user manual or the manufacturer’s instructions for specific guidelines and precautions. Additionally, always take precautions to protect yourself and your computer by wearing an anti-static wrist strap and grounding yourself before handling any components.
Regularly cleaning your CPU cooler, along with other computer maintenance tasks, will help keep your system running smoothly and extend its lifespan. So, don’t neglect this important aspect of PC maintenance.
We hope that this guide has provided you with valuable insights and instructions on how to clean your CPU cooler. So go ahead, grab the necessary tools, and give your CPU cooler the cleaning it deserves!