Introduction
Welcome to our guide on how to clean dirt out of your CPU cooler. Keeping your CPU cooler clean is essential for maintaining optimal performance and prolonging the lifespan of your computer. Over time, dust, dirt, and debris can accumulate on the heatsink and fan blades, reducing the cooling efficiency and causing the CPU to overheat. This can lead to system instability, reduced performance, and even hardware damage.
In this article, we will provide you with a step-by-step guide on how to properly clean your CPU cooler. We will walk you through the process, highlighting the tools you will need and the precautions you should take to ensure a safe and effective cleaning. Whether you are a seasoned computer enthusiast or a beginner, this guide will equip you with the knowledge and confidence to keep your CPU cooler running smoothly.
Regularly cleaning your CPU cooler not only ensures that your computer stays cool and performs at its best, but also helps to reduce the noise level generated by the fan. A clean CPU cooler can effectively dissipate heat, preventing the need for the fan to work at higher speeds. This not only improves the overall efficiency of the cooling system but also results in a quieter computing experience.
Before we dive into the cleaning process, let’s take a look at the tools you will need to get the job done properly.
Why is it important to clean your CPU cooler?
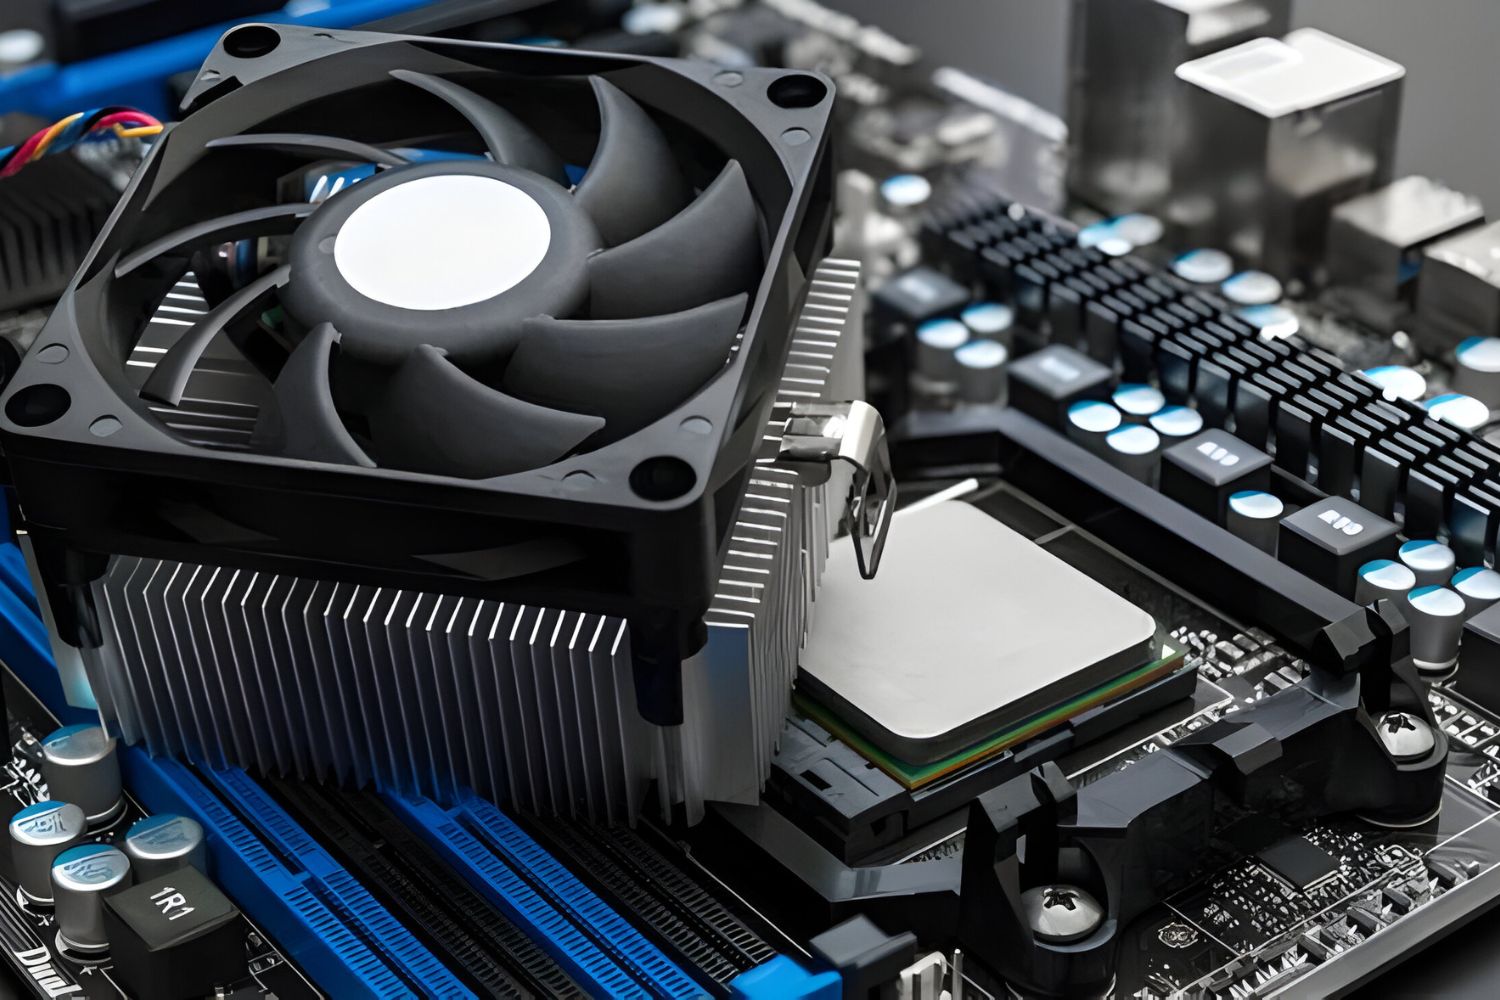
The CPU cooler is responsible for keeping your computer’s central processing unit (CPU) operating at a safe temperature. It consists of a heatsink, which absorbs and dissipates the heat generated by the CPU, and a fan that helps to circulate air and cool the heatsink. As dust and dirt accumulate on the heatsink and fan blades, the cooling efficiency of the CPU cooler decreases, leading to potential problems and performance issues.
Here are a few key reasons why it is important to regularly clean your CPU cooler:
- Prevent overheating: When dust and debris block the airflow or coat the heatsink, the CPU cooler cannot effectively dissipate heat. This can cause the CPU temperature to rise, potentially leading to overheating. An overheated CPU can result in system crashes, random shutdowns, and potential damage to the CPU.
- Improve performance: A clean CPU cooler ensures that the CPU can operate at its optimal temperature. When the CPU is kept cool, it can perform tasks more efficiently without thermal throttling, which can result in faster processing speeds and improved overall performance.
- Extend hardware lifespan: Overheating can significantly reduce the lifespan of your computer hardware, including the CPU. By keeping the CPU cooler clean and well-maintained, you can prolong the life of your hardware and avoid costly replacements or repairs.
- Reduce fan noise: Accumulated dust and dirt can cause the fan blades to become unbalanced and noisy. A clean CPU cooler not only improves cooling efficiency but also reduces fan noise, providing a quieter computing experience.
- Maintain system stability: Overheating due to a dirty CPU cooler can lead to system instability. Frequent crashes, freezes, and unexpected shutdowns can all be symptoms of an overheating CPU. By keeping your CPU cooler clean, you can ensure stable and reliable system operation.
Now that you understand the importance of cleaning your CPU cooler, let’s move on to the next section, where we will discuss the tools you will need for the cleaning process.
Tools you will need
Before you start cleaning your CPU cooler, it’s important to gather the necessary tools to ensure an effective and safe cleaning process. Here are the tools you will need:
- Compressed air: A can of compressed air is an essential tool for removing loose dirt and dust from your CPU cooler. It provides a powerful burst of air that can dislodge debris from the heatsink and fan blades without the need for physical contact.
- Soft brush or cloth: You will need a soft brush or cloth to gently clean the heatsink and fan blades. Avoid using brushes with hard bristles or abrasive materials that may damage the surfaces.
- Isopropyl alcohol: Isopropyl alcohol is commonly used to clean electronic components and is effective in removing stubborn stains and residues. It evaporates quickly, leaving behind no residue or moisture that could damage the components. Make sure to use a high concentration of isopropyl alcohol (at least 90%) for best results.
- Cotton swabs or q-tips: Cotton swabs or q-tips can be helpful for reaching small and tight areas, such as in-between the fins of the heatsink or the crevices of the fan blades. They allow for precise cleaning and are particularly useful for removing stubborn dirt.
- Screwdriver: Depending on the type of CPU cooler you have, you may need a screwdriver to remove it from the CPU socket. Ensure that you have the appropriate screwdriver to avoid damaging the screws or the CPU cooler itself.
- Antistatic wrist strap: While not strictly necessary, an antistatic wrist strap can provide an extra layer of protection when working with sensitive computer components. It helps prevent static electricity from damaging the delicate electronic circuits.
Having these tools ready before you start cleaning your CPU cooler will ensure a smoother and more efficient process. In the next section, we will provide a step-by-step guide on how to clean your CPU cooler.
Step-by-step guide to cleaning your CPU cooler
Now that you have gathered the necessary tools, it’s time to dive into the process of cleaning your CPU cooler. Follow these steps to effectively clean out the dirt and dust:
- Shut down your computer and unplug it: Before you begin cleaning, make sure to shut down your computer completely and unplug it from the power outlet. This will ensure your safety and prevent any potential damage to the components.
- Remove the CPU cooler: Depending on the type of CPU cooler you have, the method of removal may vary. In most cases, you will need to unscrew the cooler from the CPU socket. Refer to your motherboard manual or the CPU cooler manufacturer’s instructions for specific guidance.
- Use compressed air to remove loose dirt and dust: Holding the can of compressed air upright, use short bursts of air to blow away the loose dirt and dust from the heatsink and fan blades. Make sure to keep the can a safe distance away (about 2-3 inches) to prevent any damage from the force of the air.
- Clean the heatsink with a brush or soft cloth: Gently brush the heatsink with a soft brush or cloth to remove any remaining dirt or debris. Be careful not to apply too much pressure to avoid bending or damaging the delicate fins of the heatsink.
- Clean the fan blades: Use a cloth or brush to clean the fan blades, making sure to remove any dust or grime that may have accumulated. Pay close attention to the areas between the blades and the center hub, as these areas tend to collect more dirt.
- Reinstall the CPU cooler: After you have thoroughly cleaned the heatsink and fan, carefully reinstall the CPU cooler. Make sure it is properly seated and securely fastened according to the manufacturer’s instructions.
Following these steps will help ensure that your CPU cooler is clean and functioning optimally. Keep in mind that the exact process may vary depending on the specific CPU cooler model you have. Always refer to the manufacturer’s instructions for the most accurate and detailed guidance.
In the next section, we will provide some final words of advice to help you maintain a clean and efficient CPU cooler.
Shut down your computer and unplug it
Before you begin the process of cleaning your CPU cooler, it is crucial to ensure your safety and prevent any potential damage to the components. Follow these steps to properly shut down your computer and unplug it:
- Save your work and close all applications: Before shutting down your computer, make sure to save any unsaved work and close all open applications. This will prevent the loss of any important data or unsaved changes.
- Click on the Start menu: Click on the Start icon located at the bottom left corner of your screen. A menu will appear.
- Click on “Power”: In the Start menu, click on the “Power” option. This will display a submenu.
- Select “Shut down”: From the submenu, select the “Shut down” option. This will initiate the shutdown process.
- Wait for the computer to fully shut down: Give your computer some time to complete the shutdown process. You may see a screen indicating that Windows is shutting down, followed by a blank screen.
- Unplug the power cord: Once your computer has completely shut down, locate the power cord connected to the back of the computer tower. Gently pull the plug out of the power outlet to disconnect it from the electrical supply.
- Press the power button (optional): To discharge any remaining power, you can briefly press the power button on your computer tower. This will help ensure that there is no residual electricity running through the system.
By following these steps, you have successfully shut down your computer and disconnected it from the power outlet. This precautionary measure will safeguard you from any electrical hazards and protect your computer components during the cleaning process.
Now that your computer is safely shut down and unplugged, you can proceed to the next step of removing the CPU cooler from your system.
Remove the CPU cooler
Once you have shut down your computer and unplugged it, it’s time to remove the CPU cooler. Follow these steps to safely detach the CPU cooler from your system:
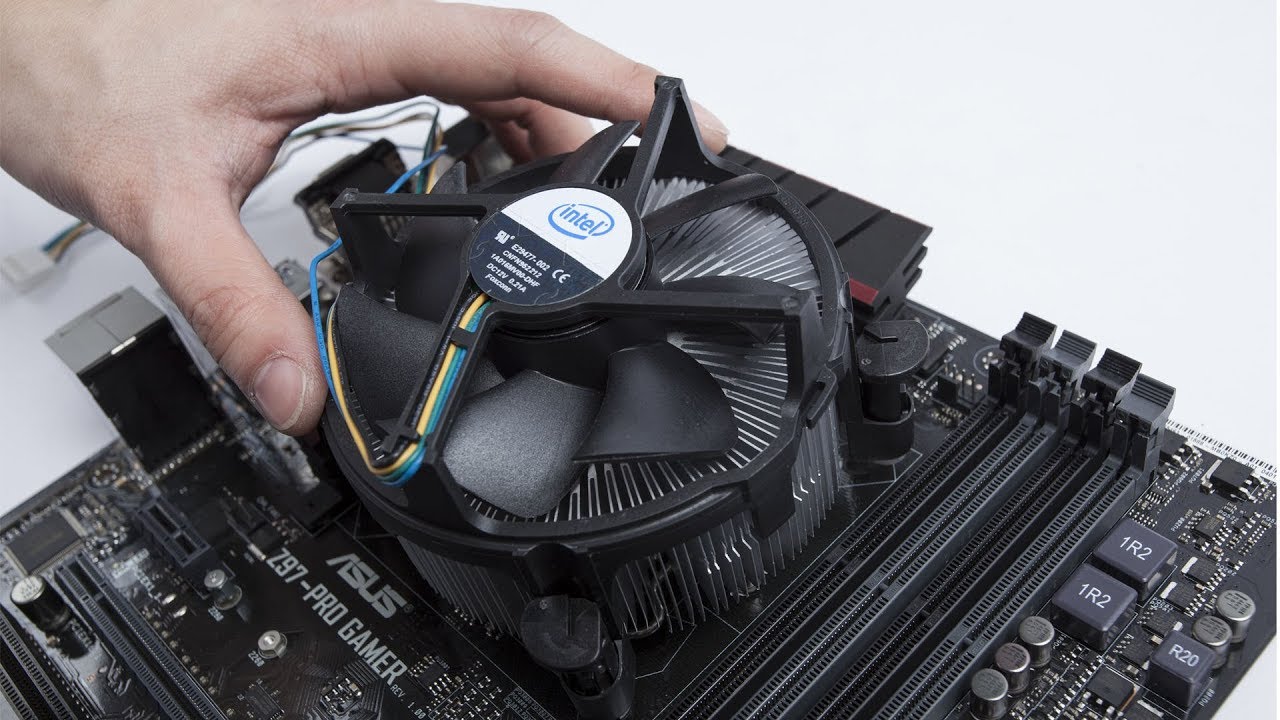
- Locate the CPU cooler: The CPU cooler is typically positioned on top of the CPU socket. It consists of the heatsink, which is in direct contact with the CPU, and the fan, which helps to dissipate heat.
- Identify the CPU cooler mounting mechanism: Different CPU coolers employ different mounting mechanisms, such as brackets, clips, or screws. Take a moment to identify the specific mounting mechanism used by your CPU cooler.
- Refer to the motherboard manual or manufacturer’s instructions: Before proceeding with the removal, consult your motherboard manual or the CPU cooler manufacturer’s instructions for guidance. They will provide specific and detailed instructions tailored to your particular model.
- Remove any retention mechanisms: If your CPU cooler has any retention mechanisms, such as brackets or clips, carefully detach them according to the instructions provided. Be gentle and take your time to avoid any damage to the CPU or motherboard.
- Unscrew the CPU cooler (if applicable): If your CPU cooler is secured by screws, grab a screwdriver that fits the screws and carefully unscrew them. As you unscrew, hold the CPU cooler to prevent it from accidentally falling or putting pressure on the CPU.
- Lift the CPU cooler off the CPU socket: Once all the retention mechanisms or screws are removed, gently and evenly lift the CPU cooler off the CPU socket. Be cautious not to twist or tilt the CPU cooler as you lift it.
- Place the CPU cooler on a clean, static-free surface: After removing the CPU cooler, find a safe and clean surface where you can place it temporarily. Make sure the surface is free from any static electricity to prevent damage to the sensitive electronic components.
By following these steps, you have successfully removed the CPU cooler from your system. Take extra care during this process to avoid damaging the CPU or motherboard. Now that the CPU cooler is detached, we can move on to the next step of cleaning the CPU cooler components.
Use compressed air to remove loose dirt and dust
Once you have safely removed the CPU cooler from your system, it’s time to remove any loose dirt and dust using compressed air. This step will help dislodge and blow away the debris that has accumulated on the heatsink and fan blades. Follow these steps to effectively clean with compressed air:
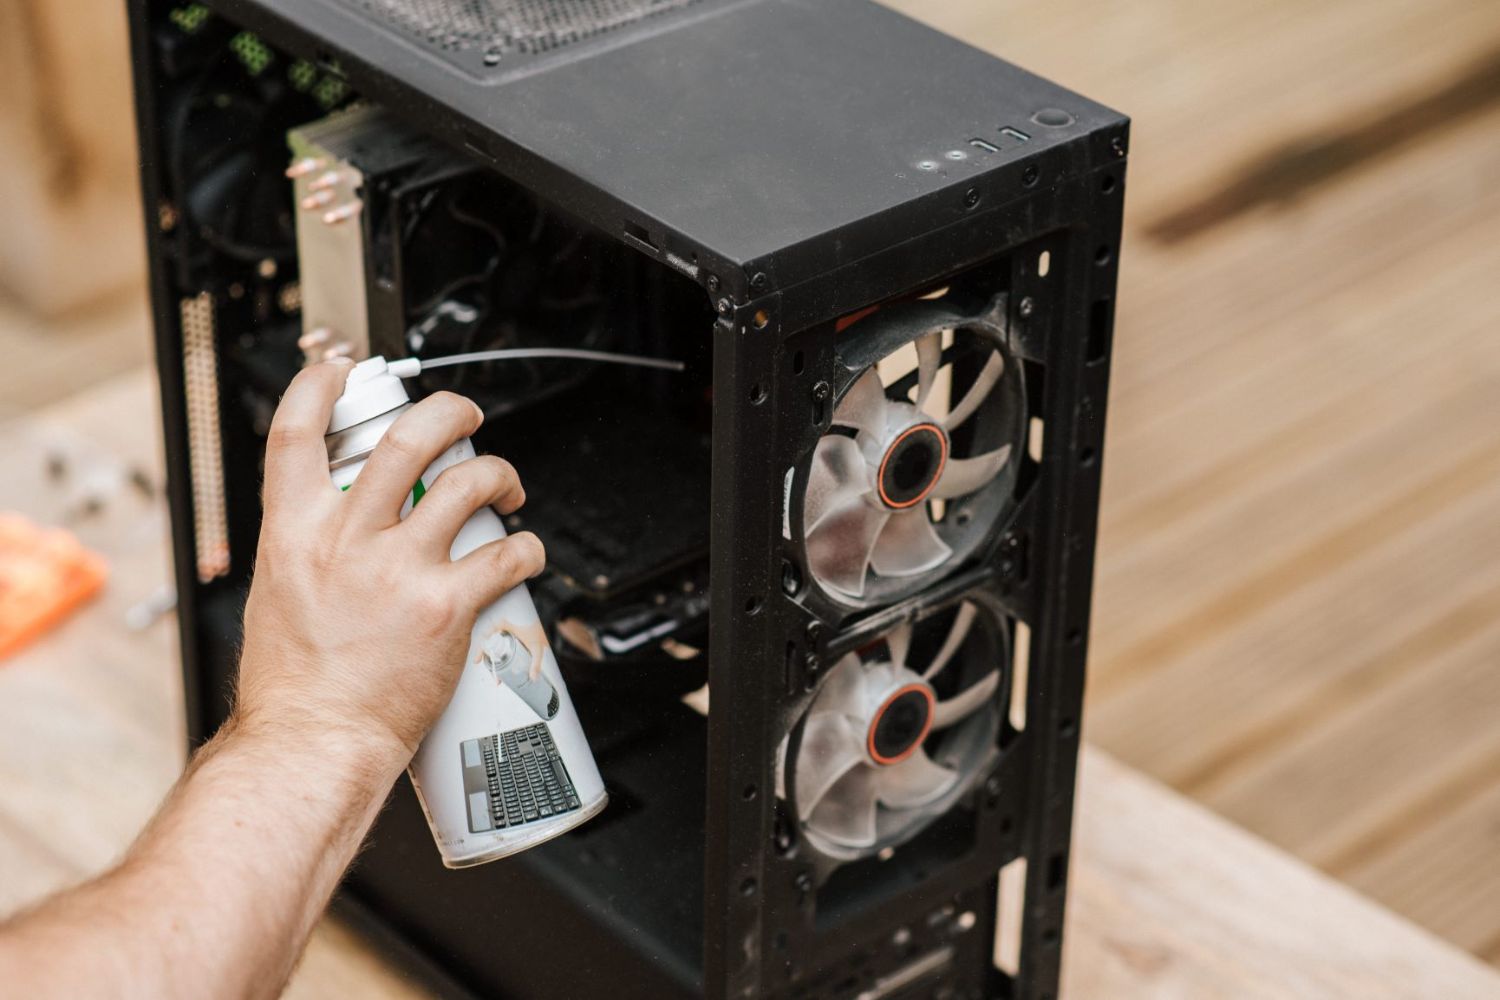
- Prepare the can of compressed air: Ensure that you have a can of compressed air ready for use. Hold the can upright and keep it at a safe distance (about 2-3 inches) from the CPU cooler components.
- Blow away loose dirt and dust: Begin by directing the nozzle of the compressed air can towards the heatsink and fan blades. Using short bursts of air, blow away the loose dirt and dust particles. Start from a distance and gradually move closer if necessary, but be cautious not to get too close to avoid damaging any delicate components.
- Pay attention to hard-to-reach areas: While blowing the compressed air, pay extra attention to hard-to-reach areas, such as the narrow gaps between the heatsink fins or the crevices of the fan blades. Use the air pressure to dislodge the dirt and ensure it is blown out and away from the CPU cooler.
- Work methodically: Work in a methodical manner, moving across the entire surface of the heatsink and fan blades. Ensure that you cover all areas and blow away as much dirt and dust as possible.
- Repeatedly blow until clean: If necessary, repeat the process of blowing compressed air until the heatsink and fan blades appear clean and free from debris. Take your time and be thorough to achieve the best results.
Using compressed air is an efficient and safe method to remove loose dirt and dust from your CPU cooler. However, keep in mind that compressed air alone may not be sufficient for stubborn or stuck-on dirt. We’ll cover how to deal with those in the following steps.
Now that you have effectively removed loose dirt and dust using compressed air, we can proceed to the next step of cleaning the heatsink with a brush or soft cloth.
Clean the heatsink with a brush or soft cloth
Once you have used compressed air to remove loose dirt and dust from your CPU cooler, it’s time to clean the heatsink. The heatsink plays a critical role in dissipating heat from the CPU, so it’s important to ensure that it is free from any debris. Follow these steps to properly clean the heatsink:
- Inspect the heatsink: Carefully examine the heatsink for any remaining dirt or dust. Pay close attention to the fins and the areas between them, as these are the most common places where debris can accumulate.
- Use a brush or soft cloth: Take a soft brush or cloth and gently brush or wipe the heatsink to remove any remaining dirt or dust. Be careful not to apply excessive force that could bend or damage the fragile fins.
- Work in one direction: When cleaning the heatsink, it’s best to work in one direction, preferably in the direction of the fins. This will help dislodge and remove the dirt more effectively.
- Take your time: Cleaning the heatsink may require some patience, especially if there are stubborn stains or residue. Take your time and be thorough, ensuring that you clean each fin and crevice on the heatsink.
- Inspect for cleanliness: After cleaning, inspect the heatsink again to ensure it is free from dirt, dust, and any other debris. This will help ensure optimal cooling performance.
If the heatsink is heavily soiled or has stuck-on dirt or residue, you can use a mild solution of isopropyl alcohol. Dampen a cloth or q-tip with the isopropyl alcohol and gently wipe the affected areas. Make sure to use a high concentration of isopropyl alcohol (at least 90%) and avoid saturating the heatsink with the solution.
Once you have thoroughly cleaned the heatsink, you can move on to the next step of cleaning the fan blades.
Clean the fan blades
After cleaning the heatsink, it’s time to clean the fan blades of your CPU cooler. The fan blades help circulate air and play a crucial role in maintaining airflow and cooling efficiency. Here’s how to effectively clean the fan blades:
- Visual inspection: Take a close look at the fan blades to identify any visible dirt, dust, or debris. Pay attention to the areas between the blades and the center hub, as these areas tend to accumulate more dirt.
- Brushing or wiping: Gently brush the fan blades with a soft brush or wipe them with a soft cloth. Use a delicate touch to avoid bending or damaging the blades. Be thorough and make sure to clean both sides of each blade.
- Stuck-on dirt or residue: If there is any stubborn dirt or residue on the fan blades, you can dampen a cotton swab or q-tip with a small amount of isopropyl alcohol. Carefully and lightly rub the affected areas to remove the dirt. Avoid using excessive moisture to prevent damage to the fan motor or other components.
- Repeat as needed: If necessary, repeat the brushing or wiping process until the fan blades appear clean and free from dirt or debris. Take your time and ensure that each blade is thoroughly cleaned.
- Allow the fan blades to dry: After cleaning, allow the fan blades to air dry completely before reinstalling the CPU cooler. This will prevent the accumulation of moisture, which could lead to potential damage or malfunctions.
By cleaning the fan blades, you ensure that the CPU cooler operates at its best by maintaining proper airflow and preventing any obstruction that could affect cooling efficiency. Cleaning the fan blades will also help reduce noise caused by accumulated dust on the blades.
Once you have cleaned the fan blades, you are now ready to reinstall the CPU cooler and complete the cleaning process.
Reinstall the CPU cooler
After you have thoroughly cleaned the heatsink and fan blades, it’s time to reinstall the CPU cooler. Proper installation is crucial for effective cooling and overall stability. Follow these steps to reinstall the CPU cooler:
- Refer to the motherboard manual: Before proceeding with the reinstallation, refer to your motherboard manual for specific guidance on how to properly install the CPU cooler. Each motherboard may have slightly different instructions.
- Apply thermal paste (if required): Depending on the type of CPU cooler you have, you may need to apply thermal paste on the CPU before reinstalling the cooler. Refer to the manufacturer’s instructions for the correct amount and application method. Thermal paste helps improve heat conductivity between the CPU and the cooler.
- Align the CPU cooler: Carefully align the CPU cooler over the CPU socket. Ensure that the mounting holes or brackets on the cooler are aligned with the corresponding holes or brackets on the motherboard.
- Secure the CPU cooler: Once aligned, gently press the CPU cooler down onto the CPU socket, ensuring that it is securely in place. Depending on your CPU cooler, you may need to use brackets, clips, or screws to secure it. Follow the manufacturer’s instructions for the proper installation method.
- Tighten screws securely: If your CPU cooler uses screws for installation, tighten them in a diagonal pattern to ensure even pressure. Avoid over-tightening to prevent any damage to the motherboard or CPU cooler.
- Double-check the installation: After securing the CPU cooler, double-check that it is properly mounted and securely attached. Make sure there is no wobbling or loose connection that could affect cooling performance.
- Reconnect any cables: Reconnect any cables that were disconnected during the removal process, such as the CPU fan cable or any RGB lighting cables. Ensure that they are properly plugged in and secured.
Once you have successfully reinstalled the CPU cooler and reconnected any necessary cables, you can proceed to the final words of advice to ensure your CPU cooler remains clean and efficient.
Final words of advice
Congratulations, you have successfully cleaned and reinstalled your CPU cooler! Following these steps will help maintain optimal cooling performance and ensure the longevity of your computer. Here are some final words of advice to keep in mind:
- Regular cleaning: Make it a habit to clean your CPU cooler regularly. Depending on your environment, it is recommended to clean it every 3 to 6 months to prevent excessive dust buildup and maintain efficient cooling.
- Monitor temperatures: Keep an eye on your CPU temperatures using monitoring software. High temperatures may indicate a need for more frequent cleaning or other cooling adjustments.
- Maintain a clean environment: Minimize the amount of dust and dirt in your computer environment by keeping the area clean. Regularly dust your computer desk, vacuum the surrounding area, and consider using an air purifier to reduce airborne particles.
- Handle components carefully: When cleaning or handling your CPU cooler and other computer components, ensure that you are grounded to prevent static electricity discharge. Use an antistatic wrist strap if available and handle the parts with care to avoid any accidental damage.
- Follow manufacturer’s instructions: Always refer to the manufacturer’s instructions for your specific CPU cooler model. They may provide additional cleaning advice or maintenance recommendations tailored to your particular cooler.
- Keep your overall system clean: While cleaning the CPU cooler is important, don’t forget to clean other components of your computer, such as the case fans, power supply, and filters. A clean system ensures better overall performance and longevity.
- Consider upgrading if necessary: If you notice that your CPU temperatures remain high even after cleaning, or if you experience performance issues, it may be time to consider upgrading your CPU cooler to a more efficient model.
By following these tips, you can ensure that your CPU cooler remains clean, efficient, and provides optimal cooling performance for your system. Remember, a well-maintained CPU cooler leads to a longer lifespan for your computer components. Now, go ahead and enjoy a cooler and smoother computing experience!
Conclusion
Cleaning your CPU cooler is an essential task that ensures optimal cooling performance and prolongs the life of your computer. By following the step-by-step guide we have provided, you can effectively remove dirt, dust, and debris from the heatsink and fan blades, maintaining efficient heat dissipation and preventing overheating.
Throughout this guide, we emphasized the importance of regularly cleaning your CPU cooler and provided detailed instructions on how to properly clean and reinstall it. We discussed the tools you will need, including compressed air, brushes, soft cloths, isopropyl alcohol, cotton swabs, and a screwdriver. We also highlighted the significance of safety measures, such as shutting down your computer, unplugging it, and handling components with care.
Remember, a clean CPU cooler not only improves cooling efficiency but also contributes to a quieter computing experience and better overall system performance. Regular maintenance of your CPU cooler is essential to prevent overheating, system instability, and potential hardware damage.
Furthermore, we provided final words of advice, which emphasized the importance of regular cleaning, monitoring temperatures, maintaining a clean environment, handling components carefully, following manufacturer’s instructions, keeping the overall system clean, and considering upgrading if necessary.
By incorporating these practices into your computer maintenance routine, you can ensure that your CPU cooler operates optimally, providing efficient cooling and prolonging the life of your computer components.
Now that you have the knowledge and guidance on cleaning your CPU cooler, take the necessary steps to keep it in top condition. Your computer will thank you with improved performance, reduced noise levels, and a longer lifespan.