Introduction
Welcome to our guide on how to change your MacBook Pro to a solid state drive (SSD). Upgrading your MacBook’s hard drive to an SSD can significantly improve its performance, speed up boot times, and enhance overall user experience. In this article, we will walk you through the step-by-step process of upgrading your MacBook Pro to an SSD.
Before we begin, it’s important to note that changing the hard drive on your MacBook Pro may void your warranty. We recommend consulting your laptop’s manufacturer or authorized service center for guidance if you are concerned about your warranty status.
Replacing the traditional hard drive with an SSD involves physically removing the existing drive and installing the new SSD in its place. Additionally, you will need to transfer your data from the old drive to the new one once the installation is complete.
Upgrading to an SSD offers numerous benefits such as improved speed, reduced power consumption, and increased durability. SSDs use flash memory instead of magnetic disks, resulting in faster read/write speeds and higher reliability. This makes them a popular choice for MacBook Pro users looking to maximize the performance of their machines.
Now that we’ve covered the basics, let’s get started with the process of changing your MacBook Pro to an SSD. Don’t forget to back up your data before proceeding!
Backup your Data
Before you begin the process of changing your MacBook Pro to an SSD, it’s crucial to back up your data to ensure that you don’t lose any important files or documents. Follow these steps to back up your data:
- Time Machine Backup: Connect an external hard drive to your MacBook Pro and set up a Time Machine backup. Time Machine is a built-in feature of macOS that allows you to automatically back up your files, applications, and system settings. Once the backup is complete, you can restore your data onto the new SSD.
- Cloud Storage: If you prefer to store your data in the cloud, consider using services like iCloud, Google Drive, Dropbox, or OneDrive. These platforms offer storage space where you can upload and sync your files. Make sure to transfer any important files or folders to the cloud storage platform of your choice.
- External Hard Drive: If you don’t have access to cloud storage or prefer a physical backup, you can manually copy your important files onto an external hard drive. Simply connect the external hard drive to your MacBook Pro, locate the files you want to back up, and drag and drop them onto the external drive.
Whichever method you choose, ensure that your data is fully backed up and accessible before proceeding to the next steps. It’s better to be safe than sorry when it comes to safeguarding your important files!
Gather Necessary Tools and Materials
Before you can start upgrading your MacBook Pro to an SSD, it’s important to gather all the necessary tools and materials. Here is a list of items you will need:
- SSD: Select a compatible solid state drive (SSD) for your MacBook Pro. Ensure that it is the correct size (2.5-inch for most models) and has the appropriate interface (SATA or NVMe) for your specific MacBook Pro model.
- Screwdriver: You will need a small Phillips screwdriver to remove the screws holding your MacBook Pro’s bottom case in place.
- Anti-static wrist strap: To protect your MacBook Pro and the internal components from static electricity, use an anti-static wrist strap. This will help prevent any accidental static discharge that could potentially damage your laptop.
- External storage: It’s a good idea to have an external storage device, such as a USB flash drive or an external hard drive, to store your data backup. This will ensure that your files are safe and easily accessible during the upgrade process.
- Clean, flat surface: Find a clean and stable surface where you can work on your MacBook Pro comfortably. A flat, non-static surface such as a table or desk is ideal.
- Microfiber cloth: For cleaning purposes, have a microfiber cloth ready. This will allow you to gently clean any dust or fingerprints from your MacBook Pro without scratching the surface.
- Adhesive strips (optional): Some SSD upgrades may require adhesive strips to secure the SSD in place. Check the installation instructions or consult the SSD manufacturer’s guidelines to determine if adhesive strips are necessary for your specific model.
By gathering these tools and materials before you start, you’ll be well-prepared for the upgrading process and can ensure a smooth and hassle-free experience.
Choose the Right SSD for Your MacBook Pro
When upgrading your MacBook Pro to a solid state drive (SSD), it’s essential to choose the right SSD that is compatible with your specific model. Here are some factors to consider when selecting an SSD:
- Interface: Determine the interface type of your MacBook Pro to ensure compatibility with the SSD. Most MacBook Pro models use either a SATA or NVMe interface. SATA drives have a maximum transfer speed of 6 Gbps, while NVMe drives offer much faster speeds of up to 32 Gbps. Check your MacBook Pro’s specifications or consult the manufacturer’s guidelines to determine the appropriate interface.
- Capacity: Consider the storage capacity you need for your MacBook Pro. SSDs are available in various sizes, ranging from 128GB to 4TB or more. Assess your storage requirements, keeping in mind your current usage and anticipated future needs.
- Form Factor: Check the physical size of the SSD. Most MacBook Pro models require a 2.5-inch form factor SSD, but newer models might require M.2 or PCIe SSDs. Verify the form factor supported by your MacBook Pro to ensure compatibility.
- Brand and Reliability: Consider the reputation and reliability of the SSD brand. Opt for brands that are known for producing high-quality, durable drives that offer good performance and longevity.
- Price: Compare prices of different SSD options while considering the storage capacity, brand, and performance. Set a budget and look for the best value for your money.
- Reviews: Read customer reviews and feedback on various SSD models to get an idea of their performance, reliability, and compatibility with MacBook Pro systems. These reviews can provide valuable insights to help you make an informed decision.
By considering these factors, you can select the right SSD that meets your specific requirements and ensures optimal performance and compatibility with your MacBook Pro.
Shut Down Your MacBook Pro
Before you begin the process of upgrading your MacBook Pro to an SSD, it’s important to shut down your laptop properly to avoid any potential damage or data loss. Here’s how to shut down your MacBook Pro:
- Save your work: Make sure you save any open documents or files that you are working on. This will ensure that you don’t lose any unsaved progress during the shutdown process.
- Close all applications: Close any running applications on your MacBook Pro. This will prevent any data corruption or conflicts during the shutdown process.
- Click on the Apple menu: Located at the top-left corner of the screen, click on the Apple logo to open the dropdown menu.
- Choose “Shut Down”: From the dropdown menu, select the “Shut Down” option. This will initiate the shut down process for your MacBook Pro.
- Wait for the shutdown to complete: Allow your MacBook Pro some time to shut down completely. You may notice the screen going blank and the Apple logo disappearing. Do not interrupt the shutdown process.
Once your MacBook Pro has shut down, you can proceed with the next steps in the SSD installation process. It’s important to ensure that your laptop is fully powered off before proceeding to avoid any electrical or hardware issues.
Remove the Bottom Case
Now that your MacBook Pro is shut down, it’s time to remove the bottom case to gain access to the internal components. Follow these steps to remove the bottom case:
- Gather the necessary tools: Ensure that you have a small Phillips screwdriver handy, as you will need it to remove the screws holding the bottom case in place.
- Flip your MacBook Pro: Turn your MacBook Pro over so that the bottom side is facing up. Place it on a clean and stable surface.
- Locate the screws: Look for the screws on the bottom case of your MacBook Pro. They are typically located along the bottom edges of the laptop.
- Use the screwdriver: Carefully unscrew the screws holding the bottom case in place. Be sure to keep the screws in a safe place as you will need them when reassembling your MacBook Pro later.
- Remove the bottom case: Once you have unscrewed all the screws, gently lift the bottom case off your MacBook Pro. Take care not to force it or apply excessive pressure, as you don’t want to damage the internal components.
- Set aside the bottom case: Place the removed bottom case in a safe and clean location. You can use a soft cloth or a non-static surface to prevent any scratches or dust from accumulating on the case.
With the bottom case removed, you now have access to the internal components of your MacBook Pro. This will allow you to proceed with the next steps in the SSD installation process.
Unplug the Battery Connector
Before you can continue with upgrading your MacBook Pro to an SSD, it is crucial to unplug the battery connector to ensure the safety and prevent any electrical mishaps. Follow these steps to unplug the battery connector:
- Locate the battery connector: Inside your MacBook Pro, near the center of the logic board, you will find the battery connector. It is usually a white or blue connector with multiple wires connected to it.
- Prepare an anti-static surface: Before proceeding further, it is important to work on an anti-static surface. Place an anti-static mat or use an anti-static wrist strap to discharge any static electricity and protect your MacBook Pro.
- Disconnect the battery connector: Using your thumb and index finger, gently grip the sides of the battery connector and pull it straight up. Take care not to pull on the wires or apply excessive force. The connector should come off easily.
- Check for any residual power: After unplugging the battery connector, it’s a good practice to press and hold the power button for 10 seconds. This will discharge any remaining power from the MacBook Pro.
- Double-check the disconnection: Take a moment to ensure that the battery connector is completely disconnected. You should not see any visible wires still connected to the logic board.
Unplugging the battery connector is a vital step to ensure safety and prevent any accidental electrical current while working on your MacBook Pro’s internals. With the battery connector unplugged, you can proceed with the next steps in the SSD installation process.
Remove the Original Hard Drive
Now that you have successfully unplugged the battery connector, it’s time to remove the original hard drive from your MacBook Pro. Follow these steps to remove the original hard drive:
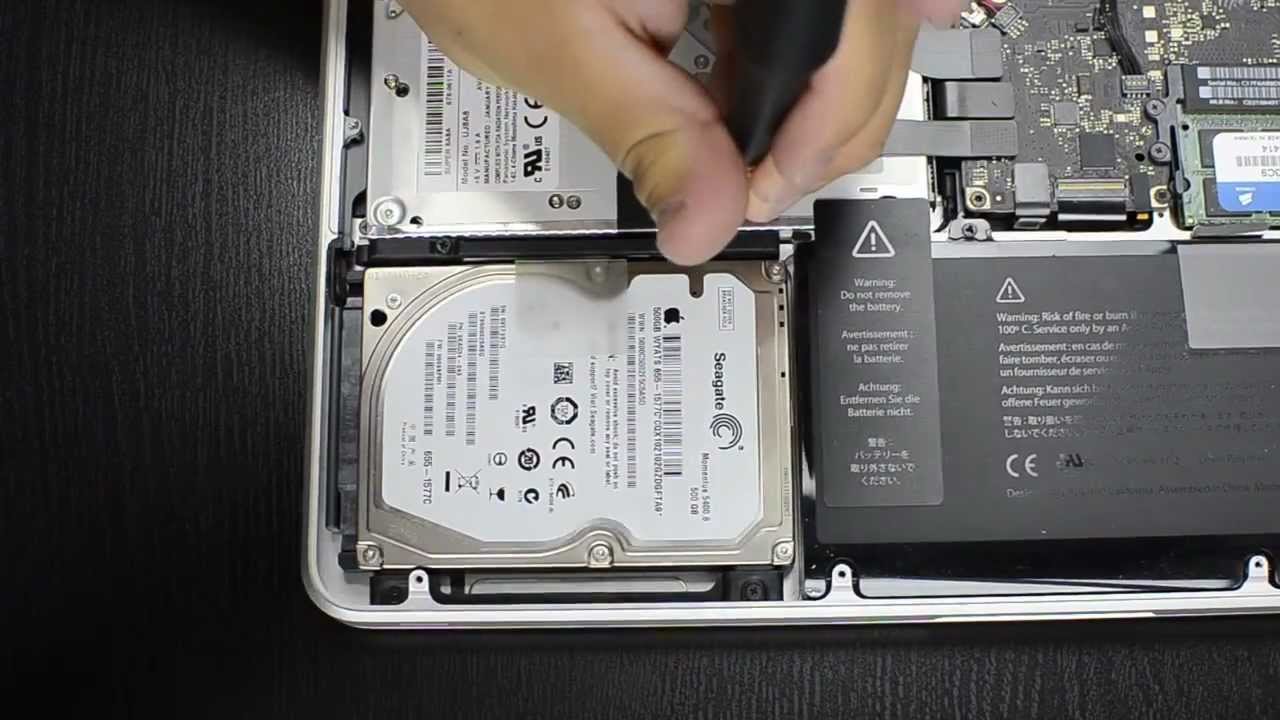
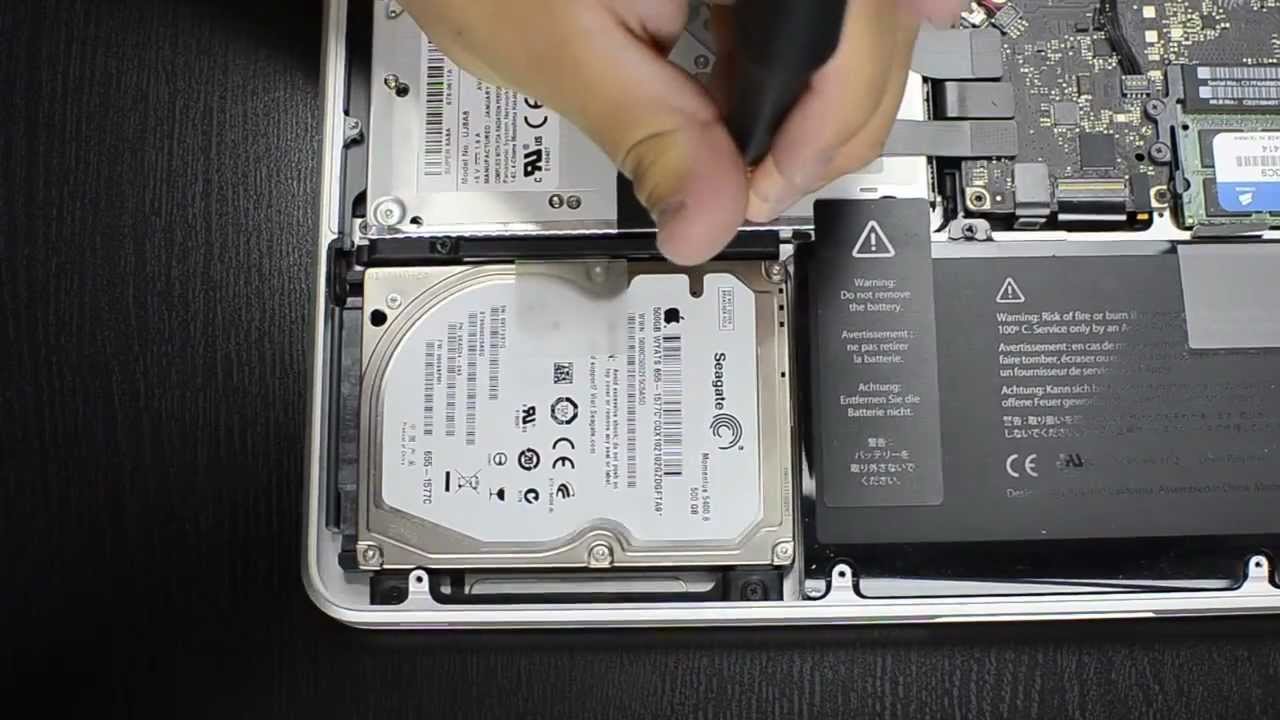
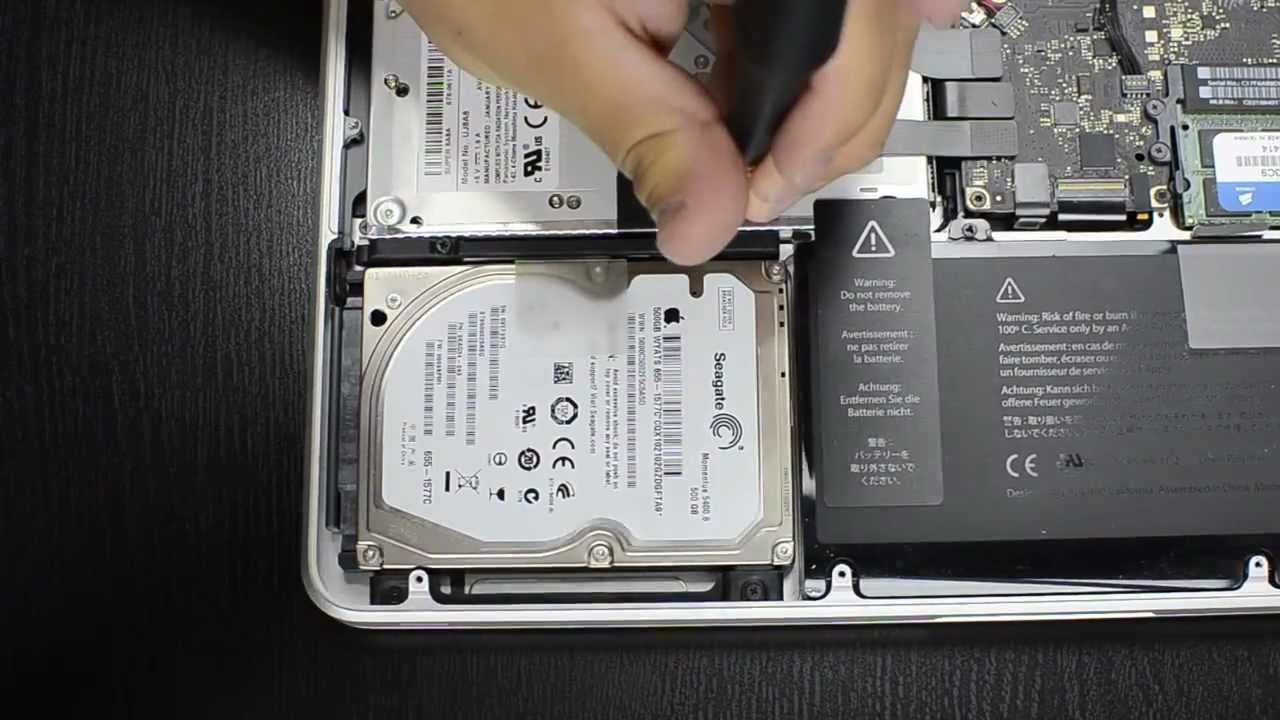
- Locate the hard drive: Inside your MacBook Pro, you will find the hard drive located near the center or side of the laptop, depending on the model. It is a rectangular component with a SATA connector and screws holding it in place.
- Identify the hard drive screws: Look for the screws that secure the hard drive to the laptop. There are usually two to four screws that hold the hard drive in place. Use a Phillips screwdriver to remove these screws.
- Gently disconnect the SATA connector: Once the screws are removed, carefully pull the SATA connector out of its socket to disconnect it from the hard drive. Take care not to pull on the wires or use excessive force.
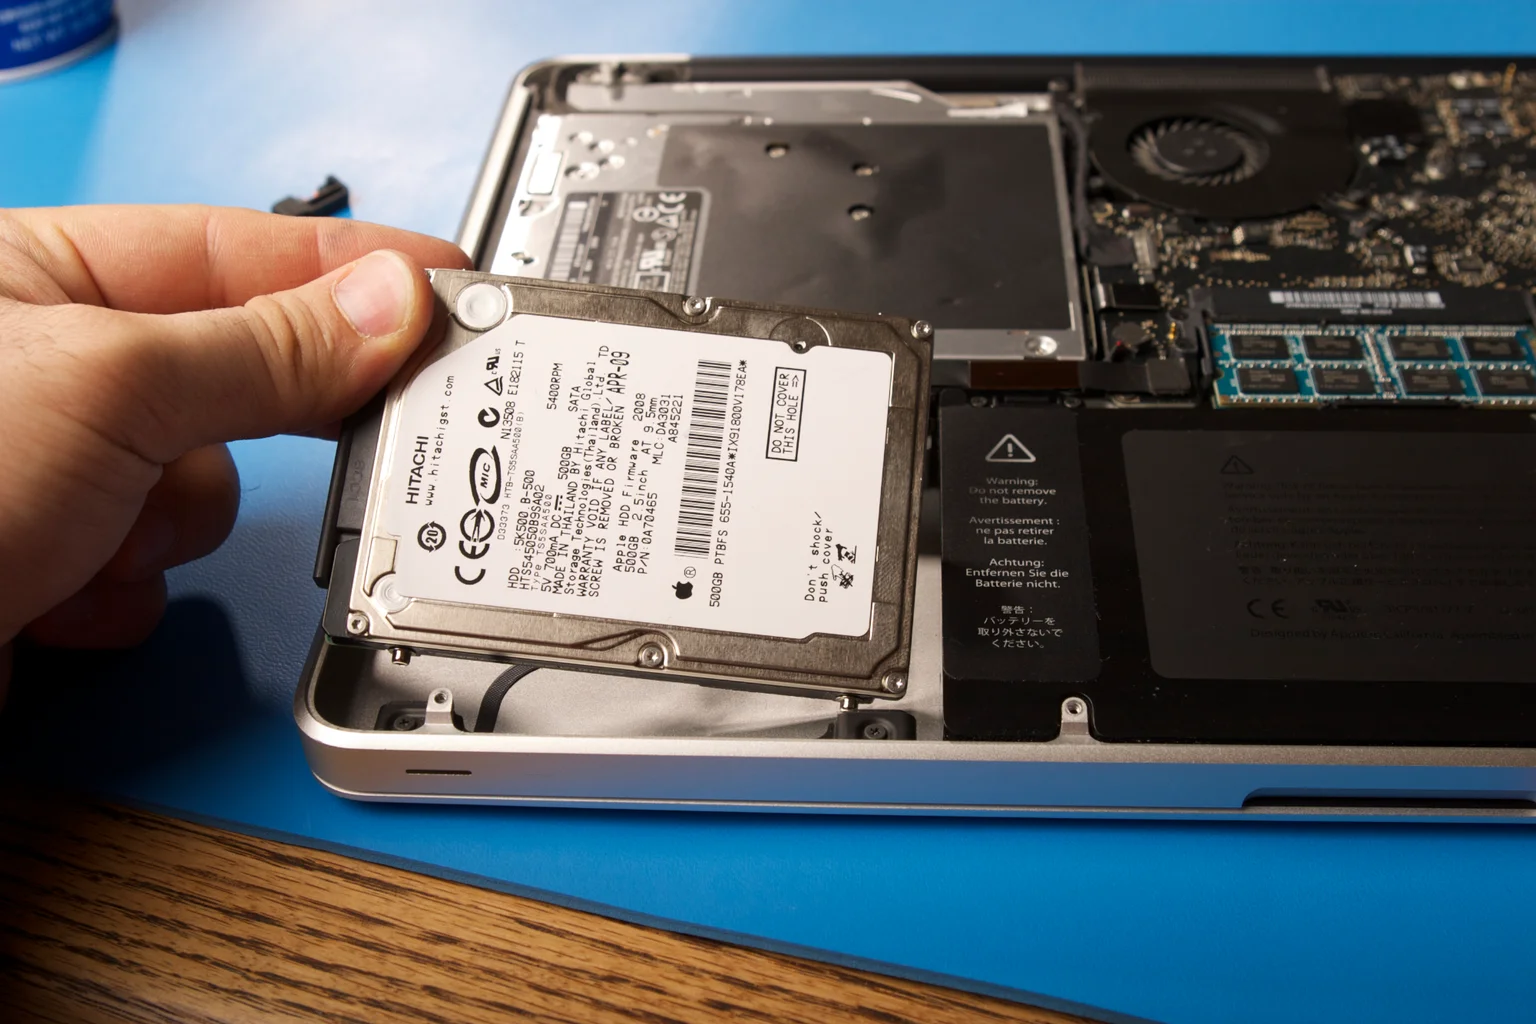
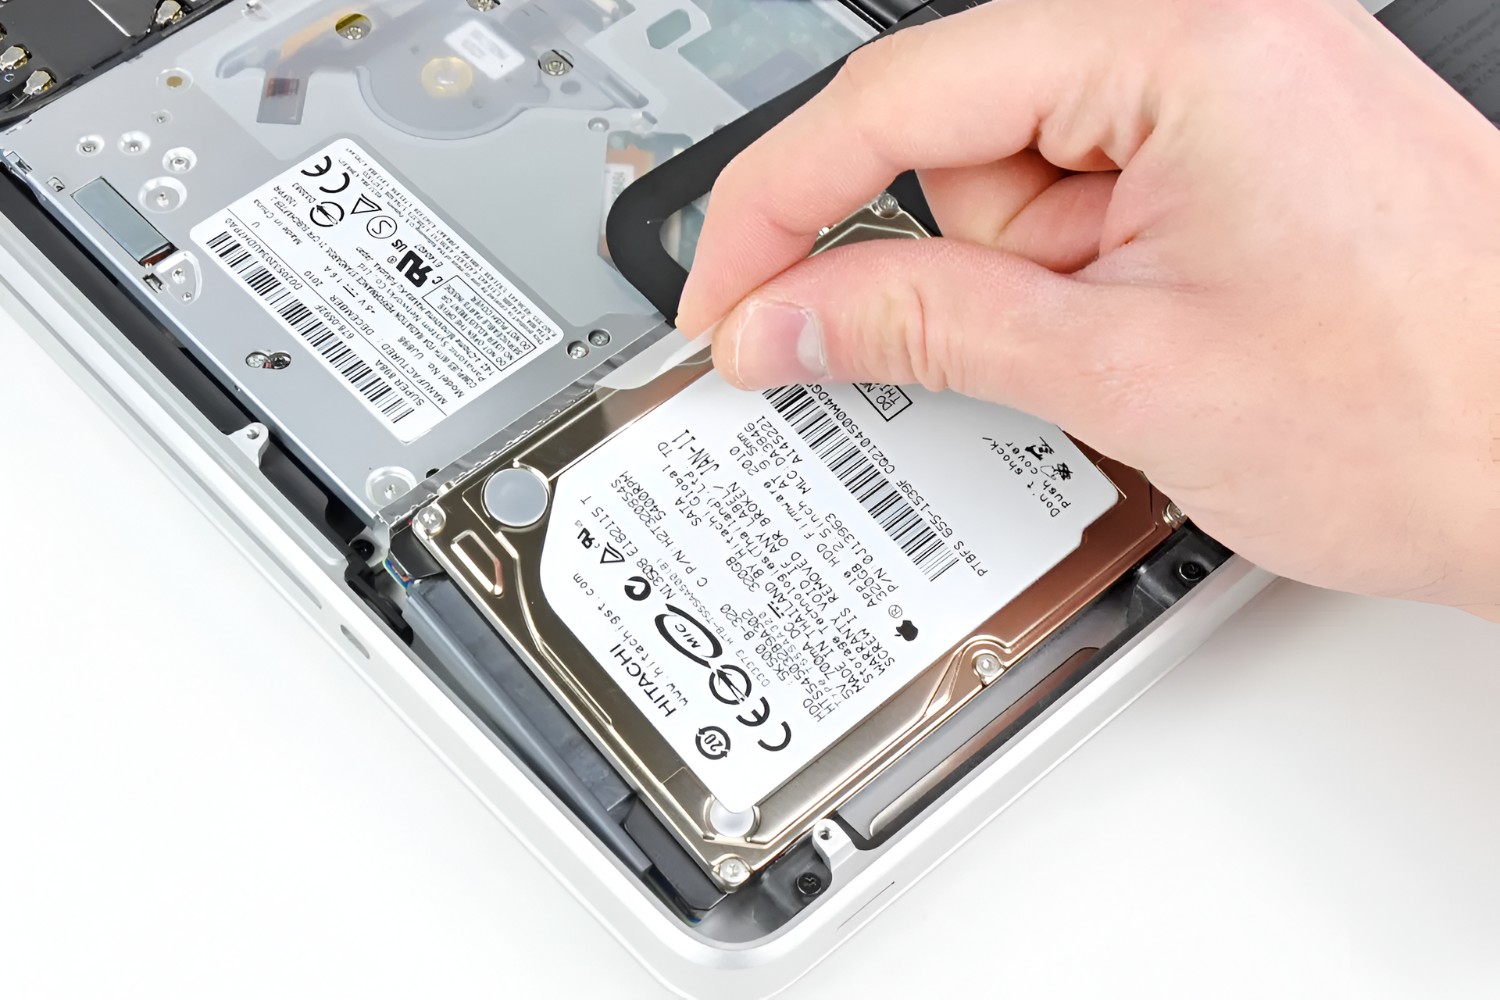
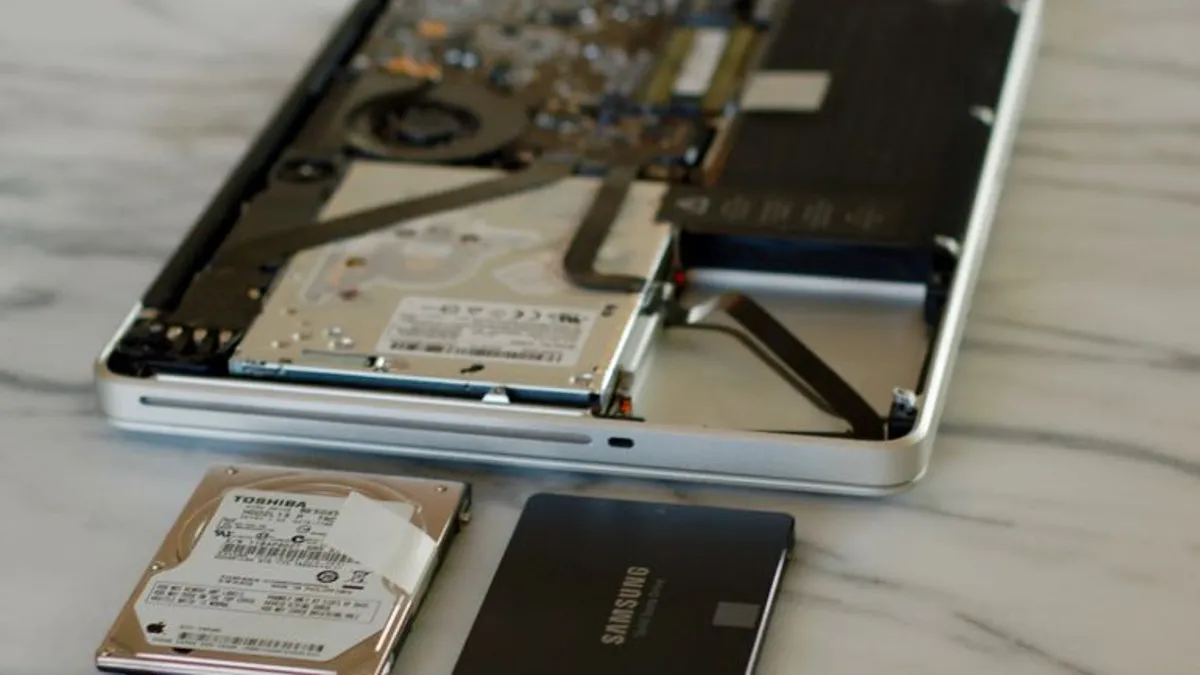
- Remove the hard drive: With the SATA connector disconnected, you can now remove the original hard drive from your MacBook Pro. Slide it out of its slot or lift it up, depending on the mechanism used in your specific model.
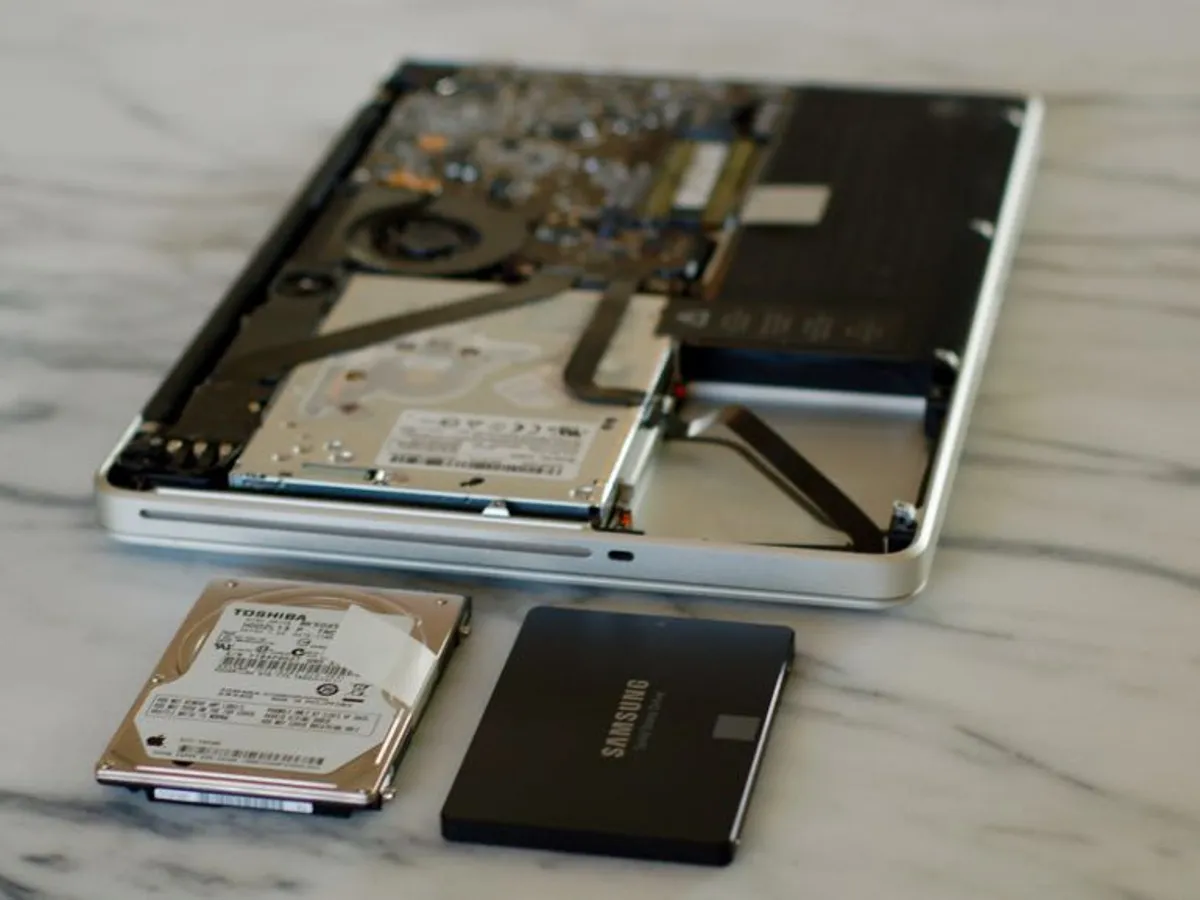
- Set aside the original hard drive: Place the removed hard drive in a safe and clean location. You may want to keep it as a backup or repurpose it for other uses if it’s still in working condition.
With the original hard drive removed, you have made way for the installation of your new SSD in your MacBook Pro. Keep the screws and the original hard drive in a secure place as you may need them later for reassembly.
Install the SSD in its Place
Now that you have removed the original hard drive from your MacBook Pro, it’s time to install the new solid state drive (SSD). Follow these steps to install the SSD:
- Prepare the SSD: Remove the new SSD from its packaging and handle it with care. Avoid touching the gold connectors to prevent any damage from static electricity or fingerprints.
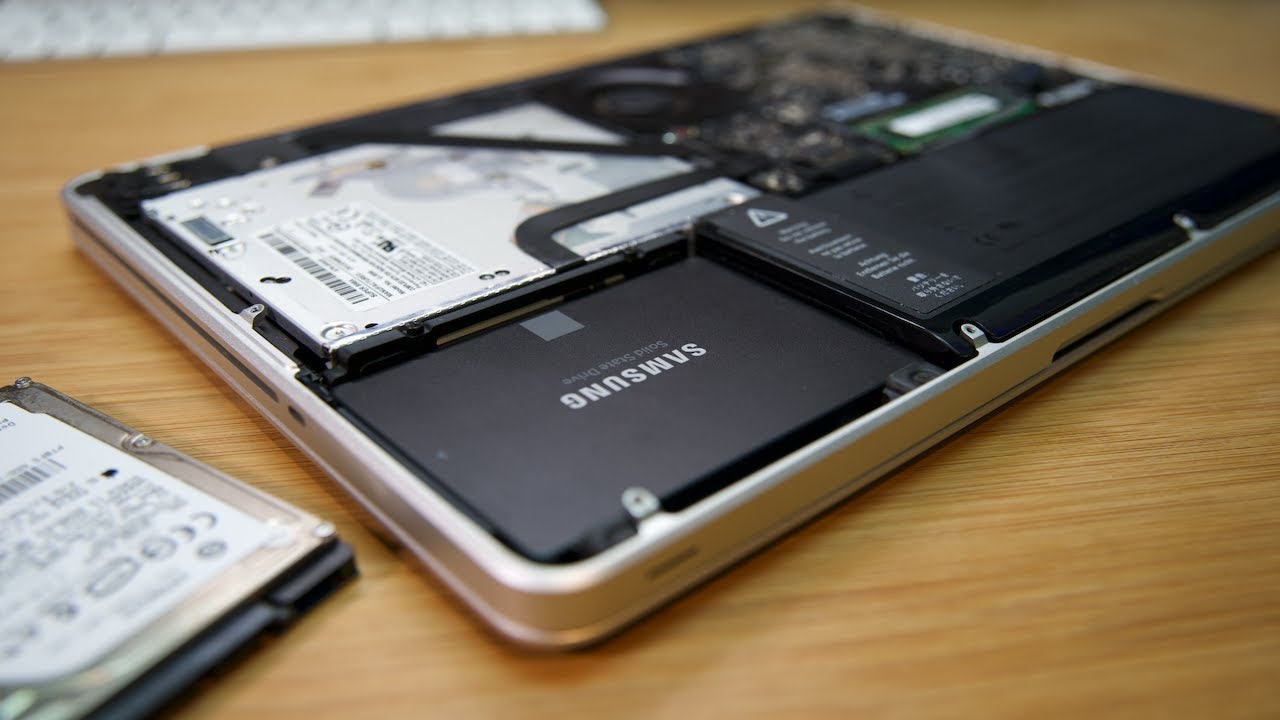
- Align the SSD: Locate the slot where the original hard drive was installed. Align the SSD with the connector in the slot, ensuring that it matches the orientation of the slot.
- Insert the SSD: Gently slide the SSD into the slot, making sure it is fully inserted and properly aligned. Take care not to force it or apply excessive pressure.
- Secure the SSD: Once the SSD is inserted, use the screws that were removed from the original hard drive to secure the new SSD in place. Tighten the screws, but be cautious not to overtighten them.
- Reconnect the SATA connector: Locate the SATA connector on the SSD and gently plug it back into its socket, ensuring a secure connection. Be careful not to pull on the wires or use excessive force.
- Double-check the installation: Take a moment to ensure that the SSD is properly installed and secured. Verify that all connectors are attached securely and that the SSD is aligned correctly.
With the SSD installed in its place, you are ready to proceed with the next steps in the SSD installation process. The new SSD will provide improved performance and faster data access for your MacBook Pro.
Reconnect the Battery Connector
Now that the SSD is installed in your MacBook Pro, it’s time to reconnect the battery connector to restore power to your laptop. Follow these steps to reconnect the battery connector:
- Locate the battery connector: Inside your MacBook Pro, near the center of the logic board, you will find the battery connector. It is usually a white or blue connector with multiple wires connected to it.
- Align the battery connector: Gently align the battery connector with its corresponding socket on the logic board. Take care to match the shape and orientation of the connector with the socket to ensure a proper fit.
- Connect the battery connector: Once aligned, carefully push the battery connector straight down into the socket on the logic board. Apply gentle pressure until you feel a click or until the connector is securely in place.
- Verify the connection: After connecting the battery, ensure that there are no visible gaps between the connector and the socket. Double-check that the connector is fully inserted and seated properly.
- Remove the anti-static precautions: If you were using an anti-static wrist strap or working on an anti-static mat, you can now remove them. Store them safely for future use.
Once the battery connector is reconnected, you can move on to the next steps in the SSD installation process. Restoring power to your MacBook Pro is an important step to ensure proper functioning of the newly installed SSD.
Replace the Bottom Case
With the SSD installed and the battery connector reconnected, it’s time to replace the bottom case of your MacBook Pro. Follow these steps to properly reattach the bottom case:
- Position the bottom case: Align the bottom case with the edges of your MacBook Pro. Make sure it lines up correctly with the ports, vents, and screw holes.
- Secure the bottom case screws: Use the Phillips screwdriver to carefully insert and tighten the screws that hold the bottom case in place. Start with the corner screws and gradually work your way around the perimeter, ensuring that each screw is snug but not overtightened.
- Double-check the alignment: Take a moment to verify that the bottom case is properly aligned and flush with the rest of your MacBook Pro. Ensure that there are no gaps or misaligned sections.
- Clean the exterior: Use a microfiber cloth or a soft, lint-free cloth to gently wipe any smudges or fingerprints off the exterior of your MacBook Pro. This will help restore its clean and polished appearance.
- Power on your MacBook Pro: Press the power button to turn on your MacBook Pro. If everything is reassembled correctly, your MacBook Pro should boot up normally.
With the bottom case securely in place, your MacBook Pro is now fully reassembled and ready to be used with the new SSD. Enjoy the improved performance and enhanced efficiency that the SSD brings to your MacBook Pro!
Power on your MacBook Pro
With the bottom case secured and all the necessary connections made, it’s time to power on your MacBook Pro and ensure that everything is functioning properly. Follow these steps to power on your MacBook Pro:
- Check the battery: Confirm that your MacBook Pro is connected to a power source or that the battery has sufficient charge. This will prevent any unexpected shutdowns during the startup process.
- Press the power button: Locate the power button on your MacBook Pro’s keyboard. Press and hold it for a few seconds until you see the Apple logo or hear the startup chime.
- Observe the startup process: Once the MacBook Pro powers on, you should see the Apple logo on the screen. Pay attention to any error messages or abnormal behavior during the startup process.
- Login and test the SSD: If the startup process completes without any issues, you will be prompted to log in to your MacBook Pro. Enter your credentials and proceed to the desktop. Open a few applications and perform some tasks to test the responsiveness and speed of the new SSD.
- Verify storage capacity: Go to the “About This Mac” option in the Apple menu and click on “Storage” to check if your MacBook Pro recognizes the new SSD and displays the correct storage capacity.
- Ensure data transfer success: Double-check your data backup and ensure that all your important files, applications, and settings have been successfully transferred to the new SSD. Open various files and folders to ensure that everything is intact and accessible.
If your MacBook Pro starts up smoothly and you can access your data without any issues, congratulations! You have successfully upgraded your MacBook Pro to an SSD. Enjoy the improved performance and faster data access that your new SSD provides.
Format and Initialize the New SSD
After successfully powering on your MacBook Pro with the new SSD, it’s important to format and initialize the SSD to ensure its proper functionality and compatibility with the macOS. Follow these steps to format and initialize the new SSD:
- Access Disk Utility: Open the “Finder” and navigate to the “Applications” folder. From there, go to the “Utilities” folder and launch “Disk Utility.”
- Select the new SSD: In the Disk Utility window, locate the new SSD in the list of available drives. It should be recognized as a separate disk, typically labeled by the SSD manufacturer and its capacity.
- Erase the SSD: Select the new SSD and click on the “Erase” button at the top of the Disk Utility window. Choose a name for the SSD and select the appropriate format (preferably APFS for macOS Sierra and later versions) and scheme (usually GUID Partition Map).
- Confirm the erasure: A warning message will appear, informing you that erasing the SSD will permanently delete all data on it. Ensure that you have backed up all necessary data from the old drive before proceeding. Click “Erase” to confirm the process.
- Wait for the formatting to complete: Disk Utility will format and initialize the new SSD. The process may take a few minutes, depending on the size of the SSD.
- Verify the formatted SSD: Once the formatting is complete, the new SSD will appear as a formatted drive in Disk Utility, ready to be used as a storage device.
With the SSD formatted and initialized, it’s ready to be utilized by your MacBook Pro. You can now proceed to transfer your data from the backup onto the new SSD and enjoy the improved performance and storage capabilities it offers.
Transfer Your Data to the New SSD
Now that you have successfully formatted and initialized the new SSD, it’s time to transfer your data from the backup to the SSD. Follow these steps to transfer your data:
- Connect your data backup: If you backed up your data to an external hard drive or cloud storage, connect the backup device to your MacBook Pro.
- Use Time Machine (if applicable): If you used Time Machine to back up your data, you can easily restore your files. Go to “System Preferences” and click on “Time Machine.” Select “Restore from Time Machine Backup” and follow the prompts to select the backup source and restore your files.
- Manually transfer files: If you backed up your data to an external hard drive or cloud storage, you can manually transfer the files. Open your backup device or cloud storage platform, locate your files, and copy them to the appropriate locations on the new SSD.
- Reinstall applications: If necessary, reinstall any applications you had on your MacBook Pro. Visit the respective websites or use the App Store to download and reinstall the applications onto the new SSD.
- Organize your files: Take the opportunity to declutter and organize your files on the new SSD. Create folders, sort files into appropriate categories, and ensure your data is well-organized for easy access in the future.
- Verify data transfer: Double-check that all your important files, folders, and applications have been successfully transferred to the new SSD. Open a few files and launch applications to ensure that everything is intact and functional.
By following these steps, you can successfully transfer your data from the backup to the new SSD. Enjoy the improved speed and performance of your MacBook Pro with the fresh installation and data transfer to the new SSD!
Conclusion
Congratulations! You have successfully upgraded your MacBook Pro to a solid state drive (SSD), a decision that will greatly enhance your laptop’s performance and overall user experience. By following the steps outlined in this guide, you were able to change the hard drive, format the new SSD, and transfer your data, ensuring a smooth and efficient transition.
Upgrading to an SSD offers numerous benefits, including faster boot times, quicker application launches, and improved file transfer speeds. The SSD’s use of flash memory instead of traditional magnetic disks enhances durability, reduces power consumption, and provides reliable and efficient storage for your MacBook Pro.
Throughout the process, it’s crucial to back up your data, choose the right SSD, handle the components with care, and follow the instructions meticulously. Additionally, take the time to properly format and initialize the new SSD, and ensure successful data transfer from your backup device.
With the new SSD installed and your data seamlessly transferred, you can now enjoy a more responsive and efficient MacBook Pro. Take advantage of the increased storage capacity and speedy performance to streamline your work, indulge in multimedia content, or tackle resource-intensive tasks with ease.
Remember, if you encounter any issues or uncertainties during the upgrade process, it’s always recommended to consult the manufacturer’s guidelines or seek professional assistance.
Thank you for following along with this guide, and we hope that your MacBook Pro with its new SSD provides you with optimal performance and an enhanced computing experience for years to come.


