Introduction
Welcome to our guide on how to change the IP address on a printer. In today’s digital age, printers have become an integral part of our lives, allowing us to bring our digital documents to life. However, from time to time, you may encounter situations where you need to change the IP address of your printer. This could be due to network configuration changes, IP conflicts, or simply to improve the performance of your printer.
Changing the IP address on a printer may sound like a complex task, but with the right guidance, it can be a straightforward process. By following the step-by-step instructions in this guide, you’ll be able to navigate through the printer’s settings menu and make the necessary adjustments to change the IP address.
Before we dive into the steps, it’s important to note that the specific process may vary slightly depending on the make and model of your printer. However, the underlying concept remains the same, so you should be able to adapt the instructions to suit your printer’s interface.
So, if you’re ready to take control of your printer’s IP address and ensure seamless connectivity, let’s get started with the first step: accessing the printer’s settings menu.
Step 1: Access the printer’s settings menu
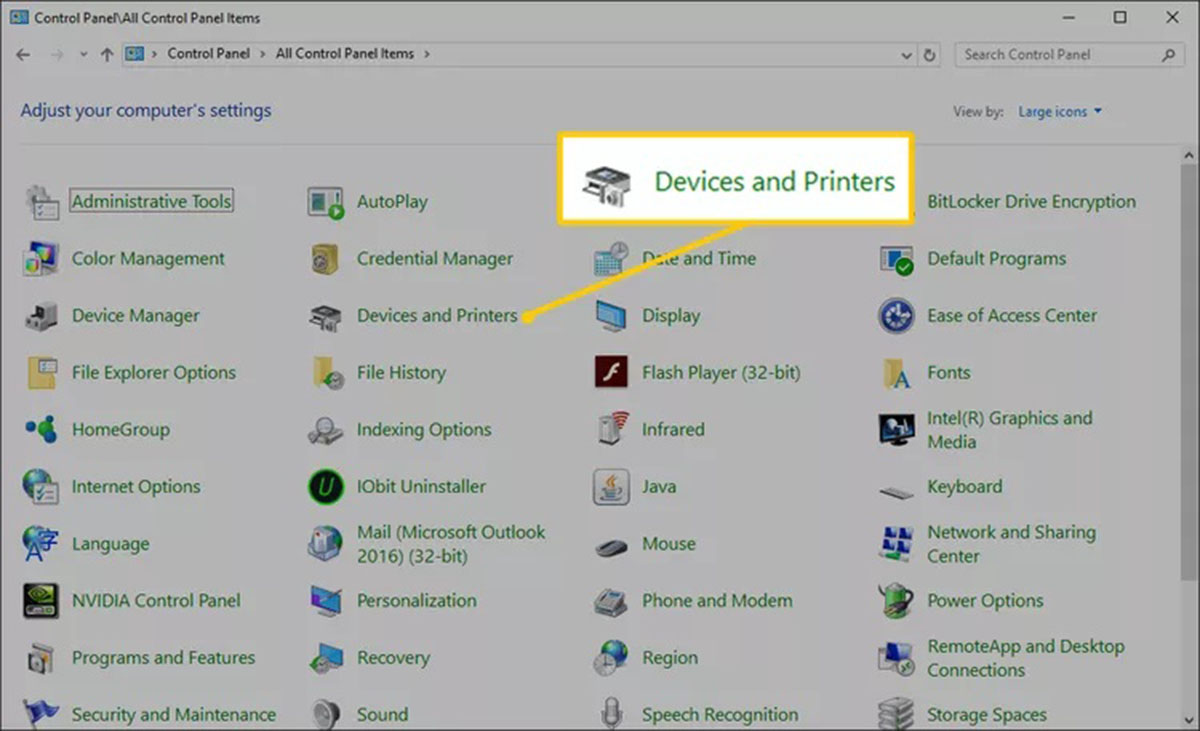
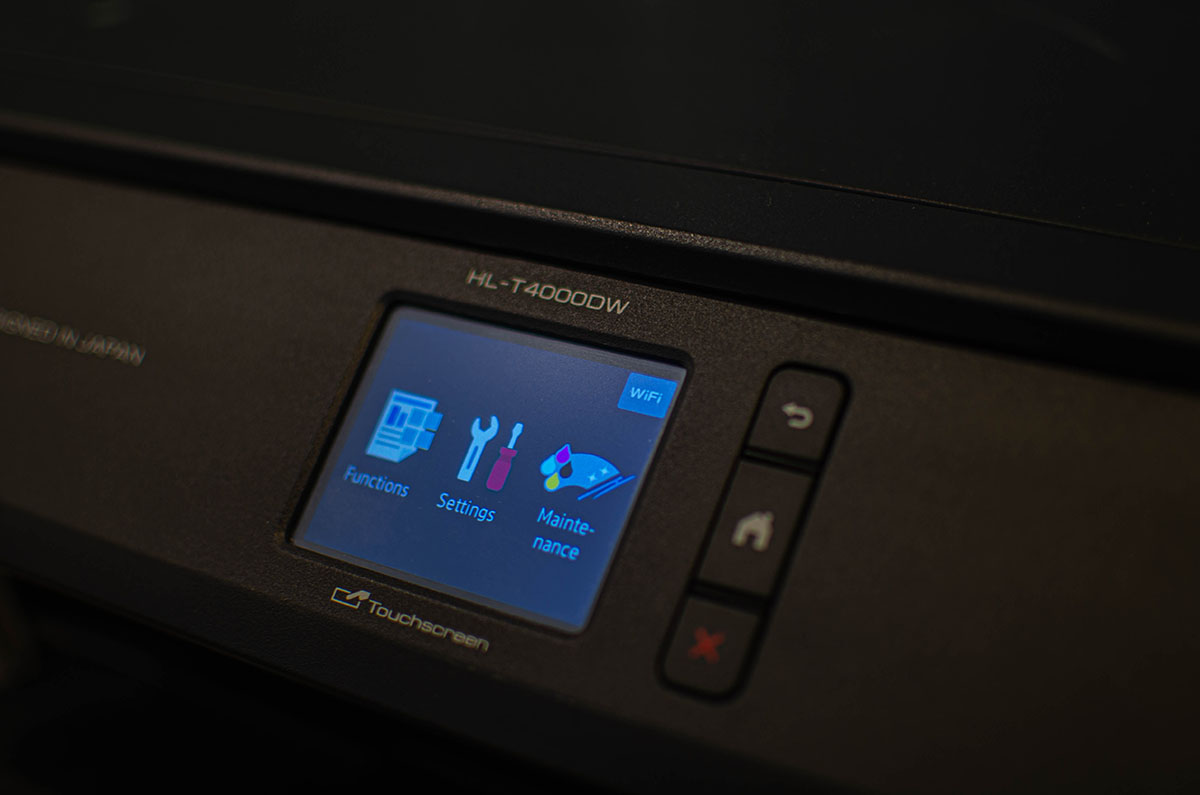
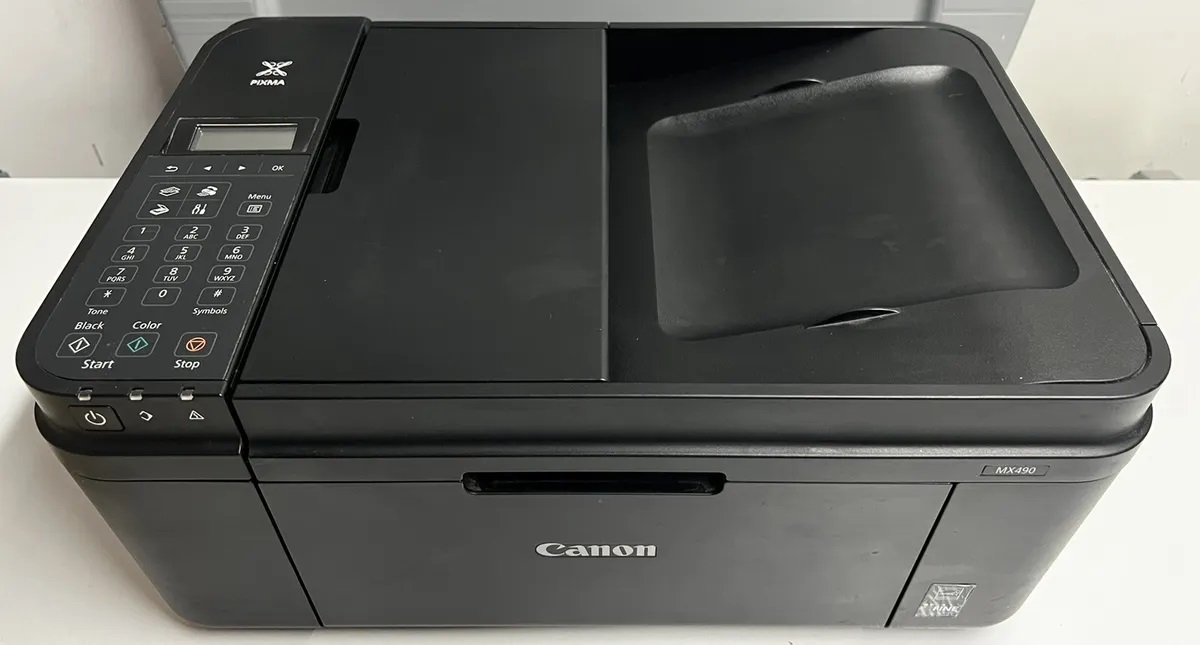
The first and fundamental step in changing the IP address on your printer is to access the printer’s settings menu. To do this, you will need to locate the control panel or display screen on your printer. The location and appearance of the control panel may vary depending on the printer model, but it is typically found on the front or top of the machine.
Once you have located the control panel, power on the printer and navigate to the settings menu. This can usually be achieved by pressing the menu or setup button on the control panel. Some printers may require you to press a combination of buttons or use the arrow keys to scroll through the options.
After accessing the settings menu, you will be presented with a variety of options. The labels and arrangement may differ between printer models, but keep an eye out for network, connectivity, or advanced settings. These categories typically contain the necessary options to change the IP address.
It’s important to note that some printers may require you to enter a password or PIN to access the settings menu. If you have set up a password or PIN, input it accordingly to proceed to the next step. If you haven’t set up a password, simply continue navigating through the settings menu.
Once you have successfully accessed the printer’s settings menu, you are ready to move on to the next step, where we’ll locate the network or TCP/IP settings. So let’s proceed to Step 2!
Step 2: Locate the network or TCP/IP settings
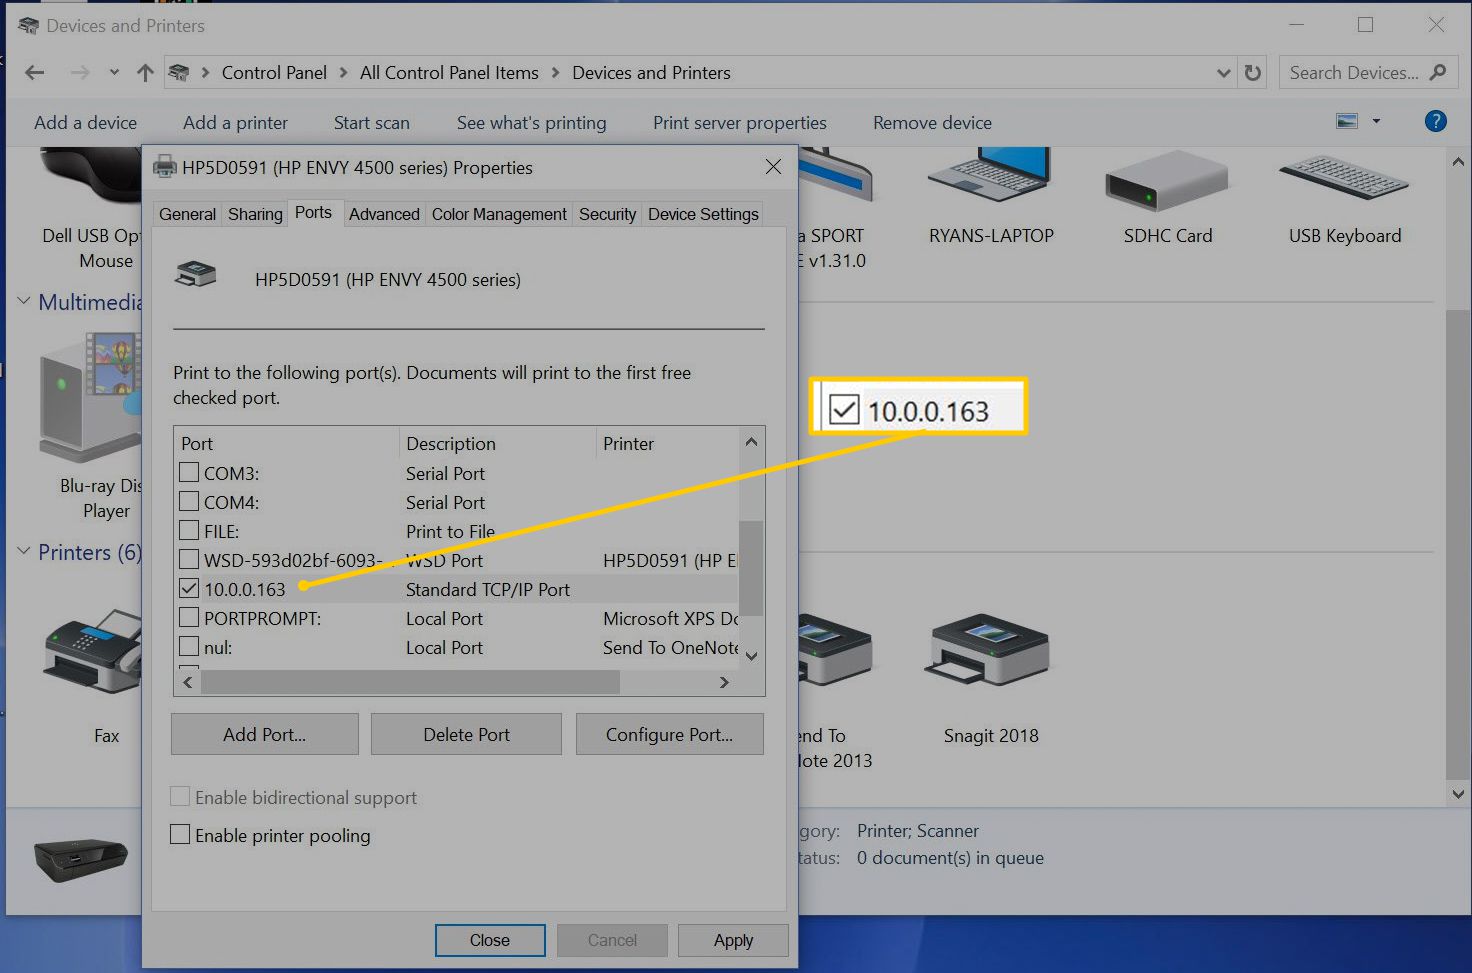
Now that you have accessed the printer’s settings menu, the next step is to locate the network or TCP/IP settings. These settings determine how the printer connects to your network and obtain an IP address.
Depending on the printer model and interface, the network or TCP/IP settings may be found under different categories or sub-menus. Look for options such as “Network Settings,” “Wireless Settings,” “Ethernet Configuration,” or “TCP/IP Setup.” It’s worth noting that the terminology used may vary, but the general concept remains the same.
Once you have located the network or TCP/IP settings, you will have access to a range of configuration options. These options may include setting the IP address mode (manual or automatic), configuring the subnet mask, gateway address, and DNS settings.
If you are using a wired connection, you may need to select “Ethernet” or “Wired LAN” to access the TCP/IP settings. On the other hand, if you are using a wireless connection, you will likely find options like “Wireless LAN” or “Wi-Fi” in the network settings menu.
Keep in mind that some printers may have both wired and wireless connectivity options. Ensure you are modifying the correct settings based on your printer’s connection type.
Take your time to review the available options and locate the specific settings related to the IP address. Make a note of the current IP address settings if necessary, as you will need this information when inputting the new IP address in a later step.
With Step 2 completed, you are now familiar with the location of the network or TCP/IP settings on your printer. In the next step, we will discuss how to change the IP address. Let’s move on to Step 3!
Step 3: Choose the option to change the IP address
Now that you have located the network or TCP/IP settings on your printer, the next step is to choose the option that allows you to change the IP address. This step may involve selecting a specific submenu or configuration option within the network settings menu.
Look for options such as “Change IP Address,” “Set IP Address,” “Manual IP Mode,” or something similar. The wording may vary depending on the printer model, but the idea is to find the setting that enables you to modify the IP address settings.
Once you have identified the appropriate option, select it to access the IP address configuration settings. Here, you may be presented with various fields to input the new IP address, subnet mask, gateway, and other relevant details.
Before proceeding with changing the IP address, it’s important to determine the type of IP address you want to assign to your printer. You can choose between a static IP address and a dynamic IP address.
- A static IP address is manually assigned to the printer and remains fixed. This means that the printer will always have the same IP address, even after rebooting or powering off.
- A dynamic IP address, on the other hand, is automatically assigned by the network router or DHCP server. This allows the IP address to change dynamically each time the printer connects to the network.
Choose the option that aligns with your network configuration and requirements. Keep in mind that if you opt for a static IP address, you will need to ensure it falls within the range of valid IP addresses on your network.
Once you have made your selection and entered the desired IP address, subnet mask, and gateway, double-check the information for accuracy. Any mistakes in these settings can lead to connectivity issues. Take your time to review the changes before moving on to the next step.
With Step 3 completed, you have chosen the option to change the IP address on your printer. In the next step, we will discuss how to input the new IP address. Let’s move on to Step 4!
Step 4: Input the new IP address
Now that you have accessed the IP address configuration settings on your printer, it’s time to input the new IP address. This step is crucial to ensure that the printer is assigned the desired IP address for proper network connectivity.
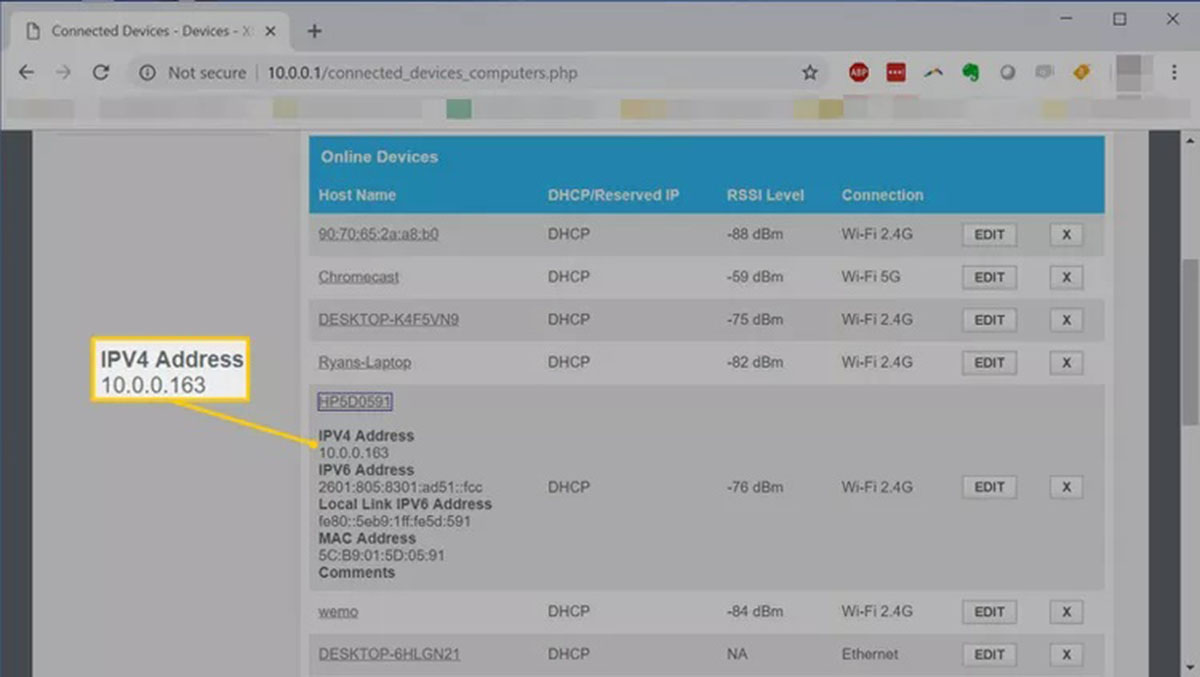
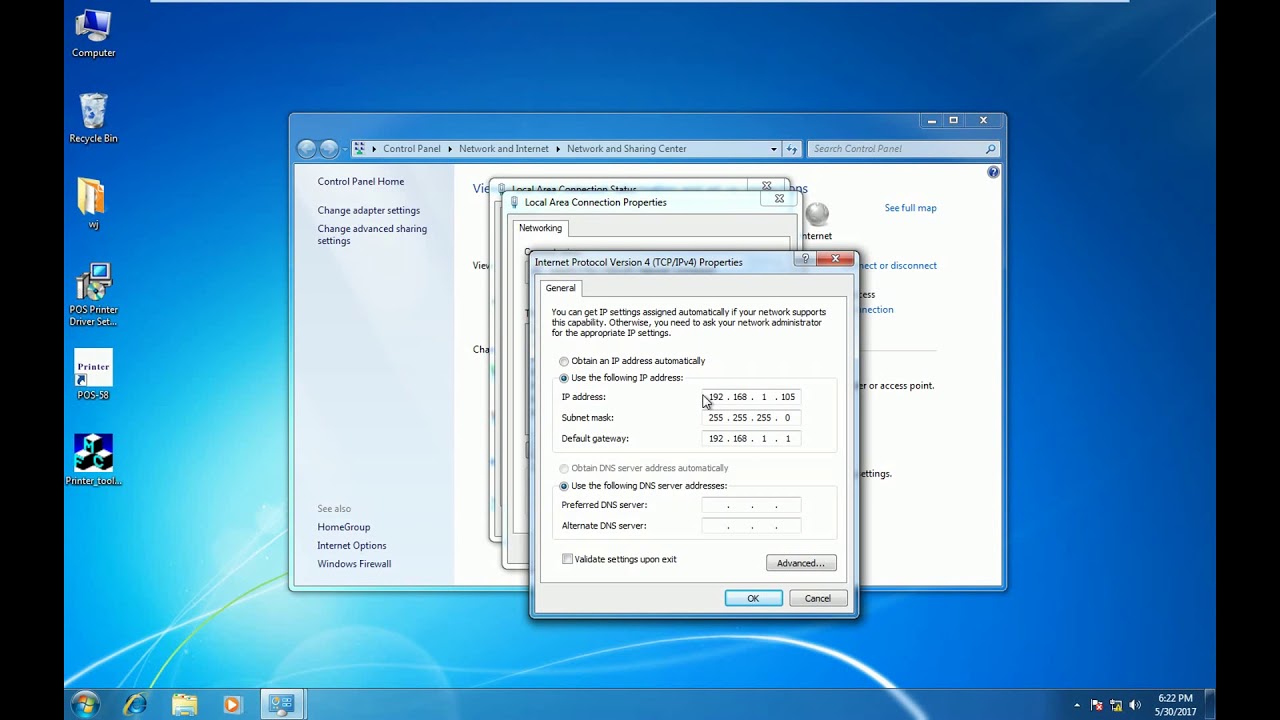
Using the keyboard or on-screen interface, enter the new IP address in the designated field. Be careful while entering the IP address to avoid any typos or errors. Remember to follow the IP address format, which consists of four sets of numbers separated by periods (e.g., 192.168.0.1).
In addition to the IP address, you may need to provide other details such as the subnet mask, default gateway, and DNS settings. These additional settings help establish proper network communication and ensure smooth operation of your printer.
If you are unsure of the correct values for these settings, you can refer to your network administrator or check the network settings of another device connected to the same network. Often, the subnet mask and default gateway will be automatically filled in based on the network configuration settings.
Once you have entered all the necessary information, double-check the accuracy of the IP address and other settings. It’s crucial to ensure that there are no errors to avoid any connectivity issues or conflicts on the network.
If everything appears in order, proceed to the next step to save and apply the changes. We will cover this in Step 5, so let’s move on!
Step 5: Save and apply the changes
After inputting the new IP address and any additional settings, it’s crucial to save and apply the changes to ensure that the printer adopts the new configuration. This step finalizes the process of changing the IP address on your printer.
To save the changes, look for an option such as “Save” or “Apply” within the settings menu. It may be located at the bottom of the configuration page or in a separate section specifically for saving changes.
Before proceeding, take a moment to review the settings one last time to confirm their accuracy. Ensure that the new IP address is correct, the subnet mask and gateway are properly entered, and any other necessary settings are appropriately configured.
Once you are confident that everything is accurate and no changes are required, select the “Save” or “Apply” option. The printer will then save the new settings and apply them to establish a connection with the network using the updated IP address.
During this process, the printer may briefly disconnect from the network as it applies the changes. It’s normal for the printer to pause for a moment or display a message indicating that it is updating the settings. Avoid interrupting the process or turning off the printer until it has completely applied the changes.
Once the changes have been saved and applied, you will have successfully changed the IP address on your printer. However, to ensure that the printer operates smoothly with the new settings, it is recommended to proceed to the next step and restart the printer. We will cover the restart process in Step 6, so let’s dive in!
Step 6: Restart the printer
After saving and applying the changes to the IP address settings on your printer, it is important to restart the printer. Restarting the printer allows it to fully implement the new IP address and establish a fresh connection with the network.
To restart the printer, locate the power button on the control panel or interface. Press and hold the power button for a few seconds until the printer turns off completely. Once the printer is powered off, wait for a few seconds before pressing the power button again to turn it back on.
During the restart process, the printer may go through a self-diagnostic routine or display a message indicating that it is restarting. Give the printer a few moments to boot up and establish a connection with the network.
After the restart, check if the printer is properly connected to the network by printing a test page or accessing the printer’s network configuration settings again. Verify that the new IP address is reflected in the settings. If the test page prints or the new IP address is displayed correctly, it is a good indication that the printer has successfully restarted and connected to the network using the updated IP address.
If you encounter any issues during the restart process or the printer fails to connect to the network, double-check the IP address settings and ensure that they are correct. Repeat the previous steps if necessary to make corrections or contact your network administrator for assistance.
With the printer successfully restarted and connected to the network, you have completed the process of changing the IP address on your printer. Enjoy seamless connectivity and improved performance with your newly configured IP address!
Conclusion
Changing the IP address on your printer may initially seem like a daunting task, but by following the step-by-step instructions outlined in this guide, you can easily navigate through the settings and successfully configure the new IP address. Whether you need to resolve IP conflicts, update network configurations, or optimize printer performance, these steps will help you accomplish your goal.
Remember, while the specific steps may vary slightly based on your printer’s make and model, the underlying concepts remain the same. By accessing the settings menu, locating the network or TCP/IP settings, choosing the option to change the IP address, inputting the new IP address, saving and applying the changes, and finally, restarting the printer, you can successfully update the IP address of your machine.
It is important to be cautious and double-check the accuracy of the new IP address, subnet mask, gateway, and other settings to avoid connectivity issues. Taking the time to review the changes before applying them can save you from potential troubleshooting down the line.
Lastly, remember to consult your printer’s user manual or contact the manufacturer’s support if you encounter any difficulties or have specific queries regarding your printer’s settings.
Now that you have completed the process of changing the IP address on your printer, you can enjoy uninterrupted connectivity and smooth printing operations. Explore the possibilities and make the most out of your printer’s capabilities with the updated IP address!