Introduction
Knowing your IP address is essential for various reasons, whether you want to troubleshoot network issues, set up a secure connection, or simply satisfy your curiosity. If you’re an iPhone user, finding your IP address is a straightforward process that can be done in a few different ways. In this article, we will explore several methods to help you discover your IP address on your iPhone.
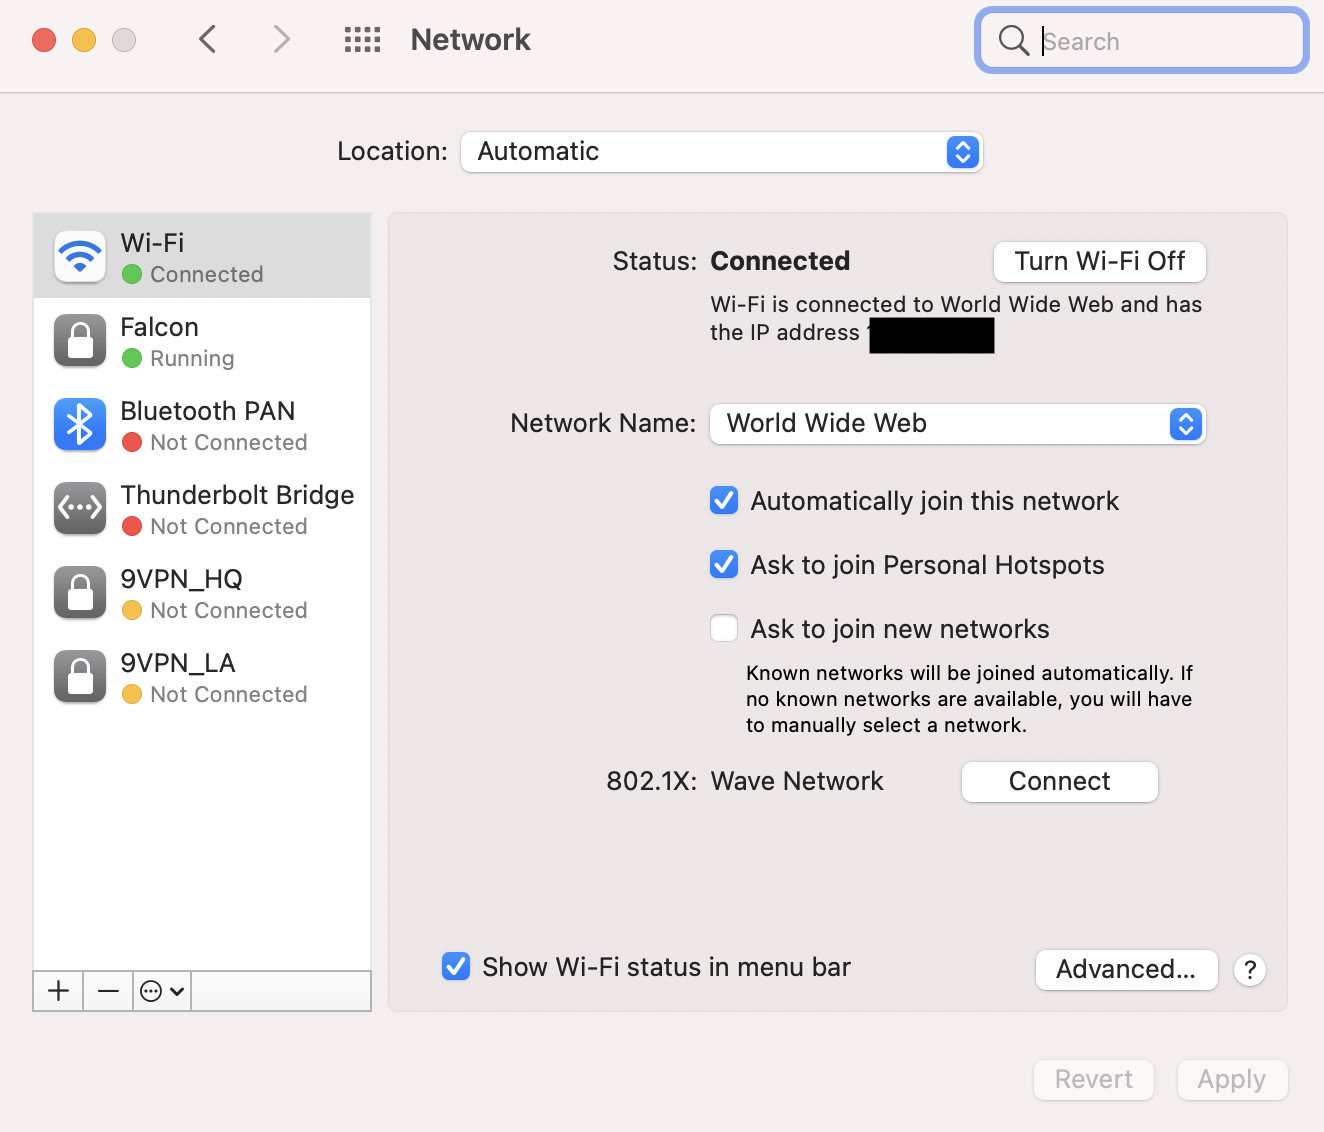
Your IP address is a unique identifier that allows devices to communicate with each other over the internet. It can be likened to a digital address that helps data packets find their way from one place to another. By identifying your IP address, you can gain insights into your network connectivity and make necessary adjustments to optimize your online experience.
With the popularity of Apple’s iPhone, it is important for users to have the knowledge and tools to find their IP address whenever needed. Whether you are a tech-savvy individual or not, these methods are designed to be user-friendly and accessible for everyone.
In the following sections, we will explore five different methods to find your IP address on your iPhone. These methods include using the Settings app, utilizing a third-party app, leveraging Siri, using Command Prompt on a Windows PC, and using Terminal on a Mac.
It’s worth noting that the exact steps and options mentioned in this article may vary slightly depending on your iPhone model and the software version you are running. However, the overall process and principles remain the same, allowing you to find your IP address regardless of the specific iPhone model you have.
Now, let’s dive into each method and discover how to find your IP address on your iPhone.
Method 1: Using the Settings App
One of the simplest ways to find your IP address on your iPhone is by using the built-in Settings app. Follow these steps:
- Open the Settings app on your iPhone. You can usually find it on your home screen.
- Scroll down and tap on “Wi-Fi”.
- Make sure that Wi-Fi is enabled. If it’s not, tap the toggle switch to turn it on.
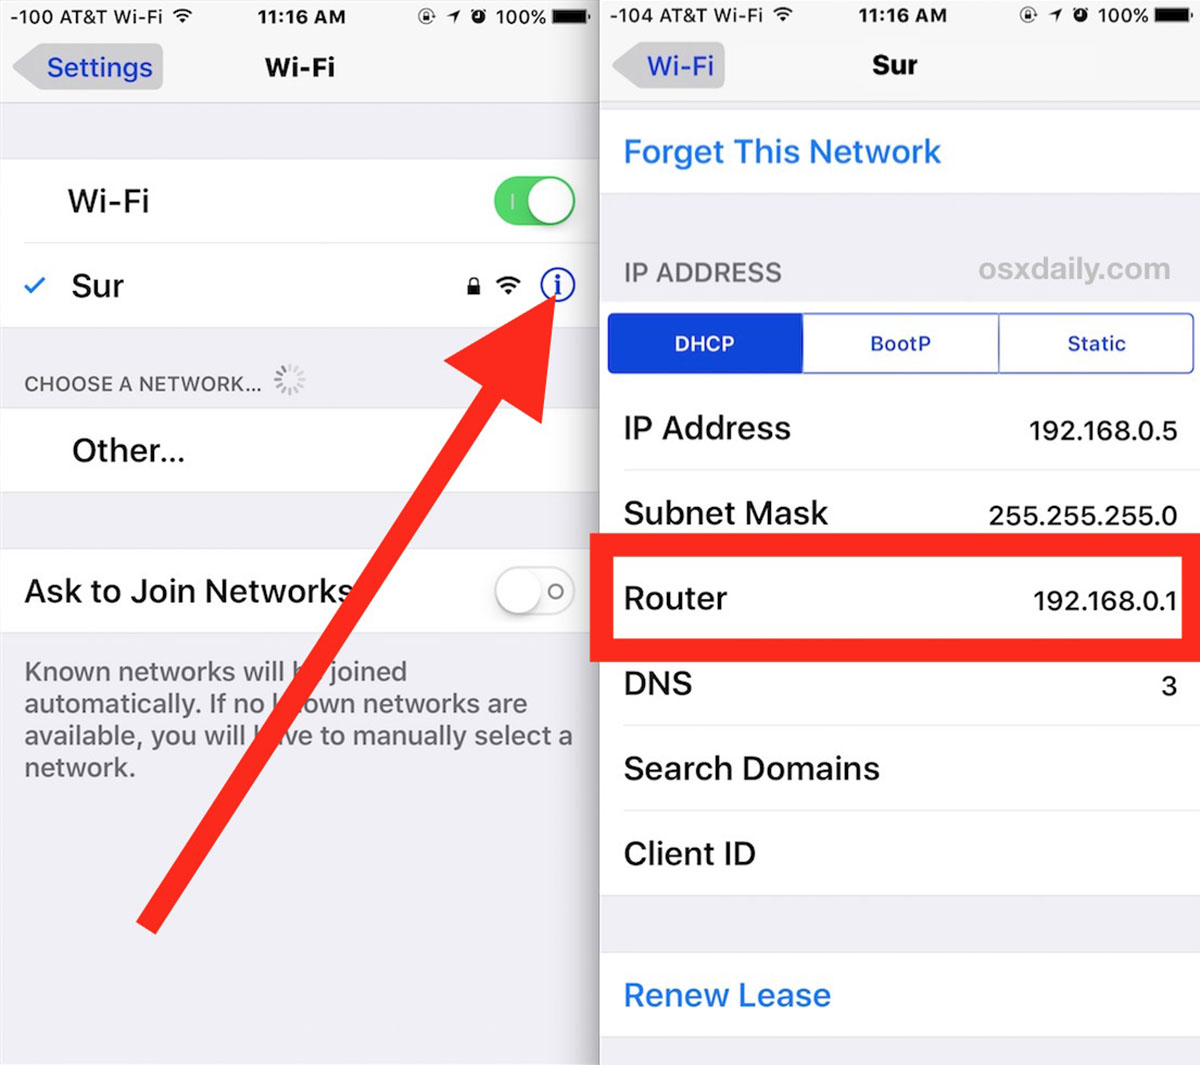
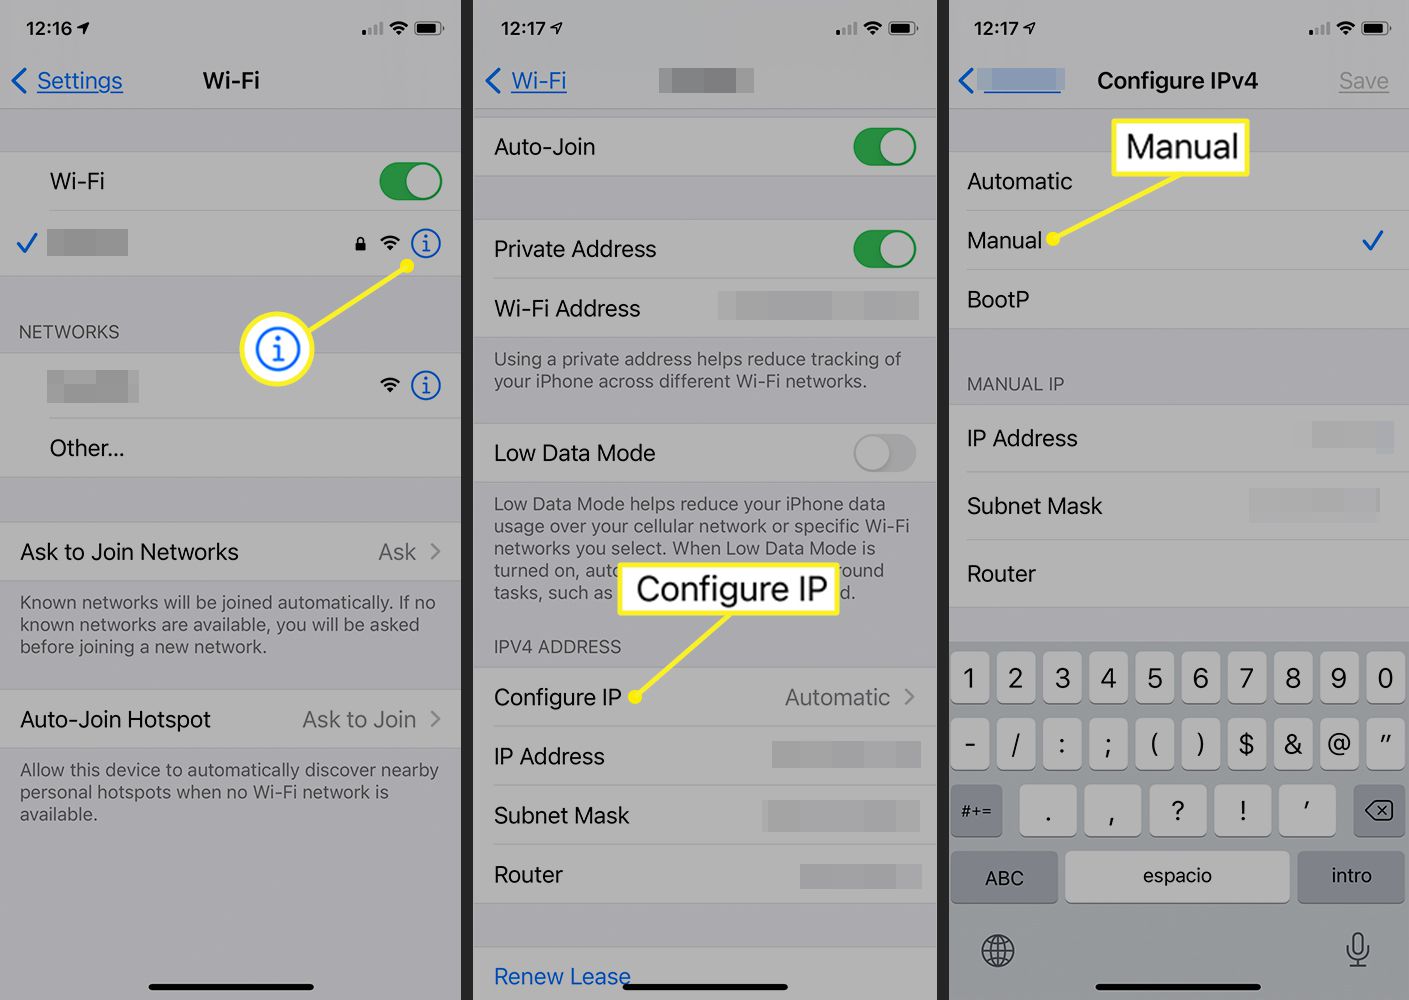
- Find the Wi-Fi network you are connected to and tap on the blue “i” icon next to it.
- On the Wi-Fi details screen, you will see various information about your network connection. Your IP address will be listed next to the “IP Address” field.
With these simple steps, you can quickly find your IP address using the Settings app. This method doesn’t require any additional apps or technical knowledge. It’s a straightforward way to obtain your IP address without any hassle.
It’s important to note that your IP address may be assigned dynamically by your network’s router, which means it can change periodically. If you need to find your IP address frequently, you may want to consider using one of the other methods mentioned in this article or using a static IP address for your device.
Now that you know how to find your IP address using the Settings app, let’s explore another method using a third-party app.
Method 2: Using a Third-Party App
If you prefer a more simplified approach or want additional features beyond just finding your IP address, using a third-party app can be a convenient option. There are several apps available on the App Store that can help you discover your IP address along with other network information.
Here’s how you can use a third-party app to find your IP address on your iPhone:
- Open the App Store on your iPhone.
- Search for “IP address” or “network tools” to find relevant apps.
- Choose a trusted app that suits your needs and install it.
- Once the app is installed, open it and navigate to the IP address or network information section.
- Your IP address should be displayed along with other relevant network details such as subnet mask, gateway, and DNS servers.
Using a third-party app can provide additional functionality and may be more convenient for those who want a dedicated solution for network information. These apps often offer features like network speed tests, Ping, Traceroute, and more, allowing you to troubleshoot and analyze your network connection.
Keep in mind that while third-party apps can be useful, it’s important to choose reputable and well-reviewed apps from the App Store to ensure your data privacy and security.
Now that you know how to find your IP address using a third-party app, let’s explore another method using Siri.
Method 3: Using Siri
If you’re a fan of voice assistants, you’ll be glad to know that Siri can also help you find your IP address on your iPhone. Here’s how:
- Activate Siri by pressing and holding the home button or using the “Hey Siri” command (if enabled).
- Once Siri is active, simply ask, “What is my IP address?
- Siri will analyze your request and provide the answer by displaying your IP address on the screen.
Using Siri to find your IP address is a quick and hands-free method. It’s especially useful if you’re in a situation where you can’t physically access your device or prefer to use voice commands for convenience.
It’s important to remember, though, that Siri relies on an active internet connection to fetch the information. So, ensure that you have a stable internet connection before asking Siri for your IP address.
Now that you know how to find your IP address using Siri, let’s explore another method using Command Prompt on a Windows PC.
Method 4: Using Command Prompt on a Windows PC
If you have a Windows PC and want to find the IP address of your iPhone, you can use the Command Prompt utility. This method requires your iPhone and Windows PC to be connected to the same Wi-Fi network. Here’s how you can do it:
- On your Windows PC, click the Start menu and search for “Command Prompt”.
- Open the Command Prompt app from the search results.
- Type “ipconfig” and press Enter.
- The Command Prompt will display a list of network information. Look for the “IPv4 Address” under the active network connection.
- The IPv4 Address mentioned is the IP address of your Windows PC.
Now that you have the IP address of your Windows PC, you can proceed to find the IP address of your iPhone. Here’s what you need to do:
- On your iPhone, open the Settings app and go to the “Wi-Fi” section.
- Make sure Wi-Fi is enabled and connected to the same network as your Windows PC.
- Tap on the blue information (i) icon next to your Wi-Fi network.
- You will find your iPhone’s IP address listed next to the “IP Address” field.
By using Command Prompt on your Windows PC, you can easily find the IP address of your iPhone without any additional apps. Just make sure that both devices are connected to the same Wi-Fi network for this method to work.
Now that you know how to find your IP address using Command Prompt on a Windows PC, let’s explore another method using Terminal on a Mac.
Method 5: Using Terminal on a Mac
If you’re using a Mac and want to find the IP address of your iPhone, you can use the Terminal application. This method requires your iPhone and Mac to be connected to the same Wi-Fi network. Follow the steps below:
- On your Mac, open the Applications folder and navigate to Utilities. Open the Terminal application.
- In the Terminal window, type “ifconfig” and press Enter.
- A list of network interfaces and their corresponding information will be displayed. Look for the section labeled “en0” or “en1” with the heading “inet”.
- The IP address listed after the “inet” heading is the IP address of your Mac.
Now that you have the IP address of your Mac, you can proceed to find the IP address of your iPhone. Here’s what you need to do:
- On your iPhone, open the Settings app and go to the “Wi-Fi” section.
- Make sure Wi-Fi is enabled and connected to the same network as your Mac.
- Tap on the blue information (i) icon next to your Wi-Fi network.
- Your iPhone’s IP address will be listed next to the “IP Address” field.
Using Terminal on your Mac allows you to find the IP address of your iPhone without needing any additional tools or applications. Just make sure that both devices are connected to the same Wi-Fi network for this method to work.
Now that you know how to find your IP address using Terminal on a Mac, you can easily obtain this information whenever you need it.
Conclusion
Discovering your IP address on your iPhone is essential for various purposes, from troubleshooting network issues to ensuring secure connections. In this article, we explored five different methods to help you find your IP address on your iPhone.
We started with the simple method of using the Settings app, where you can easily locate your IP address in the Wi-Fi settings. Then, we discussed the option of using third-party apps, which not only provide your IP address but also offer additional network tools and features.
Next, we explored the convenience of using Siri to obtain your IP address by simply asking. This voice-activated method is great for hands-free access to your IP address information.
For Windows PC users, we explored the use of Command Prompt to find the IP address of your iPhone. Similarly, we discussed how Mac users can use the Terminal application to accomplish the same.
With all these methods at your disposal, you now have multiple options to discover your IP address on your iPhone, depending on your preference and the available resources.
Remember, your IP address may change periodically, especially if it is assigned dynamically. If you need to find your IP address frequently, consider using a static IP address or using one of the methods described in this article.
Now that you’re equipped with the knowledge of finding your IP address on your iPhone, you can better understand and manage your network connectivity. Whether you’re troubleshooting technical issues or optimizing your online experience, knowing your IP address is a valuable tool.
So, the next time you need to find your IP address on your iPhone, refer back to this article and use the method that suits you best. Stay connected, troubleshoot with ease, and enjoy a seamless online experience!