Introduction
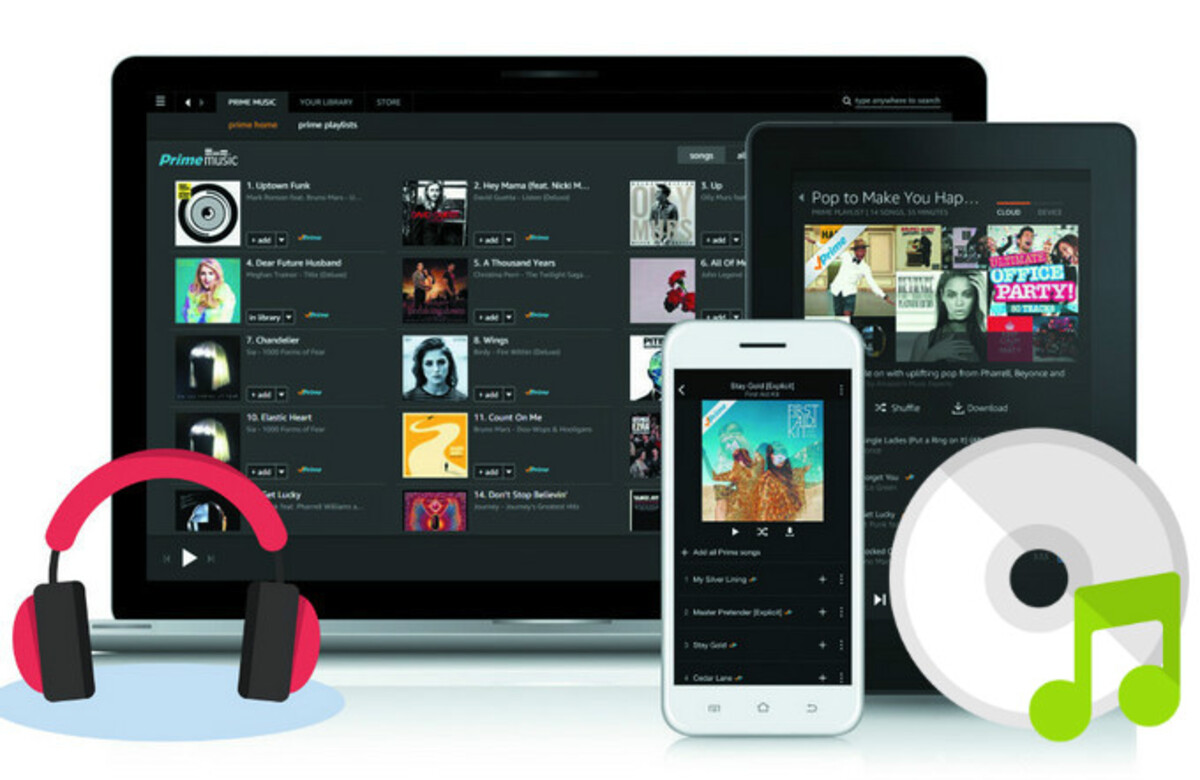
Music is an integral part of our lives, and with the advancement of technology, we now have the convenience of accessing and streaming our favorite tunes from various platforms. One such popular platform is Amazon Music, which offers a vast library of songs and albums for its users. While streaming music has become the norm, there may still be instances where you want to create a physical copy of your favorite songs on a CD.
Burning a CD allows you to enjoy your favorite tracks on older CD players, in your car, or create a personalized mixtape for a friend. Fortunately, Amazon Music provides an easy and straightforward way to burn a CD directly from their platform. Whether you want to create a CD compilation of your most-played songs or transfer music to a physical format for convenience, Amazon Music has you covered.
In this guide, we will walk you through the step-by-step process of burning a CD using Amazon Music for PC or Mac. From checking your CD burner compatibility to choosing and organizing your music, we will cover every detail to ensure a successful CD burning experience. So, if you’re ready to bring your favorite Amazon Music tracks into your CD collection, let’s get started!
Step 1: Check your CD burner compatibility
Before you begin burning a CD on Amazon Music, it’s essential to ensure that your computer’s CD burner is compatible. Not all computers come with a built-in CD burner, so you might need to check if your computer has one or if you’ll need an external CD burner.
To check if your computer has a CD burner, follow these steps:
- Open “My Computer” or “This PC” on your Windows computer. On a Mac, open Finder.
- Look for a CD drive listed under “Devices and Drives” or “Devices”. If you see a CD drive icon with a letter (e.g., D: or E:), it means your computer has a CD burner.
- If you don’t see a CD drive icon, it means your computer doesn’t have a built-in CD burner. In this case, you’ll need to connect an external CD burner to your computer.
Once you’ve confirmed the presence of a CD burner, make sure that it’s in good working condition. Inspect the CD burner for any physical damages or loose connections. Additionally, you may need to update the CD burner’s drivers to ensure compatibility with the burning software.
It’s worth mentioning that not all CD burners support all types of CDs. Some older CD burners may only be compatible with CD-R discs, while newer ones can also burn CD-RW discs. Make sure to check the supported disc types in the CD burner’s specifications or manual.
By verifying your CD burner compatibility, you can ensure a smooth and successful CD burning process on Amazon Music. Once you’ve confirmed that your computer has a CD burner and it’s in working order, you’re ready to move on to the next step to start burning your favorite tracks from Amazon Music.
Step 2: Download and install Amazon Music for PC or Mac
To burn a CD using Amazon Music, you’ll need to download and install the Amazon Music application on your PC or Mac. Follow these steps to get started:
- Open your preferred web browser and visit the Amazon Music website.
- Look for the “Download” or “Get App” button and click on it. This will redirect you to the download page.
- Select the appropriate version of the Amazon Music app for your operating system (Windows or Mac).
- Click the “Download” or “Install” button to start the download process. The file size may vary, so it might take a few minutes to complete.
- Once the download is finished, locate the downloaded file on your computer and double-click on it to initiate the installation process.
- Follow the on-screen instructions provided by the Amazon Music installer to complete the installation. Make sure to read and accept the terms and conditions before proceeding.
- After the installation is complete, launch the Amazon Music application on your PC or Mac.
- If you already have an Amazon account, sign in using your credentials. If not, create a new Amazon account and sign in.
Once you’ve successfully downloaded and installed the Amazon Music app, you’ll have access to the vast music library provided by Amazon. This application allows you to stream music online and offline, as well as burn CDs of your favorite tracks.
Note that Amazon Music offers both a free and a premium subscription. While you can still burn CDs with a free account, having a premium subscription might provide additional benefits such as high-quality streaming and accessing exclusive content.
Now that you have the Amazon Music app installed and are logged in to your account, you’re ready to proceed to the next step, where we’ll guide you through signing in to your Amazon Music account.
Step 3: Sign in to your Amazon Music account
Before you can start burning a CD using Amazon Music, you need to sign in to your Amazon Music account. Follow these simple steps to sign in:
- Launch the Amazon Music application on your PC or Mac.
- If you’re not already signed in, you’ll be prompted to enter your Amazon account credentials. Enter your registered email address and password.
- If you prefer a more seamless sign-in experience, you can select the “Remember Me” or “Keep Me Signed In” option. This will save your login information and automatically sign you in the next time you open the Amazon Music app.
- Click on the “Sign In” button to proceed.
- If you have enabled two-factor authentication for your Amazon account, you may need to enter a verification code sent to your registered mobile device or email address.
- Once your account is successfully verified, you will be signed in to your Amazon Music account.
It’s important to sign in to your Amazon Music account to gain access to the full features and functionality of the app, including the ability to burn CDs. By signing in, you can also sync your music library, playlists, and preferences across multiple devices for a seamless music streaming experience.
If you don’t have an Amazon Music account, you can create one by clicking on the “Create New Account” or “Sign Up” option during the sign-in process. Follow the on-screen instructions to create your account and proceed with signing in.
Now that you’re signed in to your Amazon Music account, let’s move on to the next step, where we’ll guide you through selecting and organizing the music you want to burn to a CD.
Step 4: Select and organize the music you want to burn
Now that you are signed in to your Amazon Music account, it’s time to choose the songs you want to burn to a CD. Amazon Music provides a user-friendly interface that allows you to easily navigate through your music library and select the tracks you desire. Follow these steps to select and organize your music:
- On the Amazon Music app, you will find various tabs or sections such as “My Music”, “Playlist”, “Artists”, or “Browse”. Use these options to explore and locate the songs you want to burn to your CD.
- You can browse through different categories or use the search bar to find specific songs, albums, or artists. Use keywords or filters to narrow down your search.
- Hover over a song or album to reveal additional options such as adding it to a playlist, liking it, or playing it.
- To select multiple songs for burning, hold down the Ctrl key (Windows) or Command key (Mac) and click on each song you wish to add to your CD.
- Alternatively, you can create a playlist before adding songs to it. This allows you to have better control over the organization and order of the tracks on your CD.
Organizing your music before burning the CD helps create a smooth and enjoyable listening experience. You can arrange the songs in a particular order, create a themed playlist, or include specific genres, artists, or moods.
Take your time to curate a selection of songs that truly reflect your preferences and the mood you want for your CD. Amazon Music provides a vast collection of songs, so feel free to explore different genres and artists to find the perfect mix for your CD.
Once you have selected and organized the music you want to burn, proceed to the next step where we will guide you through creating a playlist for burning the CD.
Step 5: Create a playlist for burning the CD
Creating a playlist is a great way to organize and customize the order of the songs you want to burn to a CD. By creating a specific playlist for your CD burning process, you can easily manage and fine-tune the tracklist to your liking. Follow these steps to create a playlist:
- Open the Amazon Music app on your PC or Mac.
- Click on the “Playlist” tab or section, which is usually located in the sidebar or navigation menu of the app.
- Look for the option to create a new playlist, usually denoted by a “New Playlist” button or an icon with a plus (+) sign.
- Click on the “New Playlist” button and give your playlist a name that reflects the theme or mood you want for your CD.
- Once you have created the playlist, it will appear in your playlist library.
Creating a playlist allows you to have better control over the organization of the tracks for your CD. You can add, remove, or rearrange songs in the playlist based on your preferences. Remember, the order of the songs in the playlist will be the order in which they will be burned onto the CD.
Feel free to experiment with different combinations and sequences to create the desired flow and vibe for your CD. Whether you want a high-energy mix, a relaxing compilation, or a nostalgic throwback, a playlist gives you the flexibility to curate your CD in a way that resonates with you.
Once you have created your playlist, you are ready to add songs to it. In the next step, we will guide you through adding songs to the playlist for burning onto the CD.
Step 6: Add songs to the playlist
Now that you have created a playlist for your CD, it’s time to add songs to it. Adding songs to your playlist allows you to curate the perfect selection of tracks to be burned onto the CD. Follow these steps to add songs to your playlist:
- Open the Amazon Music app on your PC or Mac.
- Navigate to the “Playlist” section and locate the playlist you created for your CD burning process.
- Click on the playlist to open it.
- Now, you have multiple options to add songs to the playlist:
- Browse your music library and hover over a song or album. Click on the “+” or “Add to Playlist” button to add it to your CD playlist.
- Search for specific songs, albums, or artists using the search bar. Once you find the desired track, click on it and choose the “Add to Playlist” option.
- If you already have a playlist with similar songs, you can go to that playlist, select the songs you want, and then choose the “Add to Playlist” option to add them to your CD playlist.
Take your time to browse through your music library, explore different genres, and add songs that resonate with the theme or mood you want for your CD. You can add as many songs as you like to your playlist, but keep in mind that the total duration of the CD is limited to approximately 80 minutes.
While adding songs, you can also adjust the order of the tracks within the playlist. Simply click and drag a song to the desired position in the playlist to rearrange them. This gives you complete control over the sequence of the songs on your CD.
Once you have added the desired songs to your playlist and arranged them in the desired order, you’re ready to move on to the next step, where we’ll guide you through adjusting the order of songs in the playlist.
Step 7: Adjust the order of songs in the playlist
After adding songs to your playlist, you may want to fine-tune the order of the tracks to create a seamless and enjoyable listening experience on your CD. Adjusting the order of songs in your playlist is a simple process that allows you to customize the flow and transitions between the tracks. Follow these steps to adjust the order of songs in your playlist:
- Open the Amazon Music app on your PC or Mac.
- Navigate to the “Playlist” section and locate the playlist you created for your CD burning process.
- Click on the playlist to open it.
- Within the playlist, click and hold the song you want to move.
- Drag the selected song to the desired position within the playlist.
- As you drag the song, you will see a visual indicator of its new position.
- Release the mouse button to drop the song in its new position.
- Repeat these steps for any other songs you want to adjust.
By adjusting the order of songs in your playlist, you can create a cohesive and engaging listening experience on your CD. Consider the energy levels, tempos, and transitions between songs when rearranging them. You may want to aim for a smooth flow from one track to another, creating a seamless journey for the listener.
Take your time to experiment with different arrangements until you achieve the desired order and flow. Remember, the order in which the songs appear in the playlist will be the order in which they will be burned onto the CD.
Once you are satisfied with the order of songs in your playlist, you’re ready to move on to the next step, where we’ll guide you through the process of inserting a blank CD into your computer’s CD burner.
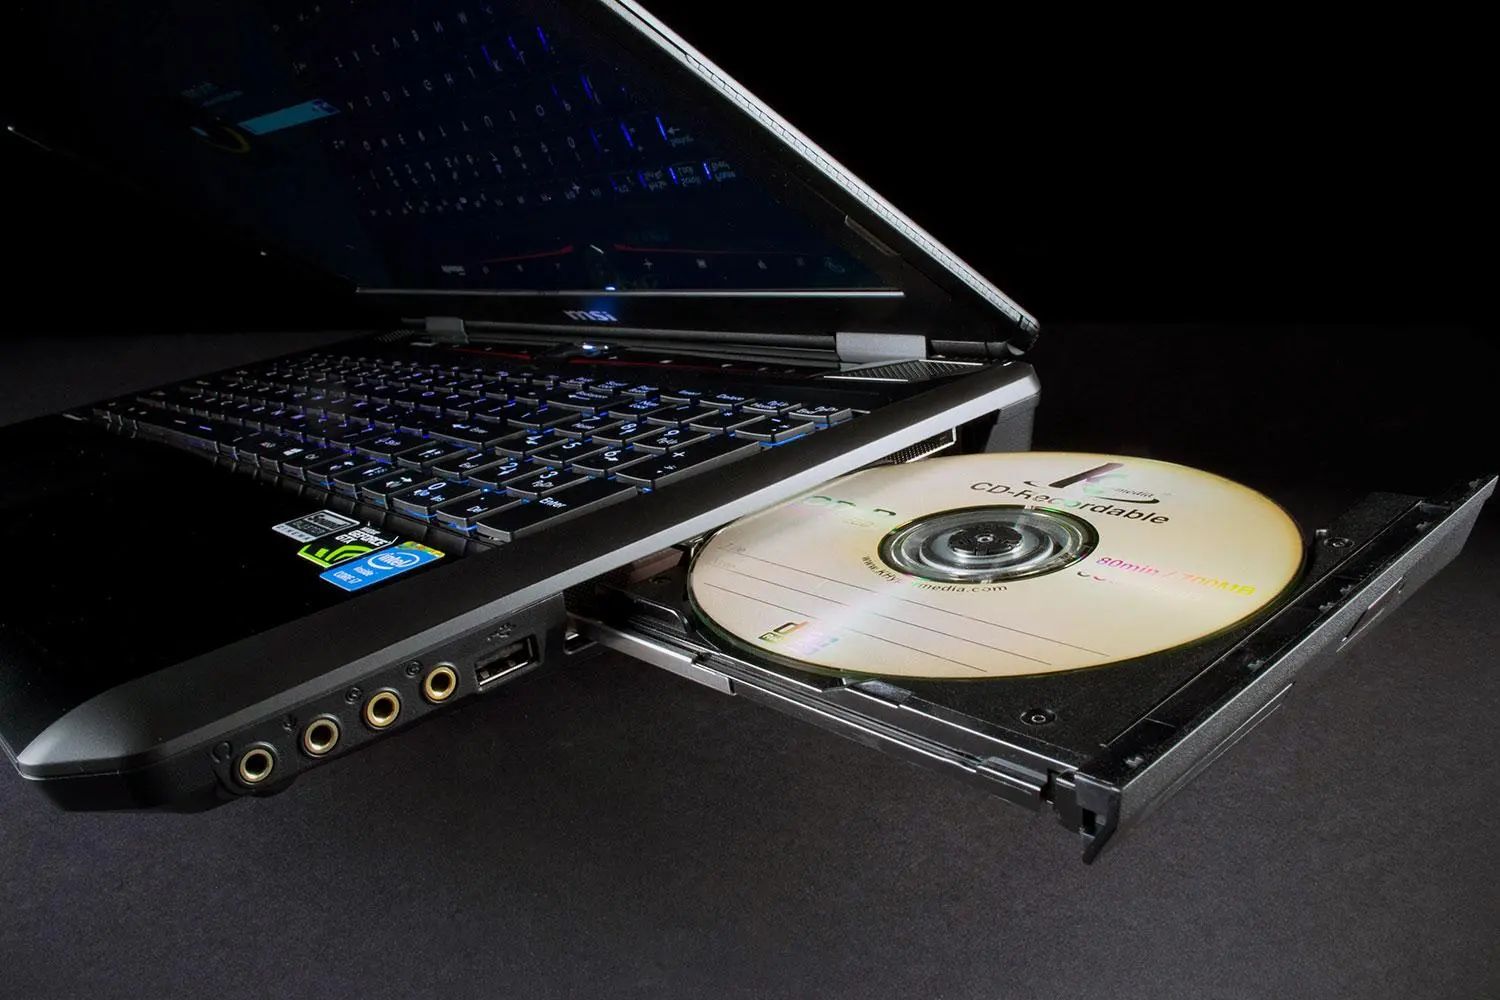
Step 8: Insert a blank CD into your computer’s CD burner
Before you can start the CD burning process, you need to insert a blank CD into your computer’s CD burner. Follow these steps to insert a blank CD:
- Locate the CD/DVD drive on your computer. It is usually located on the front panel of a desktop computer or on the side of a laptop.
- Press the eject button on the CD/DVD drive to open the tray.
- Take a blank CD and carefully place it onto the tray with the labeled side facing up. Ensure that the CD is properly centered on the tray.
- Gently push the tray back into the CD/DVD drive until it is fully closed.
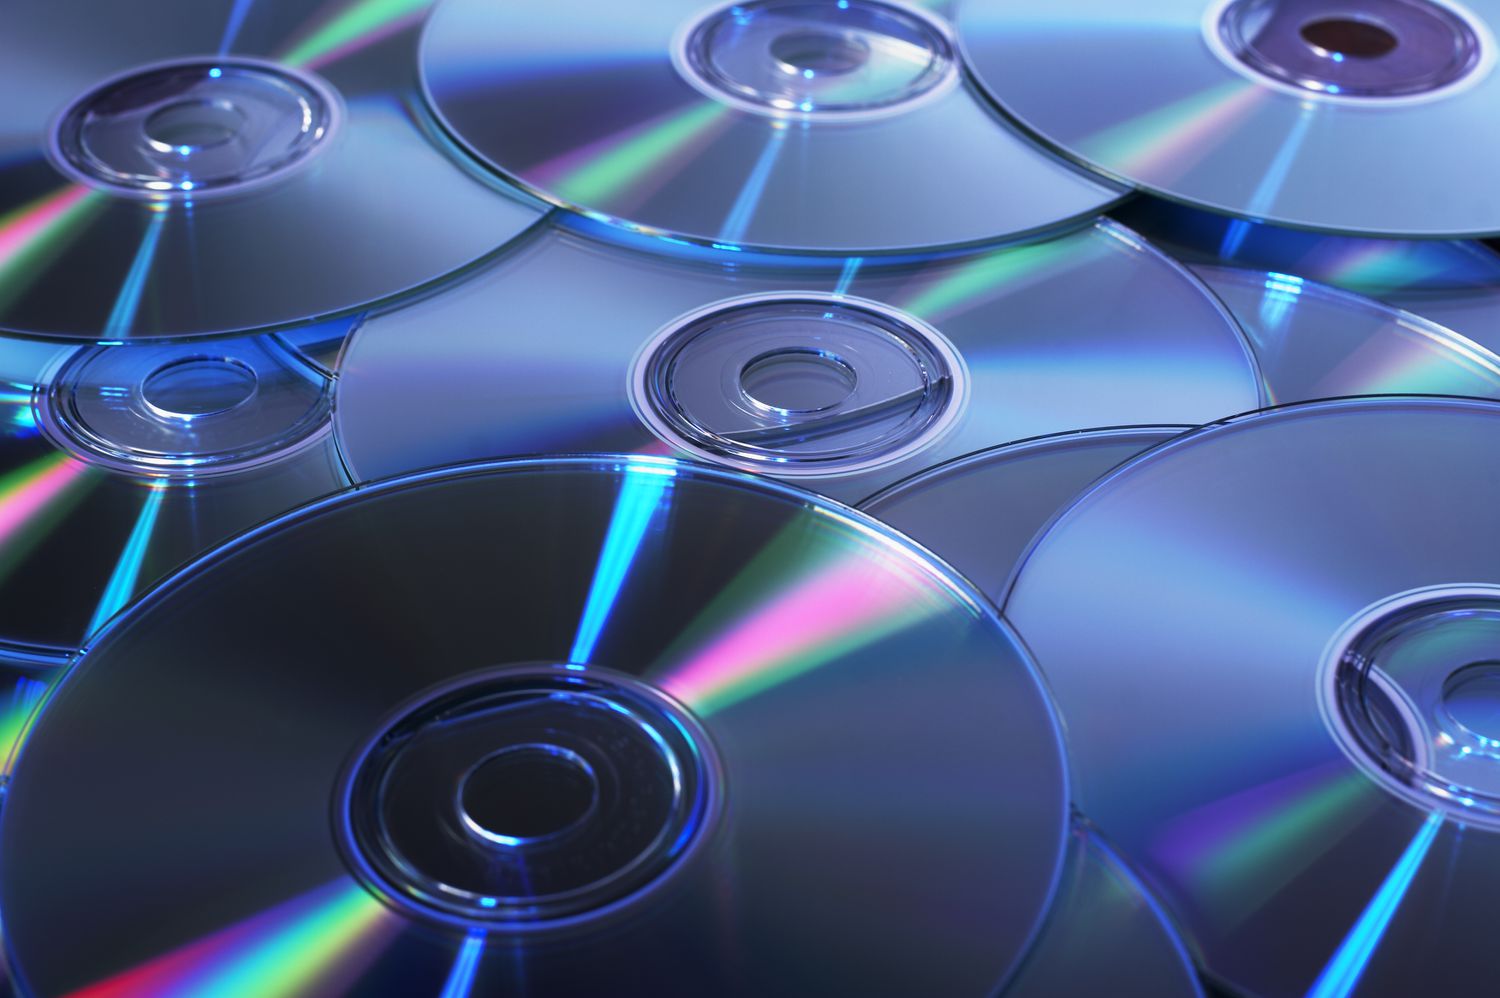
It’s important to use a blank CD for burning your music, as a CD that already contains data or has been used before may cause issues during the burning process or result in a corrupted CD.
Ensure that the blank CD you are using is compatible with your CD burner. Most CD burners support CD-R discs, which can only be burned once. However, some CD burners also support CD-RW discs, which can be rewritten multiple times. Check your CD burner’s specifications or manual to determine the supported types of blank CDs.
Once you have properly inserted the blank CD into your computer’s CD burner, you’re ready to move on to the next step, where we’ll guide you through opening the CD burning software.
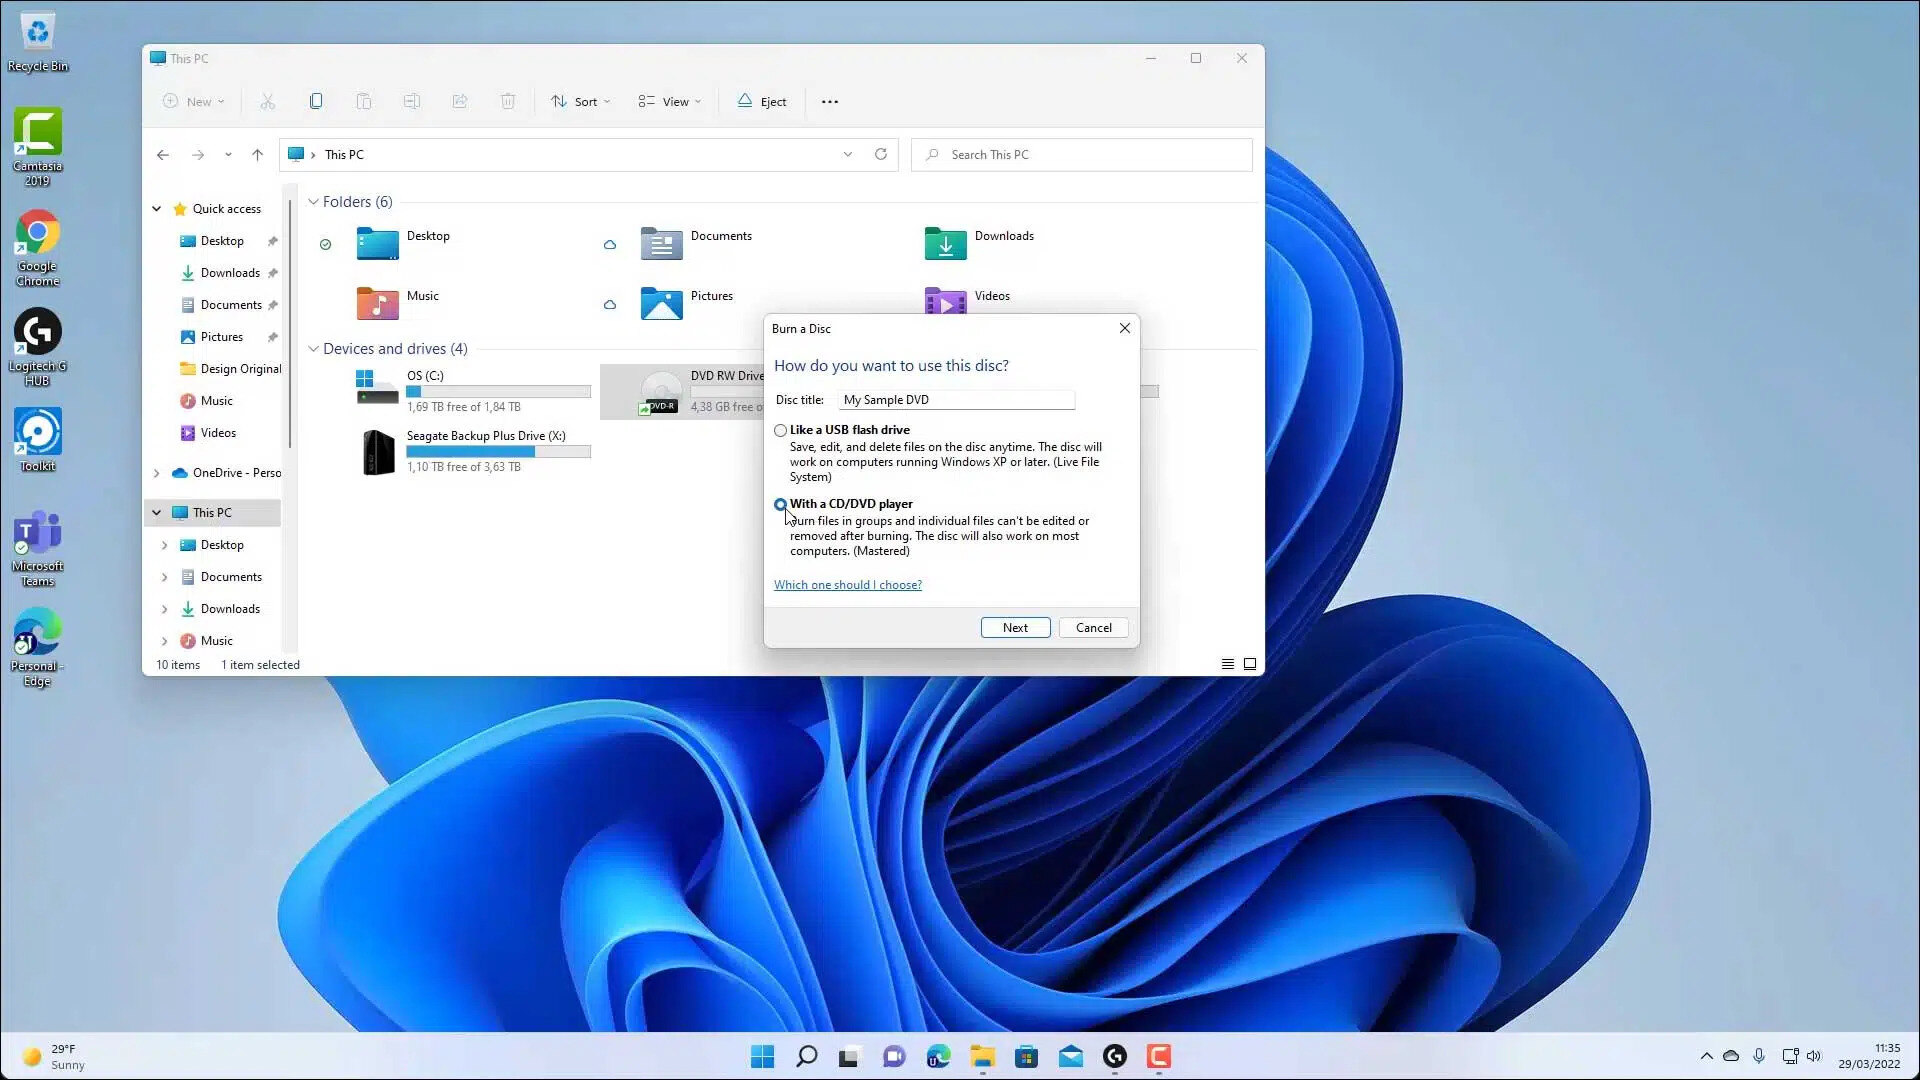
Step 9: Open the CD burning software
With a blank CD inserted into your computer’s CD burner, it’s time to open the CD burning software to prepare for the actual burning process. The CD burning software allows you to select the burning settings, add the playlist you created, and initiate the burning process. Follow these steps to open the CD burning software:
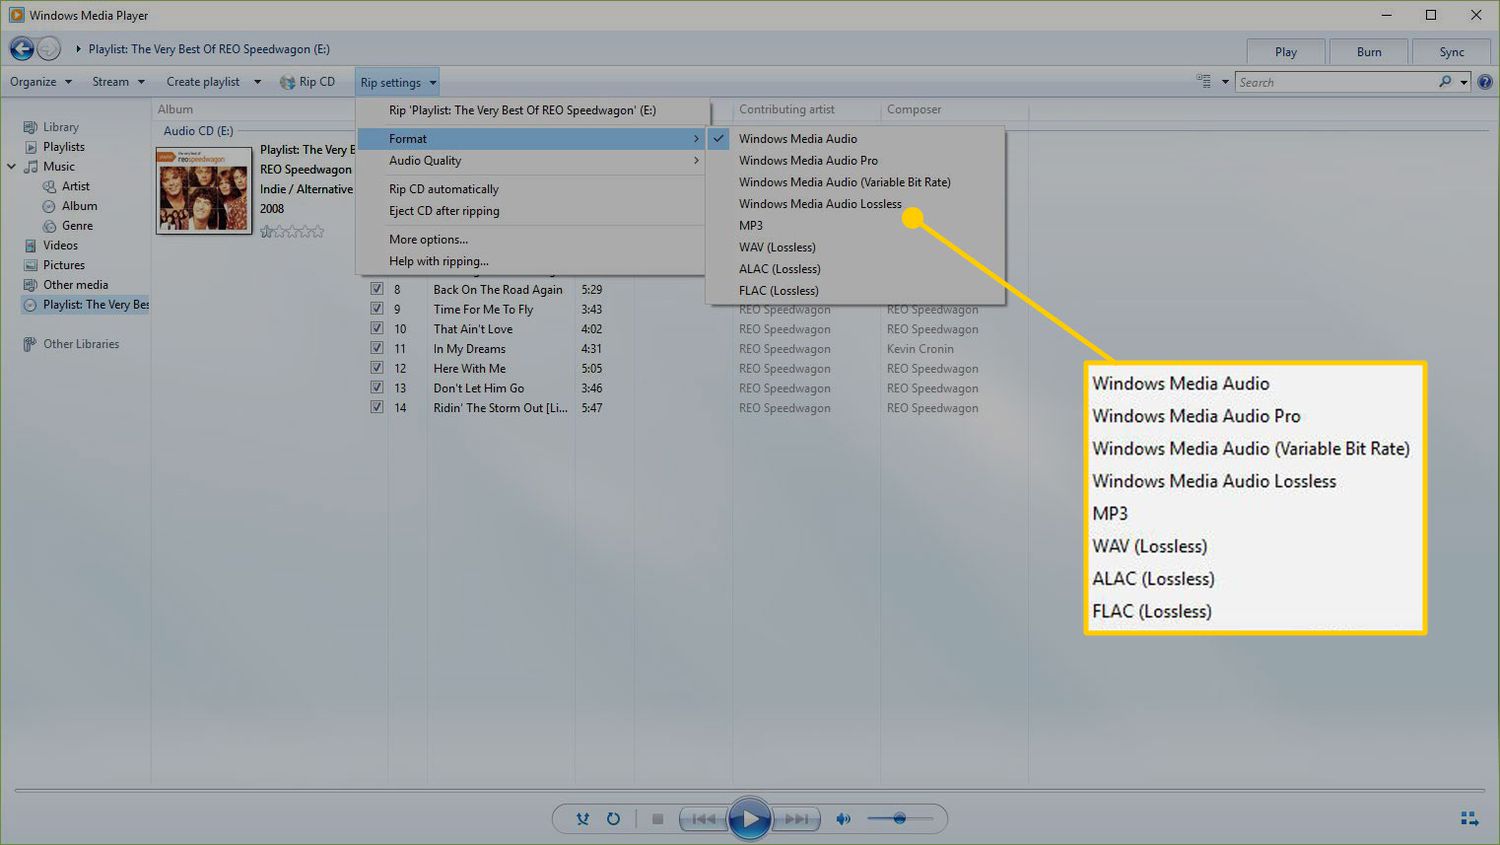
- On your computer, locate the CD burning software that is installed. Common CD burning software includes Windows Media Player, iTunes, or third-party software like Nero or Roxio.
- Double-click on the CD burning software icon to launch the application.
- Once the CD burning software is open, look for an option or menu that allows you to create an audio CD, burn a disc, or a similar feature related to burning CDs.
- Click on the designated option to open the CD burning interface or window.
It’s important to note that the specific steps to open the CD burning software may vary depending on the software you are using. However, most CD burning software follows a similar process to initiate the burning process.
If you are using Windows Media Player or iTunes, you can typically find the CD burning options in the application’s Library or Burn tab. Third-party software may have different layouts and menu options, so refer to the software’s user guide or documentation for detailed instructions on opening the CD burning interface.
Once you have successfully opened the CD burning software, you’re one step closer to burning your selected playlist from Amazon Music onto the blank CD. In the next step, we’ll guide you through selecting the CD burner and adjusting the burning settings.
Step 10: Select the CD burner and settings
Now that you have the CD burning software open, it’s time to select the CD burner and adjust the necessary settings before burning the CD. Follow these steps to select the CD burner and configure the burning settings:
- In the CD burning software, look for an option or menu that allows you to select the CD burner device. This option is typically located on the main interface or in the settings/preferences section of the software.
- Click on the drop-down menu or browse for the available CD burner devices connected to your computer.
- Select the appropriate CD burner device that matches the one you inserted the blank CD into.
- Once you have selected the CD burner, you may also have the option to adjust the burning speed. Choosing a lower burning speed can help minimize errors and ensure a higher quality burn, but it may take longer. You can usually find the burning speed settings in the CD burning software’s preferences or options.
- Ensure that the burning settings are configured for an audio CD. Depending on the CD burning software, you may need to specify the CD format as an audio CD or select an option for burning music.
It’s important to ensure that the right CD burner device is selected to avoid any issues during the burning process. Selecting the appropriate burning speed and verifying the burning settings ensure that the CD is burned properly and can be played on various CD players.
Once you have selected the CD burner device and adjusted the necessary settings, you’re ready to proceed to the next step, where we’ll guide you through adding the playlist to the burn queue.
Step 11: Add the playlist to the burn queue
With the CD burner device selected and the burning settings configured, the next step is to add your playlist to the burn queue in the CD burning software. Adding the playlist to the burn queue ensures that the selected songs will be written onto the blank CD. Follow these steps to add the playlist to the burn queue:
- In the CD burning software, locate the option or menu that allows you to add files or playlists to the burn queue. This option is usually found in the main interface or the burn section of the software.
- Click on the “Add” or “Add Files/Playlist” button.
- Navigate to the playlist you created in Amazon Music and select it.
- Click on the “Add” or “OK” button to add the playlist to the burn queue.
Adding the playlist to the burn queue ensures that the songs in your selected playlist will be burned onto the blank CD in the order you have arranged them. The burn queue allows you to verify the tracklist before initiating the burning process.
Some CD burning software also provides options to adjust the track order or remove specific songs from the burn queue, giving you more control over the final CD compilation.
Once you have added the playlist to the burn queue, you’re now ready to initiate the CD burning process. In the next step, we will guide you through starting the CD burning process.
Step 12: Start the CD burning process
After adding the playlist to the burn queue, you’re just a few steps away from creating your CD. Initiating the CD burning process allows the CD burner to write the selected songs onto the blank disc. Follow these steps to start the CD burning process:
- Double-check that the blank CD is still inserted in the CD burner device.
- In the CD burning software, locate the option or button to start the burning process. This button is usually labeled as “Burn”, “Start Burn”, or a similar term.
- Click on the “Burn” or “Start Burn” button to begin the CD burning process.
- During the burning process, the CD burner will spin the disc and write the audio data onto it. This process may take several minutes, depending on the speed of your CD burner and the number of songs being burned.
- Once the CD burning process is complete, you will usually receive a notification or prompt indicating its successful completion.
It’s important to note that once the burning process begins, it’s recommended not to interrupt or remove the CD until it has been successfully burned. Interrupting the process may result in a faulty CD or incomplete burn.
Sit back and allow the CD burning software to complete the process. You can monitor the progress through a progress bar or a similar indicator provided by the CD burning software.
After completion, you will have a fully burned CD ready for playback on CD players, computers, or other compatible devices. With your playlist converted into a physical format, enjoy the personalized collection of songs wherever you go.
In the final step, we will guide you through verifying the CD after burning to ensure its accuracy and quality.
Step 13: Verify the CD after burning
Once the CD burning process is complete, it is important to verify the burned CD to ensure the accuracy and quality of the music. Verifying the CD helps to confirm that all the songs have been successfully written onto the disc without any errors. Follow these steps to verify the CD after burning:
- Eject the burned CD from the CD burner device.
- Inspect the CD for any visible physical damage, scratches, or smudges. These can potentially affect the playback quality.
- Insert the burned CD into a CD player, computer, or any other compatible device.
- Test the CD by playing it or accessing the songs through the device’s media player.
- Ensure that each song plays without any skips, pauses, or distortion. Listen closely to the tracks and confirm that they are in the correct order as per your playlist arrangement.
- If you encounter any issues or errors during playback, recheck the CD for any visible damage or try burning the CD again using a different blank disc.
Verifying the burned CD ensures that the songs have transferred properly from your playlist to the CD. It allows you to confirm that the final CD has the desired tracklist and maintains the audio quality you intended.
If you encounter any errors or issues with the burned CD, you may need to troubleshoot the CD burning process, check the CD burner device, or review the burning settings you used. In case of persistent issues, contacting the software support or seeking technical assistance may be necessary.
By verifying the CD after burning, you can be confident that it is ready for playback and enjoyment. Whether it’s for your personal collection or a gift to someone special, a successfully burned CD allows you to savor your favorite music in a physical format.
Conclusion
Burning a CD using the Amazon Music platform allows you to create a personal collection of your favorite songs that can be enjoyed on CD players, in your car, or shared with friends and family. With the step-by-step guide provided, you can now confidently navigate through the process of burning a CD using Amazon Music on your PC or Mac.
Starting from checking the CD burner compatibility to verifying the burned CD, each step has been carefully outlined to ensure a seamless and successful CD burning experience. By selecting and organizing your desired music, creating a playlist, and adjusting the order of the songs, you can curate a CD that perfectly suits your preferences and desired listening experience.
Remember, always check that your CD burner is compatible, insert a blank CD, and open the CD burning interface in your chosen software. Take care to select the correct CD burner, adjust the settings, and add your playlist to the burn queue. Finally, initiate the CD burning process, and once complete, verify the CD to ensure its accuracy and quality.
With the advancement of digital music streaming, burning a CD may seem like a nostalgic practice. However, it provides a tangible way to enjoy music and create a personalized collection that goes beyond the limitations of online streaming. So, whether you want to create a mixtape for a special occasion or have a physical backup of your favorite tracks, follow the steps outlined in this guide and start enjoying your music on a CD.
Burning a CD not only allows you to preserve your favorite songs but also gives you the opportunity to share your musical taste and memories with others. So, go ahead and start curating your own CD collection using Amazon Music’s CD burning feature, and experience the joy of music in a physical format.