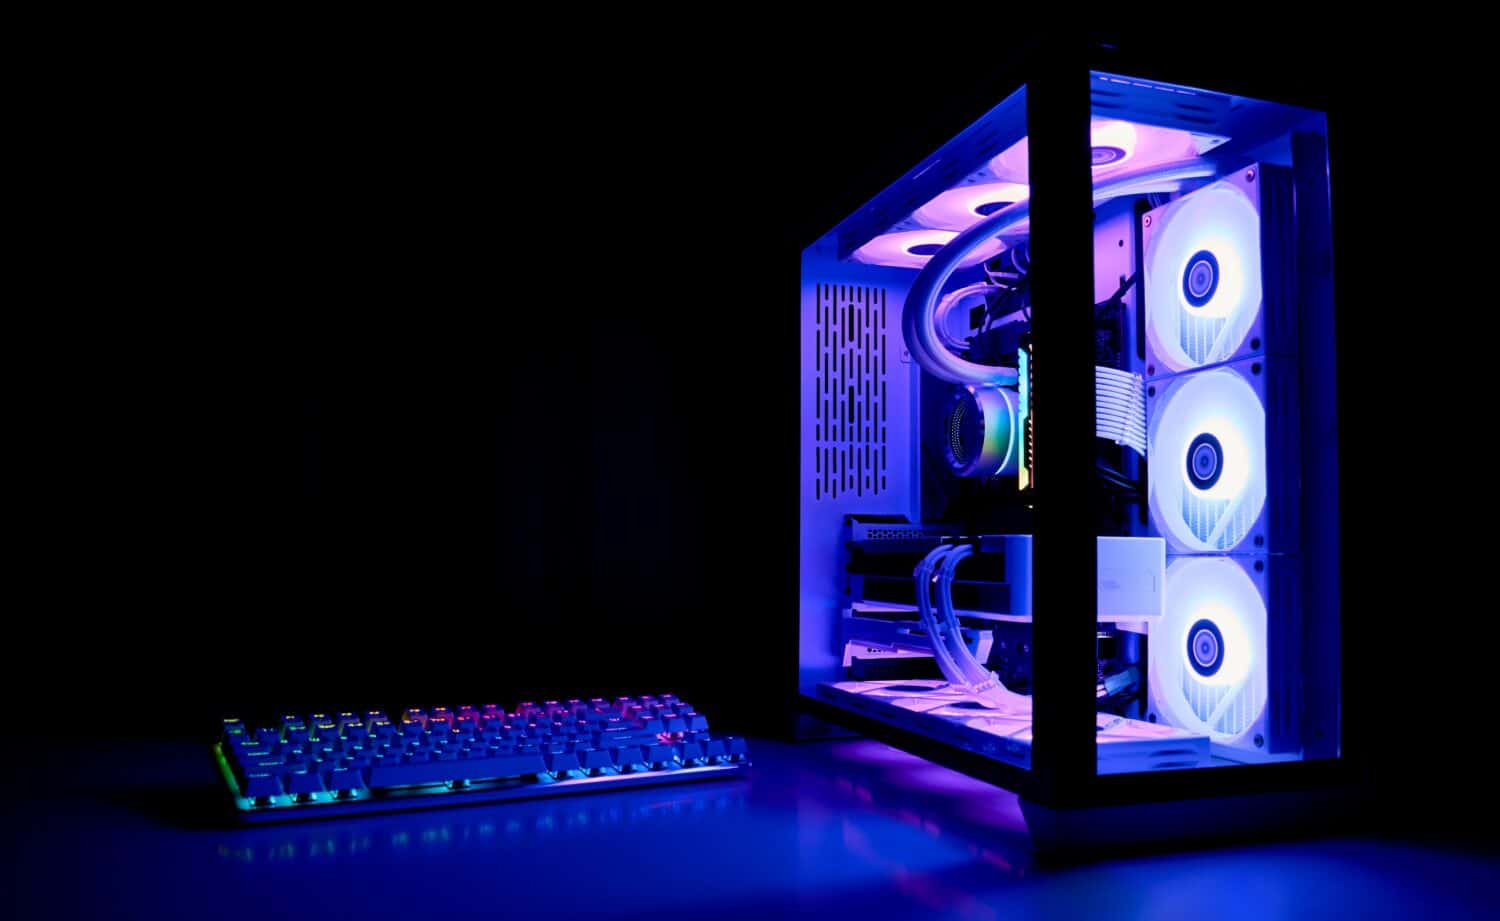
Introduction
Welcome to the exciting world of PC gaming! Building your own gaming PC can be a rewarding and fulfilling experience. Not only does it give you a sense of accomplishment, but it also allows you to customize your system to suit your needs and preferences. Whether you are a casual gamer or an enthusiast, having a gaming PC tailored to your specifications can greatly enhance your gaming experience.
Before diving into the process of building your gaming PC, it’s essential to understand the importance of choosing the right components. From the processor and graphics card to the motherboard and storage devices, every component plays a crucial role in delivering optimal gaming performance. Making informed decisions regarding the components will ensure that your gaming PC can handle the latest games and provide smooth gameplay.
Once you have selected the components, the next step is to prepare your workstation. Ensure that you have a clean and well-organized working area with sufficient lighting. Having the necessary tools, such as screwdrivers and thermal paste, readily available will make the process smoother.
Now, let’s dive into the step-by-step process of building your gaming PC. We’ll cover everything from installing the power supply unit (PSU) to optimizing gaming performance. By following this guide, you’ll be well-equipped to build your own gaming PC and embark on an incredible gaming journey.
Before we begin, it’s important to note that building a gaming PC requires a basic understanding of computer hardware and some technical knowledge. If you’re new to this or feel uncertain, don’t worry! With a little research and patience, you’ll be able to successfully build your gaming PC.
Choosing the Right Components
When it comes to building a gaming PC, selecting the right components is crucial to ensure optimal performance. Here are some key considerations for each component:
Processor (CPU)
The CPU is the brain of your gaming PC. It determines how quickly your system can process data and execute commands. For gaming, you’ll want a processor with at least four cores and a high clock speed. Look for models that are specifically designed for gaming, such as Intel Core i5 or AMD Ryzen 5.
Graphics Card (GPU)
The graphics card is responsible for rendering and displaying the visuals in your games. It significantly affects gaming performance, so investing in a high-quality GPU is essential. Look for models with ample VRAM and high clock speeds, such as NVIDIA GeForce GTX or AMD Radeon RX series.
Motherboard
The motherboard is the central component that connects all the other parts of your gaming PC. Ensure that it is compatible with your chosen CPU and has sufficient slots for RAM, storage devices, and expansion cards. Look for motherboards with good VRM (Voltage Regulator Module) design and adequate connectivity options.
RAM (Random Access Memory)
RAM affects the overall speed and responsiveness of your gaming PC. Aim for at least 8GB of RAM, but for optimal gaming performance, consider 16GB or more. Additionally, choose RAM with high clock speeds to enhance data transfer rates.
Storage
For a gaming PC, it’s best to have a combination of fast and spacious storage. Consider using an SSD (Solid State Drive) as your primary drive for faster boot times and loading speeds. Pair it with a larger capacity HDD (Hard Disk Drive) for storing games and multimedia files.
Power Supply Unit (PSU)
A reliable power supply unit is essential to ensure stable and uninterrupted power delivery to your gaming PC. Consider the wattage requirements of your components and choose a PSU with a higher wattage to allow for future upgrades.
When selecting components, be mindful of your budget and prioritize components that will have the most significant impact on gaming performance. It’s always a good idea to do thorough research and read reviews to ensure you’re making informed decisions.
By carefully choosing the right components, you’ll be well on your way to building a powerful and efficient gaming PC that can handle the demands of the latest games.
Preparing the Workstation
Before you start building your gaming PC, it’s important to prepare your workstation to ensure a smooth and hassle-free assembly process. Here are some key steps to follow:
Clean and Organize Your Workspace
Clear your workspace of any clutter and ensure that you have ample room to work comfortably. Dust off your work area and remove any potential hazards that could potentially damage your components. Having a clean and organized workspace will not only make the process easier but also help prevent accidents and mishaps.
Ensure Sufficient Lighting
Proper lighting is essential when working on delicate computer components. Ensure that your workspace is well-lit to avoid strain on your eyes and to enable better visibility while handling small connectors and cables. Consider using a desk lamp or positioning your workstation near a natural light source.
Gather the Necessary Tools
Before diving into the assembly process, gather all the necessary tools and equipment. A standard Phillips screwdriver, anti-static wrist strap, cable ties, and thermal paste are some of the common tools you may require. Having these tools readily available will save you time and prevent any potential frustration during the build.
Follow Safety Precautions
Building a gaming PC involves handling delicate and sensitive components. Make sure to take necessary precautions, such as wearing an anti-static wrist strap to prevent accidental damage from electrostatic discharge. Additionally, it is advisable to work on a non-conductive surface, such as a wooden table or an anti-static mat.
Read Component Manuals
Each component you’ve chosen for your gaming PC may have specific instructions and guidelines for installation. Take the time to read the manuals provided by the manufacturers to familiarize yourself with the components and their installation requirements. This will ensure that you assemble the PC correctly and avoid any compatibility issues.
By taking the time to properly prepare your workstation, you’ll create an environment that promotes efficiency, safety, and accuracy during the assembly process. These initial steps will set the foundation for a successful and enjoyable journey in building your gaming PC.
Installing the Power Supply Unit (PSU)
The power supply unit (PSU) is a vital component that provides the necessary electrical power to your gaming PC. Here’s a step-by-step guide on how to properly install the PSU:
1. Choose the Right Location
Locate the area in your PC case where the PSU is meant to be installed. Usually, there is a dedicated area at the bottom rear of the case. Make sure the PSU is correctly aligned with the mounting holes.
2. Mount the PSU
Place the PSU in the designated area and align the screw holes on the PSU with the corresponding holes in the case. Use the provided screws to securely attach the PSU to the case, ensuring that it is tightly fastened to prevent any movement or vibrations.
3. Connect Power Cables
Attach the necessary power cables from the PSU to the various components in your gaming PC. Start with the 24-pin ATX power connector, which powers the motherboard. Then, connect the CPU power cable to the appropriate CPU power header on the motherboard. If your graphics card requires additional power, plug in the suitable PCIe power cables.
4. Organize Cables
To maintain good airflow and minimize cable clutter, it’s essential to organize the cables effectively. Use cable ties or Velcro straps to secure and bundle the cables neatly. This will not only improve the overall appearance of your PC but also improve airflow, which is crucial for cooling efficiency.
5. Test the PSU
Before proceeding with the next steps in building your gaming PC, it’s highly recommended to test the PSU to ensure it is functioning correctly. Double-check all cable connections and switch on the power supply. Verify that all fans and components are receiving power and are operational.
Installing the power supply unit is a relatively straightforward process, but it’s important to take your time and follow the manufacturer’s instructions. By properly installing the PSU, you’ll ensure a reliable and stable power supply to your gaming PC, which is essential for optimal performance and longevity.
Mounting the Motherboard
The motherboard is the central component that connects all the other hardware in your gaming PC. Mounting the motherboard correctly is essential for ensuring proper functionality and efficient performance. Here’s a step-by-step guide on how to mount your motherboard:
1. Prepare the Case
Start by removing the side panel of your PC case. This will provide easy access to the internal components. Ensure that the case is placed on a stable and non-static surface to prevent any damage to the motherboard during the installation process.
2. Locate the Standoff Screws
Identify the locations on the case where the motherboard will be mounted. These areas will have raised and threaded holes known as standoff screws. Typically, there are standoffs pre-installed in standard motherboard mounting points, but double-check to ensure they are present.
3. Match the Holes
Align the screw holes on the motherboard with the standoff screws in the case. Carefully lower the motherboard into position, ensuring that each hole aligns perfectly with a standoff screw. Take your time during this step to avoid applying excessive pressure or bending the motherboard.
4. Secure the Motherboard
Once the motherboard is aligned with the standoff screws, use the provided screws to secure it in place. Start by loosely screwing in each one before gradually tightening them in a diagonal pattern. This ensures even pressure distribution and prevents warping or damage to the motherboard.
5. Verify Connections and Clearances
Double-check all your connections, making sure that the ports on the motherboard align properly with the corresponding cutouts in the case. Ensure that there is enough clearance for components such as the CPU cooler and graphics card.
6. Connect the Power and Data Cables
Once the motherboard is securely mounted, connect the power and data cables from the PSU and other components to their respective ports on the motherboard. Refer to the motherboard manual to ensure correct placement of these cables.
Mounting the motherboard properly is an important step in building your gaming PC. Taking the time to align and secure the motherboard ensures stable connections and optimal performance. Remember to refer to the motherboard manual for any specific mounting instructions and to handle the motherboard with care to avoid any accidental damage.
Installing the CPU and CPU Cooler
The CPU (Central Processing Unit) is the brain of your gaming PC, and installing it correctly is crucial for optimal performance. Along with the CPU, the CPU cooler helps dissipate heat and maintain a stable operating temperature. Here’s a step-by-step guide on how to install the CPU and CPU cooler:
1. Prepare the Motherboard
Before installing the CPU, ensure that the motherboard is placed on a clean and static-free surface. Locate the CPU socket on the motherboard, which is usually covered by a protective plastic cover.
2. Align and Install the CPU
Carefully remove the plastic cover from the CPU socket. Align the notches or markers on the CPU with those on the socket to ensure proper orientation. Gently place the CPU into the socket, taking care not to touch the delicate pins on the underside of the CPU.
3. Secure the CPU
Once the CPU is correctly aligned, gently lower the CPU retention arm and lock it into place. Apply gentle pressure to ensure that the CPU is securely seated in the socket. Be careful not to apply too much force, as this can damage the CPU or the socket.
4. Apply Thermal Paste
Thermal paste is crucial for ensuring proper heat transfer between the CPU and the CPU cooler. Apply a small amount of thermal paste onto the center of the CPU. Avoid applying too much paste, as it can lead to overheating or uneven heat distribution.
5. Mount the CPU Cooler
Make sure the CPU cooler is compatible with the socket and CPU. Align the mounting brackets of the cooler with the corresponding holes on the motherboard. Gently push down on the cooler to evenly spread the thermal paste and secure it in place.
6. Connect the CPU Cooler Fan
Connect the fan cable from the CPU cooler to the CPU fan header on the motherboard. Refer to the motherboard manual for the correct header placement. This connection allows the motherboard to regulate the fan speed based on the CPU temperature.
Installing the CPU and CPU cooler requires careful handling to avoid any damage to these delicate components. Take your time, follow the manufacturer’s instructions, and refer to the motherboard manual for specific installation guidelines. With proper installation, your CPU will perform optimally and remain cool, ensuring a smooth gaming experience.
Inserting the RAM Modules
RAM (Random Access Memory) is an essential component that affects the overall performance and responsiveness of your gaming PC. Installing RAM modules correctly is crucial for proper functioning of your system. Here’s a step-by-step guide on how to insert RAM modules:
1. Identify RAM Slots
Locate the RAM slots on the motherboard. These slots are typically long and vertically aligned. Refer to your motherboard manual to identify the slot configuration and the order in which the RAM modules should be inserted.
2. Prepare the RAM Modules
Before handling the RAM modules, discharge any static electricity by touching a grounded metal object or wearing an anti-static wrist strap. Remove the RAM modules from their packaging and hold them by the edges, avoiding contact with the gold contacts or any sensitive components.
3. Insert the RAM Modules
Align the notch on the RAM module with the corresponding notch in the RAM slot. Insert the RAM module into the slot at a slight angle, with the gold contacts facing down. Apply even and gentle pressure until the module clicks into place. Ensure that both sides of the RAM module are securely seated in the slot.
4. Repeat for Additional RAM Modules
If you have more than one RAM module, repeat the process for each module. Most motherboards have multiple RAM slots, allowing for expansion. Follow the recommended slot configuration mentioned in your motherboard manual to ensure optimal performance.
5. Verify Proper Installation
After inserting the RAM modules, double-check to ensure that they are properly installed. Confirm that the module is fully seated in the slot and that the retaining clips on both sides lock into place, securing the module.
6. Power on the System
Once the RAM modules are securely installed, connect the power supply and switch on the system. The system should detect and recognize the newly installed RAM. Check the BIOS or system settings to confirm that the total installed RAM is detected and functioning correctly.
Properly inserting the RAM modules is crucial for optimal performance and stability. Take care to handle the RAM modules with caution and follow the recommended installation guidelines provided by the motherboard manufacturer. With the right amount and correctly installed RAM, your gaming PC will have the necessary resources to handle demanding games and applications effectively.
Connecting the Storage Devices
Storage devices play a crucial role in storing and accessing your games, applications, and files. Connecting the storage devices correctly ensures that your gaming PC has ample space and fast data transfer rates. Here’s a step-by-step guide on how to connect storage devices:
1. Identify the SATA Ports
Locate the SATA ports on your motherboard. These ports are typically labeled and can be found near the edge of the motherboard. SATA ports are used to connect SATA cables, which in turn connect to the storage devices.
2. Connect SATA Cables
Take a SATA cable and connect one end to the SATA port on the motherboard. Align the L-shaped connector with the corresponding port and ensure a snug fit. Connect the other end of the SATA cable to the SATA port on the storage device, such as an SSD or HDD. Repeat this process for each storage device you are connecting.
3. Secure the Drives
Place the SSD or HDD in the appropriate drive bay in your PC case. Most cases have dedicated drive bays for easy installation. Use screws or a toolless mounting system to secure the drives in place, ensuring they are firmly seated and do not move when the case is moved or transported.
4. Connect Power Cables to the Drives
Locate the appropriate power cables from the power supply unit (PSU) and connect them to the power connectors on the SSDs or HDDs. SATA power cables are typically used for this purpose. Ensure a secure connection to provide power to the drives.
5. Configure the Drives
After connecting the storage devices, you will need to configure them within the operating system. This usually involves formatting the drives and assigning drive letters. Refer to the operating system’s documentation or online resources for detailed instructions on how to configure and manage your storage devices.
6. Verify Drive Detection
Once the storage devices are connected and configured, power on the system and access the BIOS to ensure that all drives are detected correctly. Verify that the BIOS recognizes the connected drives and that the appropriate storage capacities are displayed.
Properly connecting the storage devices ensures that your gaming PC has enough storage space and enables fast and efficient data access. Follow these steps carefully and refer to the motherboard and storage device manuals for specific instructions. With correctly connected storage devices, you’ll have the capacity and speed needed to install and run your favorite games and applications.
Installing the Graphics Card
The graphics card is a critical component that significantly impacts gaming performance by rendering and displaying visuals. Installing the graphics card correctly ensures optimal graphics processing and smooth gameplay. Here’s a step-by-step guide on how to install the graphics card:
1. Prepare the Motherboard
Before installing the graphics card, ensure that your gaming PC is powered off and disconnected from the power supply. Identify the PCIe x16 slot on the motherboard where the graphics card will be installed. This slot is typically the longest one and is closest to the CPU.
2. Remove Expansion Slot Covers
Remove the expansion slot covers on the back of the case that align with the PCIe x16 slot. These covers allow the graphics card to be inserted and secured in place. Set aside the removed covers for future use or reinstallation if needed.
3. Insert the Graphics Card
Hold the graphics card by its edges and align the gold contacts at the bottom of the card with the PCIe x16 slot on the motherboard. Gently insert the graphics card into the slot, making sure that it is properly aligned with the slot. Apply even pressure until the card is fully seated in the slot.
4. Secure the Graphics Card
Once the graphics card is inserted, secure it in place by using the screws or the locking mechanism provided with your case. This ensures that the card remains securely attached and prevents any accidental dislodging during use or handling.
5. Connect Power Cables
If your graphics card requires additional power, locate the appropriate power connectors on the card and connect the matching power cables from the power supply unit (PSU). Ensure a secure connection to provide sufficient power to the graphics card.
6. Verify Connections and Testing
Double-check all connections, including the power cables and any other necessary connections to the graphics card, such as display cables. Once everything is properly connected, reassemble the case and ensure that all components are properly installed and secured. Power on your gaming PC and test to ensure that the graphics card is functioning correctly.
Properly installing the graphics card is crucial for optimal gaming performance. Take your time, handle the graphics card with care, and follow the manufacturer’s instructions and guidelines. With a properly installed graphics card, you’ll be able to enjoy smooth and immersive gaming experiences with stunning visuals.
Connecting the Peripherals
Connecting the peripherals to your gaming PC is essential for enabling input and output devices, allowing you to interact with your system. Here’s a step-by-step guide on how to connect the peripherals:
1. Keyboard and Mouse
Connect your keyboard and mouse to the appropriate USB ports on your gaming PC. These devices usually have USB connectors and can be plugged into any available USB port. Ensure a secure connection to prevent any intermittent issues.
2. Display
Connect your display device, such as a monitor or TV, to the graphics card on your gaming PC. Depending on your display device and graphics card, you may need to use an HDMI, DisplayPort, or DVI cable. Follow the manufacturer’s instructions for connecting the display properly.
3. Audio Devices
If you have external speakers or headphones, connect them to the appropriate audio port on your gaming PC. Most PCs have separate audio jacks for microphone input and audio output. Ensure correct placement of the audio plugs to avoid any sound-related issues.
4. USB Devices
If you have additional USB devices, such as a gaming controller, external storage, or peripherals, connect them to available USB ports on your gaming PC. USB devices usually have USB connectors and can be plugged into any available USB port.
5. Network Connectivity
If you want to connect to the internet via Ethernet, connect one end of the Ethernet cable to the Ethernet port on your gaming PC and the other end to the router or modem. Alternatively, if you have a wireless network adapter, follow the manufacturer’s instructions to connect to your wireless network.
6. Power on and Configure Peripherals
Once all the peripherals are connected, power on your gaming PC and configure them according to your preferences. Install any necessary drivers or software provided by the peripheral manufacturers to ensure optimal functionality.
Connecting the peripherals properly enables you to interact with your gaming PC effectively. Make sure to double-check all connections and ensure that all peripherals are functioning correctly. With all peripherals connected, you’ll be ready to enjoy your gaming experience to the fullest.
Cable Management
Proper cable management is essential for maintaining a clean and organized build, improving airflow, and preventing potential hazards or damage. Here are some tips to help you effectively manage the cables in your gaming PC:
1. Plan Ahead
Before starting the cable management process, take a moment to plan how you want to route your cables. Consider the shortest and most efficient paths, as well as the locations of cable tie-down points or hooks in your case.
2. Group and Bundle Cables
Grouping and bundling cables together helps to keep them organized and reduces clutter. Use cable ties, Velcro straps, or zip ties to secure cables in bundles. Route larger power cables and thicker data cables separately to minimize interference and ensure proper airflow.
3. Route Cables Behind the Motherboard
Many modern PC cases have ample space behind the motherboard tray for cable routing. Utilize this area to hide excess cables, improving aesthetics and airflow. Use cable tie-down points or hooks to secure the cables and prevent them from obstructing the motherboard or other components.
4. Use Cable Management Features of Your Case
Take advantage of any cable management features in your case, such as built-in cable routing channels, Velcro straps, or rubber grommets. These features are designed to help you effectively route and manage your cables, resulting in a cleaner build.
5. Keep Connectors Accessible
When routing cables, ensure that connectors or ports remain easily accessible. This will make it easier to connect or disconnect devices in the future, saving you time and effort during maintenance or upgrades.
6. Regularly Check and Adjust Cables
After completing the cable management process, periodically check and adjust your cables to maintain organization and prevent any potential issues. Over time, cables may become loose or tangled, so taking a few moments to readjust and tidy them up is beneficial.
Proper cable management not only improves the overall aesthetics of your gaming PC but also enhances airflow and reduces the risk of damage or overheating. Take your time to ensure neat and organized cable routing, and don’t hesitate to reposition or readjust cables for the best results. With efficient cable management, your gaming PC will not only look sleek and tidy but also perform at its best.
Testing and Troubleshooting
Once you have assembled your gaming PC, it’s crucial to test and troubleshoot to ensure that it functions optimally. Here are some steps you can take to test and troubleshoot your system:
1. Power on the System
After double-checking all connections and ensuring that everything is securely installed, plug in the power supply and switch on your gaming PC. Listen for any abnormal noises and observe the LED indicators to ensure that the system powers on without any issues.
2. Check the BIOS
Enter the BIOS (Basic Input/Output System) by pressing the designated key during startup. Ensure that the BIOS recognizes all the installed components, including the CPU, RAM, and storage devices. Verify that the clock speeds and memory timings are correctly detected and set to their appropriate values.
3. Run System Stability Tests
Use system stability testing software, such as Prime95 or Memtest86, to assess the overall stability and performance of your gaming PC. These tests can help identify any potential hardware issues, such as overheating, faulty RAM, or CPU instability.
4. Monitor Temperatures
Keep an eye on the temperatures of your CPU and other components using software such as CPUID HWMonitor or MSI Afterburner. Ensure that the temperatures stay within safe limits during idle and load conditions. If temperatures are too high, check to ensure that the CPU cooler is correctly mounted and that there is sufficient airflow within the case.
5. Troubleshoot Performance Issues
If you encounter any performance issues, such as slow boot times or crashes, start by updating your device drivers and operating system. Ensure that you have the latest updates and drivers installed for your hardware. Additionally, check for any software conflicts or background processes that may be affecting performance.
6. Seek Professional Help
If you are unable to resolve any issues or if your gaming PC experiences persistent problems, it may be beneficial to seek assistance from a professional technician. They can offer specialized knowledge and expertise to diagnose and fix any hardware or software-related issues.
Testing and troubleshooting your gaming PC is an ongoing process that ensures optimal performance and stability. Regularly monitor your system’s health, update software and drivers, and address any issues promptly. With thorough testing and effective troubleshooting, you can enjoy a smooth and trouble-free gaming experience.
Installing the Operating System
Now that your gaming PC is built and tested, it’s time to install the operating system (OS) to make it fully functional. Here’s a step-by-step guide on how to install the OS:
1. Prepare the Installation Media
Obtain a copy of the OS installation media, such as a USB drive with the OS files or a DVD-ROM. Ensure that you have the necessary product key or license information for the OS you intend to install.
2. Set Boot Priority in the BIOS
Access the BIOS (Basic Input/Output System) by pressing the designated key during startup. Locate the Boot or Startup options and set the priority to boot from the installation media (USB drive or DVD-ROM) before the internal storage drives.
3. Boot from the Installation Media
Insert the installation media into the appropriate drive and restart your gaming PC. The system should boot from the installation media and display the OS installation screen.
4. Follow the Installation Wizard
Follow the on-screen prompts provided by the OS installation wizard. Typically, you will be asked to select a language, accept the license agreement, choose the installation location, and configure user preferences. Make the appropriate selections based on your preferences.
5. Format and Partition Drives
During the installation process, you will have the option to format and partition the storage drives. Decide whether you want to partition your drives, and if so, how you want to allocate the storage space. Formatting and partitioning will erase any existing data on the drives, so make sure to back up any important files before proceeding.
6. Complete the Installation
Once you have made the necessary selections and configurations, proceed with the installation. The installation process may take some time to complete, and your PC may restart multiple times. Follow any additional prompts to set up user accounts, network settings, and other preferences.
7. Install Device Drivers
After the OS installation is complete, install the necessary device drivers for your hardware components. Refer to the manufacturer’s website or the included driver discs to obtain the latest drivers. Properly installed drivers will ensure optimal functionality and compatibility for your gaming PC.
Installing the operating system is a crucial step in making your gaming PC fully functional. Ensure that you have a valid license and follow the installation steps carefully. Once the OS is installed, you can begin installing your favorite games and software, customizing your system, and enjoying the full capabilities of your gaming PC.
Installing Drivers and Updates
After installing the operating system (OS) on your gaming PC, it’s essential to install the necessary drivers and updates to ensure optimal performance and compatibility with your hardware. Here’s a step-by-step guide on how to install drivers and updates:
1. Identify the Drivers
Identify the drivers needed for your hardware components, such as the motherboard, graphics card, sound card, and network adapter. Visit the manufacturer’s website for each component to download the latest drivers specific to your OS version.
2. Install Motherboard Drivers
Start by installing the necessary motherboard drivers. These drivers include chipset drivers, USB drivers, audio drivers, and network drivers. Follow the manufacturer’s instructions for each driver and make sure to restart your gaming PC if prompted.
3. Install Graphics Card Drivers
Next, install the graphics card drivers. Visit the website of your graphics card manufacturer, such as NVIDIA or AMD, and download the latest drivers for your specific graphics card model. Install the drivers and restart your PC to ensure proper functionality.
4. Install Other Hardware Drivers
Continue by installing drivers for other hardware components, such as the sound card, network adapter, and peripherals. Download the appropriate drivers from the respective manufacturer’s website and follow the installation instructions provided.
5. Update Windows
Once the hardware drivers are installed, it’s crucial to update your Windows OS to the latest version. Go to the Windows Update settings, check for updates, and install any available updates. Regularly updating your OS ensures security patches and improvements for system stability and performance.
6. Install Software Updates
Besides updating your OS, it’s important to keep your installed software up to date. This includes applications such as web browsers, antivirus software, and drivers update software. Check for updates on the respective software websites or use automatic update features if available.
7. Set Up Automatic Updates
To ensure that your gaming PC remains up to date in the future, consider setting up automatic updates for your OS and software applications. This will ensure that you receive the latest security patches, bug fixes, and performance enhancements without manual intervention.
Installing the necessary drivers and keeping your system up to date with the latest updates are essential for optimal performance, stability, and security. Be proactive in checking for updates regularly and keep your gaming PC running smoothly and efficiently.
Optimizing Gaming Performance
Once you have built your gaming PC and installed the necessary software, there are several steps you can take to optimize gaming performance. By following these guidelines, you can ensure smooth gameplay and maximize the capabilities of your gaming rig. Here are some tips to optimize gaming performance:
1. Keep Graphics Card Drivers Updated
Regularly update your graphics card drivers to leverage the latest performance optimizations and bug fixes. Visit the manufacturer’s website – such as NVIDIA or AMD – and download the latest driver updates specific to your graphics card model.
2. Adjust Graphics Settings
Within each game, adjust the graphics settings to find a balance between visual quality and performance. Lowering settings such as anti-aliasing, shadow quality, and texture details can significantly improve frame rates while maintaining an enjoyable gaming experience.
3. Monitor Temperature and Overclocking
Keep an eye on your system’s temperature while gaming to ensure it stays within safe limits. Consider using software like MSI Afterburner to monitor temperatures and adjust fan speeds. If you’re familiar with overclocking, you can cautiously overclock your CPU and graphics card for potential performance gains. However, make sure to do thorough research and follow proper precautions.
4. Optimize Power Settings
Adjust the power settings on your gaming PC to prioritize performance over energy savings. In the Power Options control panel (Windows), select the High Performance power plan to ensure your system operates at maximum performance. However, keep in mind that this may consume more power.
5. Close Unnecessary Background Processes
Before gaming, close any unnecessary background processes and applications to free up system resources. This can be achieved by using the Task Manager (Windows) to end non-essential tasks or by utilizing software like Razer Cortex or Game Mode (built into Windows 10) to optimize your system for gaming.
6. Optimize Storage
For faster load times and improved performance, install games on an SSD (Solid State Drive) instead of an HDD (Hard Disk Drive). Additionally, ensure your drives have sufficient free space to prevent performance degradation. Regularly defragmenting or optimizing your drives can help maintain their performance.
7. Consider Hardware Upgrades
If you encounter performance limitations in certain games, consider upgrading specific hardware components, such as adding more RAM, upgrading your graphics card, or upgrading to a faster CPU. Research the recommended system requirements for the games you play to identify potential areas for improvement.
Optimizing gaming performance involves finding the right balance between visual quality and smooth gameplay. By following these tips, you can enhance the performance of your gaming PC and enjoy a seamless and immersive gaming experience.
Conclusion
Congratulations on building your own gaming PC! Throughout this guide, we have explored the step-by-step process of building, setting up, and optimizing a gaming PC to ensure optimal performance in gaming. By carefully choosing the right components, properly installing them, and optimizing the system, you have created a powerful gaming rig that can deliver immersive experiences.
Choosing the right components, such as the CPU, graphics card, and RAM, is crucial for ensuring your gaming PC can handle the latest games and deliver smooth gameplay. Properly installing the components, from the power supply unit to the graphics card, ensures stable and reliable performance. Optimizing your gaming PC by updating drivers, adjusting graphics settings, and managing system resources helps to achieve the best possible gaming performance.
Remember to periodically check for driver updates, install operating system and software updates, and maintain good airflow within your gaming PC to ensure optimal performance over time. Regularly monitor temperatures and take steps to prevent overheating, such as cleaning the dust filters and ensuring proper cable management.
Building and maintaining a gaming PC can be an ongoing process. It’s always a good idea to stay informed about new technologies, performance tweaks, and software updates that can further enhance your gaming experience. Explore online communities, forums, and resources dedicated to PC gaming to expand your knowledge and discover new tips and tricks.
Now that your gaming PC is up and running, it’s time to unlock the full potential of your gaming experience. Install your favorite games, explore new worlds, and immerse yourself in fantastic virtual adventures. Enjoy the crisp graphics, smooth frame rates, and unbeatable performance that your carefully built gaming PC delivers.
Remember, building a gaming PC is not only about the hardware; it’s also about the joy of customizing and creating something uniquely yours. Embrace the opportunities for personalization, from choosing your PC case design and RGB lighting to selecting the perfect peripherals and accessories that suit your gaming style.
Embrace the freedom to upgrade and expand your gaming PC in the future, allowing it to evolve alongside the ever-advancing technology and your changing gaming needs. With your newfound knowledge and experience, you’ll be better equipped to make informed decisions and take your gaming experience to new heights.


