Introduction
Welcome to the comprehensive guide on how to boot a Sun Workstation from a CD-ROM with Solaris 10! Whether you are a system administrator or an individual interested in installing or upgrading your Sun Workstation’s operating system, this step-by-step tutorial is designed to help you navigate through the process with ease.
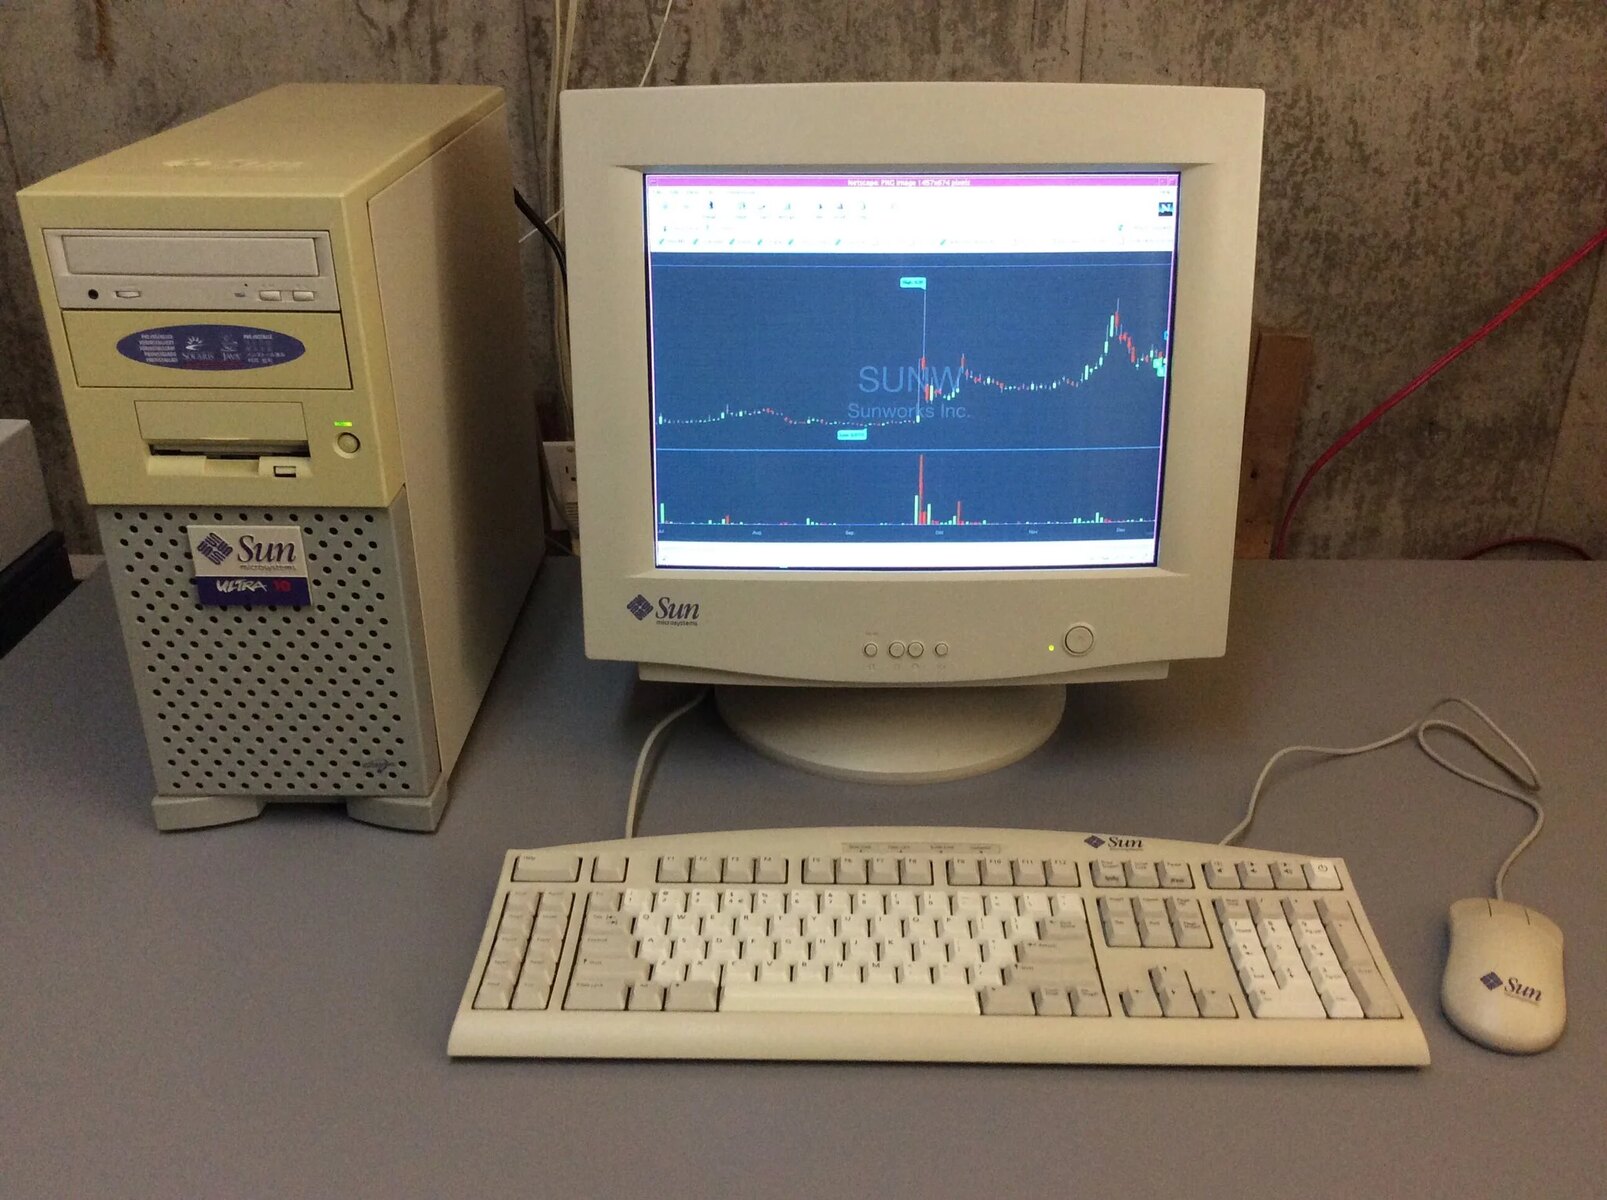
Solaris 10 is a highly stable and secure operating system developed by Sun Microsystems. It offers a wide range of features and benefits, including advanced file system management, robust networking capabilities, and built-in support for virtualization. By booting your Sun Workstation from a CD-ROM with Solaris 10, you can take advantage of the latest updates, patches, and enhancements to optimize your workstation’s performance and security.
In this guide, we will provide instructions on how to prepare the CD-ROM, power on the Sun Workstation, enter the OpenBoot PROM, set the boot device, boot from the CD-ROM, and subsequently install and configure Solaris 10. By following these steps, you will be able to seamlessly upgrade or install Solaris 10 on your Sun Workstation without any hassles.
It is important to note that the instructions provided in this guide are specific to Sun Workstations and Solaris 10. If you are using a different workstation or operating system, the steps may vary. Therefore, it is recommended to refer to the official documentation or seek expert assistance for your specific configuration.
Now, without further ado, let’s dive into the first step of preparing the CD-ROM for booting a Sun Workstation with Solaris 10!
Step 1: Prepare the CD-ROM
Before you can boot your Sun Workstation from the CD-ROM, you need to ensure that the CD-ROM is properly prepared. Here are the steps to follow:
- Locate the Solaris 10 installation CD-ROM: Check if you have the installation CD-ROM for Solaris 10. If not, you can download the ISO image from Oracle’s official website and burn it onto a blank CD-R using a CD burning software.
- Verify the integrity of the CD-ROM: It is crucial to ensure that the CD-ROM is error-free and the data is intact. You can do this by running a checksum or verifying the MD5/SHA1 hash values provided by Oracle. This step is essential to prevent any installation problems or data corruption during the boot process.
- Insert the CD-ROM into the CD/DVD drive: Once you have verified the integrity of the CD-ROM, carefully insert it into the CD/DVD drive of your Sun Workstation. Ensure that the CD-ROM is securely inserted and that the drive is functioning correctly.
- Confirm CD/DVD boot support: Access the BIOS settings of your Sun Workstation and verify that the CD/DVD drive is configured to support booting. Some workstations may require you to enable the “Boot from CD/DVD” option in the BIOS settings. Consult your workstation’s manual or contact the manufacturer for specific instructions on how to access and modify the BIOS settings.
- Save and exit BIOS settings: After confirming CD/DVD boot support, save any changes made in the BIOS settings and exit the BIOS setup utility. Your Sun Workstation will now reboot.
By following these steps, you have successfully prepared the CD-ROM for booting your Sun Workstation with Solaris 10. In the next step, we will guide you through powering on the workstation and accessing the OpenBoot PROM.
Step 2: Power on the Sun Workstation
Now that you have prepared the CD-ROM, it’s time to power on your Sun Workstation. Follow these steps to ensure a smooth power-on process:
- Make sure the Sun Workstation is properly connected to a power source: Check that the power cable is securely plugged into the workstation and that it is connected to a reliable power outlet. Ensure that the power outlet is switched on.
- Press the power button: Locate the power button on your Sun Workstation, typically located on the front or top panel. Press and hold the power button for a few seconds until you see the workstation’s power indicator light up. Release the button once the workstation starts powering on.
- Monitor the boot process: As the workstation powers on, you will see the startup sequence displayed on the screen. This may include the Sun Microsystems logo, POST (Power-On Self-Test) messages, and other system information. Pay attention to any error messages or prompts that may indicate a problem with the hardware or configuration settings.
- Wait for the workstation to complete the power-on process: The workstation will go through a series of self-checks and initialization procedures. Depending on the hardware configuration and system settings, this process may take a few minutes. Be patient and allow the workstation to complete the power-on process.
Once the workstation has powered on, you are now ready to enter the OpenBoot PROM and continue with the booting process. In the next step, we will guide you through accessing the OpenBoot PROM on your Sun Workstation.
Step 3: Enter the OpenBoot PROM
Entering the OpenBoot PROM (OBP) is an essential step in booting your Sun Workstation from the CD-ROM. The OBP is a firmware interface that allows you to interact with the system’s hardware and configure various settings. Here’s how you can enter the OBP:
- Restart the Sun Workstation: If your workstation is already powered on, you will need to restart it in order to enter the OBP. You can do this by selecting the option to restart from the operating system’s GUI or through the command line interface.
- Listen for the startup chime: As the workstation restarts, listen for a distinct startup chime. This chime indicates that the workstation is ready to accept commands to enter the OBP.
- Press the appropriate key combination: Once you hear the startup chime, quickly press and hold the appropriate key combination to enter the OBP. The specific key combination may vary depending on your Sun Workstation model. Commonly used key combinations include Stop+A, Stop+L, or Stop+N.
- Release the keys when the OBP prompt appears: After pressing the key combination, the OBP prompt should appear on the screen. This indicates that you have successfully entered the OpenBoot PROM environment. You can now proceed with configuring the boot device.
It’s worth noting that some newer Sun Workstation models may have a different method to enter the OBP, such as pressing a dedicated OBP button or accessing a specific menu option during the startup process. Refer to your workstation’s documentation or consult the manufacturer’s website for precise instructions tailored to your specific model.
Now that you have successfully entered the OpenBoot PROM, it’s time to move on to the next step: setting the boot device.
Step 4: Set the Boot Device
Setting the boot device in the OpenBoot PROM (OBP) is crucial to instruct your Sun Workstation to boot from the CD-ROM. The following steps will guide you through the process:
- Identify the available boot devices: At the OBP prompt, enter the command “devalias” to display a list of available boot devices. This command will provide you with a list of device names and their corresponding paths, such as “cdrom” for the CD-ROM drive and “disk” for the internal hard drive.
- Set the boot device: To set the boot device to the CD-ROM, use the “setenv” command followed by the device name and path. For example, enter “setenv boot-device cdrom” to assign the CD-ROM drive as the boot device. Make sure to replace “cdrom” with the appropriate device name from the “devalias” list.
- Save the settings: Once you have set the boot device, you need to save the changes to the NVRAM (non-volatile random-access memory) so that they persist across reboots. Use the “setenv” command followed by “saveenv” to save the settings.
- Verify the boot device settings: To ensure that the boot device setting is correctly configured, use the “printenv” command to display the current environment variables. Check the “boot-device” parameter to verify that the CD-ROM drive is set as the boot device.
It’s important to note that setting the boot device to the CD-ROM is temporary and will not affect the default boot device configuration. After the installation process is complete, the workstation will revert to booting from its default device (e.g., the internal hard drive) unless you manually modify the boot settings again.
With the boot device now set to the CD-ROM drive, you’re ready to move on to the next step: booting your Sun Workstation from the CD-ROM with Solaris 10.
Step 5: Boot from CD-ROM
Now that you have set the boot device to the CD-ROM, it’s time to boot your Sun Workstation from the CD-ROM containing the Solaris 10 installation. Follow these steps to initiate the boot process:
- Restart your Sun Workstation: If your workstation is still powered on, restart it. This can be done through the operating system’s GUI or via the command line interface.
- Wait for the OBP to initialize: As the workstation restarts, the OpenBoot PROM (OBP) interface will initialize. This process may take a few moments, during which you might see the OBP version and the device paths being scanned.
- Monitor the boot messages: Keep an eye on the screen as the workstation boots from the CD-ROM. You will see a series of boot messages and progress indicators, indicating that the system is loading the necessary files and drivers from the CD.
- Follow any prompts: Depending on your Sun Workstation model and configuration, you may encounter prompts during the boot process. These prompts might require you to select the desired language, confirm the installation source, or enter specific configuration settings. Follow the on-screen instructions and make the necessary selections accordingly.
- Wait for the Solaris 10 installer to load: After the necessary files have been loaded from the CD-ROM, the Solaris 10 installer will start. This graphical installer will guide you through the installation process, allowing you to customize various settings and choose the installation options that best suit your needs.
It’s important to note that the exact process and prompts may vary depending on the specific Solaris 10 version and your workstation’s hardware configuration. It is recommended to refer to the official Solaris 10 documentation or seek technical support for any specific instructions related to your workstation model.
Once the installation process starts, you can proceed with installing Solaris 10 on your Sun Workstation. We will cover the installation procedures and configurations in the next steps.
Step 6: Install Solaris 10
With your Sun Workstation successfully booted from the CD-ROM, it’s time to install Solaris 10. The installation process will guide you through setting up the operating system on your workstation. Follow the steps below to complete the installation:
- Select the installation language: The Solaris 10 installer will prompt you to select the language in which you want to proceed with the installation. Choose the appropriate language option and continue.
- Accept the license agreement: You will be presented with the Solaris 10 license agreement. Read through it carefully and, if you agree to the terms, accept the agreement to proceed with the installation.
- Select the installation type: The installer will provide options for the type of installation you wish to perform. This includes options such as a typical installation, a customized installation, or an upgrade from a previous version of Solaris. Choose the installation type that best suits your needs.
- Select the destination disk: The installer will display a list of available disks on your Sun Workstation. Select the appropriate disk on which you want to install Solaris 10. If needed, you can also partition the disk or create a new partition during this step.
- Configure additional installation options: Depending on your preferences and requirements, you may have the option to customize the installation by configuring additional options such as network settings, file systems, user accounts, and system security.
- Begin the installation: Once you have made all the necessary selections and configurations, initiate the installation process. The installer will copy the required files, install the operating system, and configure the system according to your chosen options.
- Monitor the installation progress: During the installation, the Solaris 10 installer will display progress bars and status messages to keep you informed about the installation process. Be patient and allow the installer to complete the installation without interruptions.
Once the installation is complete, your Sun Workstation will restart, and you will be ready to configure Solaris 10. In the following step, we will guide you through the process of configuring the newly installed operating system.
Step 7: Configure Solaris 10
After successfully installing Solaris 10 on your Sun Workstation, it’s time to configure the operating system to meet your specific needs. Follow these steps to customize and optimize your Solaris 10 configuration:
- Set the system hostname: The first step in configuring Solaris 10 is to set the hostname for your workstation. This can be done through the system settings or the command line interface. Choose a meaningful hostname that reflects the purpose or name of your workstation.
- Configure network settings: Next, configure the network settings to enable connectivity and communication. Depending on your network setup, you may need to specify an IP address, subnet mask, default gateway, and DNS servers. Make sure to provide accurate information based on your network requirements.
- Create user accounts: Set up user accounts for yourself and any additional users who will be utilizing the workstation. Specify the usernames, passwords, and any necessary user privileges. This step ensures secure access to the system and allows each user to have their own personalized environment.
- Set up time synchronization: Configure the system time synchronization to ensure that your workstation is always up to date. You can choose to synchronize with a network time server or use the system’s internal clock. Accurate timekeeping is crucial for various system functions and log management.
- Install additional software: If there are additional software packages or applications you need on your workstation, now is the time to install them. Solaris 10 provides package management tools that allow you to install, update, and remove software packages. Use these tools to add the desired software to your system.
- Configure system security: Implement security measures to safeguard your Solaris 10 workstation. This may include enabling firewalls, configuring access controls, setting up encryption, and enabling secure remote access protocols. Customize the security settings based on your specific requirements and the level of protection needed.
- Verify system settings: Once you have made the necessary configurations, verify the system settings to ensure that everything is in order. Double-check the network, user accounts, time synchronization, installed software, and security settings to ensure they are correctly set up and functioning as intended.
By following these steps to configure Solaris 10, you will have a customized and optimized operating system environment on your Sun Workstation. Feel free to explore additional Solaris 10 features and settings to further enhance your workstation’s performance and productivity.
Conclusion
Congratulations! You have successfully learned how to boot a Sun Workstation from a CD-ROM with Solaris 10. By following the step-by-step instructions in this guide, you can upgrade or install Solaris 10 on your workstation and take advantage of its powerful features and capabilities.
Remember, preparing the CD-ROM, powering on the Sun Workstation, entering the OpenBoot PROM, setting the boot device, booting from the CD-ROM, installing Solaris 10, and configuring the operating system are all essential steps in the process. Each step is crucial to ensure a smooth installation and a properly functioning Solaris 10 environment.
Throughout this guide, we have provided you with detailed instructions and tips to make the process as straightforward as possible. However, it’s important to note that the specific steps and prompts may vary based on your Sun Workstation model and the version of Solaris 10 you are installing. Consulting official documentation or seeking technical support can provide you with more precise instructions tailored to your specific configuration.
Once Solaris 10 is successfully installed and configured, you can explore its vast array of features such as advanced file system management, networking capabilities, and built-in virtualization support. Solaris 10 is designed to provide stability and security, making it an excellent choice for any Sun Workstation owner.
We hope that this guide has equipped you with the knowledge and confidence to effortlessly boot a Sun Workstation from a CD-ROM with Solaris 10. Enjoy your newly installed operating system and make the most of the powerful capabilities it offers!