Introduction
Backing up your important files and data is essential to protect against unexpected events such as hardware failures, accidental deletions, or ransomware attacks. While cloud-based backup solutions are becoming increasingly popular, using an external hard drive for backup remains a reliable and convenient option. With an external hard drive, you have complete control over your data and can easily access it offline.
In this article, we will explore the benefits of using an external hard drive for backup and provide a step-by-step guide on how to backup and restore your files. We will also discuss tips and best practices to ensure a successful backup process.
Having a backup strategy in place is crucial to safeguard your important files, such as documents, photos, videos, and music. Losing these files could have significant consequences, both personally and professionally. By using an external hard drive for backup, you can minimize the risk of losing your data and ensure its availability whenever you need it.
Not only does using an external hard drive provide peace of mind, but it also offers several other advantages. Unlike cloud-based solutions, an external hard drive gives you full control over your data. You don’t have to worry about privacy concerns or rely on an internet connection to access your files. You can simply plug in the external hard drive to your computer and access your data instantly.
Another benefit of using an external hard drive for backup is the speed of transferring files. With a USB 3.0 connection, you can enjoy fast data transfer rates, ensuring that your backup process is quick and efficient. This is especially beneficial when dealing with large files or a significant amount of data.
Furthermore, using an external hard drive allows you to create multiple copies of your data, providing an extra layer of redundancy. Having multiple backups ensures that even if one backup fails or becomes corrupted, you still have a reliable copy of your files.
In the following sections, we will guide you through the process of choosing the right external hard drive for backup, preparing it for backup, backing up files to the external hard drive, setting up a scheduled backup, verifying the backup, and restoring files when needed. By the end of this article, you will have a comprehensive understanding of how to effectively use an external hard drive for your backup needs.
Benefits of using an External Hard Drive for Backup
An external hard drive is a versatile and reliable option for backing up your important files. Here are some key benefits of using an external hard drive for backup:
- Control over your data: Unlike cloud-based backup solutions, using an external hard drive gives you complete control over your data. You don’t have to rely on third-party services or worry about privacy concerns. Your files are stored locally and accessible only to you.
- Offline access: Having an offline backup solution is essential in situations where you may not have access to an internet connection. With an external hard drive, you can access your files anytime, anywhere, without the need for an internet connection. This is especially useful when traveling or during internet outages.
- Faster backup and restore: With the high-speed USB 3.0 connection, external hard drives offer faster data transfer rates compared to cloud-based backups. This means that backing up and restoring your files is quicker and more efficient.
- Physical protection: External hard drives provide physical protection for your data. They are designed to withstand accidental drops, bumps, and other physical damage, keeping your files safe from hardware failures or accidents. Additionally, you can store your external hard drive in a secure location to protect it from theft or unauthorized access.
- Redundancy and data mirroring: Using an external hard drive allows you to create multiple copies of your data, providing an additional layer of redundancy. You can easily create a mirror image or synchronized backup of your files, ensuring that even if one backup fails or becomes corrupted, you still have a reliable copy of your important data.
- Cost-effective: External hard drives offer a cost-effective backup solution, especially when compared to monthly subscription fees for cloud-based backup services. You only need to make a one-time investment in the external hard drive, and you can use it for multiple backups over an extended period.
By utilizing an external hard drive for backup, you can enjoy these benefits and have peace of mind knowing that your important files are securely backed up and readily accessible whenever you need them. In the next section, we will discuss how to choose the right external hard drive for your backup needs.
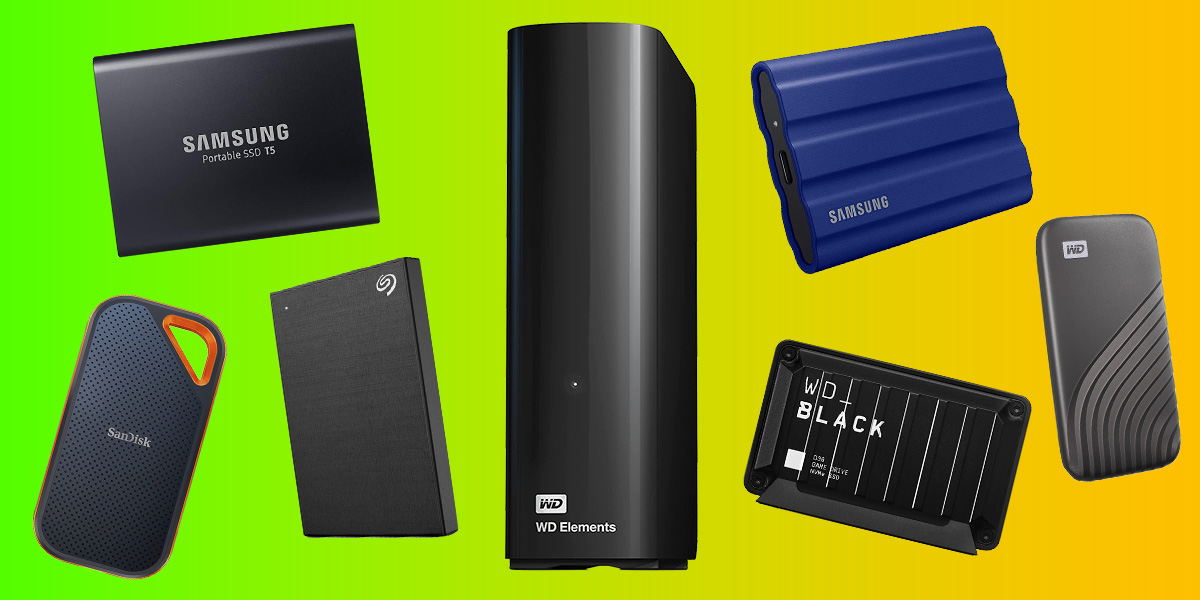
Choosing the Right External Hard Drive for Backup
When it comes to selecting an external hard drive for backup, there are a few factors to consider. The right choice will depend on your specific needs and preferences. Below are some key aspects to look for when choosing the right external hard drive for your backup:
- Storage capacity: The storage capacity of the external hard drive is crucial, as it determines how much data you can store. Assess your current storage needs and consider any future growth to ensure that you choose an external hard drive with ample storage space. It’s recommended to opt for a larger capacity than you currently require to accommodate any future data expansion.
- Interface and transfer speed: The interface of the external hard drive determines how it connects to your computer. USB 3.0 is the most common and offers high-speed data transfer rates. Ensure that the external hard drive you choose has a compatible interface with your computer to ensure optimal performance.
- Portability: If you need to carry your external hard drive with you frequently, consider its portability. Look for slim, lightweight designs that are easy to transport. Some external hard drives are specifically designed for portability, with rugged exteriors for added durability.
- Reliability and durability: Consider the reliability and durability of the external hard drive. Look for trusted brands that have a good reputation for producing reliable storage devices. Consider features such as shock resistance, water resistance, and encryption to ensure that your data remains safe and protected.
- Backup software: Some external hard drives come with built-in backup software, making the backup process more convenient. These software solutions offer automated backups, scheduled backups, and easy restoration of files. Evaluate the available backup software options and choose one that suits your requirements.
- Price: Set a budget for your external hard drive and consider the price in relation to the features and storage capacity offered. Compare prices from different retailers and online stores to find the best deal without compromising on quality and reliability.
Consider these factors when choosing the right external hard drive for your backup. It’s also worth reading customer reviews and seeking recommendations to ensure you make an informed decision. Once you’ve selected an external hard drive, you can proceed to prepare it for backup, which we will cover in the next section.
Preparing Your External Hard Drive for Backup
Before you start backing up your files to an external hard drive, it’s important to properly prepare the drive to ensure a smooth and efficient backup process. Follow these steps to get your external hard drive ready for backup:
- Format the external hard drive: If your external hard drive is brand new or has been used for other purposes, it’s recommended to format it before using it for backups. Formatting will erase any existing data on the drive and set it up for use. Be cautious while formatting and ensure that you have backed up any important data already on the drive.
- Choose the file system: When formatting the external hard drive, you’ll need to choose the file system. For compatibility with both Windows and Mac operating systems, consider using the exFAT file system. It allows you to read and write files on both platforms without any limitations.
- Create a new folder: Once the external hard drive is formatted, create a new folder on the drive to store your backup files. Naming the folder something descriptive, such as “Backup” or “My Files Backup,” will make it easier to organize and locate your backup files in the future.
- Organize files: If you have specific files or folders that you want to backup, organize them on your computer before starting the backup process. This will make it easier to locate and select the files you want to backup, saving you time and effort during the backup process.
- Ensure sufficient space: Check the storage capacity of your external hard drive and ensure that it has enough free space to accommodate your backup files. If needed, consider deleting unnecessary files or transferring them to another storage device to free up space on the external hard drive.
- Eject the external hard drive: Once you have completed the above steps, safely eject the external hard drive from your computer. This ensures that all pending read and write operations are completed and reduces the risk of data corruption. Follow the proper ejection process recommended by your operating system.
By following these preparatory steps, you’ll have your external hard drive ready for backup. With the drive properly formatted, organized, and set up, you can proceed to back up your files effectively. In the next section, we will guide you through the process of backing up files to your external hard drive.
Backing Up Files to Your External Hard Drive
Once you have prepared your external hard drive, you can start backing up your files using a simple and straightforward process. Follow these steps to back up your files to an external hard drive:
- Connect the external hard drive: Connect the external hard drive to your computer using the appropriate cable. Ensure that the drive is recognized by your computer and appears as a connected device.
- Select the files for backup: Identify the files and folders you want to back up from your computer. This could include important documents, photos, videos, and any other files you want to protect. You can select individual files or entire folders, depending on your backup needs.
- Copy and paste or drag and drop: Once you’ve selected the files for backup, you can choose either to copy and paste them or drag and drop them into the designated folder on your external hard drive. This will initiate the file transfer process, and your files will be copied to the external hard drive.
- Monitor the backup progress: Depending on the size and number of files being backed up, the process may take some time. Keep an eye on the progress bar or status indicator to monitor the backup process. Avoid interrupting the process until it is completed to ensure all files are successfully transferred.
- Verify the backup: After the backup is complete, it is essential to verify the integrity of the backup files. Open some of the backed-up files directly from the external hard drive to confirm that they are accessible and intact. This step helps ensure that you have a valid backup that can be restored in the future if needed.
- Eject the external hard drive: Once you have verified the backup and are certain that your files are safely stored on the external hard drive, make sure to eject the drive from your computer. Properly ejecting the drive protects your data from potential corruption and ensures that all pending read and write operations are completed.
Backing up files to your external hard drive is a crucial step in securing your data against unexpected loss. By following these steps, you can ensure that your important files are safely stored on your external hard drive. In the next section, we will explore how to set up a scheduled backup to automate the process.
Setting Up a Scheduled Backup
Setting up a scheduled backup can help automate the process and ensure that your files are regularly and automatically backed up to your external hard drive. This eliminates the need to manually initiate the backup every time and provides peace of mind knowing that your data is constantly protected. Follow these steps to set up a scheduled backup:
- Choose a backup software: If your external hard drive came with backup software, use that to set up the scheduled backup. Alternatively, you can explore third-party backup software options that offer advanced scheduling features. Choose a software that aligns with your operating system and meets your specific backup requirements.
- Select the files and folders for backup: Once you have installed the backup software, choose the files and folders you want to include in the scheduled backup. This can typically be done by browsing your computer’s file system and selecting the desired locations.
- Set the backup schedule: Determine how frequently you want the scheduled backup to occur. You can choose daily, weekly, or monthly backups, depending on the importance of your files and the frequency of updates and changes. It’s recommended to schedule backups during periods when your computer is typically powered on and not in use.
- Configure backup settings: Customize the backup settings according to your preferences. This may include options such as incremental backups to only back up changed or new files, encryption for added security, and compression to save storage space on the external hard drive.
- Test the scheduled backup: After you have set up the scheduled backup, it is essential to test its functionality. Ensure that the backup software is executing the scheduled backups as intended and that files are being backed up to the external hard drive. Verify the backup files and confirm that they are accessible and intact.
- Monitor and maintain the scheduled backup: Regularly check the backup software’s status and performance to ensure that backups are occurring as scheduled. Keep an eye out for any error messages or failures and address them promptly. Additionally, periodically check the available storage space on the external hard drive to ensure there is enough room for backups.
By setting up a scheduled backup, you can automate the backup process and ensure that your important files are regularly and consistently protected. This saves you time and effort while providing a reliable backup solution. In the next section, we will discuss how to verify the backup on the external hard drive to ensure its integrity.
Verifying Your Backup on the External Hard Drive
After performing a backup to your external hard drive, it is crucial to verify the integrity of the backup files. Verifying the backup ensures that your files are successfully and accurately stored on the external hard drive and can be restored if needed. Follow these steps to verify your backup on the external hard drive:
- Open files directly from the external hard drive: Access the backup files directly from the external hard drive by navigating to the designated backup folder. Open a few randomly selected files to ensure they can be accessed and viewed without any issues. This step confirms that the files were correctly copied to the external hard drive.
- Compare the original files: Compare the backup files on the external hard drive with the original files on your computer. Check the file sizes, timestamps, and contents to ensure they match. This step helps verify that the backup process accurately copied the files and that there are no discrepancies or data loss.
- Test file restoration: Select a few files from the backup on the external hard drive and attempt to restore them to your computer. This will verify that the restoration process works correctly and that the backup files can be successfully retrieved when needed. Ensure that the restored files open properly and are identical to the original versions.
- Check for any errors or discrepancies: While verifying the backup, keep an eye out for any errors or discrepancies. Look for any corrupted or inaccessible files, missing files, or unexpected changes. Address any issues promptly to ensure that your backup is reliable and up-to-date.
- Regularly perform verification: Verification should be performed on a regular basis to ensure the ongoing integrity of your backups. Set a schedule to periodically check and verify your backup files on the external hard drive. This will help catch any potential issues early on and allow you to take corrective measures if needed.
By following these steps to verify your backup on the external hard drive, you can have confidence in the reliability and effectiveness of your backup solution. If any issues are identified during the verification process, take the necessary steps to rectify them and ensure the integrity of your backup files. In the next section, we will discuss how to restore files from the external hard drive when needed.
Restoring Files from the External Hard Drive
Restoring files from your external hard drive is a straightforward process that allows you to retrieve your backed-up data whenever needed. Follow these steps to restore files from the external hard drive:
- Connect the external hard drive: Connect the external hard drive to your computer using the appropriate cable. Ensure that the drive is recognized by your computer and appears as a connected device.
- Navigate to the backup folder: Open the file explorer or finder on your computer and navigate to the backup folder on the external hard drive where your files are stored. This is the folder you designated for your backups during the initial setup.
- Select the files for restoration: Identify the files or folders you want to restore from the external hard drive. You can choose specific files or entire folders, depending on your needs. If restoring multiple files, you can utilize the shift or Ctrl key to select multiple files simultaneously.
- Copy and paste or drag and drop: Once you’ve selected the files for restoration, you can choose either to copy and paste them or drag and drop them to their original location on your computer. This will initiate the file transfer process and restore the files.
- Confirm the restoration: After the file transfer is complete, verify that the restored files are accessible and in their original condition. Open a few of the restored files to ensure their integrity and check for any issues or errors.
- Organize the restored files: If necessary, organize the restored files on your computer to their appropriate locations. This will help you maintain a structured file system and make it easier to access your restored data.
With these steps, you can successfully restore files from your external hard drive. Whether you need to retrieve a single file or an entire folder, the restoration process allows you to recover your backed-up data quickly and effortlessly. Keep in mind that regular backups and maintenance of your external hard drive are essential to ensure the availability and reliability of your restored files.
Throughout this article, we have discussed the benefits of using an external hard drive for backup, the process of choosing the right external hard drive, preparing it for backup, backing up files, setting up a scheduled backup, verifying the backup, and restoring files. By following these guidelines and best practices, you can protect your important data and have peace of mind knowing that your files are secure and readily available when needed.
Tips and Best Practices for External Hard Drive Backup
Backing up your files to an external hard drive is an effective way to protect your data from loss or damage. To ensure a successful and reliable backup process, here are some valuable tips and best practices to keep in mind:
- Backup regularly: Make it a habit to back up your files at regular intervals. Set up a schedule that suits your needs and ensures that your most recent data is always backed up.
- Keep multiple copies: It’s recommended to maintain multiple copies of your backups on different external hard drives or storage devices. This provides an additional layer of redundancy and protection.
- Store the external hard drive properly: Store the external hard drive in a cool, dry, and secure location to prevent physical damage. Avoid exposing it to extreme temperatures, humidity, or direct sunlight.
- Ensure sufficient storage space: Regularly check the available storage space on your external hard drive and make sure it has enough capacity to accommodate new backups. If necessary, consider upgrading to a larger capacity drive.
- Label and organize backups: Properly label and organize your backups to easily locate specific files or folders when needed. Use descriptive names or dates to simplify the identification process.
- Protect your external hard drive: Keep your external hard drive secure by using password protection or encryption. This adds an extra layer of security and ensures that only authorized individuals can access your backup files.
- Test your backups: Periodically restore files from your external hard drive to ensure that the backup files are intact and accessible. This helps identify any potential issues with the backup process or the integrity of the files.
- Keep your software up to date: Regularly update your backup software and firmware for the external hard drive to ensure compatibility and access to the latest features and improvements.
- Monitor errors and warnings: Keep an eye out for any error messages or warnings related to your external hard drive. Address any issues promptly to prevent data loss or corruption.
- Consider off-site backups: In addition to using an external hard drive, consider implementing off-site backups as an extra layer of protection. This can be achieved through cloud-based backup services or by keeping a duplicate external hard drive at a different location.
By following these tips and best practices, you can ensure a reliable and effective backup process with your external hard drive. Remember that proactive and consistent backup strategies are key to safeguarding your valuable data and protecting against unexpected events that can lead to data loss.
Conclusion
Using an external hard drive for backup offers numerous benefits, including control over your data, offline access, faster transfer speeds, physical protection, redundancy, and cost-effectiveness. By choosing the right external hard drive, preparing it properly, and following best practices, you can ensure the security and accessibility of your important files.
Setting up a scheduled backup automates the process and provides peace of mind knowing that your files are regularly protected. Verifying your backup on the external hard drive helps confirm the integrity of your backed-up data, while restoring files from the external hard drive allows you to retrieve your data whenever needed.
Remember to adhere to tips and best practices such as regular backups, keeping multiple copies, proper storage, sufficient space, organization, data protection, testing backups, software updates, error monitoring, and considering off-site backups. These practices contribute to a reliable and effective backup strategy.
Backing up your files is essential in safeguarding your valuable data against unexpected events. Whether it’s a sudden hardware failure, accidental deletion, or security breach, having a backup on an external hard drive ensures that your files are protected, easily accessible, and can be restored when needed.
By understanding the benefits of using an external hard drive for backup, following the recommended steps, and implementing best practices, you can create a robust backup system and have the peace of mind that your important files are securely backed up and readily available whenever you need them.