Introduction
Backing up your Windows 10 system is essential to safeguard your data and protect against unexpected data loss. Whether it’s due to a hardware failure, a malicious attack, or accidental deletion, losing important files can be devastating. Fortunately, Windows 10 offers several backup options to help you secure your data and restore it when needed.
In this article, we will explore the various backup methods available in Windows 10 and provide step-by-step instructions on how to set them up. We will also discuss the benefits and limitations of each method to help you choose the right backup solution for your needs.
Before diving into the different backup options, it’s important to understand the importance of backing up your system. By creating regular backups, you ensure that your valuable files, documents, photos, and videos are safe from unexpected events that could lead to data loss.
A backup acts as a safety net, allowing you to restore your files and settings to a previous state in the event of a system failure, hardware malfunction, or software corruption. With a reliable backup in place, you can minimize downtime and resume your work or personal activities without losing precious data.
Moreover, a backup provides peace of mind. Knowing that your important files are protected allows you to focus on your tasks without worrying about losing hours or weeks of hard work due to unforeseen circumstances.
In the following sections, we will explore the different backup options available in Windows 10, providing detailed instructions on how to set them up and utilize them effectively.
The Importance of Backing Up Your Windows 10 System
Backing up your Windows 10 system is not just a good practice, it is absolutely crucial to protect your valuable data and ensure the continuity of your work. Imagine losing all your important files, documents, photos, and videos in an instant – it can be a nightmare!
There are several reasons why backing up your Windows 10 system is important:
- Data Loss Prevention: Hardware failures, software glitches, viruses, power outages, and even human error can result in data loss. By having a backup, you can quickly recover your lost files and minimize the impact of such events.
- Protection Against Malicious Attacks: With the increasing number of cybersecurity threats, it’s more important than ever to protect your data from ransomware, viruses, and other malicious attacks. Regular backups can help you restore your system to a clean state, unaffected by these threats.
- Easy System Recovery: In the event of a system malfunction or software corruption, having a backup allows you to easily restore your system to a previous working state. This can save you a significant amount of time and frustration trying to troubleshoot and fix the issue.
- Peace of Mind: Knowing that your important files are securely backed up gives you peace of mind. You can focus on your work or personal activities without constantly worrying about losing your data due to unforeseen circumstances.
Windows 10 offers various backup options to suit different needs and preferences. Whether you prefer automatic backups, system images, or cloud storage services, there is a solution that fits your requirements.
Having emphasized the significance of backing up your Windows 10 system, it is now time to explore the different backup options provided by Windows 10. In the upcoming sections, we will guide you through each method, explaining how to set it up and utilize it effectively.
Different Backup Options for Windows 10
Windows 10 offers a range of backup options to suit different preferences and needs. Let’s explore some of the most common backup methods available:
- Using File History: File History is a built-in feature in Windows 10 that automatically backs up your files to an external drive or network location. It allows you to easily restore previous versions of files and recover deleted items. File History is ideal for individual file backup and is suitable for users who frequently work on important documents or files.
- Creating a System Image: Windows 10 allows you to create a complete replica of your system called a system image. This image includes the operating system, settings, programs, and files. In case of a system failure, you can use the system image to restore your computer to its previous state. Creating a system image is beneficial for those who want a full system backup and the ability to restore everything in one go.
- Using Windows Backup and Restore: Windows Backup and Restore is another built-in feature in Windows 10 that allows you to create backups of your files, system image, and even create a system repair disk. This comprehensive backup solution offers flexibility and control over what to backup and when to perform the backup.
- Utilizing Cloud Storage Services: Cloud storage services, such as OneDrive, Google Drive, or Dropbox, offer the convenience of storing your files in the cloud. By syncing your files to the cloud, you automatically create a backup that can be accessed from any device with an internet connection. Cloud storage is ideal for users who want their files accessible from anywhere and appreciate the added layer of security that comes with storing data on remote servers.
- Using Third-Party Backup Software: There are numerous third-party backup software options available for Windows 10 that offer advanced features and customization options. These software tools often provide more control over backup schedules, file encryption, and the ability to back up to different types of storage media.
Each backup method has its unique advantages, so it’s important to choose the option that best suits your needs. In the following sections, we will provide step-by-step instructions on how to set up and use each backup method.
Using File History
File History is a feature in Windows 10 that allows you to automatically back up your files to an external drive or network location. It provides an easy way to protect and restore your important files in case of accidental deletion, file corruption, or hardware failures.
To set up File History:
- Connect an external drive to your computer or set up a network location that will serve as the backup destination.
- Open the Settings app by clicking on Start and selecting the gear icon.
- In the Settings window, click on “Update & Security”.
- From the left-hand menu, select “Backup”.
- Click on “Add a drive” and select the external drive or network location you want to use for File History.
- Toggle the “Automatically back up my files” switch to “On”.
- Optional: Click on “More options” to customize which folders to include in the backup, how long to keep saved versions of files, and how frequently File History should run.
Once File History is set up, it will automatically start backing up your files based on the selected options. It will create multiple versions of the files and keep them in the backup destination, allowing you to easily restore previous versions if needed.
To restore files using File History:
- Open the folder where the file you want to restore is located.
- Right-click on the file and select “Restore previous versions”.
- A list of previous versions of the file will appear. Select the version you want to restore and click on the “Restore” button.
File History provides a convenient and user-friendly way to back up and restore individual files in Windows 10. However, it is important to regularly check the backup destination to ensure that there is enough storage space available for the backups. Additionally, remember to keep the external drive or network location connected to your computer to ensure continuous backups.
Creating a System Image
Creating a system image in Windows 10 allows you to create a complete copy of your system, including the operating system, settings, programs, and files. This is useful in case of a system failure, allowing you to restore your computer to its previous state with all your data intact.
To create a system image:
- Connect an external hard drive with sufficient storage capacity to your computer.
- Open the Control Panel by searching for it in the Start menu.
- Select “System and Security”, and then click on “Backup and Restore (Windows 7)”.
- In the Backup and Restore window, click on “Create a system image” located in the left-hand menu.
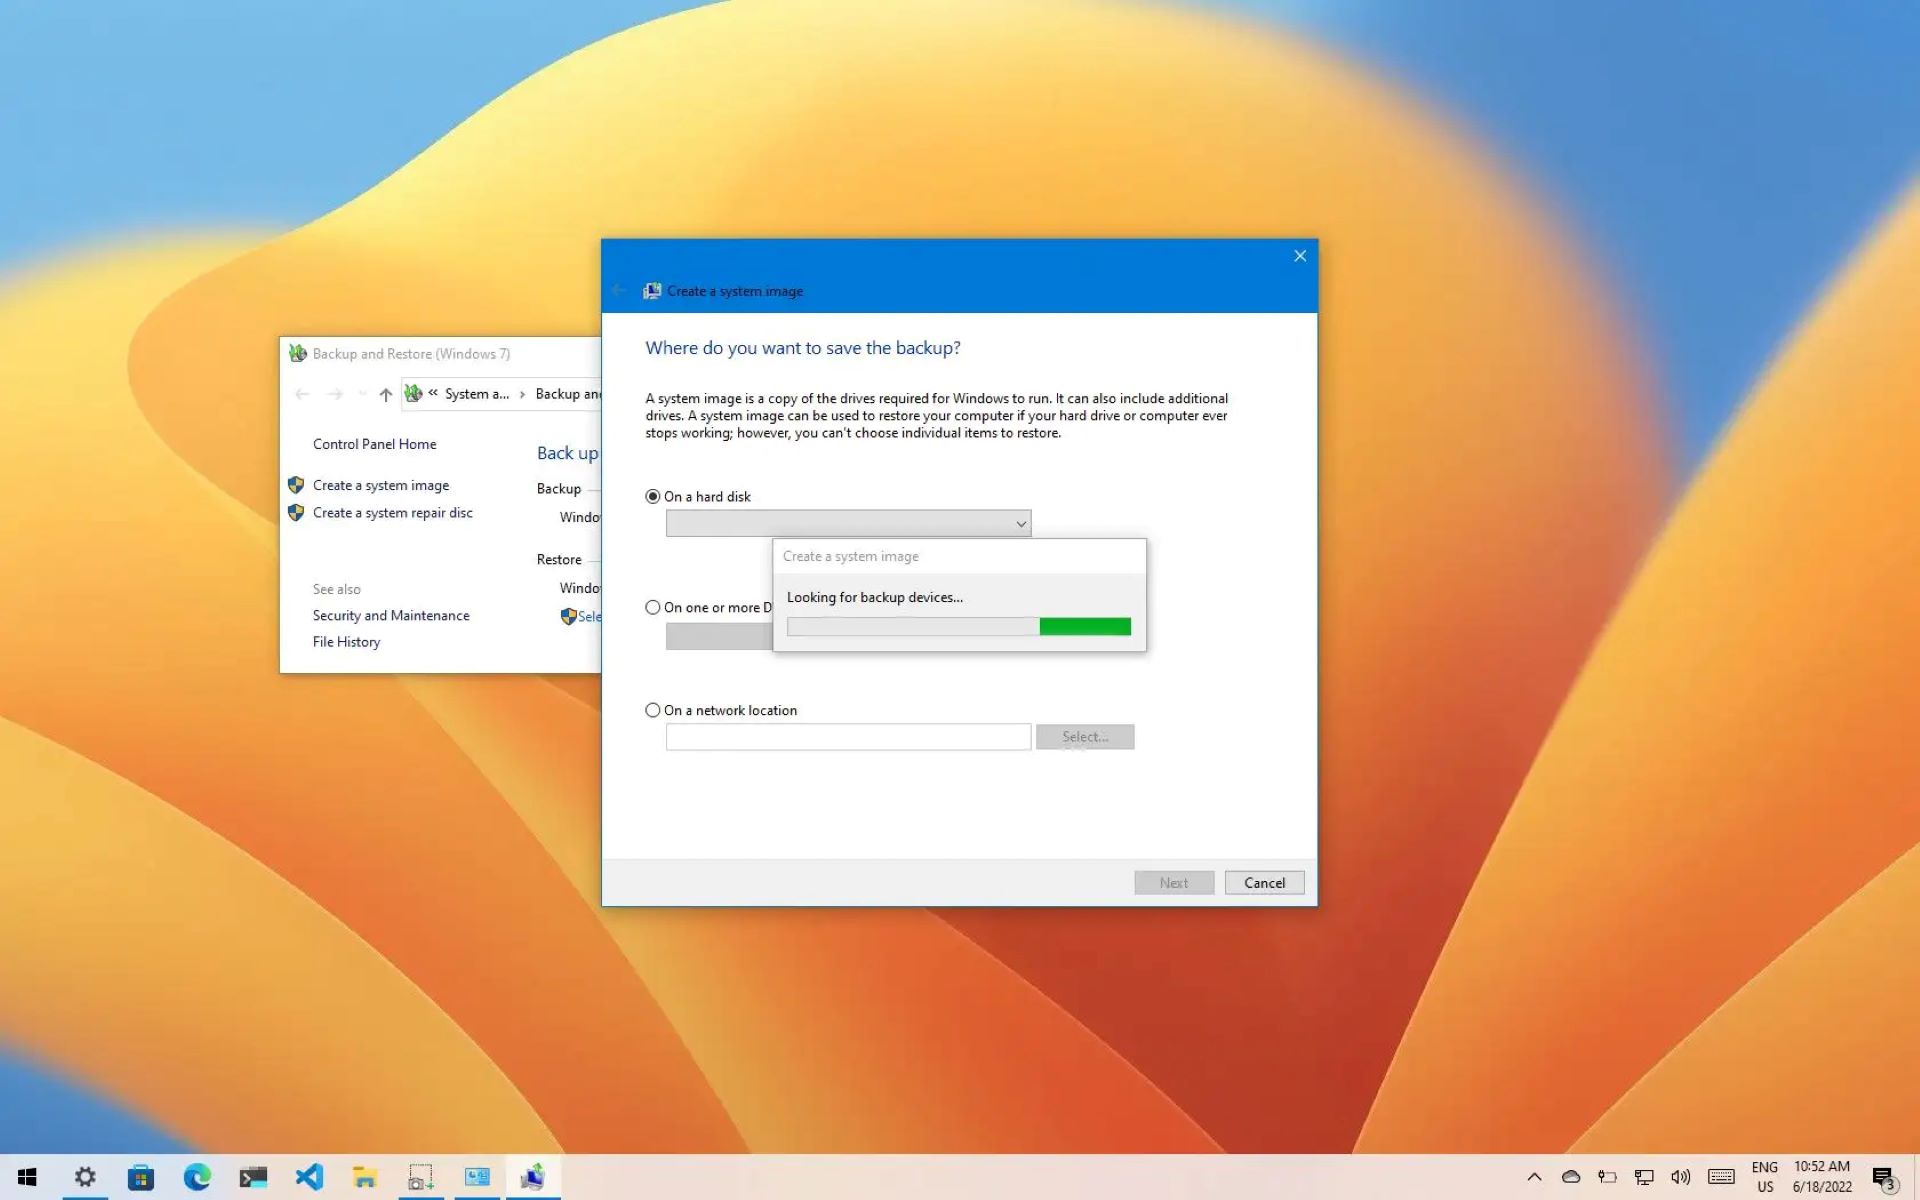
- Choose the destination where you want to save the system image. Select the connected external hard drive or a network location.
- Select the drives you want to include in the system image. By default, the system drive (usually C:) is selected along with the system reserved partition.
- Click on “Next” and review the backup settings. Make sure everything is correct, and then click on “Start backup”.
- Wait for the backup process to complete. The time it takes will depend on the size of your system and the speed of your external hard drive.
- Once the system image is created, you can create a system repair disk, which will allow you to boot your computer and restore the system image if needed. Follow the prompts in the Backup and Restore window to create the repair disk.
It’s important to regularly create system images to ensure that you have an up-to-date backup of your entire system. You can also schedule automatic system image backups to run periodically for added convenience.
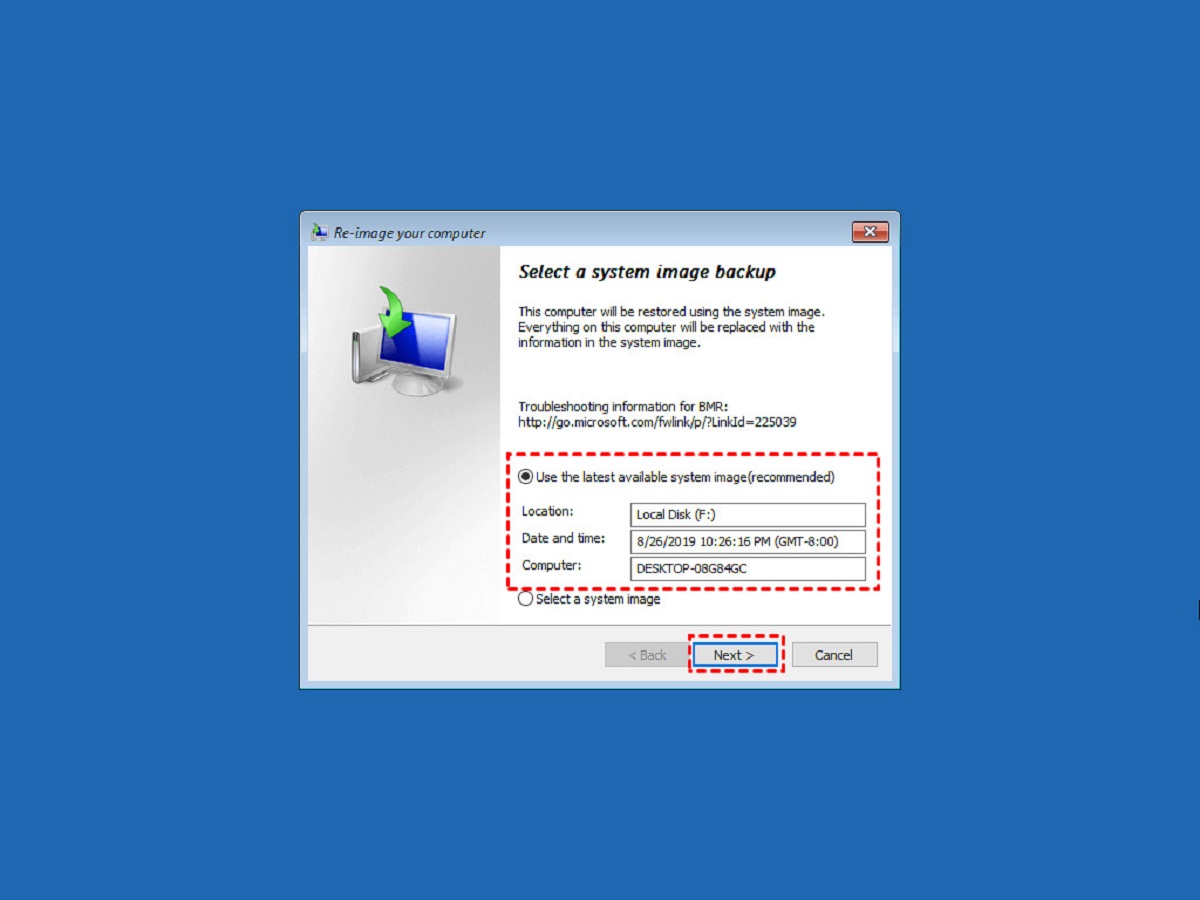
If you ever need to restore your computer using a system image, you can do so by booting from the system repair disk and following the prompts to restore the image. The restoration process will overwrite your current system, so it’s important to back up any new data or changes made since the last system image was created.
Creating a system image provides a comprehensive backup solution for Windows 10, allowing you to easily restore your entire system in case of a critical error or hardware failure. Keep in mind that system images can occupy a significant amount of storage space, so ensure that you have enough room on your external hard drive or network location to accommodate regular backups.
Using Windows Backup and Restore
Windows Backup and Restore is a built-in feature in Windows 10 that provides a comprehensive backup solution for your files, system image, and even the ability to create a system repair disk. With this feature, you have greater flexibility and control over what to backup and when to perform the backup.
To use Windows Backup and Restore:
- Connect an external hard drive with sufficient storage capacity to your computer.
- Open the Control Panel by searching for it in the Start menu.
- Select “System and Security”, and then click on “Backup and Restore (Windows 7)”.
- In the Backup and Restore window, click on “Set up backup”.
- Choose the destination where you want to save the backup. Select the connected external hard drive or a network location.
- Choose whether you want Windows to select the files to back up or if you want to manually choose the files and folders.
- Review the backup settings and click on “Save settings and run backup” to start the backup process.
You can also click on “Change schedule” to set up automatic backups at specific intervals, such as daily, weekly, or monthly.
Windows Backup and Restore also allows you to create a system repair disk, which is used to boot your computer and restore your backup in case of system failure. It’s recommended to create a system repair disk when setting up your backup to ensure you can restore your files and system even if your computer cannot boot normally.
To restore files using Windows Backup and Restore:
- Open the Backup and Restore window in the Control Panel.
- Click on “Restore my files” to selectively restore specific files or click on “Restore all users’ files” to restore all backed up files.
- Follow the prompts to locate the backup location and select the files or folders you want to restore.
- Choose the destination where you want to restore the files and click on “Restore”.
Windows Backup and Restore provides a comprehensive backup solution with the flexibility to choose which files to back up and when to perform the backups. It also includes the ability to create a system repair disk, ensuring that you can easily recover your files and system in the event of a disaster.
Utilizing Cloud Storage Services
Cloud storage services have gained popularity in recent years as a convenient and secure way to store and backup files. Services like OneDrive, Google Drive, or Dropbox allow you to store your files in the cloud, making them accessible from any device with an internet connection. Utilizing cloud storage services for backup offers several benefits:
- Accessibility: Cloud storage allows you to access your files from anywhere, on any device. This is particularly useful if you work from multiple devices or need to access your files on the go.
- Automatic Backup: Many cloud storage services offer automatic syncing of files. This means that any changes you make to files on your computer will be automatically reflected in the cloud storage, providing a seamless backup process.
- Version Control: Cloud storage services often keep track of file versions, allowing you to restore previous versions of files if needed. This is helpful in case of accidental changes or file corruption.
- Security: Cloud storage services typically have robust security measures in place to protect your files from unauthorized access. They use encryption and authentication protocols to ensure that your data remains secure.
To utilize cloud storage services for backup:
- Create an account with a cloud storage service provider of your choice.
- Download and install the cloud storage client application for your operating system.
- Sign in to the client application with your account credentials.
- Select the folders or files you want to back up to the cloud storage service.
- Allow the client application to sync your files to the cloud. The initial syncing process may take some time, depending on the size of your files and the speed of your internet connection.
Once the initial synchronization is complete, any changes made to the files in the designated folders will be automatically backed up and synced with the cloud storage service. This provides continuous protection for your files without the need for manual intervention.
It is worth noting that most cloud storage services offer a limited amount of free storage space, with options to upgrade to larger storage capacities for a fee. Evaluate your storage needs and consider if a free plan or a paid plan suits your requirements.
Utilizing cloud storage services for backup is a convenient and reliable method to protect your files. The automatic syncing and accessibility features make it a popular choice for users who value convenience and flexibility in their backup solutions.
Using Third-Party Backup Software
In addition to the built-in backup options provided by Windows 10, there are numerous third-party backup software options available that offer advanced features and customization options. These software tools can provide a more robust backup solution tailored to your specific needs.
Here are some benefits of using third-party backup software:
- Advanced Features: Third-party backup software often offers a wide range of advanced features such as scheduling backups, incremental backups, encryption, and compression. These features provide more control and flexibility in managing your backups.
- Greater Customization: With third-party backup software, you can often customize your backup settings and choose which files, folders, or even entire drives to include or exclude from the backup. This allows you to fine-tune your backup strategy based on your specific requirements.
- Diverse Backup Options: Third-party software can offer additional backup options beyond what is available in Windows 10, such as backing up to multiple destinations, backing up to cloud storage services, or creating bootable recovery media.
- Technical Support: Many third-party backup software providers offer dedicated technical support to assist you with any issues or questions you may have. This can be particularly helpful if you encounter any challenges during the backup or restoration process.
When choosing third-party backup software, consider factors such as ease of use, compatibility with your operating system and hardware, reputation, and the specific features that are important to you.
Here are some popular third-party backup software options for Windows 10:
- Acronis True Image: Acronis True Image provides comprehensive backup and recovery features, including system imaging, file backup, and cloud backup options.
- Macrium Reflect: Macrium Reflect offers easy-to-use backup and disk imaging solutions, with features like scheduled backups, disk cloning, and rapid delta restore.
- EaseUS Todo Backup: EaseUS Todo Backup provides a user-friendly interface and a variety of backup options, including system backup, file backup, and disk/partition backup.
- Paragon Backup & Recovery: Paragon Backup & Recovery offers advanced backup and disk imaging capabilities, including backup scheduling, differential backups, and support for virtual machines.
Each third-party backup software has its own unique features and capabilities. Take the time to research and compare different options to find the one that best fits your backup needs.
Using third-party backup software can enhance your backup strategy and provide more flexibility and customization options. Consider your specific requirements and explore the various software solutions available to find the right fit for your Windows 10 system.
How to Set up and Use File History
Setting up and using File History in Windows 10 is a straightforward process that allows you to automatically back up your files to an external drive or network location. Here’s how to get started:
- Connect an external drive to your computer or set up a network location that will serve as the backup destination.
- Open the Settings app by clicking on Start and selecting the gear icon.
- In the Settings window, click on “Update & Security”.
- From the left-hand menu, select “Backup”.
- Click on “Add a drive” and select the external drive or network location you want to use for File History.
- Toggle the “Automatically back up my files” switch to “On”.
- Optional: Click on “More options” to customize which folders to include in the backup, how long to keep saved versions of files, and how frequently File History should run.
Once File History is set up, it will start automatically backing up your files based on the selected options. It will create multiple versions of the files, making it easy to restore previous versions if needed.
To restore files using File History:
- Open the folder where the file you want to restore is located.
- Right-click on the file and select “Restore previous versions”.
- A list of previous versions of the file will appear. Select the version you want to restore and click on the “Restore” button.
File History provides a user-friendly and efficient way to back up and restore individual files in Windows 10. It offers flexibility in choosing backup destinations and customizable backup options. Additionally, File History makes it easy to recover files from previous versions, giving you peace of mind knowing that your important files are protected.
Remember to regularly check the backup destination to ensure that enough storage space is available for the backups. It’s also important to keep the external drive or network location connected to your computer to ensure continuous backups.
By setting up and utilizing File History, you can ensure the safety of your files and easily restore any lost or corrupted data, making it an essential tool for Windows 10 users.
How to Create a System Image in Windows 10
Creating a system image in Windows 10 is a reliable way to back up your entire system, including the operating system, settings, programs, and files. Follow these steps to create a system image:
- Connect an external hard drive with sufficient storage capacity to your computer.
- Open the Control Panel by searching for it in the Start menu.
- Select “System and Security”, and then click on “Backup and Restore (Windows 7)”.
- In the Backup and Restore window, click on “Create a system image” located in the left-hand menu.
- Choose the destination where you want to save the system image. Select the connected external hard drive or a network location.
- Select the drives you want to include in the system image. By default, the system drive (usually C:) is selected along with the system reserved partition.
- Click on “Next” and review the backup settings. Make sure everything is correct, and then click on “Start backup”.
- Wait for the backup process to complete. The time it takes will depend on the size of your system and the speed of your external hard drive.
- Once the system image is created, you can create a system repair disk, which will allow you to boot your computer and restore the system image if needed. Follow the prompts in the Backup and Restore window to create the repair disk.
It is important to regularly create system images to ensure that you have an up-to-date backup of your entire system. You can also schedule automatic system image backups to run periodically for added convenience.
If you ever need to restore your computer using a system image, you can do so by booting from the system repair disk and following the prompts to restore the image. The restoration process will overwrite your current system, so it’s important to back up any new data or changes made since the last system image was created.
Remember to store the system image in a safe and secure location, such as an external hard drive or network location, to ensure its availability when needed. Additionally, keep in mind that system images can occupy a significant amount of storage space, so ensure that you have enough room on your destination drive to accommodate regular backups.
Creating a system image provides a comprehensive backup solution for Windows 10, allowing you to easily restore your entire system in case of a critical error or hardware failure. It is a recommended practice to regularly create system images to ensure the integrity and recoverability of your Windows 10 environment.
How to Use Windows Backup and Restore
Windows Backup and Restore is a built-in feature in Windows 10 that provides a comprehensive backup solution for your files, system image, and even allows you to create a system repair disk. Here’s how to use Windows Backup and Restore:
- Connect an external hard drive with sufficient storage capacity to your computer.
- Open the Control Panel by searching for it in the Start menu.
- Select “System and Security”, and then click on “Backup and Restore (Windows 7)”.
- In the Backup and Restore window, click on “Set up backup”.
- Choose the destination where you want to save the backup. Select the connected external hard drive or a network location.
- Choose whether you want Windows to select the files to back up or if you want to manually choose the files and folders.
- Review the backup settings and click on “Save settings and run backup” to start the backup process.
You can also click on “Change schedule” to set up automatic backups at specific intervals, such as daily, weekly, or monthly.
Windows Backup and Restore also allows you to create a system repair disk, which is used to boot your computer and restore your backup in case of system failure. It’s recommended to create a system repair disk when setting up your backup to ensure you can restore your files and system even if your computer cannot boot normally.
To restore files using Windows Backup and Restore:
- Open the Backup and Restore window in the Control Panel.
- Click on “Restore my files” to selectively restore specific files or click on “Restore all users’ files” to restore all backed up files.
- Follow the prompts to locate the backup location and select the files or folders you want to restore.
- Choose the destination where you want to restore the files and click on “Restore”.
Windows Backup and Restore provides a comprehensive backup solution with the flexibility to choose what to back up and when to perform the backups. It also includes the ability to create a system repair disk, ensuring that you can easily recover your files and system in the event of a disaster.
Regularly check the backup destination to ensure that sufficient storage space is available for backups. It’s also important to keep the external hard drive or network location connected to your computer to ensure continuous backups.
By utilizing Windows Backup and Restore, you can have peace of mind knowing that your important files and system are protected and easily recoverable in case of accidental deletion, hardware failure, or system corruption.
Tips for Using Cloud Storage Services for Backup
Cloud storage services, such as OneDrive, Google Drive, or Dropbox, offer a convenient and secure way to back up your files. To make the most out of using cloud storage services for backup, consider the following tips:
- Choose a Reliable and Secure Service: Select a reputable cloud storage service that provides reliable service, robust security measures, and a good track record for data protection.
- Take Advantage of Automatic Syncing: Enable automatic syncing on your device to ensure that your files are continuously backed up to the cloud without requiring manual intervention.
- Create a Folder Structure: Organize your files into a logical folder structure to facilitate easy navigation and efficient backup and restoration.
- Regularly Check Storage Space: Monitor the available storage space in your cloud storage account to ensure that it is sufficient for your backup needs. Consider upgrading your storage plan if necessary.
- Enable File Versioning: If your cloud storage service offers file versioning, enable this feature to keep track of changes made to your files. This allows you to restore previous versions if needed.
- Use Encryption: For added security, encrypt your files before uploading them to the cloud. Many cloud storage services offer encryption options, or you can use third-party encryption tools.
- Enable Two-Factor Authentication: Protect your cloud storage account by enabling two-factor authentication. This adds an extra layer of security and helps prevent unauthorized access to your files.
- Regularly Test Your Restorations: Periodically test the restoration process by retrieving and opening files from your cloud storage. This ensures that your backup is functioning properly and your files are accessible.
- Consider Multiple Backup Services: Diversify your backup strategy by using multiple cloud storage services or combining cloud storage with other backup methods. This provides redundancy and protects against potential service outages or data loss.
- Maintain a Local Backup: While cloud storage services offer convenience and accessibility, it’s also a good practice to maintain a local backup on an external hard drive or network-attached storage (NAS) device. This ensures that you have an additional copy of your important files offline.
By following these tips, you can maximize the benefits of using cloud storage services for backup and ensure the safety and accessibility of your files. Regularly review and optimize your backup strategy to adapt to changing needs and technology advancements.
Recommended Third-Party Backup Software for Windows 10
While Windows 10 offers built-in backup options, third-party backup software can provide additional features and customization options to enhance your backup strategy. Here are some recommended third-party backup software options for Windows 10:
- Acronis True Image: Acronis True Image is a popular and comprehensive backup software that offers features like system imaging, file backup, cloud backup, and ransomware protection. It provides a user-friendly interface and robust backup capabilities.
- Macrium Reflect: Macrium Reflect is a reliable backup solution that offers advanced features such as scheduled backups, disk cloning, and rapid delta restore. It provides options for both file-level and system-level backups, along with flexible recovery options.
- EaseUS Todo Backup: EaseUS Todo Backup is a user-friendly backup software that offers a range of backup and recovery features. It supports system backup, file backup, disk/partition backup, and even provides options for backup scheduling and intelligent disk imaging.
- Paragon Backup & Recovery: Paragon Backup & Recovery is a comprehensive backup software that offers features such as backup scheduling, differential backups, automated virtualization, and disk imaging. It provides advanced options for system backup, file backup, and data migration.
- Norton 360: Norton 360 is an all-in-one security solution that includes robust backup and restore functionality. It offers features like automatic backup, cloud backup, and ransomware protection. Norton 360 provides a seamless and integrated backup solution along with comprehensive security features.
- AOMEI Backupper: AOMEI Backupper is a reliable backup software that offers various backup and restore options. It supports system backup, disk backup, file backup, and partition backup, along with features like incremental and differential backups, encryption, and advanced scheduling.
When choosing a third-party backup software, consider factors such as ease of use, compatibility with your Windows 10 version, desired features, and budget. It’s also recommended to read user reviews and compare the available options before making a decision.
Remember to regularly update and maintain your chosen backup software to ensure compatibility with the latest Windows 10 updates and security enhancements.
By utilizing reliable third-party backup software, you can enhance your backup strategy and customize it to meet your specific needs. These software options offer advanced features, flexibility, and convenience to ensure the safety of your data in case of emergencies or system failures.
Final Thoughts
Backing up your Windows 10 system is vital for protecting your valuable data and ensuring its availability in case of unexpected events. Whether you choose to use the built-in backup options or opt for third-party backup software, having a reliable backup strategy is essential.
Consider the different backup methods available, such as File History, system imaging, Windows Backup and Restore, cloud storage services, or third-party software, and select the options that best suit your needs. Each method has its advantages and limitations, so evaluate your requirements and choose accordingly.
Regularly creating backups and testing the restoration process is crucial to verify the integrity of your backups and ensure your ability to recover your data when needed. Make it a habit to review and update your backup strategy to adapt to changing circumstances and technology advancements.
Remember that backups should be stored in a secure location, preferably in multiple locations, including external hard drives, network drives, and cloud storage services, to minimize the risk of data loss due to hardware failures, natural disasters, or theft.
Lastly, having a reliable backup strategy should be part of your overall data protection plan. It’s important to complement backups with other security measures like strong passwords, regular software updates, and using reputable antivirus software to prevent data breaches or malicious attacks.
By implementing a comprehensive backup strategy and staying vigilant about data protection, you can minimize the impact of data loss and ensure the continuity of your work and personal activities.