Introduction
Welcome to the world of Time Machine backups! In this digital age, it’s crucial to have a reliable backup solution to protect your valuable data. Time Machine, a built-in backup feature on macOS, offers a seamless and efficient way to safeguard your files, applications, and system settings.
Backing up your Mac to an external hard drive using Time Machine provides you with peace of mind, allowing you to recover your data in case of accidental deletion, hardware failure, or other unforeseen circumstances. With Time Machine, you can easily retrieve specific versions of files or even restore your entire system to a previous state.
In this article, we will guide you through the process of backing up your Mac using Time Machine to an external hard drive. We will cover everything from selecting the right external hard drive to setting up Time Machine and troubleshooting any potential issues. By following these steps, you can ensure that your important files are safe and easily recoverable.
Before we dive into the details, it’s important to note that Time Machine is compatible with most external hard drives formatted in Mac OS Extended (Journaled) or the newer Apple File System (APFS) formats. Additionally, Time Machine can also backup to network-attached storage (NAS) devices that support Time Machine.
Now, let’s get started on our journey to back up your precious data with Time Machine!
Time Machine Overview
Time Machine is a powerful and user-friendly backup software that comes pre-installed on macOS. It is designed to automatically create incremental backups of your entire Mac system, including documents, photos, applications, system preferences, and more. These backups are stored on an external hard drive, allowing you to restore files or even your entire system to a previous state.
One of the standout features of Time Machine is its ability to perform continuous backups. After an initial full backup, Time Machine only backs up the changes made to your files, cutting down on the time and storage required for subsequent backups. This feature ensures that your backups are up to date without taking up unnecessary disk space.
Another noteworthy feature of Time Machine is its intuitive interface. When you access Time Machine, you are presented with a visually stunning timeline that allows you to easily navigate through your backups. You can browse different versions of your files and restore them with a simple click. Time Machine also enables you to search for specific files or folders, making it effortless to locate and recover your important data.
Time Machine offers various options to customize your backup preferences. You can exclude certain files, folders, or even entire volumes from being backed up if you have files that are not essential or take up excessive storage space. Time Machine also provides the flexibility to set the interval for backup frequency and adjust the size of the backup cache to optimize your backup experience.
Additionally, Time Machine includes a convenient feature called “Local Snapshots.” This feature allows your Mac to store a limited number of backups directly on the internal hard drive when the external hard drive is not connected. This can be particularly useful for MacBook users who may not always have their external hard drives with them.
Overall, Time Machine is a reliable and user-friendly backup solution that provides comprehensive protection for your Mac. Its seamless integration with macOS and intuitive interface make it an ideal choice for both beginners and advanced users who want to ensure the safety and availability of their valuable data.
Selecting an External Hard Drive
When it comes to backing up your Mac using Time Machine, selecting the right external hard drive is essential. The external hard drive you choose should be reliable, compatible with Time Machine, and provide ample storage capacity for your backup needs. Here are some factors to consider when selecting an external hard drive:
Storage Capacity: The storage capacity of the external hard drive should be sufficient to accommodate your backup requirements. Consider the size of your Mac’s internal storage and the amount of data you need to back up. It’s recommended to choose a drive with at least twice the capacity of your Mac’s internal storage to allow for future growth and multiple backups.
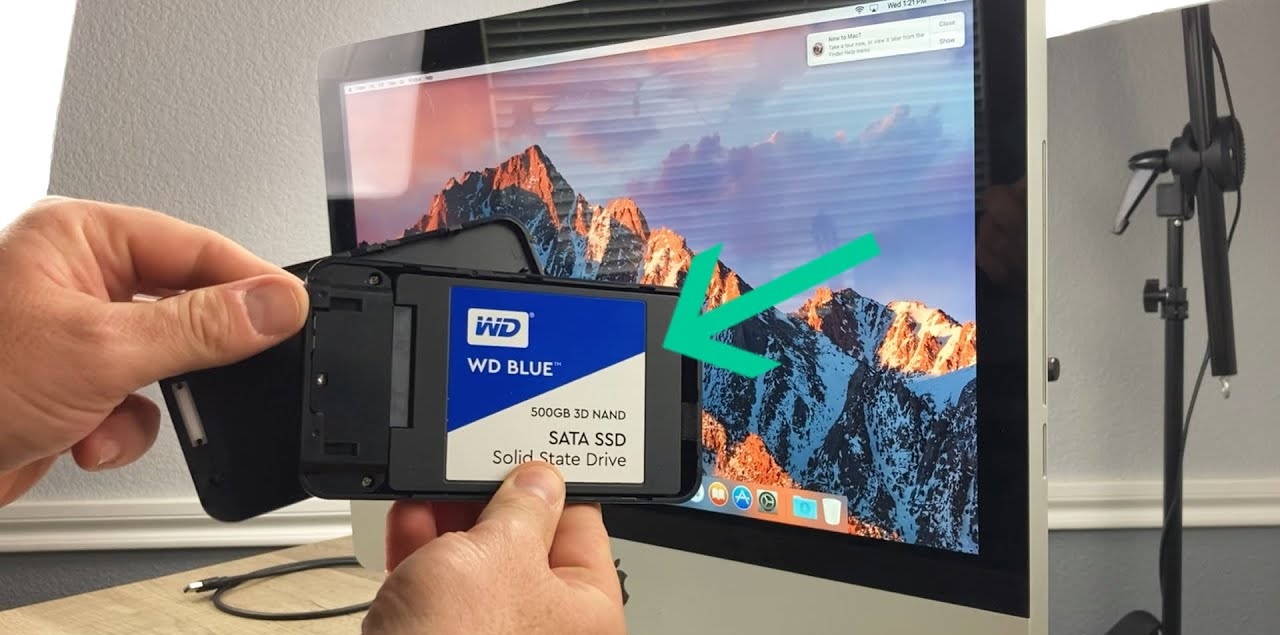
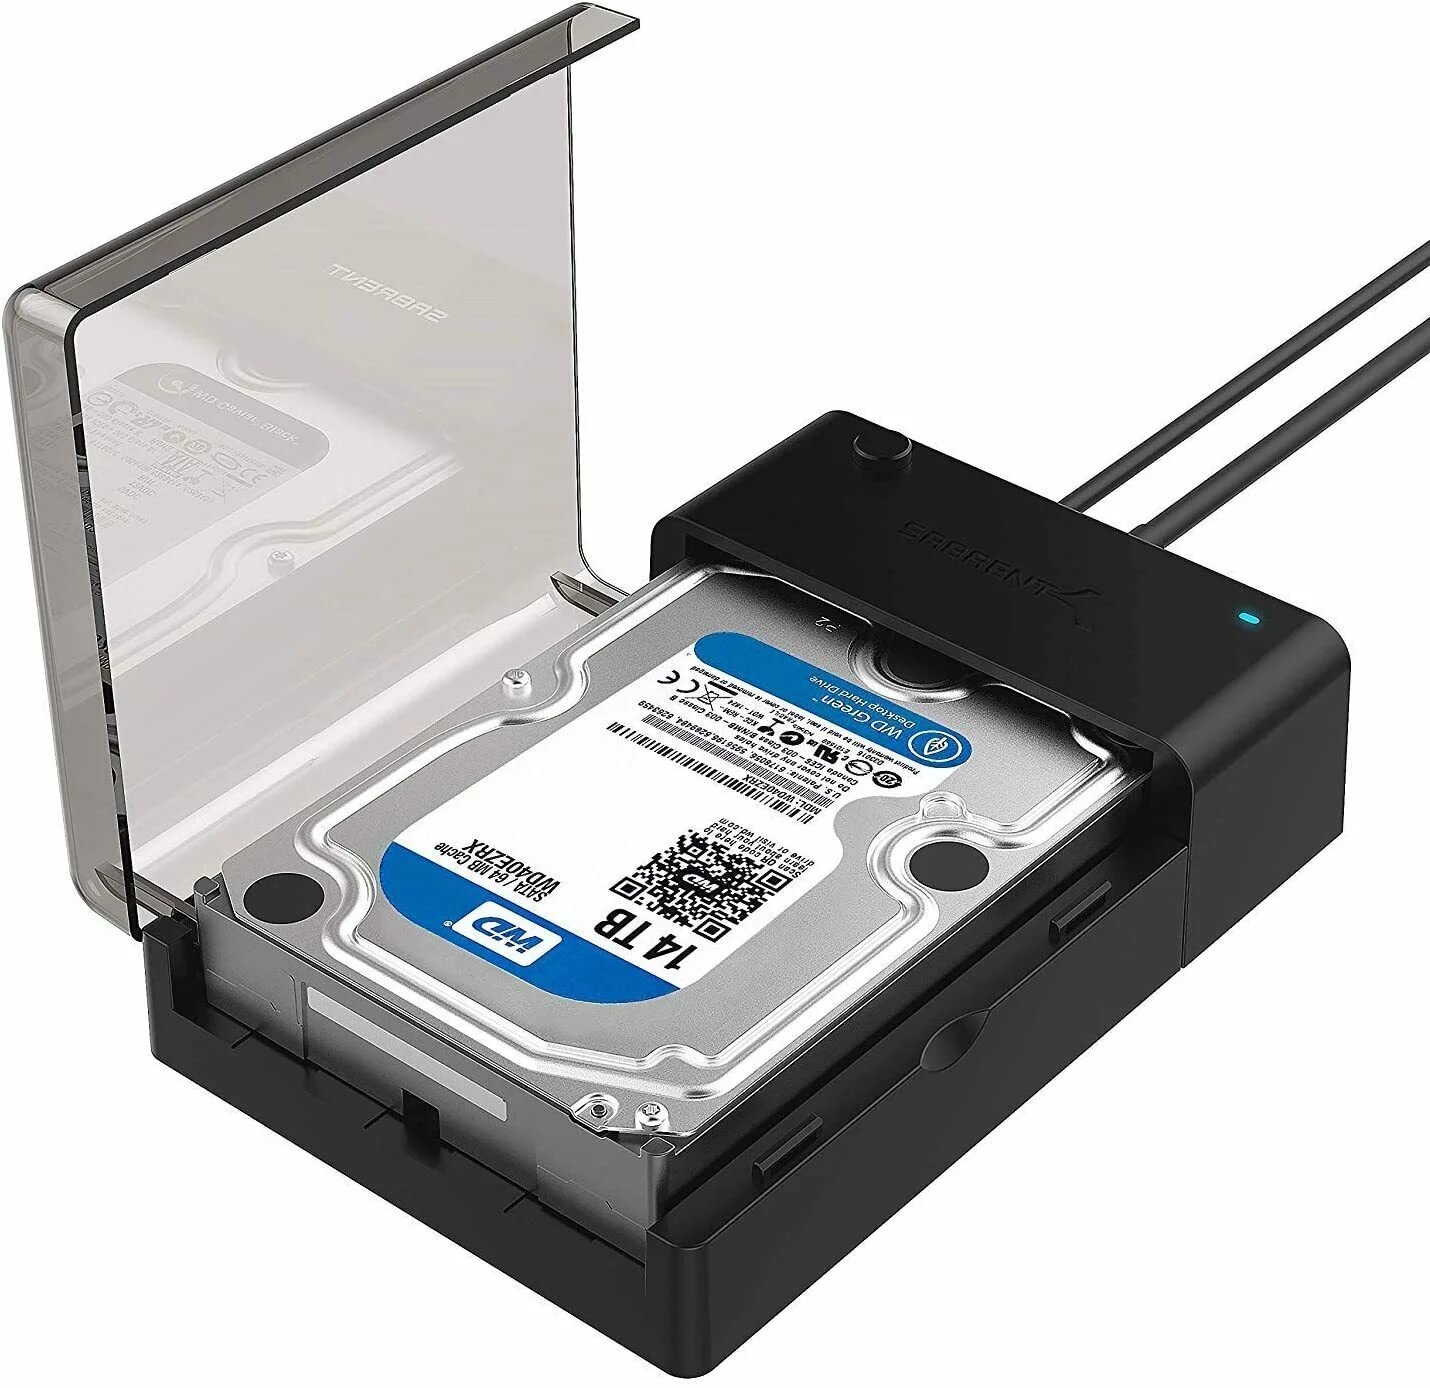
Connection Interface: The connection interface determines how the external hard drive connects to your Mac. Common interfaces include USB, Thunderbolt, and FireWire. USB is the most widely supported and affordable option, while Thunderbolt offers faster transfer speeds. Ensure that your Mac has the necessary ports to connect the external hard drive.
Durability and Reliability: Look for an external hard drive that is durable and reliable. Consider factors like build quality, shock resistance, and backup drive reviews to ensure that you choose a drive that can withstand regular use and provide long-term reliability for your backups.
Compatibility: Ensure that the external hard drive is compatible with Time Machine. Most drives are compatible with Time Machine, but it’s always a good idea to check the manufacturer’s specifications or customer reviews to confirm compatibility.
Portability: If you plan on using the external hard drive for on-the-go backups or connecting it to multiple devices, consider its size, weight, and portability features. Portable drives are usually smaller and more lightweight, making them convenient for travel.
Price: Set a budget and consider the price of the external hard drive. While it’s important to invest in a reliable drive, there are options available at various price points. Compare features and prices to find the best balance between affordability and functionality.
By considering these factors, you can select an external hard drive that meets your backup needs and provides a reliable and compatible storage solution for Time Machine. Once you’ve chosen the right external hard drive, it’s time to format it appropriately for use with Time Machine.
Formatting the External Hard Drive
Before you can start using your chosen external hard drive with Time Machine, it needs to be formatted in a compatible file system format. The two main file system formats that Time Machine supports are Mac OS Extended (Journaled) and Apple File System (APFS).
Mac OS Extended (Journaled): This file system format is compatible with older versions of macOS and offers excellent compatibility with Time Machine. To format your external hard drive as Mac OS Extended (Journaled), follow these steps:
- Connect the external hard drive to your Mac using the appropriate connection interface.
- Open “Finder” from your dock or the “Applications” folder.
- Select your external hard drive from the sidebar under “Devices”.
- Click on the “File” menu and choose “Get Info”.
- In the “Get Info” window, make note of the current format. If it’s not already in Mac OS Extended (Journaled) format, proceed to the next step.
- Open “Disk Utility” from the “Applications” folder.
- Select your external hard drive from the list on the left.
- Click on the “Erase” tab at the top of the window.
- Choose the format “Mac OS Extended (Journaled)” from the dropdown menu.
- Enter a name for your external hard drive.
- Click on the “Erase” button to begin the formatting process. This will erase all data on the drive, so ensure that you have a backup if necessary.
Apple File System (APFS): If you are using macOS High Sierra or later, you have the option to format your external hard drive as APFS, the newer file system introduced by Apple. Formatting your external hard drive as APFS provides improved performance and efficiency. To format your external hard drive as APFS, follow these steps:
- Connect the external hard drive to your Mac using the appropriate connection interface.
- Open “Disk Utility” from the “Applications” folder.
- Select your external hard drive from the list on the left.
- Click on the “Erase” tab at the top of the window.
- Choose the format “APFS” from the dropdown menu.
- Enter a name for your external hard drive.
- Click on the “Erase” button to begin the formatting process. This will erase all data on the drive, so ensure that you have a backup if necessary.
Formatting your external hard drive in either Mac OS Extended (Journaled) or APFS format ensures compatibility with Time Machine and prepares it for seamless backups. Now that your external hard drive is formatted correctly, it’s time to connect it to your Mac and set up Time Machine.
Connecting the External Hard Drive to Your Mac
Now that you have formatted your external hard drive, it’s time to connect it to your Mac and establish a connection for Time Machine backups. Follow these steps to connect your external hard drive to your Mac:
- Locate the appropriate connection interface on your Mac and the corresponding cable for your external hard drive. Common connection interfaces include USB, Thunderbolt, or FireWire.
- Connect one end of the cable to the external hard drive and the other end to the available port on your Mac.
- Ensure that the connection is secure and properly inserted on both ends.
- Once connected, your Mac should recognize the external hard drive and display it on the desktop or in the Finder sidebar.
If your external hard drive is not appearing on your Mac, try the following troubleshooting steps:
- Check the cable for any physical damage or loose connections and try a different cable if necessary.
- Restart your Mac and reconnect the external hard drive.
- Go to “Applications” > “Utilities” > “Disk Utility” and check if the external hard drive is detected. If so, you may need to mount the drive from Disk Utility.
- If the drive is still not recognized, try connecting it to a different USB port or using a different connection interface (if available).
- If none of the above steps work, consult the manufacturer’s instructions or reach out to their support for further assistance.
Once your external hard drive is successfully connected and recognized by your Mac, it’s time to proceed with setting up Time Machine for automated backups.
Setting Up Time Machine
Now that you have connected your external hard drive to your Mac, it’s time to set up Time Machine and configure the backup settings. Follow these steps to get Time Machine up and running:
- Go to the Apple menu on your Mac and click on “System Preferences”.
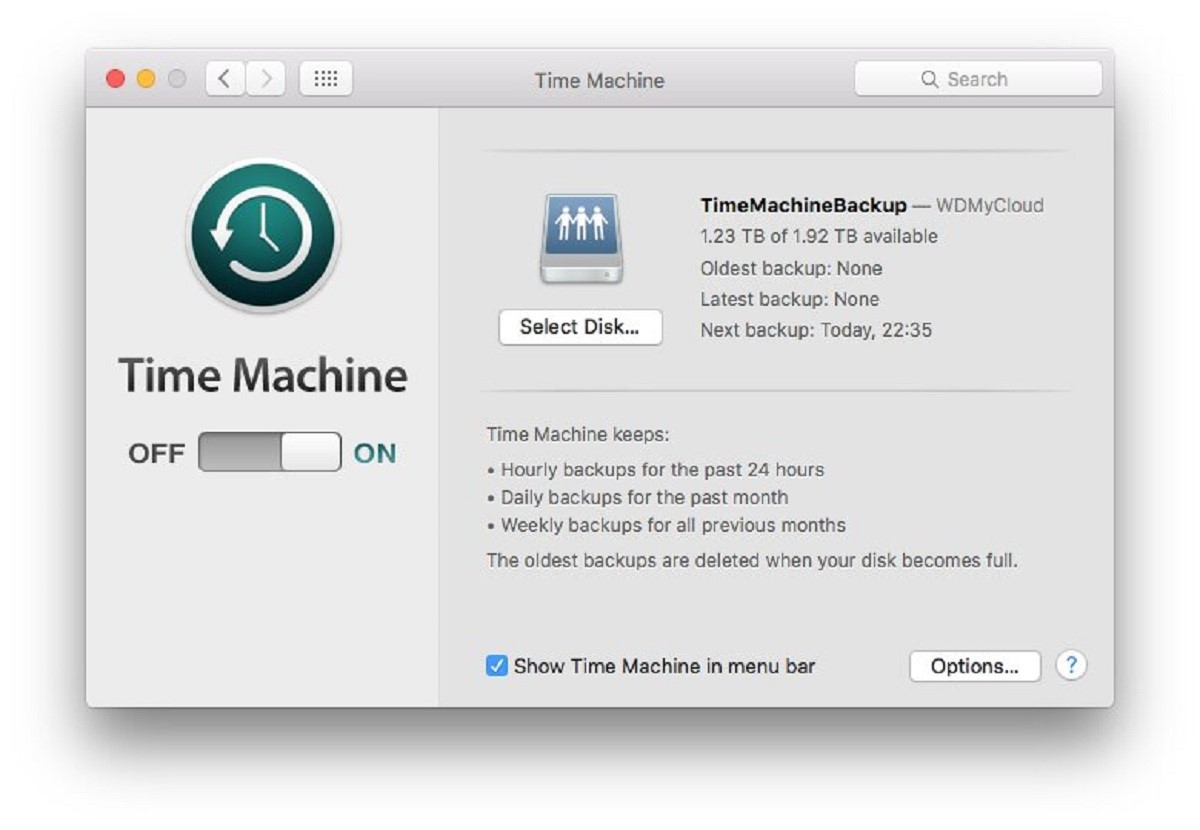
- Click on “Time Machine” to open the Time Machine preferences pane.
- If your external hard drive is not already selected as the backup disk, click on “Select Backup Disk”.
- Choose your external hard drive from the list of available options and click on “Use Disk”.
- Enable the option “Back Up Automatically” to enable regular and automatic backups.
- By default, Time Machine will start backing up your entire Mac. If you want to exclude specific files or folders from the backup, click on “Options” and add them to the exclusion list.
- Ensure that the “Encrypt Backup Disk” option is selected if you want to encrypt your Time Machine backups for added security.
- Click on “Back Up Now” to initiate the first backup. Time Machine will perform an initial full backup and then continue with incremental backups based on the changes to your files.
It’s recommended to keep your Mac connected to the external hard drive for the initial backup to ensure a complete and uninterrupted process. Subsequent backups will be performed automatically in the background as long as the external hard drive is connected.
While Time Machine performs backups, you can continue using your Mac without any interruptions. Time Machine manages backup schedules intelligently, prioritizing system resources during periods of high activity to ensure a smooth computing experience.
Once Time Machine has completed the initial backup, you can access and restore your files at any time using the Time Machine interface. Now that your backups are up and running, let’s explore how to restore files from Time Machine in case you need to recover specific data.
Backing Up Your Mac to the External Hard Drive
With Time Machine set up and running, it will automatically perform regular backups of your Mac to the connected external hard drive. However, if you want to manually initiate a backup or make sure that a backup is completed, you can follow these steps:
- Ensure that your Mac and the external hard drive are connected.
- Click on the Time Machine icon in the menu bar at the top of the screen or go to the Apple menu and select “System Preferences”.
- In the Time Machine preferences pane, click on the “Back Up Now” button.
- Time Machine will start the backup process and display its progress in the Time Machine interface.
- During the backup, you can continue using your Mac, as Time Machine works quietly in the background.
- Once the backup is completed, Time Machine will display a notification, and you can safely disconnect the external hard drive if needed.
It’s important to note that the time required for a backup can vary depending on the size of your files, the speed of your Mac, and the connection speed between your Mac and the external hard drive. It’s best to allow enough time for the backup to complete without interruptions.
Remember that Time Machine creates incremental backups, which means that it only backs up the changes made to your files since the last backup. This approach helps optimize storage space and ensures that your backups are up to date without unnecessary duplication of data.
By regularly backing up your Mac to the external hard drive using Time Machine, you can have peace of mind knowing that your important files and data are protected and easily recoverable in case of accidental deletion, hardware failure, or other unforeseen events.
Restoring Files from Time Machine
Time Machine not only provides a seamless way to back up your Mac but also allows you to easily restore files, folders, or your entire system to a previous state. Whether you accidentally deleted a file or need to recover an older version of a document, Time Machine has got you covered. Here’s how you can restore files from Time Machine:
- Make sure your external hard drive containing the Time Machine backups is connected to your Mac.
- Click on the Time Machine icon in the menu bar at the top of the screen, or go to the Apple menu and select “System Preferences”.
- In the Time Machine preferences pane, click on the “Enter Time Machine” button.
- A new window will appear, presenting you with a visually stunning timeline of your backups.
- Use the timeline on the right side of the window to navigate to the specific date and time when the file or folder you want to restore existed.
- Once you’ve located the desired version of the file or folder, select it and click on the “Restore” button.
- Time Machine will restore the selected file or folder to its original location on your Mac.
If you want to restore your entire system or migrate to a new Mac using Time Machine, follow these steps:
- Make sure your external hard drive containing the Time Machine backups is connected to your Mac.
- Restart your Mac and hold down the Command and R keys simultaneously to enter macOS Recovery.
- In macOS Recovery, select “Restore from Time Machine Backup” from the available options.
- Choose the Time Machine backup source that contains the system backup you want to restore.
- Follow the on-screen instructions to select the specific backup to restore and initiate the restore process.
- Once the restore is complete, your Mac will be reverted to the exact state of the selected backup.
Time Machine makes it incredibly easy to retrieve specific files or restore your entire system from previous backups. It provides peace of mind knowing that even in the event of data loss or system failure, you can swiftly recover and resume your work without significant disruptions.
Checking the Status of Your Time Machine Backup
Monitoring the status of your Time Machine backup is essential to ensure that your data is being regularly and successfully backed up. By checking the backup status, you can identify any issues or interruptions in the backup process and take appropriate action. Here are a few ways to check the status of your Time Machine backup:
Time Machine Menu Bar Icon:
The Time Machine menu bar icon provides a quick and convenient way to check the status of your backups. The icon includes information such as the date and time of the last backup and the progress of the current backup. If there are any issues with the backup, a warning icon may appear, indicating that attention is required.
Time Machine Preferences:
You can also check the backup status by accessing the Time Machine preferences. To do so, go to the Apple menu and select “System Preferences”, then click on the “Time Machine” icon. In the Time Machine preferences pane, you will see the status of the backups, the size of the backup, and the estimated time until the next backup.
Control-click on Time Machine Icon:
For more detailed information about your Time Machine backups, you can control-click (or right-click) on the Time Machine icon in the menu bar. From the dropdown menu, select “Back Up Now”. This will display the time remaining for the backup, the size of the backup, and the number of files being backed up.
Time Machine Interface:
If you want to delve deeper into the backup status and view the timeline of your backups, you can enter Time Machine by clicking on the Time Machine icon in the menu bar and selecting “Enter Time Machine”. This interface provides an overview of your backups, allowing you to navigate through different dates and times to check the status of specific backups.
Notifications:
Time Machine may also send notifications to your Mac when there are issues with backups or if specific actions are required. Keep an eye on these notifications, as they can alert you to problems that need immediate attention, such as an unplugged external hard drive or insufficient storage space.
Regularly checking the status of your Time Machine backup ensures that your data is being properly protected and gives you the opportunity to resolve any issues that may arise. By staying proactive and vigilant, you can have peace of mind knowing that your important files are backed up and secure.
Troubleshooting Time Machine Backup Issues
While Time Machine is generally a reliable backup solution, you may encounter occasional issues or errors that can disrupt the backup process. Here are some common troubleshooting steps to resolve Time Machine backup issues:
Check the Connection:
Ensure that your external hard drive is properly connected to your Mac. Check the cables and connections for any damage or looseness. Try connecting the drive to a different USB port or using a different cable to rule out any connection problems.
Check Available Storage Space:
Verify that you have sufficient space on the external hard drive to accommodate the backup. If the drive is nearing capacity, Time Machine may encounter errors or fail to complete the backup. Free up space or consider using a larger external hard drive for your backups.
Restart Time Machine:
Restarting Time Machine can help resolve temporary glitches. Go to the Apple menu, select “System Preferences”, and click on the “Time Machine” icon. Toggle off Time Machine, wait a few moments, and toggle it back on. This can refresh the connection and resolve minor issues.
Repair Disk Errors:
If you suspect there are disk errors on your external hard drive, you can use the built-in Disk Utility to repair them. Open Disk Utility from the “Applications” folder, select your external hard drive, and click on “First Aid” to run a repair. Once the repair is complete, try running Time Machine again.
Exclude Problematic Items:
If certain files or folders are causing issues with Time Machine backups, you can exclude them from the backup process. In the Time Machine preferences pane, click on “Options” and add the problematic items to the exclusion list. This can help prevent backup interruptions and errors.
Restart Your Mac:
Restarting your Mac can resolve various software-related issues. Sometimes, a simple restart can clear any temporary glitches that may be hindering Time Machine backups. After restarting, try running Time Machine again to see if the issue persists.
Consider Additional Software:
If you continue to experience persistent issues with Time Machine backups, consider using third-party backup software. There are many reliable options available that offer advanced features and additional troubleshooting options.
If you encounter more complex or frequent issues with Time Machine, it may be beneficial to consult Apple Support or reach out to knowledgeable professionals who can assist you. By troubleshooting and resolving Time Machine backup issues promptly, you can ensure that your valuable data is consistently backed up and protected.
Conclusion
Time Machine is a powerful built-in backup solution for macOS that offers a seamless and efficient way to protect your valuable data. By following the steps outlined in this guide, you can successfully set up Time Machine and back up your Mac to an external hard drive. With regular backups in place, you can have peace of mind knowing that your files, applications, and system settings are protected and easily recoverable in case of accidental deletion, hardware failure, or other unforeseen events.
From selecting the right external hard drive to formatting it correctly, connecting it to your Mac, and configuring Time Machine, each step is essential to ensure a smooth and reliable backup process. Additionally, understanding how to restore files from Time Machine and check the backup status allows you to confidently manage your backups and retrieve specific data when needed.
While Time Machine is designed to be user-friendly and reliable, occasional troubleshooting may be necessary to resolve any issues that may arise. By following the troubleshooting steps outlined in this guide, you can overcome common obstacles and ensure the uninterrupted functionality of Time Machine.
Remember, backing up your Mac is not a one-time task. Regularly check the status of your backups, keep your external hard drive connected, and let Time Machine perform its automatic backups. With this proactive approach, you can minimize the risk of data loss and enjoy the peace of mind that comes with having a robust backup solution in place.
By employing Time Machine and following the guidelines provided in this article, you can safeguard your data and restore your Mac to a previous state with ease. Start implementing Time Machine backups today and enjoy the benefits of having a reliable and efficient backup system at your fingertips.