Introduction
Are you constantly running out of space on your Mac? Frustrated with the “Startup Disk Full” error message that keeps popping up? Don’t worry, you’re not alone. As our digital lives become increasingly data-driven, it’s easy to accumulate gigabytes of files, photos, videos, and applications that eat up precious storage space.
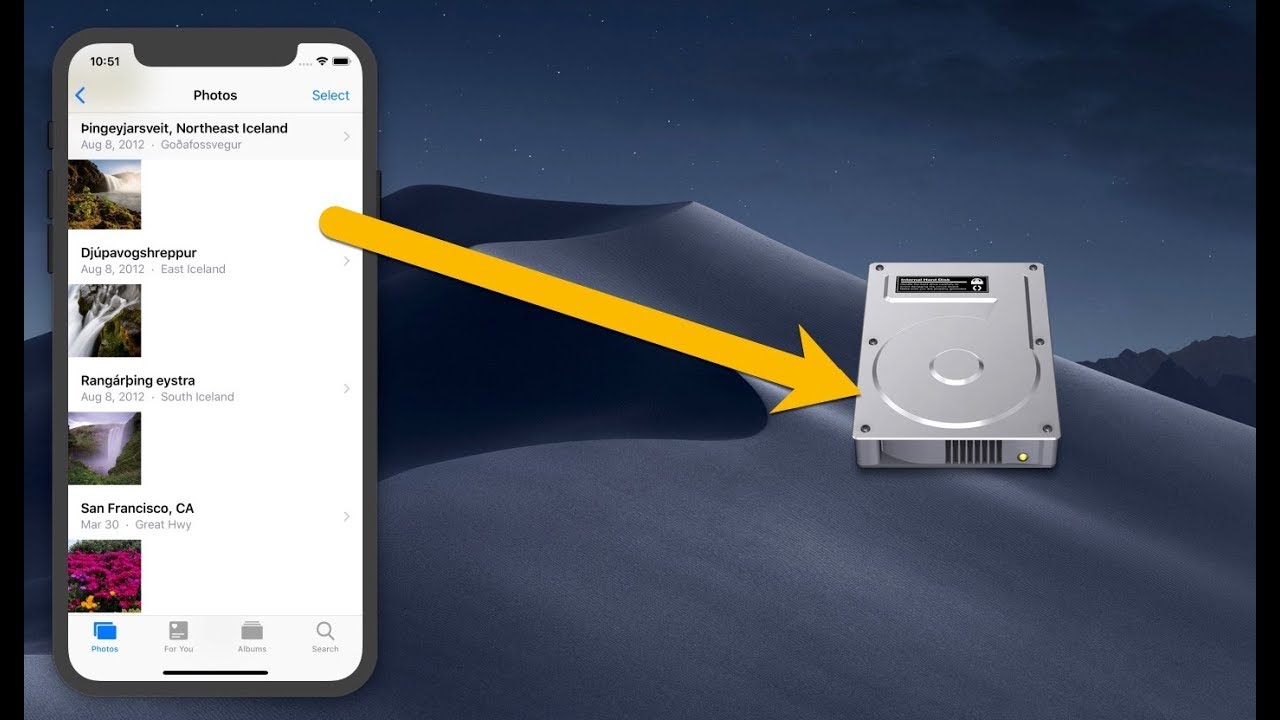
Fortunately, there’s a simple solution: using an external hard drive to free up space on your Mac. An external hard drive acts as extra storage, allowing you to offload files from your internal drive and create more room for your important data.
In this article, we’ll guide you through the process of freeing up space on your Mac with an external hard drive. We’ll explain why your Mac needs more space, help you choose the right external hard drive, teach you how to connect it to your Mac, and provide step-by-step instructions for transferring and organizing files. We’ll also discuss how to use Time Machine to back up your Mac, and share some essential tips for maintaining your external hard drive.
Whether you’re a photographer, a graphic designer, a video editor, or simply a Mac user who wants to optimize their device’s performance, this article will equip you with the knowledge and tools to effectively manage your storage space.
So, let’s dive in and learn how to free up space on your Mac with an external hard drive!
Reasons Why Your Mac Needs More Space
It’s no secret that Macs are renowned for their sleek design and powerful performance. However, even the most robust Mac can suffer from a lack of storage space. Here are a few reasons why your Mac might be in need of some breathing room:
1. Limited Internal Storage: Macs come with a fixed amount of internal storage, and depending on the model you own, it might not be sufficient to meet your growing needs. As you install new applications, download files, and accumulate media files, your Mac’s storage can quickly fill up.
2. Sluggish Performance: When your Mac’s internal storage is nearly full, it can cause your system to slow down. With limited space, your Mac may struggle to run multiple applications simultaneously, leading to lagging performance and longer load times.
3. Inability to Install Updates: macOS updates and app updates often require a significant amount of space to install. If your Mac is running out of storage, you may find yourself unable to install the latest updates, missing out on bug fixes, security patches, and new features.
4. Cramped Workspace: Having a cluttered desktop and file system can make it challenging to find the documents, photos, or videos you need. By freeing up space on your Mac, you can maintain a more organized workspace and access your files more easily.
5. Avoiding Data Loss: Running out of storage space can increase the risk of data loss. If your Mac’s internal drive becomes full, there’s a chance that your system may crash or experience data corruption. By backing up important files to an external hard drive, you can protect your data and minimize the risk of irreversible loss.
Now that we understand why your Mac requires more space, let’s explore how an external hard drive can help alleviate these issues and provide you with the extra storage you need.
Choosing the Right External Hard Drive for Your Mac
When it comes to selecting an external hard drive for your Mac, there are a few factors to consider to ensure compatibility and optimal performance. Here are some key considerations to keep in mind:
1. Storage Capacity: The first thing to determine is how much storage capacity you require. Assess your current storage needs and consider how much space you will need in the future. External hard drives come in a range of capacities, from a few hundred gigabytes to several terabytes.
2. Connection Interface: The connection interface determines how the external hard drive connects to your Mac. The most common options are USB, Thunderbolt, and FireWire. USB 3.0 or USB-C is recommended for faster data transfer speeds. Ensure that the connection interface of the external hard drive is compatible with your Mac.
3. Drive Speed: The speed of the external hard drive affects the performance of data transfer and file access. Look for drives with faster rotation speeds or solid-state drives (SSDs) for quicker read and write speeds.
4. Portability: If you need to carry your external hard drive with you frequently, consider its physical size and weight. Portable drives are typically smaller and lighter, making them more convenient for on-the-go use.
5. Reliability and Durability: Choose a reputable brand that offers reliable and durable external hard drives. Read customer reviews and check for features like shock resistance and encryption for added data protection.
6. Backup Software: Some external hard drives come with built-in backup software, making it easier to schedule automatic backups of your Mac. This can be a valuable feature to consider if you want to ensure regular and hassle-free backups.
7. Price: Set a budget for your external hard drive purchase and compare prices across different brands and models. Remember to consider the cost per gigabyte to determine the best value for your money.
By taking these factors into account, you can select an external hard drive that meets your storage needs, fits within your budget, and is compatible with your Mac. Now that you know how to choose the right external hard drive, let’s move on to connecting it to your Mac.
Connecting the External Hard Drive to Your Mac
Once you’ve chosen the perfect external hard drive for your Mac, it’s time to connect it and start using the additional storage space. Follow these steps to connect your external hard drive to your Mac:
1. Check the connection interface: Ensure that the connection interface of the external hard drive matches the ports on your Mac. If the external hard drive uses USB, make sure you have a compatible USB port (USB 3.0 or USB-C). For Thunderbolt or FireWire drives, ensure your Mac has the corresponding port.
2. Power on the external hard drive: Plug in the power cable, if applicable, and turn on the external hard drive. Some drives may draw power directly from your Mac, while others require an external power source.
3. Connect the external hard drive to your Mac: Use the appropriate cable or adapter to connect the external hard drive to your Mac. Insert one end of the cable into the external hard drive and the other end into the corresponding port on your Mac.
4. Wait for the external hard drive to be recognized: Your Mac should automatically detect the external hard drive and display it as a new device in Finder or on the desktop. If the drive does not appear, try restarting your Mac or checking the cable connection.
5. Initialize the external hard drive (if necessary): In some cases, when you connect a new external hard drive to your Mac for the first time, you may need to initialize it. Follow the on-screen prompts to format the drive to a compatible file system (such as APFS or ExFAT) before you can start using it.
Once connected, your external hard drive is ready to use. It will appear on your Mac as a separate storage device, allowing you to transfer files, create new folders, and organize your data. In the next section, we will guide you through the process of transferring files from your Mac to the external hard drive.
How to Transfer Files to the External Hard Drive
Transferring files from your Mac to an external hard drive is a straightforward process. Follow these step-by-step instructions to free up space on your Mac and store files on the external hard drive:
1. Locate the files you want to transfer: Open Finder and navigate to the files or folders you want to move to the external hard drive.
2. Select the files: Click on the first file or folder you want to transfer, then hold the Command key and click on additional files or folders to select multiple items.
3. Copy the selected files: Right-click on any of the selected files, then choose “Copy” from the drop-down menu. Alternatively, you can press Command+C on your keyboard.
4. Navigate to the external hard drive: Open a new Finder window and locate the external hard drive under “Devices” in the sidebar. Click on the drive to select it.
5. Paste the files: Right-click on an empty area within the external hard drive window, then choose “Paste” from the menu. Alternatively, you can press Command+V on your keyboard. The files will now begin to copy over to the external hard drive.
6. Monitor the transfer progress: Depending on the size and number of files being transferred, the process may take some time. You can track the progress in the Finder window or use third-party software to visualize the transfer speed.
7. Verify the successful transfer: Once the transfer is complete, you can double-check that the files are now present on the external hard drive. Open the drive and navigate to the appropriate folder to ensure that the transferred files are visible and accessible.
By following these steps, you can efficiently transfer files from your Mac to the external hard drive, freeing up valuable space on your Mac’s internal storage. Remember to safely eject the external hard drive before disconnecting it from your Mac to avoid data corruption. In the next section, we will discuss how to delete files from your Mac after transferring them to the external hard drive.
How to Delete Files from Your Mac After Transferring
After successfully transferring files to your external hard drive, it’s important to clear up space on your Mac by deleting the duplicated files. To delete files from your Mac after transferring them, follow these steps:
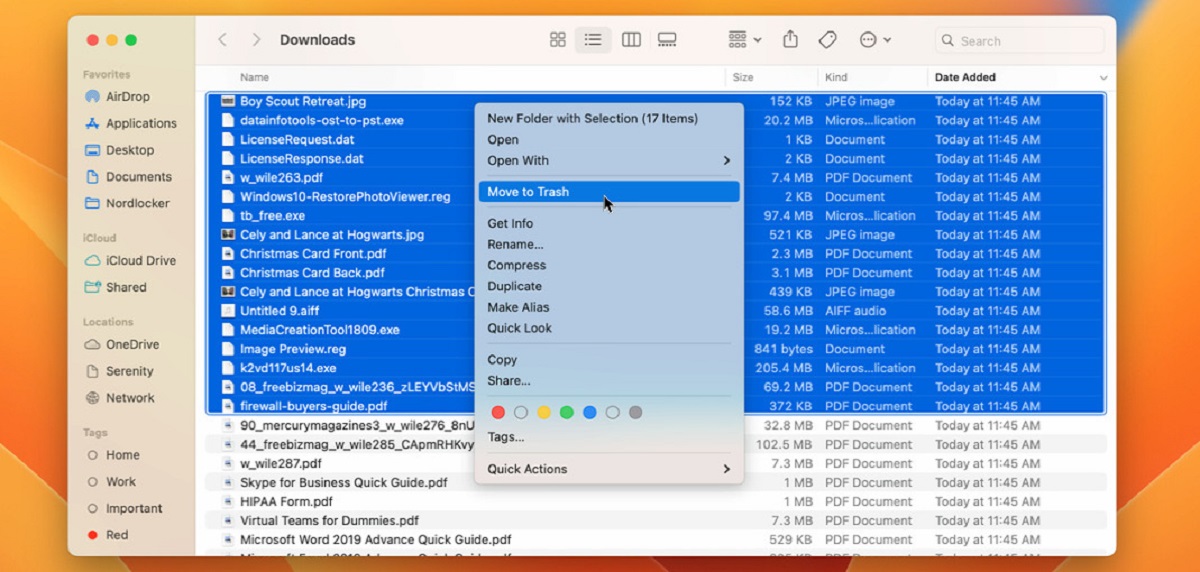
1. Locate the files you want to delete: Open Finder and navigate to the folders or files you want to remove from your Mac. It’s recommended to start with the files you just transferred to the external hard drive.
2. Select the files to be deleted: Click on the first file or folder you want to delete, then hold the Command key and click on additional files or folders to select multiple items.
3. Move the selected files to Trash: Right-click on any of the selected files, then choose “Move to Trash” from the drop-down menu. Alternatively, you can press Command+Delete on your keyboard. This action moves the selected files to the Trash folder.
4. Empty the Trash: To reclaim the storage space occupied by the deleted files, click on the Trash icon located on the Mac’s dock. Then, right-click on the Trash icon and choose “Empty Trash” from the menu. Confirm the action when prompted. Be aware that this action permanently deletes the files and cannot be undone, so double-check that you have transferred and backed up any important data before emptying the Trash.
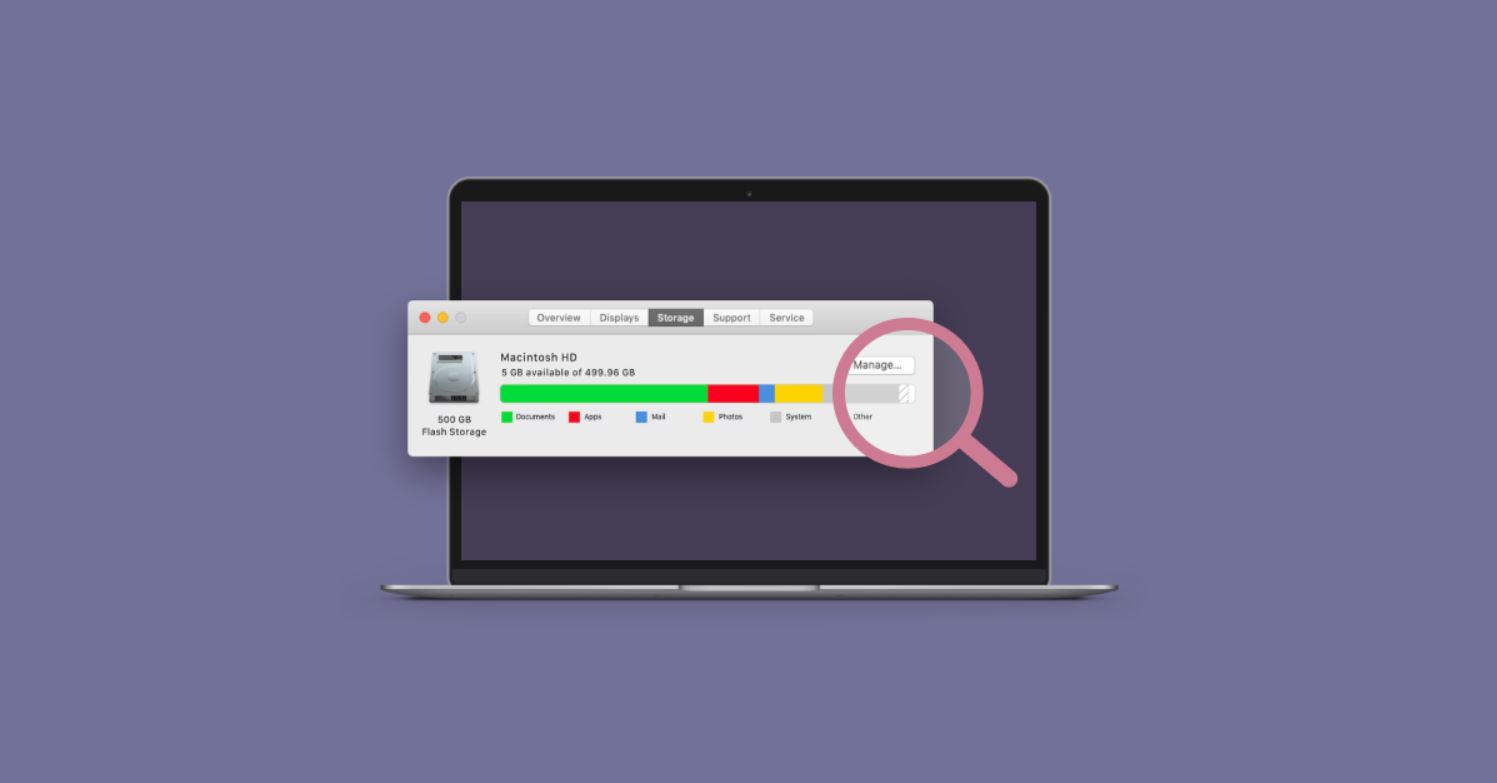
5. Verify the successful deletion: After emptying the Trash, you can confirm that the files are no longer taking up space on your Mac by checking the available storage in the About This Mac section or by using third-party disk management tools.
By following these steps, you can remove the duplicated files from your Mac’s internal storage, making room for new data and improving the overall performance of your device. Keep in mind that if you later need to recover any deleted files, it’s best to have a backup available on your external hard drive or another storage solution. In the next section, we will explore how to organize files on your external hard drive for easy access and management.
Organizing Files on Your External Hard Drive
Now that you have successfully transferred files to your external hard drive, it’s essential to keep them organized for easy access and efficient management. Here are some tips to help you organize your files effectively:
1. Create folders: Start by creating separate folders for different types of files or categories. For example, you can have folders for documents, photos, videos, music, and so on. This will make it easier to locate specific files and maintain a neat file structure.
2. Use descriptive names: When naming your files or folders, use descriptive and meaningful names. Avoid generic terms and instead provide specific details that reflect the content of the file. This will make it easier to search for files in the future.
3. Keep a logical hierarchy: Organize your folders in a logical hierarchy to reflect the relationships between different file types or categories. For example, you can have subfolders within each main category folder to further classify and organize files.
4. Use file tagging: Take advantage of file tagging features to add additional metadata to your files. This can include tags like “important,” “work-related,” “personal,” or any other labels that help you categorize and filter files quickly.
5. Regularly review and delete unnecessary files: Periodically go through your files on the external hard drive and delete any files that are no longer needed. This will help to free up additional storage space and keep your files organized.
6. Backup your files: Although files stored on an external hard drive are generally safer than those on your Mac’s internal storage, it’s still important to have backups. Consider creating duplicate copies of important files and storing them on a separate external hard drive or cloud storage service for added protection.
7. Maintain consistency: Be consistent with your organization methods to make file management easier. Use the same naming conventions, folder structure, and file tagging system throughout your external hard drive.
By following these tips, you can keep your files organized and easily accessible on your external hard drive. A well-organized file system will save you time and frustration when searching for specific files or folders. In the next section, we will discuss the importance of backing up your Mac using Time Machine and how your external hard drive can play a vital role in this process.
Backing Up Your Mac with Time Machine
One of the most critical aspects of maintaining your Mac’s data integrity is ensuring regular backups. Time Machine, a built-in backup feature in macOS, makes it effortless to back up your Mac to an external hard drive. Here’s how to set up and use Time Machine for backup:
1. Connect the external hard drive: Plug in your external hard drive to your Mac and ensure it is properly connected.
2. Open Time Machine preferences: Go to “System Preferences” by clicking on the Apple menu in the top left corner of your screen. Then, click on “Time Machine” to open the Time Machine preferences panel.
3. Select the external hard drive: Under the Time Machine preferences panel, click on “Select Backup Disk.” Choose your external hard drive from the list of available drives and click on “Use Disk.”
4. Enable Time Machine: Toggle the Time Machine switch to “On.” Time Machine will start automatically backing up your Mac to the selected external hard drive.
5. Monitor the backup process: Time Machine will initiate its first backup, which may take some time depending on the size of your data. You can track the backup progress in the Time Machine preferences or in the taskbar.
6. Automatic and incremental backups: Time Machine will continue to back up your Mac automatically, making incremental backups of any changes or additions to your files. This ensures that you have multiple versions of your files over time, allowing you to revert to previous versions if needed.
7. Restoring files from Time Machine: If you ever need to restore files from your Time Machine backup, simply click on the Time Machine icon in the taskbar or go to the Time Machine preferences panel. Browse through the timeline to locate the specific file or folder you want to restore, then click on “Restore” to retrieve it to its original location or a new directory of your choice.
Time Machine provides a hassle-free way to regularly back up your Mac, protecting your valuable data against accidental deletion, hardware failure, or other unforeseen issues. By utilizing an external hard drive, you can store these backups and ensure easy recovery in case of data loss.
Remember to keep your external hard drive connected to your Mac and powered on to ensure continuous backups. It’s also recommended to periodically check the available space on your external hard drive to avoid running out of storage for Time Machine backups.
In the next section, we will provide some essential tips for maintaining your external hard drive to ensure its longevity and reliability.
Tips for Maintaining Your External Hard Drive
Taking good care of your external hard drive is essential to ensure its longevity and maintain the integrity of your stored data. Here are some tips to help you maintain your external hard drive:
1. Handle with care: Treat your external hard drive with care, avoiding any physical impacts or exposure to extreme temperatures. Store it in a safe and dust-free environment when not in use.
2. Safely eject the drive: Always eject your external hard drive before disconnecting it from your Mac. This allows the drive to properly finish read and write operations and prevents data corruption. To safely eject, right-click on the drive icon and select “Eject” from the menu, or drag the drive icon to the Trash.
3. Protect against power surges: Use a surge protector or an uninterruptible power supply (UPS) to protect your external hard drive from sudden power surges or electrical fluctuations. This will help avoid potential damage to the drive’s circuitry.
4. Keep backups of your external hard drive: Even though your external hard drive serves as a backup for your Mac, it’s wise to create additional backups of the drive’s contents. Consider periodically copying the important data to another storage device or cloud storage for extra protection.
5. Regularly update firmware and software: Check for firmware updates for your external hard drive from the manufacturer’s website. Keeping your drive’s firmware and any associated software up to date can improve performance and ensure compatibility with your Mac.
6. Run disk maintenance utilities: Periodically run disk maintenance utilities such as Disk Utility (built-in on macOS) to detect and repair any file system errors on your external hard drive. This can help prevent data loss and optimize drive performance.
7. Avoid disconnecting during data transfers: When transferring files to or from your external hard drive, avoid disconnecting the drive mid-transfer. Abruptly disconnecting the drive can lead to data loss or file corruption. Wait until all file operations are complete before safely ejecting the drive.
8. Keep an eye on drive health: Monitor the health of your external hard drive using diagnostic tools provided by the manufacturer or third-party apps. Regularly check for any signs of potential drive failure, such as unusual noises or errors during data access.
By following these maintenance tips, you can prolong the lifespan of your external hard drive and ensure the safety of your valuable data. Remember that while external hard drives are reliable, it’s always a good practice to have multiple backups of your important files to guard against any unexpected incidents.
In the next section, we will provide a brief summary and conclude our guide on how to free up space on your Mac with an external hard drive.
Conclusion
Managing your Mac’s storage space becomes crucial as your digital content grows, but there’s no need to panic when you start running out of space. By utilizing an external hard drive, you can easily free up space on your Mac and ensure a smooth and efficient computing experience.
In this guide, we covered the importance of having more space on your Mac, the process of choosing the right external hard drive, connecting it to your Mac, transferring files, deleting files from your Mac after transferring, organizing files on your external hard drive, and backing up your Mac with Time Machine. We also provided tips for maintaining your external hard drive to prolong its lifespan.
Remember, consistently transferring and organizing files on your external hard drive helps maintain an organized workflow and makes it easier to access and manage your data. Additionally, regularly backing up your Mac with Time Machine and maintaining your external hard drive’s health are essential practices to protect your valuable data from loss.
So, whether you’re a creative professional with large media files or a student with a growing collection of documents, you now have the knowledge and tools to effectively free up space on your Mac with an external hard drive.
Investing in an external hard drive is a wise decision that not only enhances your Mac’s performance but also ensures the safety and accessibility of your important files. Take the time to research and choose a reliable and compatible external hard drive that suits your storage needs. With proper maintenance and organization, you can enjoy a clutter-free Mac and peace of mind knowing your data is secure.
Don’t let a lack of space hinder your productivity or enjoyment. Embrace the convenience and flexibility of an external hard drive and start optimizing your Mac’s storage today!