Introduction
Welcome to this comprehensive guide on how to add bullet points in Google Sheets. Bullet points are a great way to organize and present information in a concise and visually appealing manner. Whether you are creating a to-do list, summarizing key points, or outlining important details, bullet points can help you effectively communicate your ideas.
Google Sheets, Google’s powerful cloud-based spreadsheet software, offers multiple methods to incorporate bullet points into your data. In this article, we will explore five different methods that you can use to add bullet points in Google Sheets.
By following the step-by-step instructions provided in this guide, you will be able to add bullet points effortlessly, making your data more visually appealing and easier to understand. Whether you are new to Google Sheets or an experienced user, this article will equip you with the necessary tools to enhance your spreadsheet with bullet points.
Let’s dive in and explore the various methods you can employ to add bullet points in Google Sheets:
Method 1: Using the Toolbar
The easiest and most straightforward way to add bullet points in Google Sheets is by utilizing the toolbar options. Follow these simple steps:
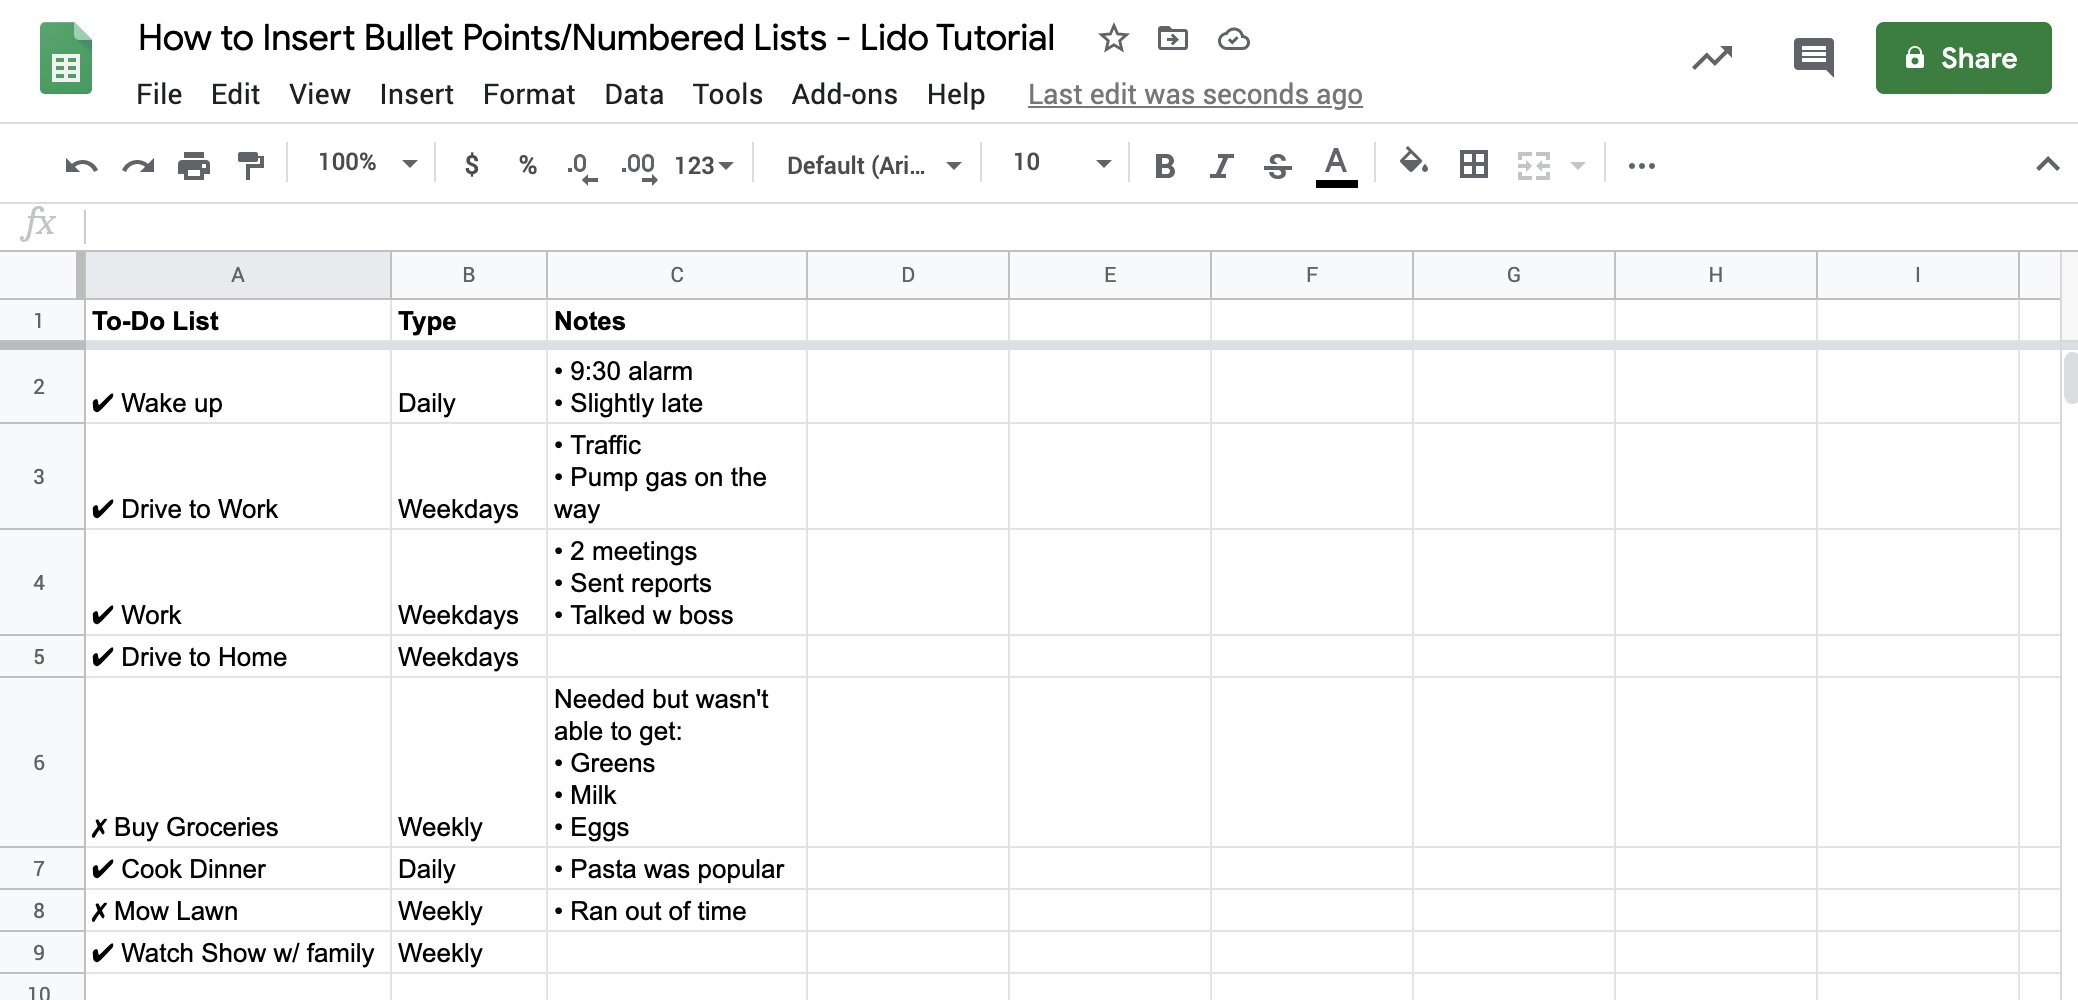
- Select the cell or range of cells where you want to add bullet points.
- In the toolbar at the top of the screen, locate the “Formatting” menu.
- Click on the down arrow next to the “Wrap text” icon to expand the options.
- Choose the “Bullets” option from the drop-down menu. A bullet symbol will be added to the beginning of each line within the selected cell or range.
Using the toolbar to add bullet points is ideal for quick and simple formatting. However, keep in mind that this method applies bullet formatting to the entire cell, rather than individual lines of text. If you need more flexibility in formatting, consider exploring the next methods.
Remember to select the appropriate cells before using this method, as the toolbar options will only apply to the currently selected cells.
Method 2: Using Keyboard Shortcuts
If you prefer to use keyboard shortcuts for faster formatting, Google Sheets provides a convenient way to add bullet points without the need for mouse clicks. Here’s how:
- Select the cell or range of cells where you want to add bullet points.
- Press “Ctrl + Shift + 8” on Windows or “Command + Shift + 8” on Mac to apply the bullet point formatting. Each line within the selected cell or range will be preceded by a bullet symbol.
This method is perfect for those who prefer to navigate and format their spreadsheets using keyboard commands. It offers a quick and efficient way to add bullet points to your data without interrupting your flow.
Keep in mind that if you select a range of cells using this method, the bullet points will be added to every cell within that range. If you want to apply bullet points to only specific cells within the range, consider using the Format Cells option outlined in the next section.
Method 3: Using the Format Cells Option
If you need more control over how the bullet points are applied in your Google Sheets, you can use the Format Cells option. This method allows you to customize the bullet symbols and apply bullet points to specific lines of text within a cell or range of cells. Follow these steps:
- Select the cell or range of cells where you want to add bullet points.
- Right-click on the selected cell or range and choose “Format cells” from the context menu.
- In the Format Cells dialog box, navigate to the “Number” tab.
- Click on the “Custom” category.
- In the “Type” field, enter a formatting code for bullet points. For example, you can use “* ” to create bulleted lists with asterisks, or “- ” for dash bullet points.
- Click “Apply” to see the changes in the preview area and then click “OK” to apply the custom formatting to the selected cells.
By using the Format Cells option, you have the flexibility to choose from various bullet symbols or even create your own custom symbols. This method allows for more precise formatting and makes it easier to apply bullet points to specific lines within a cell.
Experiment with different formatting codes to find the bullet point style that best suits your needs. This method offers greater customization options and is ideal when you require fine-grained control over the appearance of your bullet points.
Method 4: Using Conditional Formatting
If you want to automatically add bullet points to specific cells based on certain conditions, you can utilize Google Sheets’ powerful Conditional Formatting feature. Here’s how you can add bullet points using Conditional Formatting:
- Select the cell or range of cells where you want to apply the bullet points.
- Go to the “Format” menu at the top of the screen and select “Conditional formatting.”
- In the Conditional formatting pane that appears on the right side of the screen, choose the range to which you want to apply the formatting.
- Under the “Format cells if” section, select the condition that should trigger the bullet point formatting. For example, you can choose “Text contains,” “Text is equal to,” or “Custom formula is.”
- Specify the condition and the corresponding value that should be met for the bullet points to be applied.
- Click on the “Format” button next to the condition to open the formatting options.
- In the formatting options, navigate to the “Number” tab and choose the desired bullet point symbol or custom formatting code.
- Click “Done” to apply the conditional bullet point formatting.
By using Conditional Formatting, you can automate the process of adding bullet points based on specific criteria. This method is particularly useful when you need to quickly identify and highlight certain cells that meet specific conditions.
Experiment with different conditions and formatting options to create visually appealing and informative bullet points within your spreadsheet.
Method 5: Using Custom Number Formats
If you are looking for even more flexibility in formatting your bullet points in Google Sheets, you can utilize the power of custom number formats. This method allows you to create unique and customized bullet points using the formatting codes available in Google Sheets. Here’s how you can use custom number formats to add bullet points:
- Select the cell or range of cells where you want to apply the bullet points.
- Right-click on the selected cell or range and choose “Format cells” from the context menu.
- In the Format Cells dialog box, navigate to the “Number” tab.
- Select the “Plain Text” category.
- In the “Custom number formats” field, enter a formatting code for the bullet points. For example, you can use any symbol to represent the bullet point, like “* ” or “• “.
- Click “Apply” to see the changes in the preview area and then click “OK” to apply the custom number format to the selected cells.
By using custom number formats, you have full control over the appearance of your bullet points. You can choose different symbols, sizes, colors, and even combine them with other formatting elements to create unique styles.
Experiment with different formatting codes to find the bullet point style that best matches your design preferences. Custom number formats give you the flexibility to customize your bullet points exactly the way you want them, making your data more visually appealing and engaging.
Conclusion
Adding bullet points in Google Sheets is a simple and effective way to organize and present information in your spreadsheets. In this article, we explored five different methods to achieve this formatting, giving you various options depending on your preferences and requirements.
The toolbar option provides a quick and easy way to add bullet points to an entire cell or range of cells. It is ideal for basic formatting needs and quick data visualization.
For those who prefer using keyboard shortcuts, method two allows you to add bullet points without lifting your hands from the keyboard, making the formatting process more efficient.
If you require more control over the appearance of bullet points and want to customize them, the Format Cells option (method three) and custom number formats (method five) offer flexibility and the ability to personalize your bullet point styles according to your preferences.
Lastly, the conditional formatting method (method four) gives you the power to automatically apply bullet points to cells based on specific conditions, allowing for dynamic and automated formatting.
By incorporating bullet points in your Google Sheets, you can enhance readability, highlight important information, and make your data more visually appealing. Choose the method that best suits your needs and get creative with your bullet point styles.
Now that you have learned how to add bullet points in Google Sheets, you can take your spreadsheet formatting skills to the next level and present your data in a clear and visually appealing manner. Happy formatting!