Introduction
Welcome to the world of Samsung tablets! Whether you’re a student, professional, or someone who enjoys expressing their creativity through words, creating documents on your Samsung tablet can be a convenient and efficient way to stay productive on the go. In this article, we will guide you through the process of creating a document on a Samsung tablet, step by step.
Samsung tablets come with a pre-installed document app that allows you to create, edit, and view documents with ease. It offers a user-friendly interface and a wide range of features that can enhance your document creation experience. Whether you’re drafting a letter, writing a report, or designing a brochure, you can make use of different formatting options, insert images and media, add tables and charts, and customize the layout to suit your needs.
By following the steps provided in this article, you’ll be able to create professional-looking documents that can be shared or saved on your Samsung tablet. So, let’s dive in and discover how to create a document on your Samsung tablet!
Step 1: Open the Document App
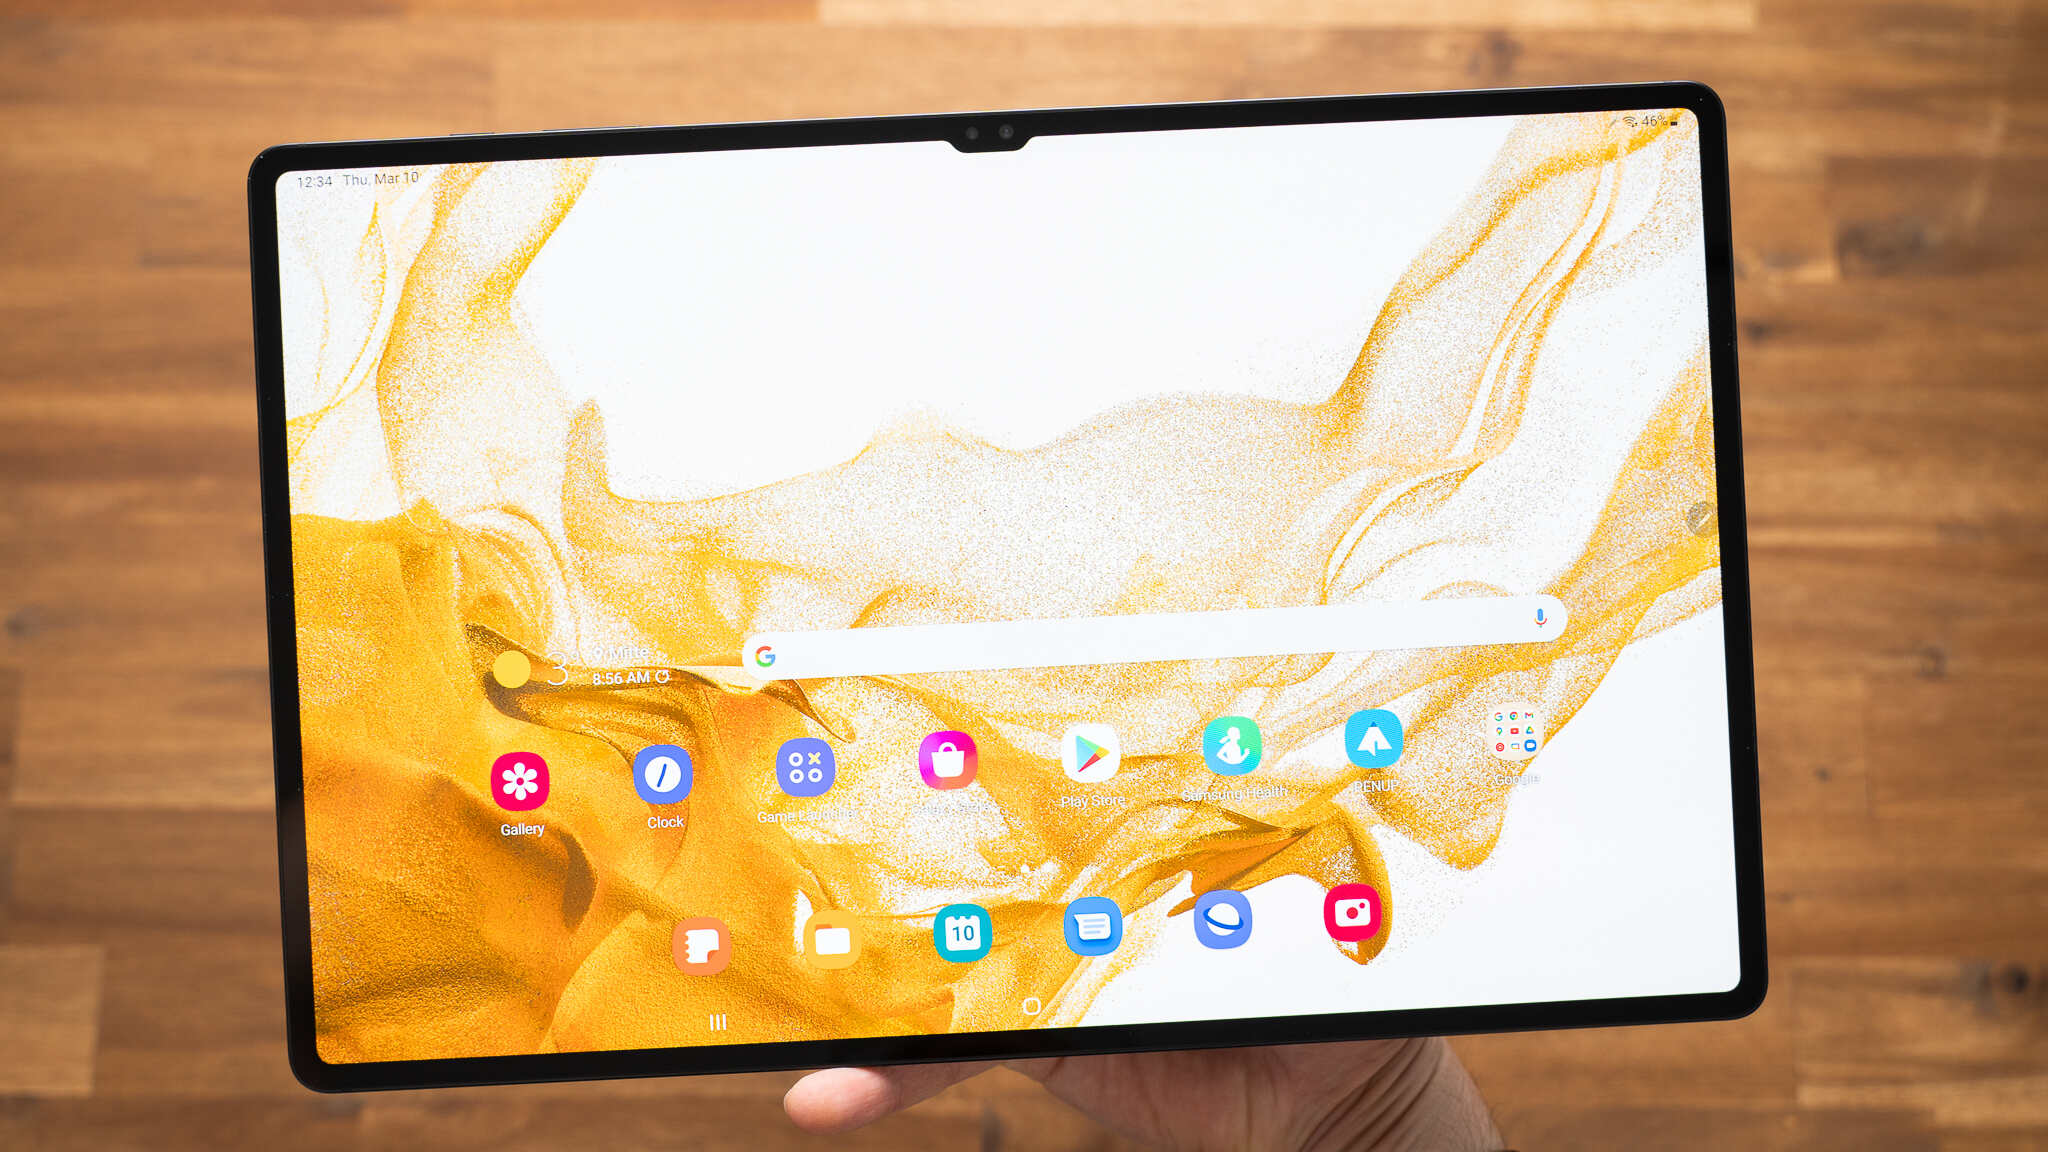
The first step in creating a document on your Samsung tablet is to open the document app. Locate the app icon, which is usually represented by a symbol that resembles a sheet of paper or a document file. Tap on the app icon to launch the document app.
Once the document app is open, you’ll be presented with the main screen, which may display a list of your previously created documents, templates, or a blank canvas ready for you to start a new document. If you’re starting from scratch, proceed to the next step. However, if you want to work on an existing document, simply select it from the list and begin editing.
If, for any reason, you don’t have the document app installed on your Samsung tablet, you can easily download it from the Samsung Galaxy Store or the Google Play Store. Just open the store app, search for the document app, and follow the prompts to download and install it on your tablet.
It’s important to note that the specific name and appearance of the document app may vary depending on the model and version of your Samsung tablet. However, the general process of opening the app should remain similar across different devices.
Now that you have successfully opened the document app, you’re ready to move on to the next step, where we’ll guide you through creating a new document. So, let’s dive in!
Step 2: Create a New Document
Now that you have the document app open, it’s time to create a new document from scratch. The process may vary slightly depending on the document app you’re using on your Samsung tablet, but the general steps should remain the same.
Look for the option to create a new document on the main screen of the app. It is usually represented by a button or an icon that resembles a plus (+) symbol or the word “New”. Tap on this option to begin creating a new document.
Next, you’ll be prompted to select the type of document you want to create. This could include options such as a blank document, a letter template, a resume template, or other pre-designed templates. If you prefer to start with a blank canvas, choose the “Blank Document” option. However, if you’d like some inspiration or a head start, select a relevant template that closely matches the purpose of your document.
Once you have made your selection, you’ll be taken to the editing screen, where the blank document or template will be displayed. If you chose a template, it will come pre-populated with text and formatting that you can customize to suit your needs.
Now you can start writing and formatting your document. Tap on the content area to begin typing, and use the on-screen keyboard to enter your text. To make formatting changes such as font style, size, alignment, and more, look for the formatting options located at the top or bottom of the screen, or access them through a toolbar or menu.
Remember to save your work regularly as you progress. Most document apps have an autosave feature, but it’s always a good practice to manually save your document to ensure you don’t lose any important changes.
That’s it! You have successfully created a new document on your Samsung tablet. In the next step, we will explore how to enter and format text in your document. So, let’s move on!
Step 3: Choose a Template (Optional)
When creating a document on your Samsung tablet, you have the option to choose a template to kickstart your project. Templates offer pre-designed layouts and formatting, saving you time and effort in creating a document from scratch. Here’s how you can choose a template:
After opening the document app and selecting the option to create a new document, you’ll be presented with a list of templates to choose from. These templates can be categorized based on document types such as resumes, business letters, reports, brochures, and more. Browse through the available templates and select the one that best suits the purpose of your document.
If you can’t find a template that perfectly matches your needs, don’t worry! Most document apps also offer the flexibility to customize the selected template to better align with your vision. You can modify the text, formatting, colors, and even insert or delete sections as required.
Choosing a template can be particularly useful if you’re not confident in your design skills or if you’re looking for a consistent and professional look for your document. Templates often come with predefined styles and layouts, making it easier to create visually appealing documents that stand out.
Additionally, templates can serve as a helpful guide, especially if you’re having trouble structuring your document. They provide a framework and suggest sections or headings that are commonly found in similar document types.
Remember, however, that using a template is entirely optional. If you prefer to start with a blank canvas, you can skip this step and proceed with the default blank document. You have the freedom to customize the document format and layout from scratch as you go.
Once you have selected or customized your template, you’re ready to enter and format the text in your document. In the next step, we’ll guide you through the process of entering and formatting text. So, let’s move on!
Step 4: Enter and Format Text
Now that you have created a new document or selected a template, it’s time to enter and format the text in your document on your Samsung tablet. Here’s how:
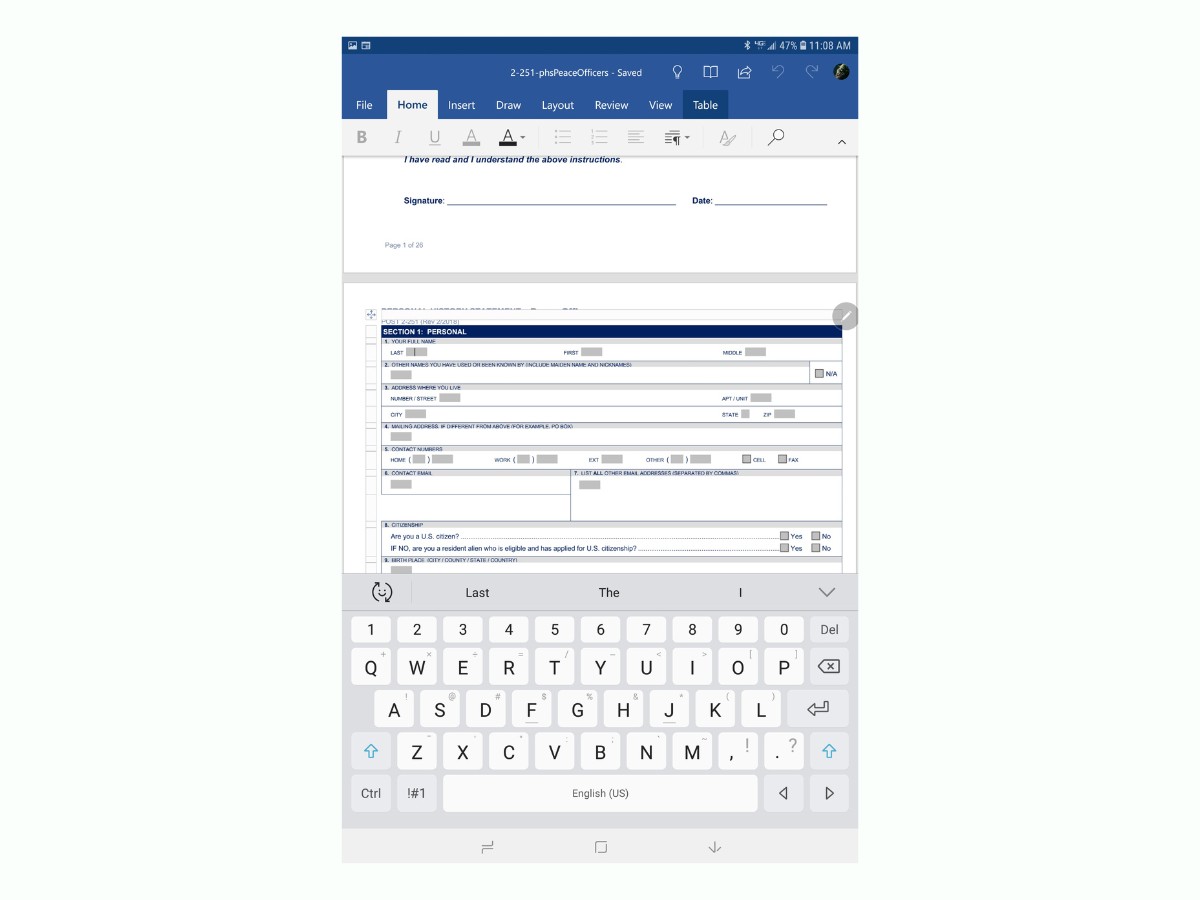
To enter text, tap on the content area of the document where you want to start typing. The on-screen keyboard will appear, allowing you to input your text. Begin typing, and watch your words come to life on the screen.
As you enter your text, you can format it to enhance the appearance and readability of your document. Most document apps offer a range of formatting options, including font styles, sizes, colors, alignment, and more.
To format a specific section of text, first, select the text by tapping and dragging your finger across it. Once the text is selected, a formatting toolbar or contextual menu will appear, providing you with various formatting options. You can change the font style, adjust the font size, make the text bold, italicize it, underline it, change the text color, and more.
In addition to basic text formatting, you may also have the option to apply styles to your document. Styles allow you to apply consistent formatting to headings, subheadings, paragraphs, bullet lists, and numbered lists with just a couple of taps.
For longer documents, you might want to consider using headings and subheadings to organize your content. Headings not only provide structure to your document but also make it easier for your readers to skim through and find specific sections.
If you want to make your document more visually engaging, you can also add bulleted or numbered lists. This can be particularly useful when presenting points, steps, or key information in a clear and concise manner.
Remember to save your document frequently to avoid losing any changes. You can usually find a save button or option within the document app’s interface.
That’s it! You have successfully entered and formatted the text in your document on your Samsung tablet. In the next step, we will explore how to add images or media to enhance your document. So, let’s move on!
Step 5: Add Images or Media (Optional)
Adding images or media to your document on your Samsung tablet can greatly enhance the visual appeal and effectiveness of your content. Here’s how you can incorporate images or media into your document:
To add an image, locate the “Insert” or “+” icon within the document app. Tap on this option, and you’ll be prompted to select an image from your device’s gallery or choose from other available sources such as cloud storage or online repositories. Browse through your files, select the desired image, and confirm its insertion into your document.
Once the image is inserted, you can resize it, move it, or adjust its position within the document. Most document apps allow you to tap and drag the corners of the image to resize it proportionally. You can also use alignment options to position the image in relation to the surrounding text or other elements.
In addition to images, you may also have the option to insert other media types such as audio or video files. This can be particularly useful when creating interactive presentations, digital portfolios, or multimedia-rich documents.
If you’re using a specific document app that offers advanced features, you might even have the ability to embed dynamic content such as charts, graphs, or interactive elements. These features can help convey complex data or provide interactive experiences for your readers.
When adding images or media to your document, ensure that the content you use is appropriate and related to the purpose of your document. Images should be clear, high-resolution, and properly cited if necessary.
Remember to consider the file size and overall document size when incorporating images or media. Large multimedia files can increase the document’s size and potentially impact its performance or compatibility when sharing or exporting.
That’s it! You have successfully added images or media to your document on your Samsung tablet. In the next step, we will explore how to insert tables, charts, or shapes to organize your content further. So, let’s move on!
Step 6: Insert Tables, Charts, or Shapes (Optional)
Tables, charts, and shapes can be powerful tools to organize and present information in your document on your Samsung tablet. Here’s how you can insert these elements to enhance your document:
To insert a table, navigate to the “Insert” or “+” option within the document app. Look for the table icon or the option to insert a table. Tap on it, and you’ll be prompted to specify the number of rows and columns for your table. Once you confirm, the table will be inserted into your document, ready for you to populate it with data.
Tables can be useful for displaying structured information, comparing data points, or creating a clear layout for your content. You can customize the appearance of the table by adjusting the cell size, changing borders, or applying different cell shading options.
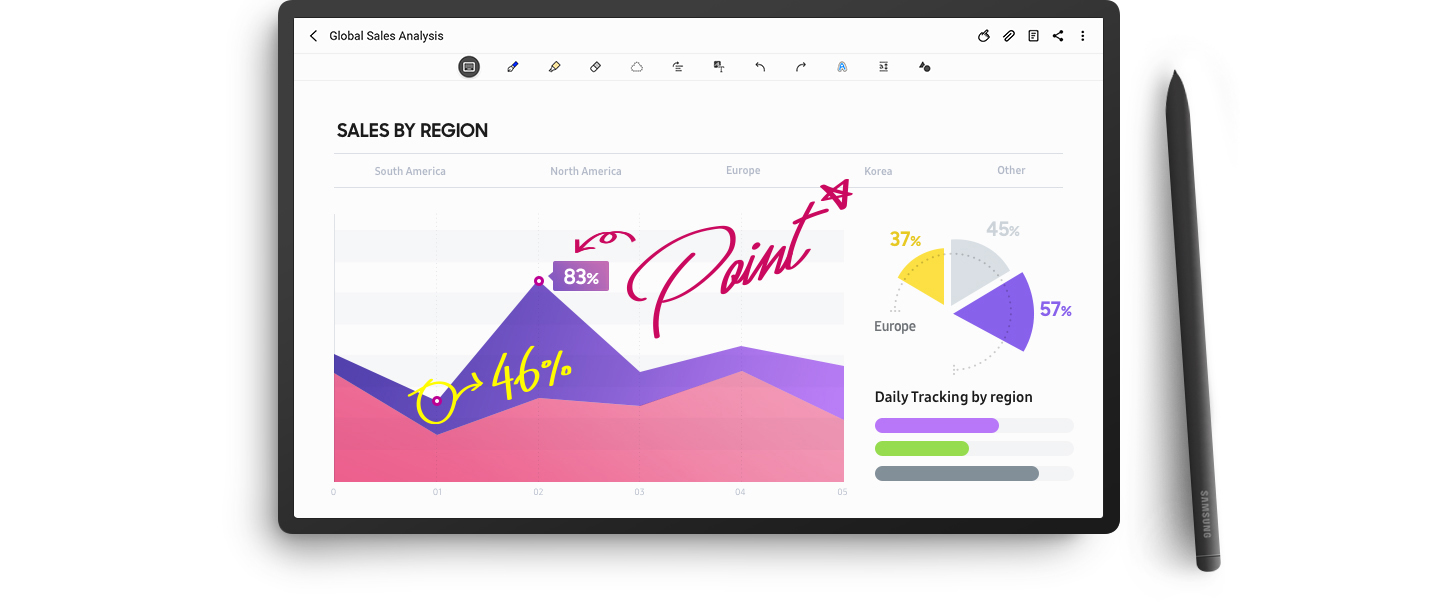
If you have numerical or statistical data that you want to represent visually, consider inserting a chart into your document. Most document apps offer different chart types, such as bar graphs, pie charts, or line graphs. Simply select the desired chart type, provide the data points, and customize the appearance of the chart to fit your needs.
Charts can effectively visualize data trends, comparisons, or patterns, making your document more impactful and informative. Make sure to label your axes, add legends, and provide relevant titles to ensure that your readers understand the context and meaning of the chart.
Shapes can also be inserted into your document to highlight specific elements or add visual interest. You can choose from a variety of shapes, such as rectangles, circles, arrows, or callout bubbles. These shapes can be resized, rotated, and customized with different colors or styles.
Shapes can be used to create diagrams, flowcharts, annotations, or graphic elements in your document. They can help you illustrate concepts, guide the reader’s attention, or simply add an aesthetically pleasing touch to your content.
Remember to maintain consistency and avoid overcrowding your document with excessive tables, charts, or shapes. Use these elements sparingly and purposefully to serve the overall objective of your document.
That’s it! You have successfully inserted tables, charts, or shapes into your document on your Samsung tablet. In the next step, we will explore how to customize the page layout to further enhance your document. So, let’s move on!
Step 7: Customize Page Layout (Optional)
Customizing the page layout of your document on your Samsung tablet allows you to adjust various aspects such as margins, orientation, page size, headers, footers, and more. Here’s how you can customize the page layout to suit your preferences:
To access the page layout options, look for the “Page Layout” or “Settings” section within the document app. This section may be represented by an icon or located in the app’s main menu or toolbar. Tap on it, and you’ll be presented with a range of customization options.
One of the key layout options is adjusting the margins. Margins define the blank space around the edges of each page and play a crucial role in ensuring readability and visual balance. You can increase or decrease the margin size to accommodate more content or create more white space, as per your requirements.
Another important aspect is the page orientation. Most documents are typically in portrait orientation, but depending on your content or design preferences, you may want to switch to landscape orientation. Landscape orientation allows for a wider canvas and can be more suitable for certain types of content such as wide tables, diagrams, or images.
Additionally, you may have the option to customize the page size. While the default page size is usually set to standard letter size (8.5×11 inches), you can adjust it to other common sizes or even specify a custom size to fit your specific needs or the printing requirements of your document.
Headers and footers are sections at the top and bottom of each page that can contain additional information such as page numbers, document title, author name, or company logo. Some document apps allow you to customize headers and footers by adding text or images, adjusting their appearance, or even applying different header and footer styles to different sections of the document.
Other customizations may include adding watermarks, changing the background color or image, applying different page numbering styles, enabling or disabling page breaks, and more. Explore the available options and experiment with different settings to achieve the desired look and feel for your document.
Remember that the extent of page layout customization may vary depending on the document app you’re using. Advanced apps may offer more options and flexibility, while simpler apps may have limited customization features.
That’s it! You have successfully customized the page layout of your document on your Samsung tablet. In the next step, we will guide you on how to save and export your document. So, let’s move on!
Step 8: Save and Export the Document
After creating, editing, and customizing your document on your Samsung tablet, it’s important to save it and consider how you want to export or share it with others. Here’s how you can save and export your document:
To save your document, locate the save button or option within the document app’s interface. This is usually represented by an icon that looks like a floppy disk or the word “Save”. Tap on this option to save your document to the default location on your tablet. It’s a good practice to regularly save your document as you work on it to avoid losing any changes in case of unexpected interruptions.
If you want to save your document to a specific location or give it a different name, look for the “Save As” option. This will allow you to choose the storage location, specify a new file name, and select the file format for saving your document. Most document apps support popular file formats such as Microsoft Word (DOCX), PDF, or plain text (TXT).
When it comes to exporting or sharing your document, document apps generally offer various options. You may find an option to directly share the document via email, messaging apps, or cloud storage services. Alternatively, you can choose to export the document to a specific location on your tablet or transfer it to other devices via USB or Wi-Fi.
If you want to collaborate with others on the document, some document apps provide options for real-time collaboration, allowing multiple users to simultaneously view and edit the document. Check the features of your document app to see if this functionality is available.
Before exporting or sharing your document, it’s a good idea to double-check its formatting, layout, and content to ensure everything is as you intended. Review the document for any potential errors, typos, or inconsistencies.
That’s it! You have successfully saved and exported your document on your Samsung tablet. Now you can confidently share it with others or keep it securely stored for future use. Congratulations on completing all the steps of document creation on your Samsung tablet!
Conclusion
Congratulations! You have learned how to create a document on your Samsung tablet, step by step. By following the instructions provided in this article, you can now confidently create professional-looking documents while utilizing the features and functionalities offered by your Samsung tablet’s document app.
By opening the document app and creating a new document, you have the freedom to start from a blank canvas or choose from a variety of templates to suit your needs. From there, you can enter and format text, adding emphasis, clarity, and structure to your content.
Enhance the visual appeal of your document by inserting images or media that complement your message or add a touch of creativity. You can illustrate data and concepts with tables, charts, and shapes, making your document more informative and engaging.
Take advantage of the customization options available to you, such as adjusting margins, selecting page orientation, and personalizing headers and footers. These customizations help you tailor your document to meet your specific requirements and create a professional presentation.
Remember to save your document regularly and consider the different export options to share it with others or keep it securely stored on your tablet or other devices.
Now that you have mastered the art of creating documents on your Samsung tablet, you can confidently tackle any writing task that comes your way. Whether you’re a student, professional, or simply enjoy expressing your creativity, your Samsung tablet provides the tools you need to stay productive and organized on the go.
So, go ahead and unleash your creativity and productivity with your Samsung tablet’s document app. Start creating those memos, reports, articles, and more. Happy document creation!