Introduction
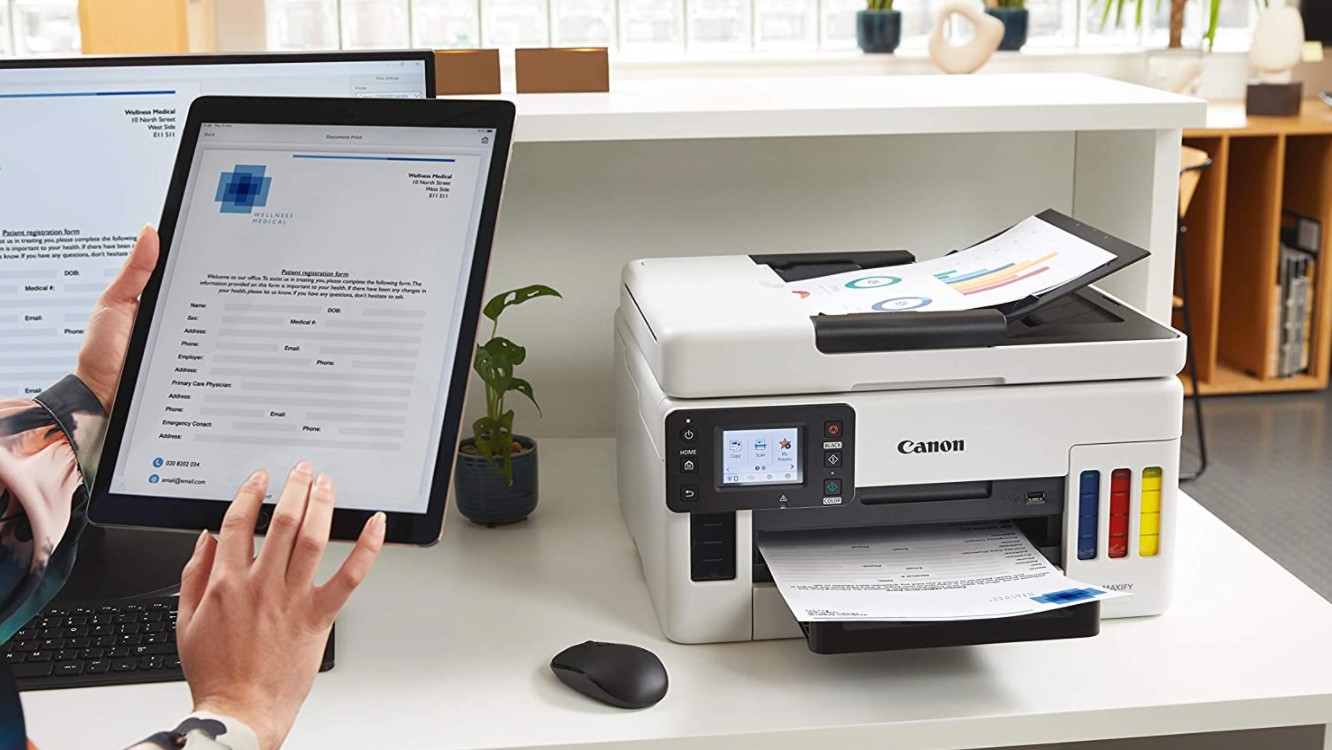
The Samsung tablet has become a popular device for both work and leisure activities, thanks to its versatility and portability. While most people are familiar with using a tablet for browsing the internet, watching videos, or playing games, it’s also possible to use your Samsung tablet for printing documents. Whether you need to print out a report for a meeting or a boarding pass for your next flight, printing from your Samsung tablet can be a convenient solution.
In this article, we will guide you through the steps of printing with a Samsung tablet. We will cover how to check printer compatibility, install the necessary print service plugin, connect your tablet to the printer, select and print documents, adjust print settings, and provide troubleshooting tips if you encounter any issues.
Before we dive into the specific steps, it’s important to note that the process may vary slightly depending on the model of your Samsung tablet and the printer you are using. However, the general instructions should apply to most Samsung tablets and printers. Make sure to have your tablet and printer nearby so you can follow along and start printing with ease.
Now, let’s get started with the first step: checking printer compatibility.
Step 1: Check Printer Compatibility
Before you begin printing with your Samsung tablet, it’s important to ensure that your printer is compatible with the device. Not all printers have built-in support for mobile printing, so you’ll want to check if your printer is compatible with the Samsung Print Service Plugin.
To do this, you can visit the official Samsung website or consult your printer’s user manual. Look for information on whether your printer supports mobile printing or if it specifically mentions compatibility with Samsung devices.
If your printer is not compatible, don’t worry. There are alternative solutions available, such as using third-party apps that enable wireless printing from your tablet. These apps often provide a wide range of printer compatibility options, so you can still print your documents from your Samsung tablet even if your printer doesn’t have built-in support.
Once you’ve confirmed that your printer is compatible with the Samsung Print Service Plugin, you can move on to the next step: installing the plugin on your tablet. This plugin is necessary for establishing the connection between your tablet and the printer, allowing you to send print jobs wirelessly from your device.
Now that you are aware of the importance of printer compatibility, let’s move on to step two: installing the Samsung Print Service Plugin.
Step 2: Install Samsung Print Service Plugin
In order to print from your Samsung tablet, you’ll need to install the Samsung Print Service Plugin. This plugin allows your tablet to communicate with the printer wirelessly, making the printing process seamless and efficient.
To install the Samsung Print Service Plugin, follow these steps:
- Open the Google Play Store on your Samsung tablet.
- Search for “Samsung Print Service Plugin” in the search bar.
- Select the official Samsung Print Service Plugin app from the search results.
- Tap on “Install” to begin the installation process.
- Once the installation is complete, tap on “Open” to launch the app.
- Follow the on-screen instructions to set up the plugin and allow the necessary permissions.
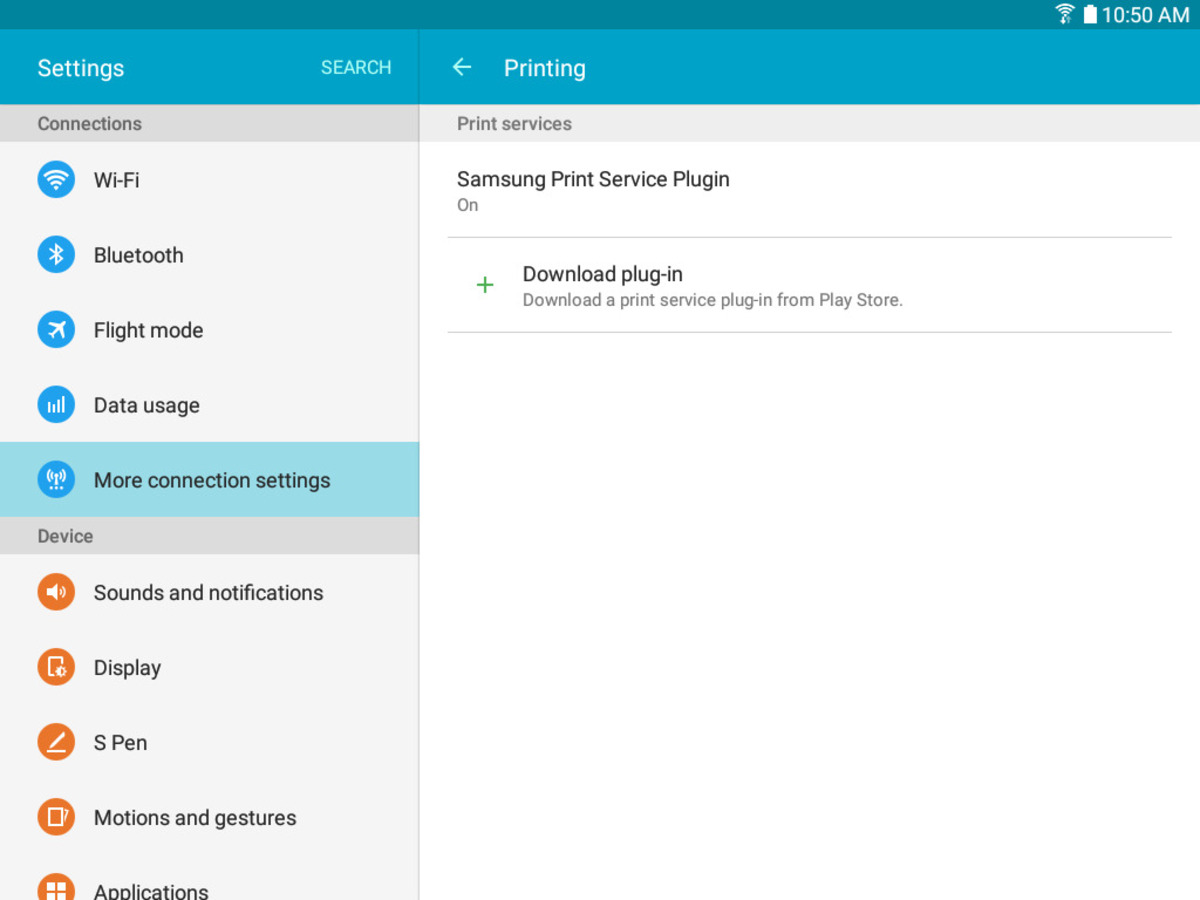
After installing the Samsung Print Service Plugin, you may need to enable it as the default print service on your tablet. To do this, navigate to your tablet’s Settings, locate the Printing section, and select the Samsung Print Service Plugin as the default print service.
It’s worth noting that the steps for installing the Samsung Print Service Plugin may vary slightly depending on the Android version running on your Samsung tablet. However, the general process remains the same, and the app should be available for download from the Google Play Store.
Once you have successfully installed and set up the Samsung Print Service Plugin, you are ready to move on to the next step: connecting your tablet to the printer. This step will establish the wireless connection between your tablet and the printer, allowing you to start printing documents seamlessly.
Step 3: Connect Tablet and Printer
Now that you have installed the Samsung Print Service Plugin, it’s time to connect your Samsung tablet to the printer. The connection process may vary depending on the type of printer you have, but the general steps are as follows:
- Ensure that your printer is turned on and connected to the same Wi-Fi network as your Samsung tablet.
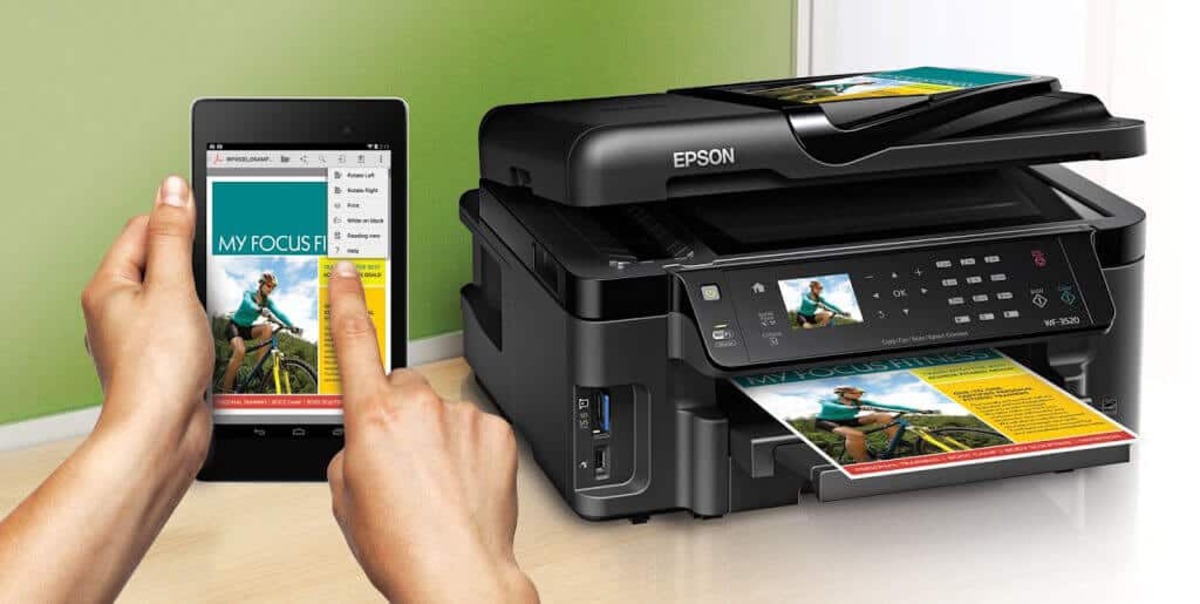
- Open the app from which you want to print your document. This could be a word processing app, a PDF reader, or even the web browser.
- Tap on the “Share” or “Print” option within the app to bring up the printing menu.
- From the list of available printers, select your printer. It may appear as the printer model or a generic name like “Samsung Printer”.
- After selecting the printer, tap on the “Print” button to send the document to the printer.
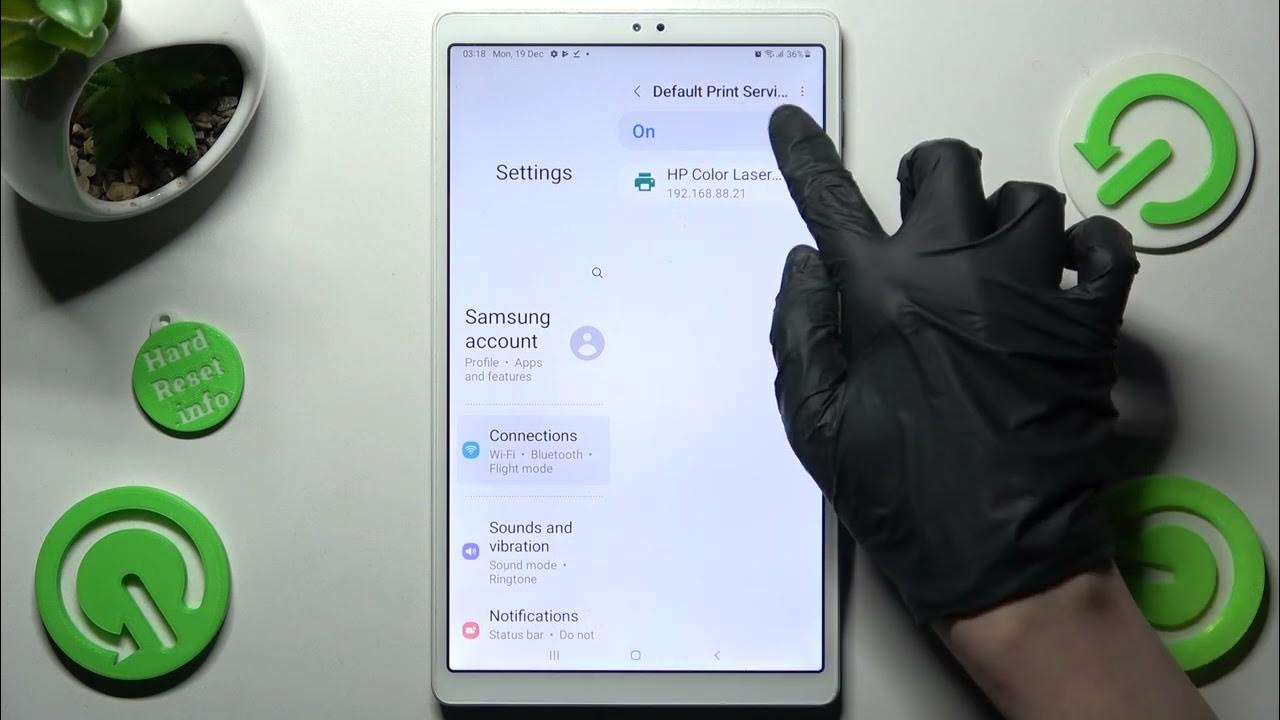
If your printer doesn’t appear in the list of available printers, try tapping on the “Refresh” or “Add printer” option to search for nearby devices again. Ensure that both your tablet and printer are connected to the same Wi-Fi network for successful detection.
In some cases, you may need to manually add the printer by entering its IP address or hostname. Consult your printer’s manual or the manufacturer’s website for guidance on how to find this information.
Once you have successfully connected your Samsung tablet to the printer, you are ready to move on to the next step: selecting and printing your desired document. This step will enable you to choose the specific file or content you want to print.
Step 4: Select and Print Document
With your Samsung tablet connected to the printer, it’s time to select and print the document you want. Whether it’s a PDF, a Word document, or a webpage, the process is straightforward.
To select and print a document from your Samsung tablet, follow these steps:
- Open the app or program that contains the document you wish to print.
- Locate the document within the app. This may involve navigating through folders or opening the specific file.
- Once you have found the document, tap on the “Share” or “Print” option.
- In the printing menu, you will see the name of your connected printer. Tap on it to confirm that you want to print to that device.
- Adjust any additional print settings if needed, such as the number of copies or page range.
- Review the document one final time to ensure that it appears as expected.
- When you’re ready, tap on the “Print” button to send the document to the printer.
After tapping “Print,” the document will be sent to the printer, and you should hear it start to print. Depending on the size and complexity of the document, it may take a few moments for the printer to complete the task.
It’s important to note that the available print options may vary depending on the app or program you are printing from. Some apps may have additional settings, such as double-sided printing or color options. Explore the print settings within the specific app to make any necessary adjustments.
Now that you have successfully selected and printed your document, you can move on to the next step: adjusting print settings. This step allows you to customize the print quality and other preferences according to your needs.
Step 5: Adjust Print Settings
After selecting the document you want to print, you may have the option to adjust various print settings to better suit your needs. These settings can include print quality, paper size, page orientation, and more.
To adjust the print settings on your Samsung tablet, follow these steps:
- After selecting the document, tap on the “Print” option.
- In the printing menu, look for a “Settings” or “Options” button. Tap on it to access the available print settings.
- Within the settings menu, you may find options such as print quality, paper size, page orientation, and color settings. Adjust these settings according to your preferences.
- Take a moment to review the preview of your document to ensure that it will be printed the way you want.
- Once you have adjusted the settings to your satisfaction, confirm your selections and tap on the “Print” button to proceed.
It’s important to note that not all apps or programs will provide an extensive range of print settings. Some applications may have a simplified printing interface with limited options, while others may offer advanced customization options. Explore the settings available within the specific app or program you are using to find and adjust the print settings.
Keep in mind that selecting higher print quality or making other adjustments may result in longer printing times or increased use of ink or toner. Consider your printing needs and resources when adjusting the print settings to optimize the balance between quality and efficiency.
Now that you have adjusted the print settings, you are one step closer to obtaining the desired printout. However, if you encounter any issues during the printing process, don’t worry. In the next step, we will provide some troubleshooting tips to help you overcome common printing problems and ensure a smooth printing experience.
Step 6: Troubleshooting Tips
While printing from your Samsung tablet is generally a straightforward process, you may encounter certain issues along the way. Here are some troubleshooting tips to help you overcome common printing problems:
- Ensure that your tablet and printer are connected to the same Wi-Fi network. A stable and reliable network connection is essential for successful printing.
- Restart your tablet and printer. Sometimes, a simple restart can resolve connectivity issues and minor glitches.
- Check the ink or toner levels in your printer. If the levels are low or empty, replace them to ensure optimal print quality.
- Make sure that the paper is loaded correctly in the printer. Improper paper alignment or paper jams can cause printing issues.
- Update the Samsung Print Service Plugin and other relevant apps on your tablet. Keeping your software up to date can often fix compatibility issues and improve performance.
- If your printer isn’t detected, try manually adding it by entering its IP address or hostname. Consult the printer’s manual or manufacturer’s website for instructions.
- Verify that the document you are trying to print is in a compatible file format. Some printers may not support certain file types, so consider converting the document to a different format if necessary.
- If you’re experiencing print quality issues, such as faded or streaky prints, try cleaning the printhead or adjusting the print settings for higher quality.
- If none of the above solutions work, consider uninstalling and reinstalling the Samsung Print Service Plugin. This can help resolve any software conflicts or corruption.
If you continue to experience issues or have specific questions about your printer or Samsung tablet model, it can be helpful to consult the user manual or reach out to the manufacturer’s support for further assistance.
By following these troubleshooting tips, you should be able to address common printing issues and enjoy a hassle-free printing experience with your Samsung tablet.
Conclusion
Printing from your Samsung tablet can be a convenient and efficient way to transform digital documents into physical copies. By following the steps outlined in this guide, you can easily print a wide variety of documents, from reports and presentations to boarding passes and photos.
We started by ensuring printer compatibility and installing the Samsung Print Service Plugin. Next, we covered the process of connecting your tablet to the printer and selecting the document you want to print. We then explored how to adjust print settings to customize the printout according to your preferences. Lastly, we provided troubleshooting tips to help you overcome common printing issues.
Remember that the specific steps may vary slightly depending on your Samsung tablet model and the printer you are using. Always refer to the user manual and consult the manufacturer’s recommendations for optimal printing performance.
Now that you have a comprehensive understanding of printing with your Samsung tablet, unleash the full potential of your device and enjoy the convenience of printing on the go.