Introduction
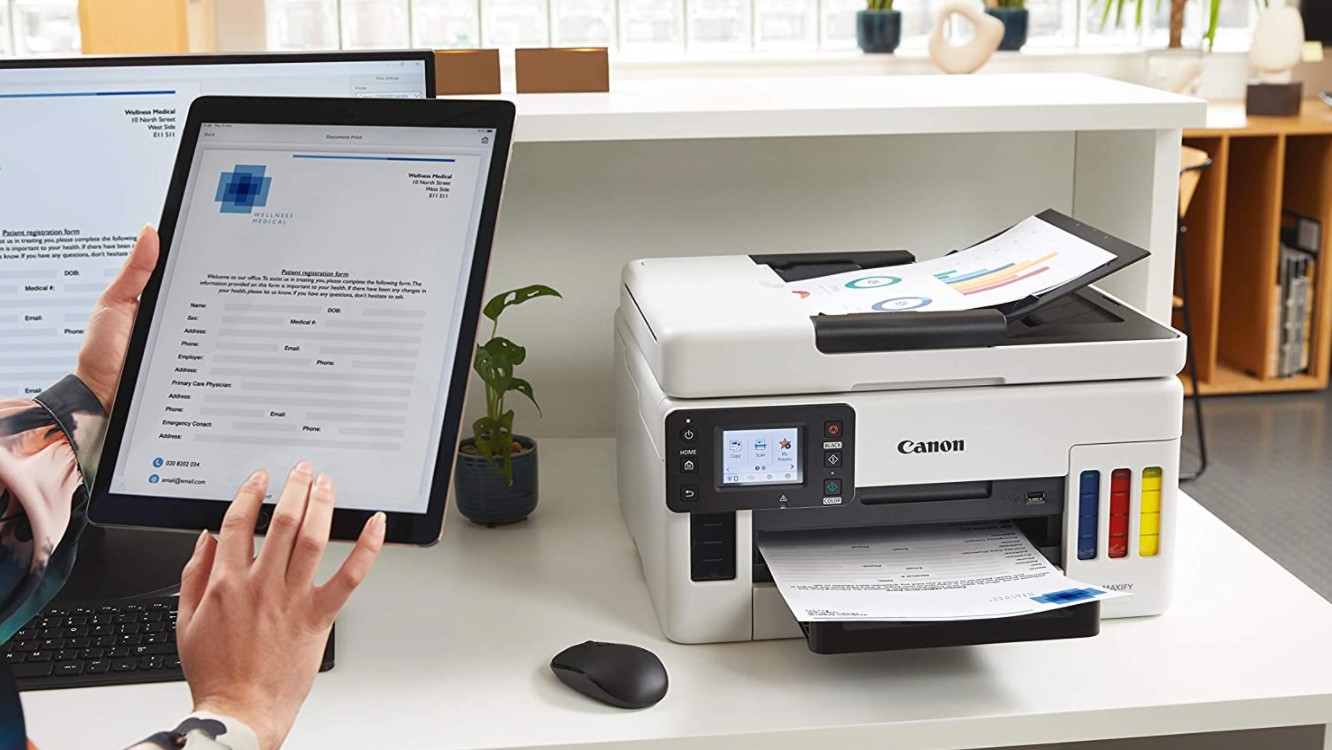
Welcome to our guide on how to add a printer to your Samsung tablet! Printing documents directly from your tablet can be incredibly convenient, whether you need to print important papers for work or school, or simply want to keep hard copies of your favorite photos. While it may seem daunting at first, connecting your Samsung tablet to a printer is a straightforward process that can be accomplished with a few simple steps.
Before we dive into the details, it’s important to note that the exact steps may vary slightly depending on the model of your Samsung tablet and the type of printer you are using. However, the general process remains the same, and by following the steps outlined in this guide, you should be able to successfully add your printer to your Samsung tablet.
In this article, we will walk you through the process of adding a printer to your Samsung tablet, from checking compatibility to printing a test page. So, let’s get started!
Step 1: Check Compatibility
The first step in adding a printer to your Samsung tablet is to ensure that it is compatible with your device. Not all printers are compatible with tablets, so it’s important to check the specifications of your printer and tablet before proceeding.
To check compatibility, you can refer to the user manual or documentation of your printer. Look for information specifically related to compatibility with mobile devices, including tablets. Some printers may support direct printing from tablets using built-in features, while others may require the use of additional software or apps.
If your printer supports wireless printing, it is more likely to be compatible with your Samsung tablet. Wireless printers utilize Wi-Fi technology to establish a connection with your tablet, allowing you to send print jobs seamlessly.
Additionally, make sure that your Samsung tablet is running on a recent version of the operating system. Newer versions of Android often come with enhanced printing capabilities and improved compatibility with printers.
If your printer is not compatible with your Samsung tablet, don’t worry. There are alternative methods to connect and print, such as using cloud-based printing services or connecting through a computer. However, for the purpose of this guide, we will focus on adding a printer directly to your Samsung tablet.
Once you have confirmed that your printer is compatible with your Samsung tablet, you can proceed to the next step: connecting your tablet to a Wi-Fi network.
Step 2: Connect Tablet to Wi-Fi
Before you can add a printer to your Samsung tablet, you need to ensure that it is connected to a Wi-Fi network. This will allow your tablet to communicate with the printer wirelessly and send print jobs.
To connect your tablet to Wi-Fi, follow these steps:
- Swipe down from the top of the tablet’s screen to access the quick settings panel.
- Tap on the Wi-Fi icon to enable Wi-Fi settings.
- A list of available Wi-Fi networks will appear on the screen. Tap on the network you want to connect to.
- If the network requires a password, enter it and tap Connect.
- Your tablet will now connect to the Wi-Fi network. Once connected, you will see the Wi-Fi icon in the notification bar at the top of the screen.
It is important to ensure that your tablet and printer are connected to the same Wi-Fi network. This is because the printer and tablet need to be on the same network in order to establish a connection and facilitate the printing process.
Once your tablet is successfully connected to Wi-Fi, you can proceed to the next step of installing the printer app on your Samsung tablet.
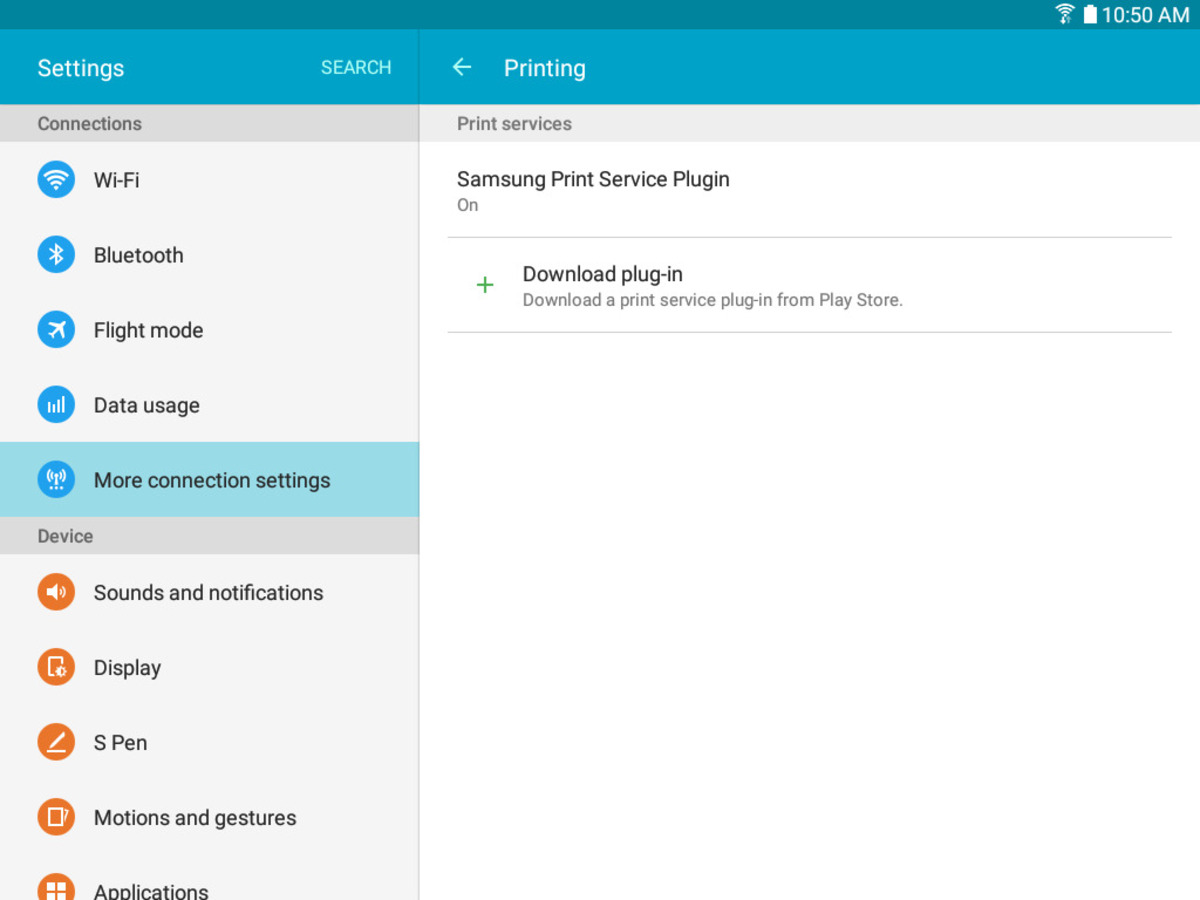
Step 3: Install Printer App
In order to add a printer to your Samsung tablet, you will need to install a printer app that is compatible with your device. This app will allow you to connect and communicate with your printer, giving you the ability to send print jobs directly from your tablet.
Here is how you can install a printer app on your Samsung tablet:
- Open the Google Play Store on your tablet.
- Tap on the search bar at the top of the screen and type in the name of the printer app you want to install. Alternatively, you can search for “printer app” to see a list of available options.
- Tap on the app you want to install from the search results.
- On the app’s page, tap the “Install” button.
- Wait for the app to download and install on your tablet. The installation process may take a few moments depending on your internet connection.
- Once the installation is complete, tap the “Open” button to launch the app.
There are several printer apps available on the Google Play Store, so make sure to choose one that is compatible with your printer and offers the features you need. Some popular printer apps include HP Print Service Plugin, Canon PRINT Inkjet/SELPHY, and Epson iPrint.
After installing the printer app, you are ready to move on to the next step: opening the app and setting up the printer connection.
Step 4: Open Printer App
Once you have installed the printer app on your Samsung tablet, it’s time to open the app and begin the setup process. Opening the printer app will allow you to configure the connection between your tablet and the printer, ensuring that they can communicate effectively for printing.
To open the printer app and begin the setup process, follow these steps:
- Locate the app icon on your tablet’s home screen or in the app drawer. It may have a name like “Printer” or “Print Services,” depending on the specific app you installed.
- Tap on the app icon to launch it.
- Once the app is open, you will be prompted to grant any necessary permissions, such as access to your device’s storage or location. Follow the on-screen instructions to grant these permissions if prompted.
- In the printer app, you will typically find a menu or settings section that allows you to configure the printer connection. Look for options like “Setup” or “Add Printer.”
Within the settings or setup section, you may have the option to connect to the printer using different methods, such as Wi-Fi, Bluetooth, or a direct USB connection. Choose the method that is most suitable for your printer and follow the on-screen instructions to establish the connection.
If your printer is connected via Wi-Fi, the printer app may display a list of available printers for you to choose from. Select your printer from the list and proceed with the setup process.
Once you have successfully opened the printer app and configured the printer connection, you are ready to move on to the next step: selecting the printer within the app.
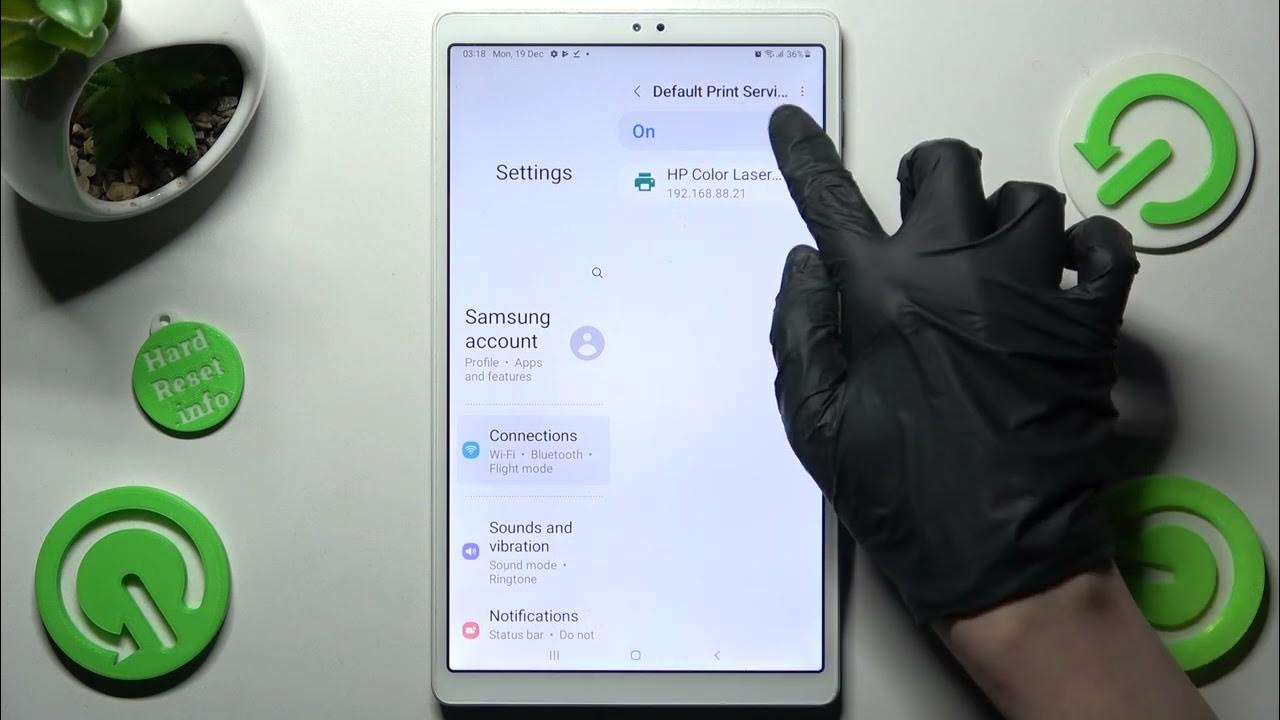
Step 5: Select Printer
After opening the printer app on your Samsung tablet and setting up the printer connection, the next step is to select the specific printer you want to use. This step is crucial as it ensures that your tablet is connected to the correct printer and enables seamless printing.
To select the printer within the printer app, follow these steps:
- Open the printer app on your tablet.
- Navigate to the “Printers” or “Settings” section within the app.
- In this section, you should see a list of printers that are available for use.
- Tap on the printer you want to add and select it.
If you have multiple printers available, ensure that you choose the correct one that you want to use for your printing needs. The printer app should display the printer’s name or model number to help you identify the right device.
Once you have selected the printer, your Samsung tablet will establish a connection with it. This connection will enable you to send print jobs directly from your tablet to the selected printer.
It’s important to note that if you don’t see your printer listed in the app, ensure that it is powered on, connected to the same Wi-Fi network as your tablet, and properly configured in the printer app’s settings.
With the printer selected, you can now proceed to the next step: configuring the printer settings within the app.
Step 6: Configure Printer Settings
After selecting the printer within the printer app on your Samsung tablet, the next step is to configure the printer settings. This will ensure that your printouts meet your desired specifications, such as paper size, print quality, and number of copies.
Here’s how you can configure the printer settings within the app:
- Launch the printer app on your tablet.
- Within the app, locate the “Settings” or “Print Options” section. This section may vary depending on the specific printer app you are using.
- In the settings section, you should find a range of options that allow you to customize your print settings.
- Adjust the settings according to your preferences, such as selecting the paper size, print quality, color or black and white printing, and the number of copies.
- Take some time to explore the various settings available and make any necessary adjustments to meet your printing needs.
It’s important to note that the available printer settings may vary depending on the capabilities of your specific printer model. Some printers offer advanced settings like double-sided printing or booklet printing, while others may have a more limited range of options.
Once you have configured the printer settings according to your preferences, you are now ready to move on to the final step: printing a test page.
Step 7: Print a Test Page
Now that you have successfully configured the printer settings within the printer app on your Samsung tablet, it’s time to print a test page to ensure that everything is working properly. Printing a test page allows you to check the print quality, verify the communication between your tablet and the printer, and make any necessary adjustments before printing important documents.
To print a test page, follow these steps:
- Open the file or document that you want to test print on your Samsung tablet.
- Tap on the print option within the app or document viewer. This option is usually represented by a printer icon or the word “Print.”
- Review the print preview to ensure that the document appears as you intended.
- Tap on the “Print” button or icon to initiate the print job.
- Wait for the printer to process the print job and produce the test page.
- When the print job is complete, carefully examine the printed page to ensure that the text and images appear as expected. Check for any smudges, streaks, or alignment issues.
If you encounter any issues with the test print, you may need to go back and adjust the printer settings or troubleshoot any connection problems between your tablet and the printer.
On the other hand, if the test page prints perfectly, congratulations! You have successfully added and configured a printer to your Samsung tablet. You can now confidently use your tablet to print documents, photos, and more.
Remember, if you encounter any difficulties or have questions specific to your printer model or tablet, refer to the printer’s user manual or the support resources provided by the printer manufacturer.
Conclusion
Adding a printer to your Samsung tablet may seem daunting at first, but by following the step-by-step process outlined in this guide, you can easily connect and configure a printer to work seamlessly with your tablet. The convenience of being able to print directly from your tablet can save you time and effort, whether you need to print important documents for work or school, or simply want to print memorable photos.
Throughout this guide, we covered the essential steps to add a printer to your Samsung tablet, from checking compatibility and connecting your tablet to Wi-Fi, to installing the printer app and selecting the correct printer. We also discussed how to configure the printer settings within the app and print a test page to ensure everything is working correctly.
Remember, the specific steps may vary slightly depending on the model of your Samsung tablet and the printer you are using. It’s essential to consult the user manual or documentation provided by the printer manufacturer for detailed instructions specific to your devices.
Now that you know the process of adding a printer to your Samsung tablet, you can enjoy the convenience and flexibility of printing directly from your tablet whenever you need to. Whether it’s important documents, creative projects, or cherished memories, printing from your tablet has never been easier.
So go ahead, give it a try and enjoy the benefits of having a printer connected to your Samsung tablet!