Introduction
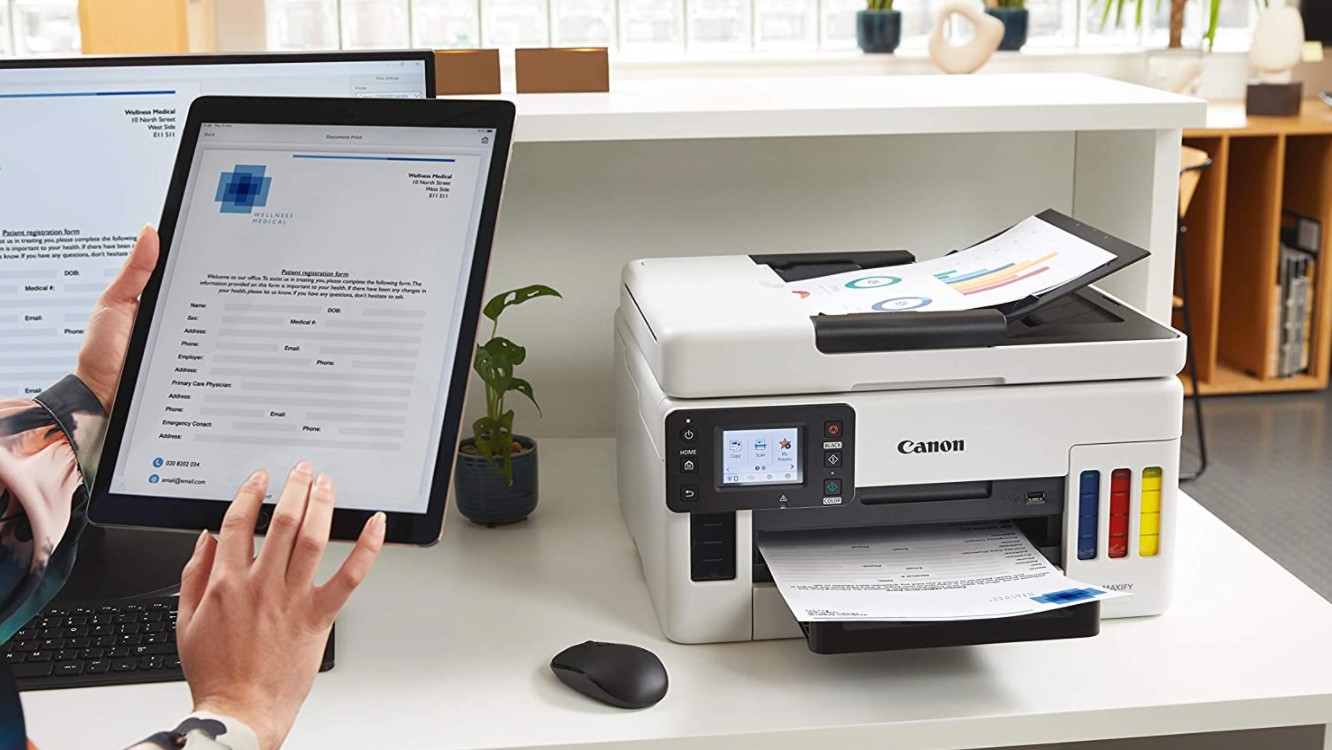
Welcome to this guide on how to add a wireless printer to your Samsung tablet. Printing documents and photos directly from your tablet can be a convenient and efficient way to get things done. Whether you need to print out an important document for work or want to create a physical copy of a cherished photo, adding a wireless printer to your Samsung tablet allows you to do so with ease.
With the advancement of technology, setting up and connecting a wireless printer to your tablet has become much simpler. Gone are the days of dealing with tangled cables and complicated installation processes. Instead, you can now connect to a wireless printer using your tablet’s Wi-Fi capabilities. This hassle-free method ensures that you can print from anywhere within your Wi-Fi network range.
In this guide, we will take you through a step-by-step process to add a wireless printer to your Samsung tablet. Whether you have a home or business printer, the procedure remains relatively similar. By following these steps, you will soon be able to print documents and photos directly from your tablet, saving you time and effort.
Before we begin, it is important to note that the specific steps may vary slightly depending on the printer model and the version of Android running on your Samsung tablet. However, the general process remains consistent across devices, and we will provide you with the essential information needed to successfully connect your tablet to a wireless printer.
Now, let’s dive into the steps required to add a wireless printer to your Samsung tablet!
Step 1: Check if your printer is wireless compatible
Before you begin the process of adding a wireless printer to your Samsung tablet, you need to make sure that your printer is wireless compatible. Not all printers have built-in wireless capabilities, so it’s essential to check if your printer supports wireless connectivity.
Here are a few ways to determine if your printer is wireless compatible:
- Check the printer’s manual: Look for information regarding wireless connectivity in the printer’s user manual. The manual should provide details on whether the printer has built-in Wi-Fi capabilities or if it requires additional hardware, such as a wireless adapter, to connect wirelessly.
- Inspect the printer’s control panel: Some printers have a built-in screen or control panel that displays connectivity options. Navigate through the settings menu to see if there is an option for wireless or Wi-Fi connectivity.
- Visit the manufacturer’s website: If you do not have the printer’s manual or cannot find the necessary information on the control panel, visit the manufacturer’s website. Look for your printer model and check its specifications to see if wireless connectivity is listed.
If you discover that your printer is not wireless compatible, don’t worry! You still have some options available. One option is to connect your printer to a wireless print server, which acts as an intermediary between your printer and your Samsung tablet. Another option is to use a USB cable to physically connect your Samsung tablet to the printer when needed.
However, if you find that your printer does support wireless connectivity, you can proceed to the next steps to connect it to your Samsung tablet wirelessly. Keep in mind that some printers may require specific software or apps to be installed on your tablet before the connection can be established.
Now that you have determined the wireless compatibility of your printer, you can move on to the next step in adding it to your Samsung tablet. In the next step, we will guide you through the process of connecting your printer to your Wi-Fi network.
Step 2: Connect your printer to your Wi-Fi network
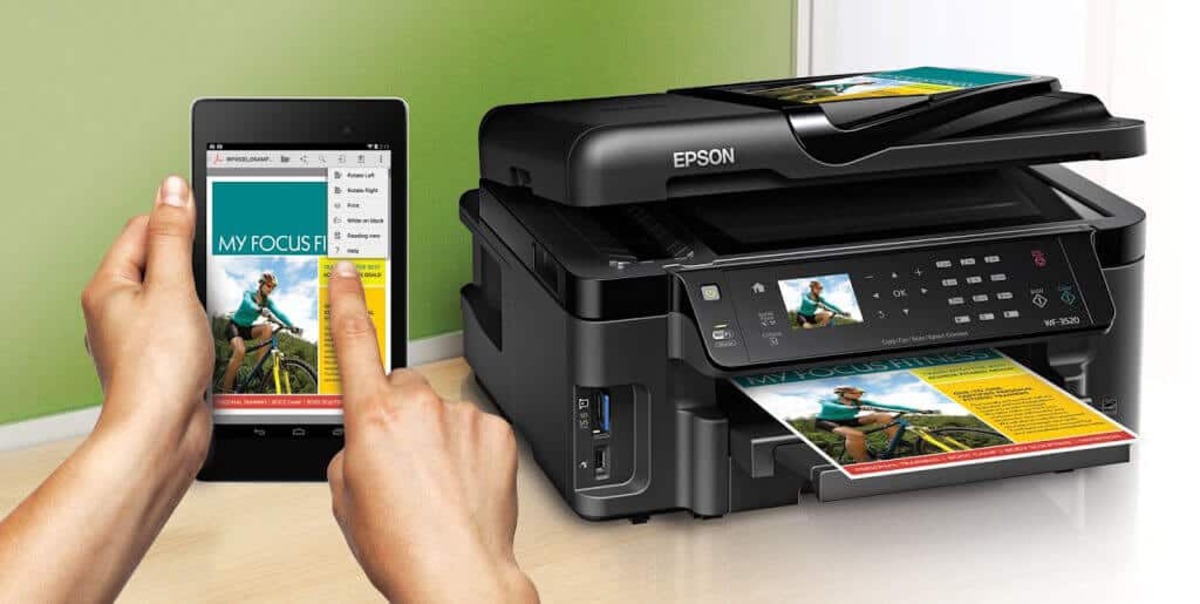
Once you have confirmed that your printer is wireless compatible, the next step is to connect it to your Wi-Fi network. By doing this, your printer will be able to communicate with your Samsung tablet and other devices on the same network.
Here’s how you can connect your printer to your Wi-Fi network:
- Access the printer’s settings: Use the printer’s control panel or screen to access the settings menu. Look for an option related to network or wireless settings. The exact location of this option may vary depending on your printer model.
- Select your network: Within the network settings, you should see a list of available Wi-Fi networks. Choose your network from the list. If your network is password-protected, you will need to enter the Wi-Fi password to connect.
- Confirm the connection: Once you have selected your network and entered the password (if required), your printer will attempt to connect to the Wi-Fi network. Wait for the printer to establish a successful connection, which may take a few moments.
- Print a network configuration page: To ensure that the connection was successful, you can print a network configuration page from the printer. This page will provide details about the network settings of your printer, including the IP address assigned to it.
It’s important to note that the above steps are a general guide, and the process may vary depending on your printer model. Refer to your printer’s user manual for specific instructions if you encounter any difficulties.
Once your printer is connected to your Wi-Fi network, it is ready to be paired with your Samsung tablet. In the next step, we will guide you through the process of installing the printer app on your tablet.
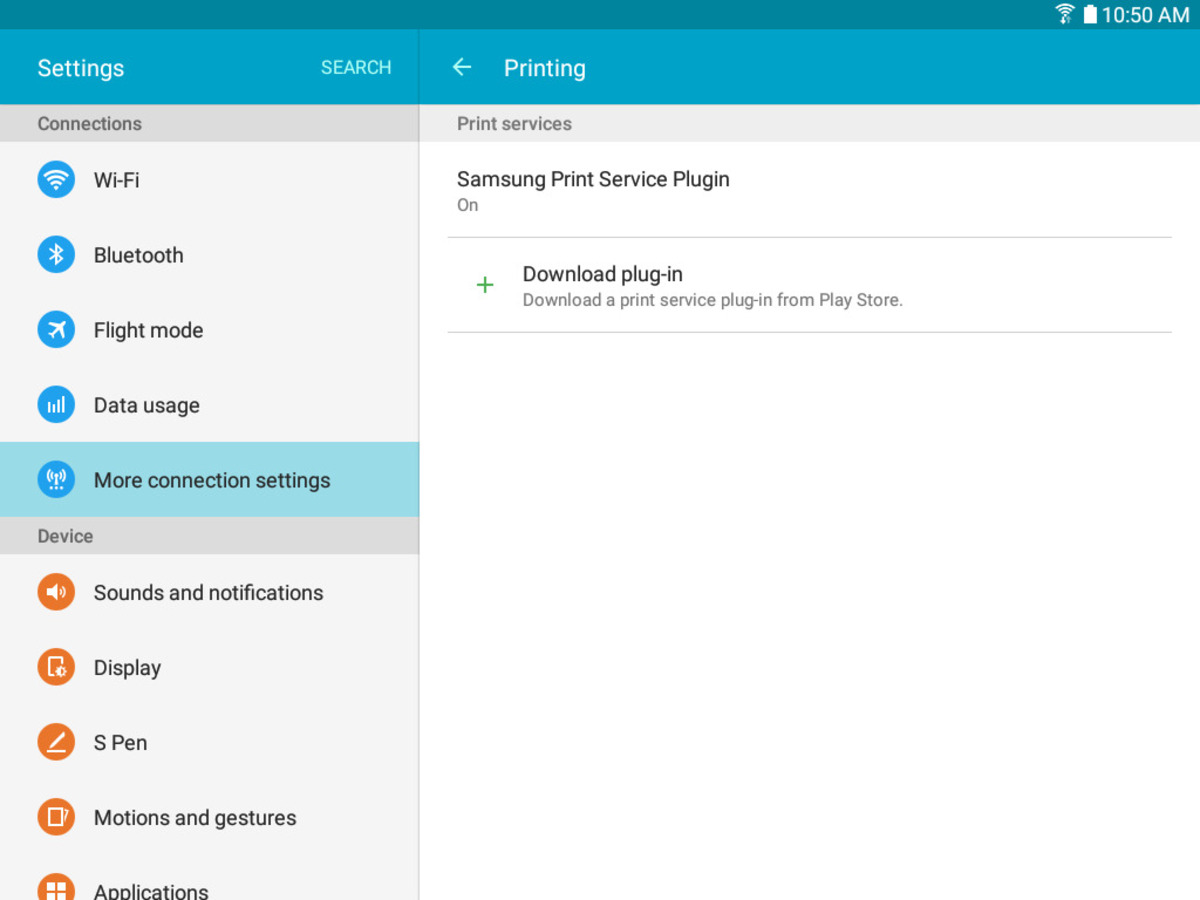
Step 3: Install the printer app on your Samsung tablet
With your printer successfully connected to your Wi-Fi network, the next step is to install the printer app on your Samsung tablet. The printer app acts as a bridge between your tablet and the printer, allowing them to communicate and enabling printing functionality.
Here’s how you can install the printer app on your Samsung tablet:
- Open the Google Play Store: On your Samsung tablet, locate and open the Google Play Store app. This is where you can download and install various applications, including the printer app.
- Search for the printer app: In the search bar at the top of the Play Store, type in the name of your printer manufacturer or the specific printer model. This will help you find the official printer app associated with your device.
- Select and install the printer app: From the search results, choose the printer app that matches your printer model and manufacturer. Tap on the app to open its details page, and then click on the “Install” button to begin the installation process.
- Follow the on-screen instructions: Once the installation is in progress, follow the on-screen prompts to complete the setup. The process may involve granting necessary permissions or signing in to your printer or manufacturer’s account.
- Wait for the installation to finish: The installation may take a few moments, depending on your internet connection speed. Ensure that your tablet remains connected to the internet until the installation is complete.
Once the printer app is successfully installed on your Samsung tablet, you are now ready to proceed with adding your printer through the app. This will allow your tablet to recognize and establish a connection with the printer. In the next step, we will guide you through this process.
Step 4: Add your printer through the app
Now that you have installed the printer app on your Samsung tablet, it’s time to add your printer through the app. This step will enable your tablet to detect and connect to the printer, allowing you to print documents and photos directly from your tablet.
Here’s how you can add your printer through the app:
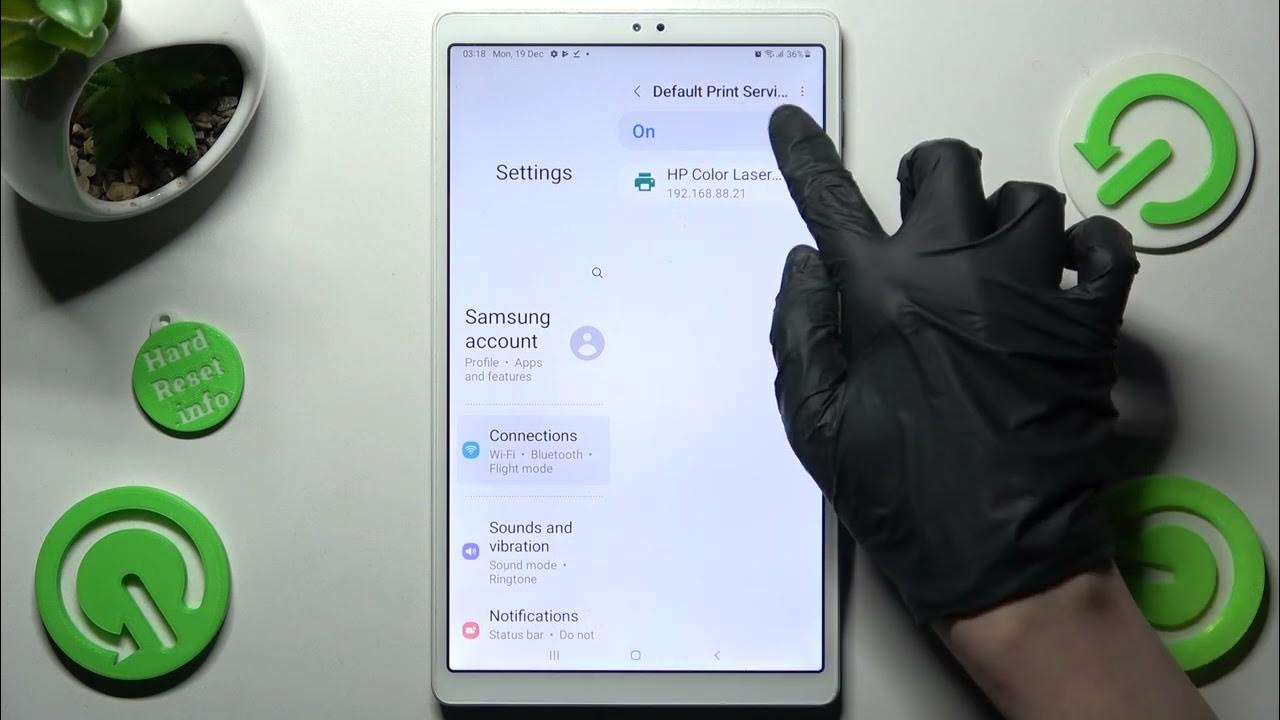
- Open the printer app: Locate the printer app on your Samsung tablet and open it by tapping on its icon. The app should launch and display a list of available printers.
- Select your printer: From the list of available printers, select your printer model. The app will initiate a search for nearby printers, and upon detection, your printer should appear on the screen.
- Tap on your printer: Once your printer is listed, tap on its name or icon to select it. This will prompt the app to establish a connection between your tablet and the printer.
- Follow any additional instructions: Depending on your printer model and the specific app, you may be prompted to provide additional information or complete certain steps to finalize the connection. Follow any on-screen instructions provided by the app to ensure a successful connection.
- Confirm the connection: Once the connection is established, the printer app should display a confirmation message or icon indicating that your Samsung tablet is now connected to the printer.
After adding your printer through the app, you can check the printing settings and preferences within the app’s interface. This allows you to customize printing options such as paper size, print quality, and color settings according to your requirements.
Now that you have successfully added your printer through the app, it’s time to move on to the final step – testing the printing functionality on your Samsung tablet.
Step 5: Test the printing functionality on your tablet
With your printer successfully added to your Samsung tablet, it’s time to test the printing functionality to ensure everything is working correctly. By printing a sample document or photo, you can verify that the connection is stable and that the printer is able to receive and process print jobs from your tablet.
Here’s how you can test the printing functionality on your Samsung tablet:
- Open a document or photo: Locate a document or photo on your Samsung tablet that you would like to print. You can choose a test document or select any file that you want to print.
- Tap on the print option: Once you have the document or photo open, tap on the print option within the app or the menu. This will open the print settings and preview screen.
- Review the print settings: Take a moment to review the print settings and adjust them if necessary. You can modify options such as paper size, orientation, number of copies, and print quality to suit your preferences.
- Select your printer: From the list of available printers, select your printer model that you added through the printer app. Ensure that the printer you want to use is selected before proceeding.
- Tap on the print button: Once you have reviewed the settings and selected your printer, tap on the print button to send the print job to your printer. Your Samsung tablet will communicate with the printer, and the printing process will begin.
- Confirm the printed output: After the printing process is complete, check the output to ensure that the document or photo printed correctly. Verify the print quality, content accuracy, and any specific details that were important for your print job.
If the printed output meets your expectations, congratulations! You have successfully tested the printing functionality on your Samsung tablet. You can now confidently use your tablet to print documents, photos, and other files whenever you need.
However, if you encounter any issues or the print job doesn’t turn out as expected, double-check the printer settings, Wi-Fi connection, and ensure that the printer and tablet are both connected to the same network. In case of persisting issues, consult the printer’s user manual or reach out to the printer manufacturer’s customer support for further assistance.
With the printing functionality successfully tested, you have completed the process of adding a wireless printer to your Samsung tablet. Enjoy the convenience of printing directly from your tablet and make your printing tasks more efficient and seamless!
Conclusion
Adding a wireless printer to your Samsung tablet can greatly enhance your productivity and convenience when it comes to printing documents and photos. With the simple steps outlined in this guide, you can easily connect your tablet to a compatible wireless printer and enjoy the benefits of wireless printing.
Throughout this guide, we have covered the essential steps to add a wireless printer to your Samsung tablet. From checking the compatibility of your printer to connecting it to your Wi-Fi network, installing the printer app, adding your printer through the app, and testing the printing functionality on your tablet, each step has been carefully explained.
By ensuring that your printer is wireless compatible, establishing a connection to your Wi-Fi network, installing the necessary printer app, and testing the printing functionality, you can confidently print documents and photos directly from your Samsung tablet.
Remember, the specific steps may vary slightly depending on your printer model and the version of Android running on your Samsung tablet. It is always a good idea to consult your printer’s user manual and the instructions provided by the printer app for any specific guidance.
With the wireless printer setup complete, you no longer have to rely on a computer or physical connection to print important documents. Enjoy the convenience of wireless printing from your Samsung tablet, and streamline your workflow for a more efficient and seamless printing experience.
Now that you have successfully added a wireless printer to your Samsung tablet, you can take advantage of the numerous printing options and features available at your fingertips. Whether it’s printing documents for work, school assignments, or cherished photos, wireless printing offers a level of convenience that can greatly simplify your printing needs.
So, go ahead and start exploring the world of wireless printing with your Samsung tablet and experience a new level of convenience and productivity!