Why Use Apple Pencil for Note Taking
When it comes to note-taking, the Apple Pencil offers a range of advantages that make it an ideal tool for the task. Whether you’re a student, professional, or simply someone who likes to jot down thoughts and ideas, utilizing the Apple Pencil can greatly enhance your note-taking experience. Here are some compelling reasons to consider using the Apple Pencil:
- Precise and Natural Writing: The Apple Pencil’s advanced technology allows for accurate and fluid writing on your iPad or iPad Pro. With its pressure sensitivity and low latency, it feels like you’re using an actual pen or pencil on paper. This precision ensures that your notes are legible and easy to read.
- Efficiency and Speed: Apple Pencil enables you to write quickly, saving you valuable time during lectures, meetings, or brainstorming sessions. Its responsiveness and seamless integration with note-taking apps allow for a smooth writing experience, so you can capture ideas effortlessly.
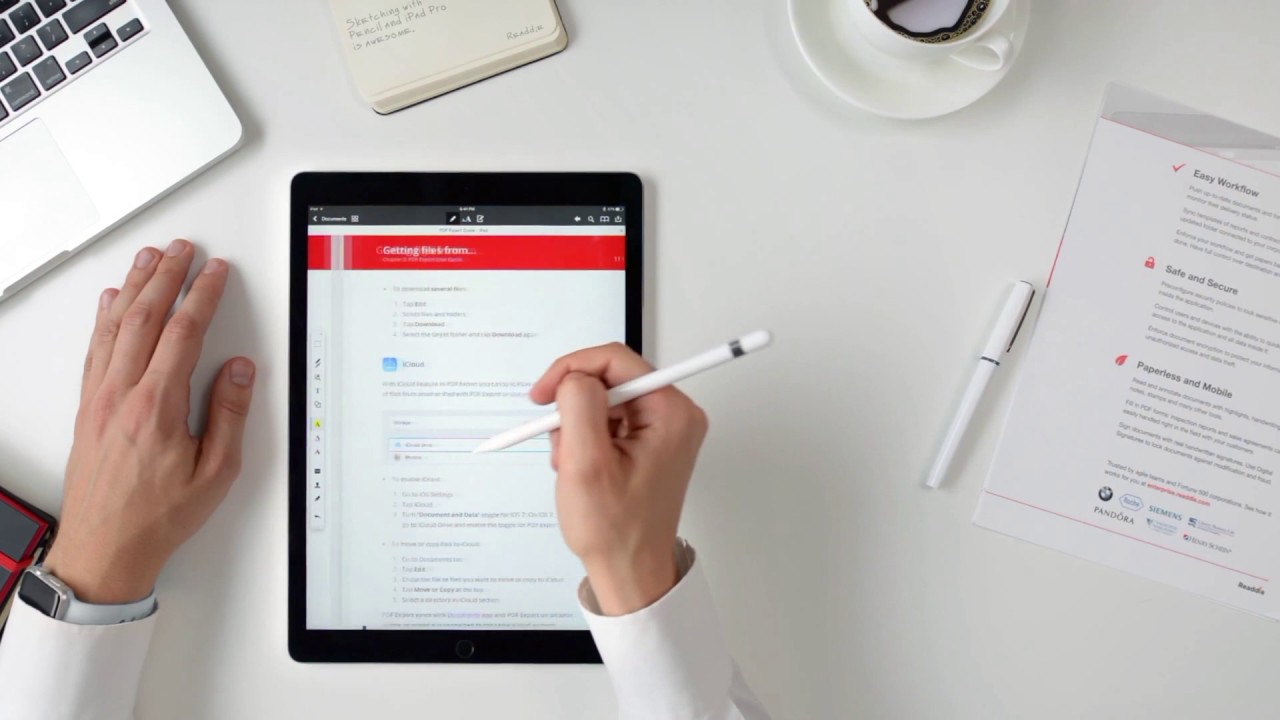
- Annotation and Markup: With the Apple Pencil, you can easily annotate PDFs, highlight important information, and mark up documents. Whether you’re reviewing study material, collaborating on projects, or editing work documents, the Apple Pencil empowers you to make precise and detailed annotations directly on your iPad.
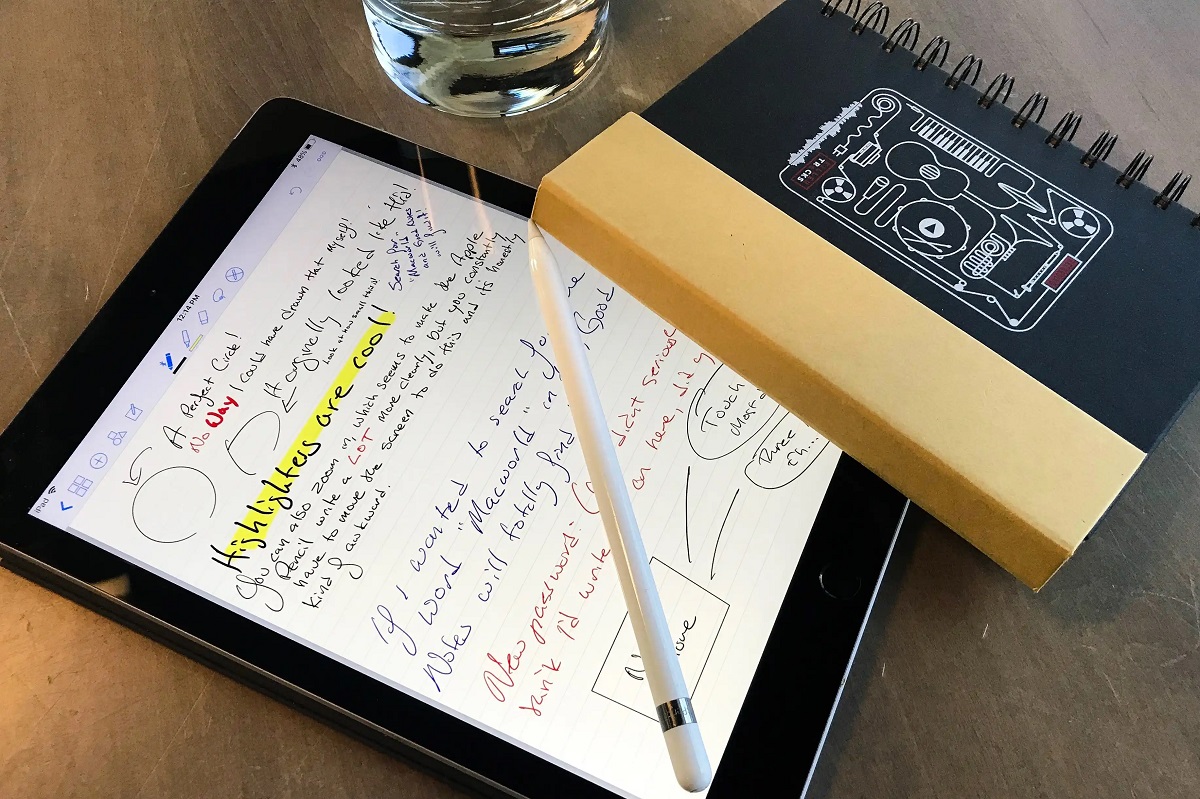
- Flexibility and Versatility: The Apple Pencil is not limited to just writing. It allows you to sketch, draw diagrams, create mind maps, and even make artistic illustrations. Whether you’re a designer, artist, or just enjoy expressing yourself creatively, the Apple Pencil provides endless possibilities for capturing your imagination.
- Seamless Integration with Note-taking Apps: The Apple Pencil seamlessly integrates with a wide range of note-taking apps available on the App Store, such as Notability, GoodNotes, and Evernote. These apps offer various features like organization, search functionality, and cloud syncing, allowing you to keep your notes organized and easily accessible across all devices.
By utilizing the Apple Pencil for note-taking, you not only improve the quality and readability of your notes, but you also unlock a new level of productivity and creativity. Its intuitive and powerful features make it a valuable tool for students, professionals, and creative individuals alike. So, if you’re looking for a seamless and efficient way to take notes, the Apple Pencil is definitely worth considering.
Getting Started with Apple Pencil
If you’ve recently acquired an Apple Pencil or are considering purchasing one, getting started is a straightforward process. Here’s a step-by-step guide on how to set up and use your Apple Pencil:
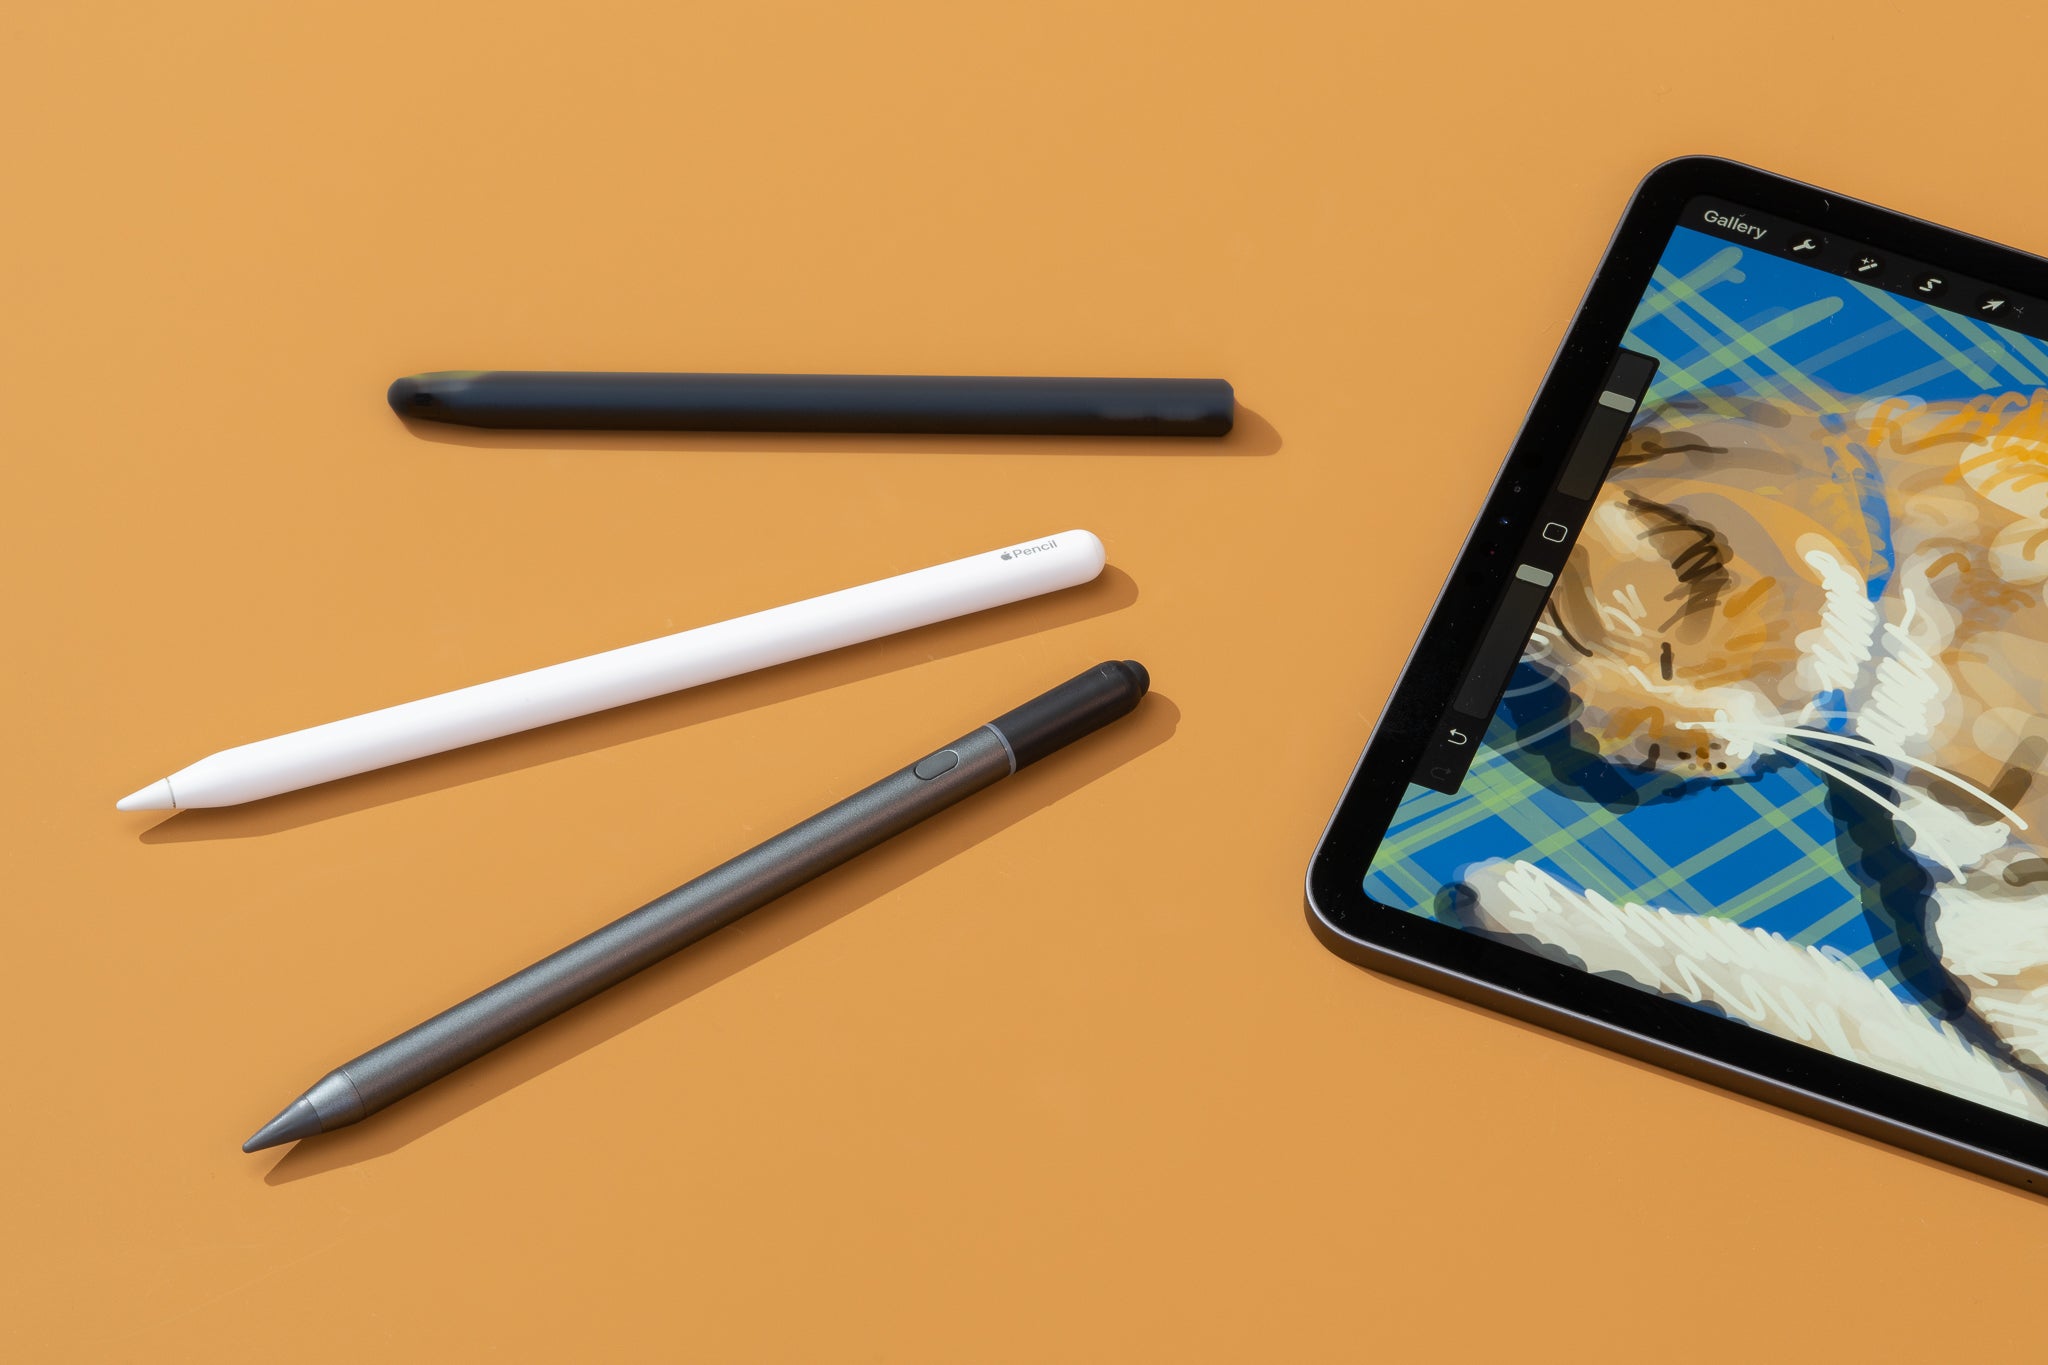
- Compatibility: Ensure that your iPad or iPad Pro model is compatible with the Apple Pencil. The first-generation Apple Pencil works with iPad (6th generation), iPad Air (3rd generation), and iPad mini (5th generation), while the second-generation Apple Pencil is compatible with iPad Pro 12.9-inch (3rd and 4th generation) and iPad Pro 11-inch (1st and 2nd generation).
- Pairing: Remove the cap from the Apple Pencil and connect it to your iPad’s Lightning or USB-C port. A pairing prompt will appear on your iPad’s screen, allowing you to connect and pair the Apple Pencil. Follow the on-screen instructions to complete the pairing process.
- Settings: Once paired, navigate to the Settings app on your iPad and select “Apple Pencil.” From here, you can customize various settings, such as double-tap functionality, palm rejection, and pressure sensitivity. Adjust these settings to suit your preferences and writing style.
- Charging: The first-generation Apple Pencil charges through the Lightning connector on your iPad. Simply remove the cap and plug it into the Lightning port of your iPad when it needs recharging. For the second-generation Apple Pencil, attach it magnetically to the side of your iPad Pro, where it will wirelessly charge.
- Using Note-taking Apps: Install a note-taking app of your choice from the App Store, such as Notability or GoodNotes. Open the app and create a new note. When you start writing or drawing with the Apple Pencil, it should automatically register and respond to your input.
- Exploring Additional Features: Depending on the app and iPad model you’re using, you may have access to additional features like shape recognition, handwriting-to-text conversion, and customizable gestures. Explore these features within your chosen note-taking app to make the most of your Apple Pencil.
By following these steps, you’ll be ready to unleash the full potential of your Apple Pencil and enjoy a seamless note-taking experience. Remember to keep your Apple Pencil charged, customize the settings to your liking, and experiment with different note-taking apps to find the one that suits your needs best. With a little practice, you’ll soon find that the Apple Pencil enhances your productivity and creativity in exciting new ways.
Choosing the Right Note-taking App
With a plethora of note-taking apps available on the App Store, finding the right one for your needs can be a daunting task. Here are some factors to consider when choosing a note-taking app to maximize your Apple Pencil experience:
- User Interface and Design: Look for an app that has an intuitive and user-friendly interface. The app should make it easy to create, organize, and search for notes, allowing you to focus on your work instead of struggling with the app’s layout.
- Compatibility and Syncing: Ensure that the note-taking app is compatible with your iPad model and operating system. It should also offer seamless syncing across multiple devices, enabling you to access your notes from anywhere, whether it’s your iPhone, Mac, or web browser.
- Functionality and Features: Consider the features you need in a note-taking app. Some apps offer handwriting recognition, allowing you to convert your handwritten notes into text. Others provide audio recording capabilities or integration with cloud storage services. Choose an app that aligns with your specific requirements.
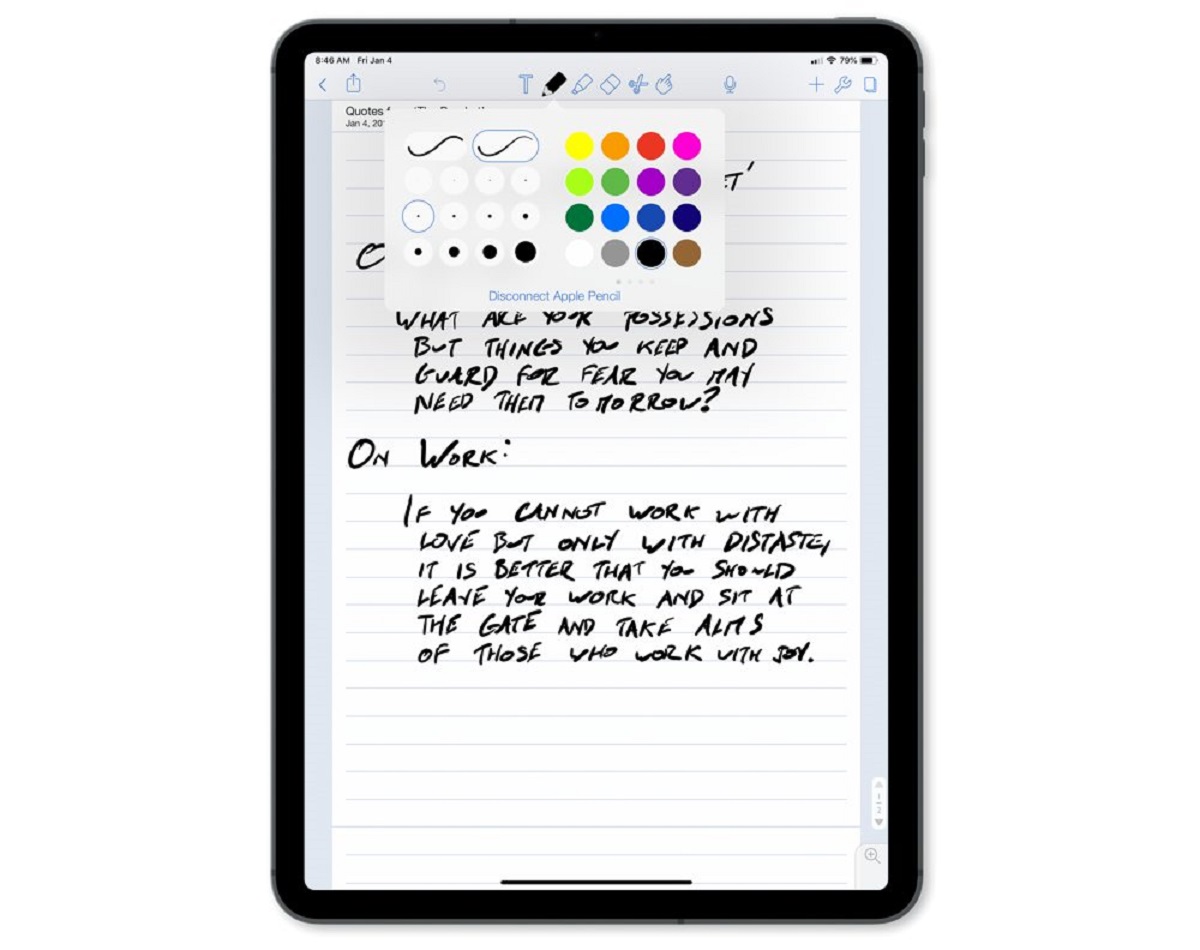
- Customization Options: Look for an app that allows you to customize your note-taking experience. This includes options such as pen thickness, colors, highlighter styles, paper backgrounds, and the ability to create custom templates. Customization features can enhance your creativity and make your notes more visually appealing.
- Organization and Search: Consider how the app allows you to organize and search for your notes. Look for features such as notebooks, folders, tags, and keyword search. These organizational tools make it easier to find specific notes and keep your digital workspace neat and tidy.
- Integration with Apple Pencil: Ensure that the app fully supports the Apple Pencil’s features, such as pressure sensitivity, palm rejection, and tilt detection. This will help you make the most of your Apple Pencil’s capabilities and provide a seamless writing and drawing experience.
- Reviews and Ratings: Read reviews and check the ratings of different note-taking apps to get a sense of their overall quality and user satisfaction. Consider feedback from other Apple Pencil users to gain insights into how well the app performs with the stylus.
Ultimately, the best note-taking app for you will depend on your personal preferences and specific requirements. It may be helpful to try out a few different apps to determine which one suits your needs best. Consider starting with popular options like Notability, GoodNotes, or Evernote, as these apps are highly regarded and widely used by Apple Pencil users.
Remember that the note-taking app you choose should enhance your productivity, organization, and creativity. With the right app and your trusty Apple Pencil, you’ll be well-equipped to take your digital note-taking to the next level.
Tips for Writing Neat and Legible Notes
Writing neat and legible notes is crucial for effective studying and information retention. Here are some useful tips to ensure your handwritten notes are clear and easy to read:
- Choose the Right Pen and Paper: Experiment with different pens or stylus tips to find one that feels comfortable and produces clean lines. Additionally, select smooth paper or a digital note-taking surface that minimizes friction and allows for fluid writing.
- Maintain Consistent Letter Formation: Pay attention to the formation of each letter and try to keep them consistent in size and shape. This consistency improves readability and makes your notes visually appealing.
- Write at a Reasonable Speed: Avoid rushing through your notes, as this can result in sloppy handwriting. Find a pace that allows you to write neatly without sacrificing content capture.
- Use Line Guides or Grid Paper: If writing on physical paper, consider using lined or grid paper to help maintain consistent letter sizing and spacing. This will make your notes easier to read and organize.
- Utilize Headings and Subheadings: Organize your notes using headings and subheadings. This not only helps you organize information but also improves readability by making it easier to scan and locate specific topics.
- Separate Sections with Bullets or Numbered Lists: Use bullets or numbered lists to create clear sections within your notes. This not only enhances organization but also makes it easier to follow your train of thought.
- Leave Spaces for Additions and Annotations: Leave sufficient space between lines and sections to allow for future additions or annotations. This provides flexibility for including additional information during review or further research.
- Practice Handwriting Legibility: Regularly practice your handwriting to improve legibility. Engage in handwriting exercises and focus on forming clean and clear letters.
- Consider Color Coding: Use colors to visually differentiate important information, headings, subheadings, and key points. This can help you quickly identify and review specific details within your notes.
- Review and Edit Your Notes: Set aside time to review and edit your notes. This allows you to clarify any unclear or messy sections, ensuring that your notes are accurate and easy to understand.
By implementing these tips, you can significantly enhance the legibility and clarity of your handwritten notes. Remember, neat and organized notes not only aid in studying and information retention but also promote a more enjoyable note-taking experience overall.
Organizing and Managing Your Notes
Effective organization and management of your notes are key to maximizing their usefulness and accessibility. Here are some tips to help you keep your notes organized and easily manageable:
- Create a System: Establish a system for organizing your notes that makes sense to you. This can involve using folders, notebooks, or tags to categorize different subjects or topics. Having a consistent structure will help you quickly locate specific notes when needed.
- Use Descriptive Titles: Give each note a descriptive title that accurately reflects its content. This makes it easier to search for and identify specific notes, especially when you have a large collection.
- Utilize Digital Search Functionality: Take advantage of the search feature in your note-taking app to quickly locate specific keywords or phrases within your notes. This saves time and eliminates the need for manual searching.
- Organize by Date or Chronology: If your notes are time-sensitive or related to a specific event, consider organizing them in chronological order. This helps provide a clear timeline of events and makes it easy to track your progress.
- Create a Table of Contents: For longer notes or documents, create a table of contents at the beginning. This acts as a roadmap and allows you to quickly navigate to specific sections without scrolling or searching.
- Use Tags or Labels: If your note-taking app supports it, utilize tags or labels to further categorize and filter your notes. This can be helpful when you have overlapping subjects or want to group related notes together.
- Regularly Review and Weed Out Unnecessary Notes: Periodically review your notes and remove any outdated or irrelevant information. This helps keep your note collection streamlined and ensures you have a clear and accurate set of notes for reference.
- Backup and Sync Your Notes: Set up automatic backup and syncing for your notes to prevent data loss and ensure accessibility across devices. Cloud storage services such as iCloud or Google Drive can be used to create regular backups.
- Create Summary or Summary Sheets: Condense longer notes into summary sheets that capture the main points and key information. This allows quick review and helps reinforce important concepts.
- Consider Physical Organization: If you prefer taking physical notes, consider using binders, dividers, or color-coded tabs to organize your paper notes. This provides a tangible and visual system for managing your notes.
By implementing these organizational strategies, you can ensure that your notes are well-organized, easily accessible, and efficiently managed. This will save you time when searching for specific information and enable you to make the most of your note-taking efforts
Using Apple Pencil for Handwritten Notes and Drawings
The Apple Pencil is not only a versatile tool for taking notes, but it can also be used for creating hand-drawn sketches, diagrams, and illustrations. Here are some ways to make the most of your Apple Pencil when it comes to handwritten notes and drawings:
- Experiment with Different Brushes and Pen Styles: Many note-taking apps offer a variety of brush styles and pen types that mimic real-life writing instruments. Try out different options to find the ones that best suit your writing style and preferences.
- Adjust Line Thickness and Opacity: Customize the line thickness and opacity settings of your Apple Pencil to create stunning effects in your drawings. Thicker lines can be used for bold headings or borders, while lighter strokes can add shading or depth to your artwork.
- Explore Different Colors and Highlighters: Use the color palette provided in your note-taking app to add vibrancy and visual interest to your notes and drawings. Highlighters can be helpful for emphasizing key points or making certain elements stand out.
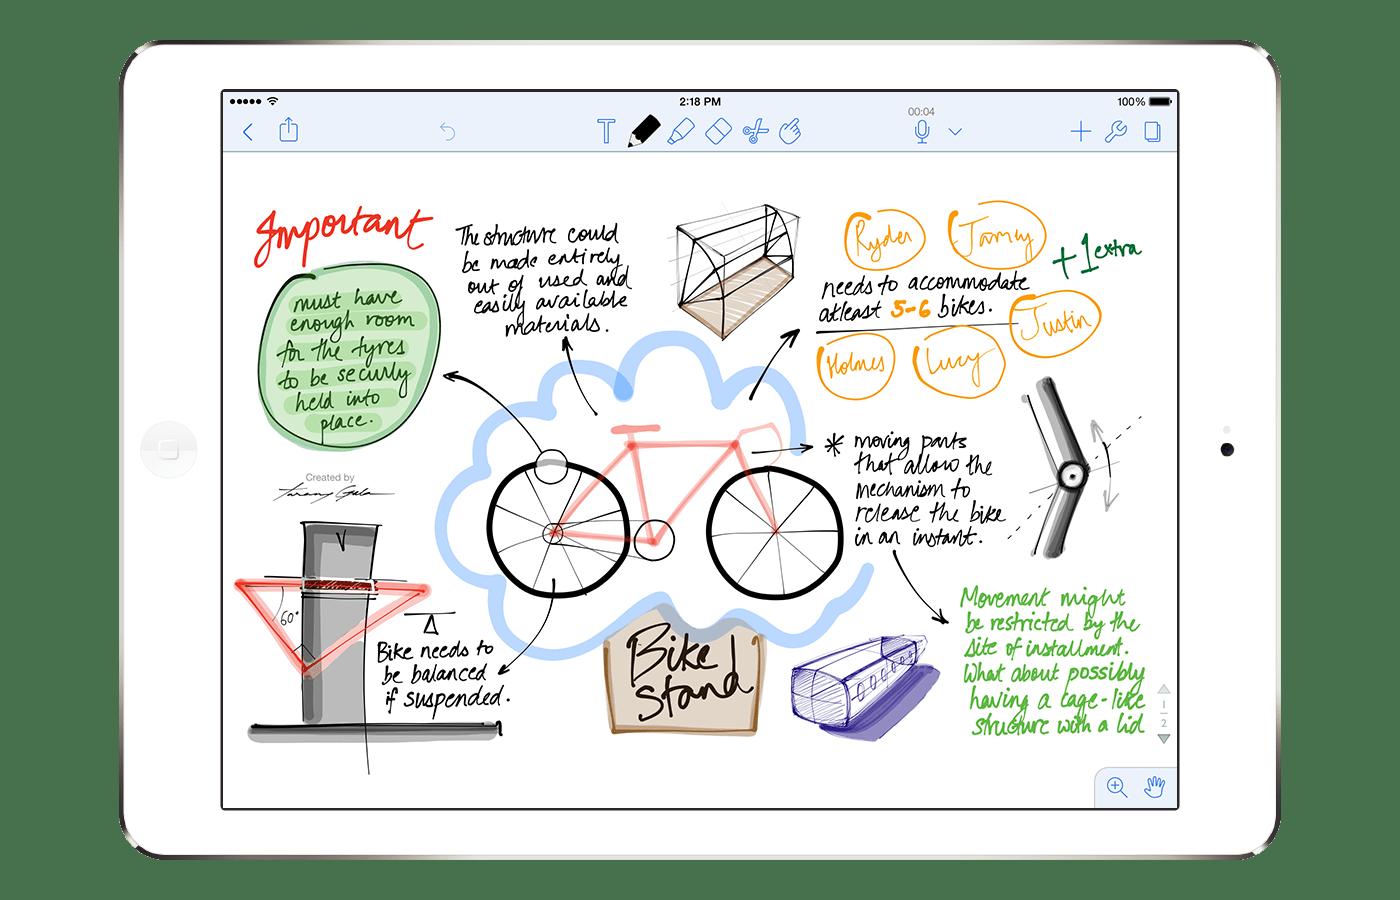
- Create Mind Maps and Diagrams: With the Apple Pencil’s precise control, you can easily create mind maps, flowcharts, and diagrams to visually organize information. This helps in brainstorming sessions or when studying complex topics.
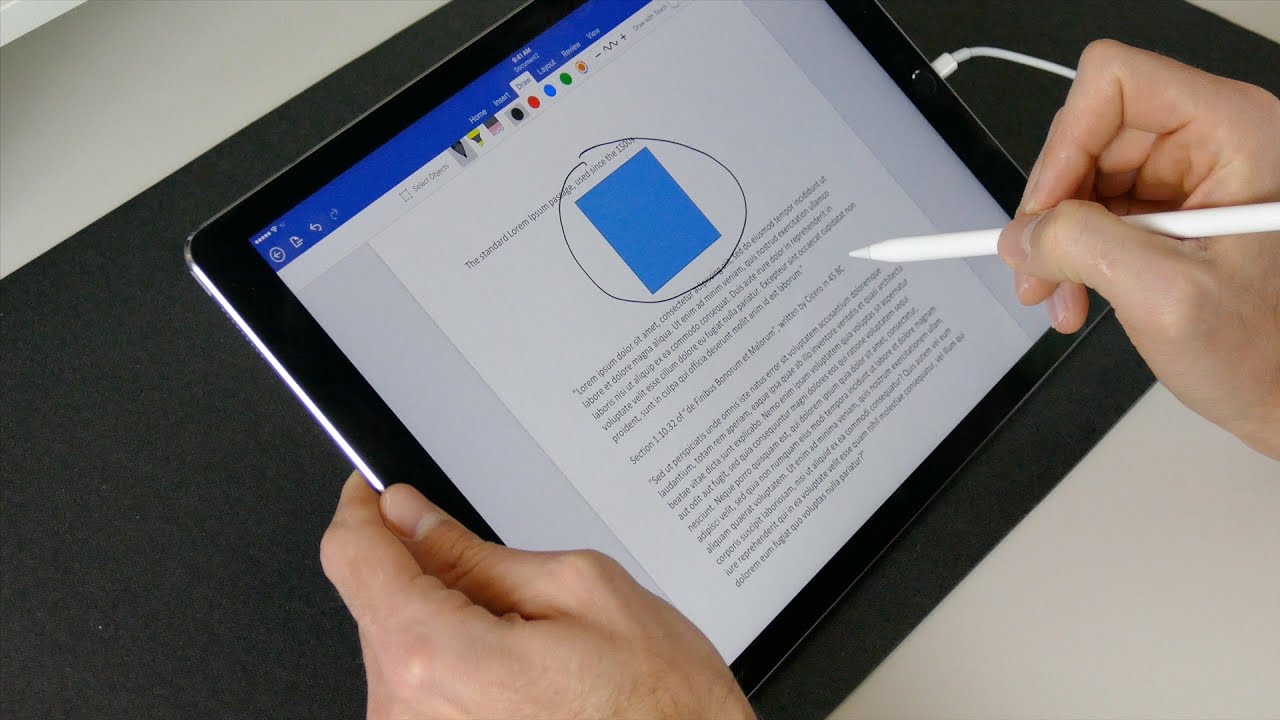
- Add Annotations and Sketches to Photos or Graphics: Import images or graphics into your note-taking app and use the Apple Pencil to annotate or draw directly on the visuals. This can be particularly useful when analyzing diagrams, annotating screenshots, or marking up design concepts.
- Practice Calligraphy and Hand Lettering: The Apple Pencil provides a great opportunity to practice your calligraphy and hand lettering skills. Experiment with various lettering styles and practice writing beautiful quotes or headings.
- Create Artistic Illustrations: Push your creativity further and use the Apple Pencil to create intricate illustrations or digital paintings. With the ability to adjust pressure sensitivity, you can achieve varying line weights and shading for stunning artistic effects.
- Use Smudging and Blending Tools: Some note-taking apps offer smudging or blending tools that allow you to blend colors or soften lines for realistic effects. Experiment with these tools to add depth and texture to your drawings.
- Share Your Work: Don’t forget to share your hand-drawn creations with others. Whether it’s on social media or within your study or professional circles, sharing your work can inspire and engage others while receiving valuable feedback.
The Apple Pencil opens up a world of possibilities when it comes to handwritten notes and artistic drawings. Embrace its precision and capabilities to create visually stunning and personalized content in your notes, sketches, diagrams, and illustrations.
Utilizing Extra Features of Apple Pencil
The Apple Pencil offers extra features and functionalities that go beyond traditional note-taking and drawing. Here are some ways to take full advantage of these additional capabilities:
- Double-Tap Functionality: Customize the double-tap feature on your Apple Pencil to perform various actions within supported apps. This can include switching between tools, accessing menus, or activating specific functions, providing a quick and seamless workflow.
- Pressure Sensitivity: Take advantage of the Apple Pencil’s pressure sensitivity to create dynamic sketches and drawings. Apply lighter or harder pressure to vary line thickness and shading for a more expressive and realistic result.
- Palm Rejection: The Apple Pencil’s palm rejection feature allows you to rest your hand on the iPad’s screen while writing or drawing without unwanted marks or strokes. This provides a more natural and comfortable drawing experience.
- Tilt Detection: The Apple Pencil can detect the angle and orientation of the pen, allowing you to create shading effects by tilting the pencil. This adds depth and dimension to your artwork and increases the level of realism.
- Instant Markup: Use the Apple Pencil for instant markup on screenshots, documents, or web pages. Simply take a screenshot or open a document on your iPad, then start annotating or highlighting directly with the Apple Pencil.
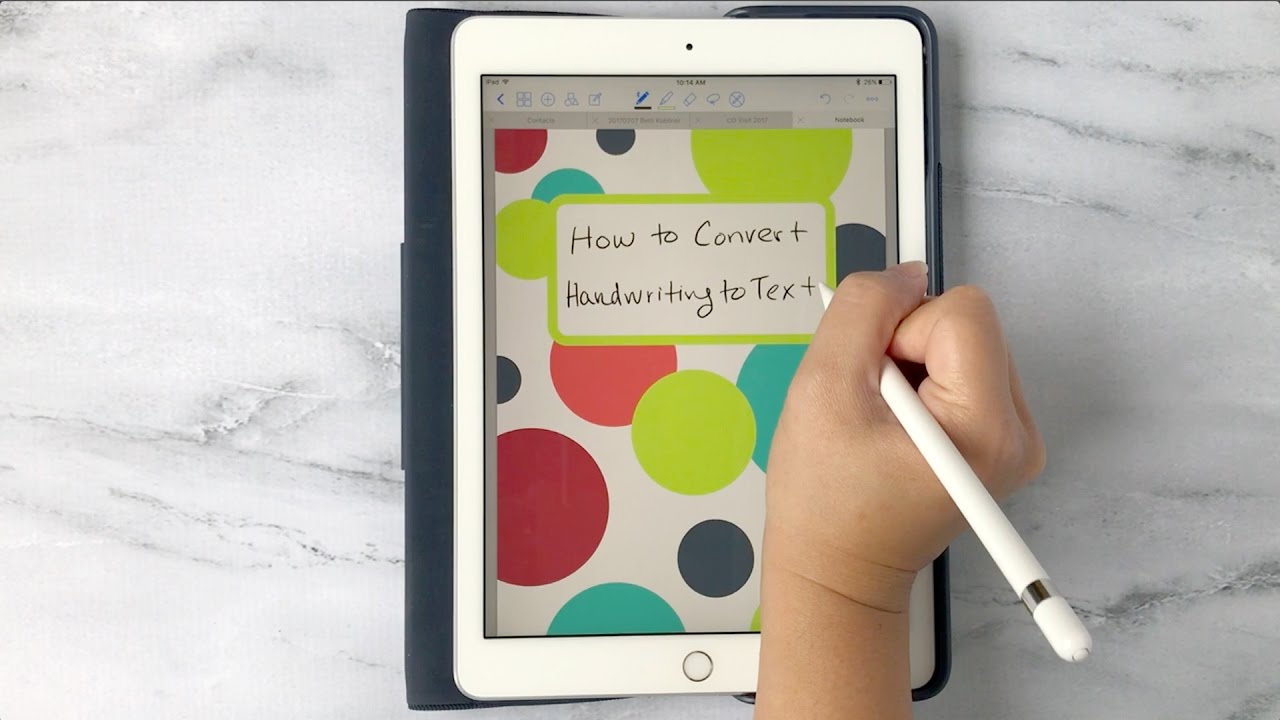
- Handwriting Recognition: Some note-taking apps offer handwriting recognition, which converts your handwritten notes into text. This makes it easy to search for specific content within your notes and improves accessibility when sharing your work with others.
- Gesture Controls and Shortcuts: Explore gesture controls and shortcuts provided by your note-taking app to streamline your workflow. For example, swipe gestures can be used to undo or redo actions, switch between tools, or access specific functions quickly.
- Smart Annotations in Pages: In apps like Pages, you can use the Apple Pencil to make smart annotations directly on your documents. This is particularly useful for proofreading, providing feedback on documents, or making edits on the go.
- Integration with Augmented Reality (AR): In certain apps, the Apple Pencil can be utilized for drawing and interacting with virtual objects in augmented reality environments. This opens up new possibilities for creative expression and immersive experiences.
- Collaboration Tools: Some note-taking apps offer collaboration features that allow multiple users to work simultaneously on a document or project. The Apple Pencil facilitates real-time collaboration, making it easier to brainstorm, edit, and share ideas with others.
By taking advantage of these extra features and functionalities of the Apple Pencil, you can enhance your productivity, creativity, and overall user experience. Explore the possibilities, experiment with different apps, and discover new ways to utilize the power of your Apple Pencil.
Syncing and Backing Up Your Notes
Syncing and backing up your notes is essential to ensure that your valuable information is protected and accessible across devices. Here’s how you can effectively sync and back up your notes created with the Apple Pencil:
- Choose a Cloud Storage Service: Select a reliable cloud storage service, such as iCloud, Google Drive, or Dropbox, to store and sync your notes. These services provide secure storage and make it easy to access your notes from any device with an internet connection.
- Enable Automatic Syncing: Set up automatic syncing within your note-taking app or cloud storage service. This ensures that any new notes or changes you make with your Apple Pencil are automatically saved and synced across your devices without manual intervention.
- Verify Syncing Settings: Double-check the syncing settings within your note-taking app to ensure that the Apple Pencil strokes and annotations are included in the sync process. This prevents any loss of important handwritten content.
- Regularly Back Up Your Notes: In addition to syncing, it’s important to create regular backups of your notes. Use the backup feature provided by your cloud storage service or consider exporting your notes as PDFs or other file formats and saving them to an external hard drive or computer.
- Sync Across Multiple Devices: If you use multiple devices, such as an iPad and iPhone, ensure that your notes are synced across all devices. This enables seamless access to your notes regardless of which device you’re using at any given time.
- Monitor Storage Space: Keep an eye on your storage space in the cloud storage service you’re using. If you’re nearing the storage limit, consider freeing up space by deleting unnecessary files or upgrading to a larger storage plan if needed.
- Test Syncing and Backups: Periodically verify that your notes are syncing correctly across devices and that your backups are working as intended. Create a test note and check if it appears on all your synced devices and in your backup folders.
- Consider Offline Access: Some note-taking apps offer offline access to your notes. This allows you to view and edit your notes even when there’s no internet connection. Take advantage of this feature if you frequently work in areas with limited or no internet access.
- Protect Your Data: Keep your notes secure by using strong passwords and enabling two-factor authentication for your cloud storage accounts. This adds an extra layer of protection to your synced and backed-up notes.
By following these syncing and backup practices, you can ensure the safety, accessibility, and availability of your notes created with the Apple Pencil. Whether you switch devices, accidentally delete a note, or experience a technical issue, having sync and backup systems in place provides peace of mind and safeguards your valuable digital content.
Troubleshooting Common Issues with Apple Pencil
While the Apple Pencil is a powerful and reliable tool, you may encounter occasional issues that can disrupt your note-taking or drawing experience. Here are some common problems and their corresponding troubleshooting steps:
- Unresponsive or Disconnected Pencil: If your Apple Pencil is unresponsive or frequently disconnects from your iPad, check the battery level. Charging the pencil or replacing its battery can often resolve this issue. Additionally, make sure the pencil is properly paired with your iPad through the Bluetooth settings.
- Wrong or Delayed Palm Rejection: Sometimes, the palm rejection feature may not function correctly, causing unintended marks on the screen. To address this issue, ensure that your iPad’s software is up to date. Additionally, try adjusting the position of your hand or disabling and re-enabling the palm rejection feature in the Apple Pencil settings.
- Offset or Inaccurate Tracking: If you notice offset or inaccurate tracking when using the Apple Pencil, try restarting your iPad. This can help resolve any temporary software glitches that may be affecting the pencil’s tracking accuracy. If the issue persists, ensuring that your iPad’s display is clean and free from any obstruction might help.
- Interference from other Devices: Electronic interference from other devices, such as wireless keyboards or Bluetooth accessories, can affect the performance of the Apple Pencil. Try moving away from potential sources of interference or turning off nearby devices to see if the issue resolves.
- App Compatibility Issues: If you encounter issues with the Apple Pencil not working correctly in a specific app, check for updates for both the app and your iPad’s software. It’s also advisable to contact the app developer for any known compatibility issues or troubleshooting steps specific to that app.
- Pen Tip Wear: Over time, the Apple Pencil’s pen tip may wear down, resulting in reduced accuracy or responsiveness. If you experience this issue, consider replacing the pen tip with a new one, which can be purchased separately. Simply unscrew the worn pen tip and screw in the new one.
- Bluetooth Connection Issues: If your Apple Pencil is not connecting or pairing with your iPad via Bluetooth, ensure that both devices are in close proximity and have Bluetooth enabled. Restarting both the pencil and the iPad can also help establish a successful connection. If the problem persists, consult the Apple support website or contact their support team for further assistance.
If you encounter other issues or the troubleshooting steps mentioned above don’t resolve the problem, it’s recommended to contact Apple Support or visit an authorized service center for further assistance. They can provide specific guidance and potential solutions tailored to your situation.
Enhancing Your Note Taking Experience with Additional Tools and Accessories
The Apple Pencil is a fantastic tool for note-taking, but there are various additional tools and accessories available that can further enhance your note-taking experience. Here are some options to consider:
- Screen Protectors: Applying a screen protector to your iPad can provide a smoother writing surface and protect the screen from scratches. Look for a screen protector that is compatible with the Apple Pencil to maintain its responsiveness.
- Pencil Grips: If you find the Apple Pencil uncomfortable to hold for long periods, consider using a pencil grip. Grips provide a more ergonomic grip and can reduce hand fatigue during extended writing sessions.
- Storage Cases: Investing in a dedicated case or holder for your Apple Pencil ensures that it is securely stored when not in use. Some cases offer additional storage for pen tips or charging adapters, keeping everything organized in one place.
- External Keyboards: If you prefer typing for note-taking, an external keyboard can be a valuable addition. Bluetooth keyboards can transform your iPad into a lightweight laptop, offering a more traditional typing experience for efficient text-based notes.
- Stylus Pens: While the Apple Pencil is specifically designed for iPad use, there are other stylus options available in the market. If you have an older iPad model without Apple Pencil compatibility, explore stylus pens with capacitive tips that can still allow for basic note-taking functionality.
- Notebook Adapters: For those who enjoy the tactile experience of writing on paper but prefer digital organization, notebook adapters are available. These adapters attach to your paper notebook and use sensors to transfer your handwritten notes to your iPad or computer.
- iPad Stand: An iPad stand allows you to position your iPad at a comfortable angle for writing or drawing. This can be particularly useful during long note-taking or study sessions, reducing strain on your neck and wrists.
- Wireless Headphones: Using wireless headphones or earbuds can help create a distraction-free environment for focused note-taking. Noise-cancelling features can further block out background noise, ensuring maximum concentration.
- Smart Folio or Keyboard Case: If you often carry your iPad and Apple Pencil together, consider investing in a smart folio or keyboard case. These cases protect your iPad while providing a convenient slot or attachment for securely storing and charging your Apple Pencil.
- Desk Organizer: Keeping your note-taking essentials organized on your desk can save time and prevent clutter. Invest in a desk organizer to neatly store your iPad, Apple Pencil, notebooks, and other accessories, making them easily accessible whenever you need them.
By exploring and incorporating the right tools and accessories into your note-taking routine, you can customize your setup for optimal comfort, efficiency, and organization. These extra additions can elevate your overall note-taking experience and help you make the most out of your Apple Pencil and iPad combination.