Introduction
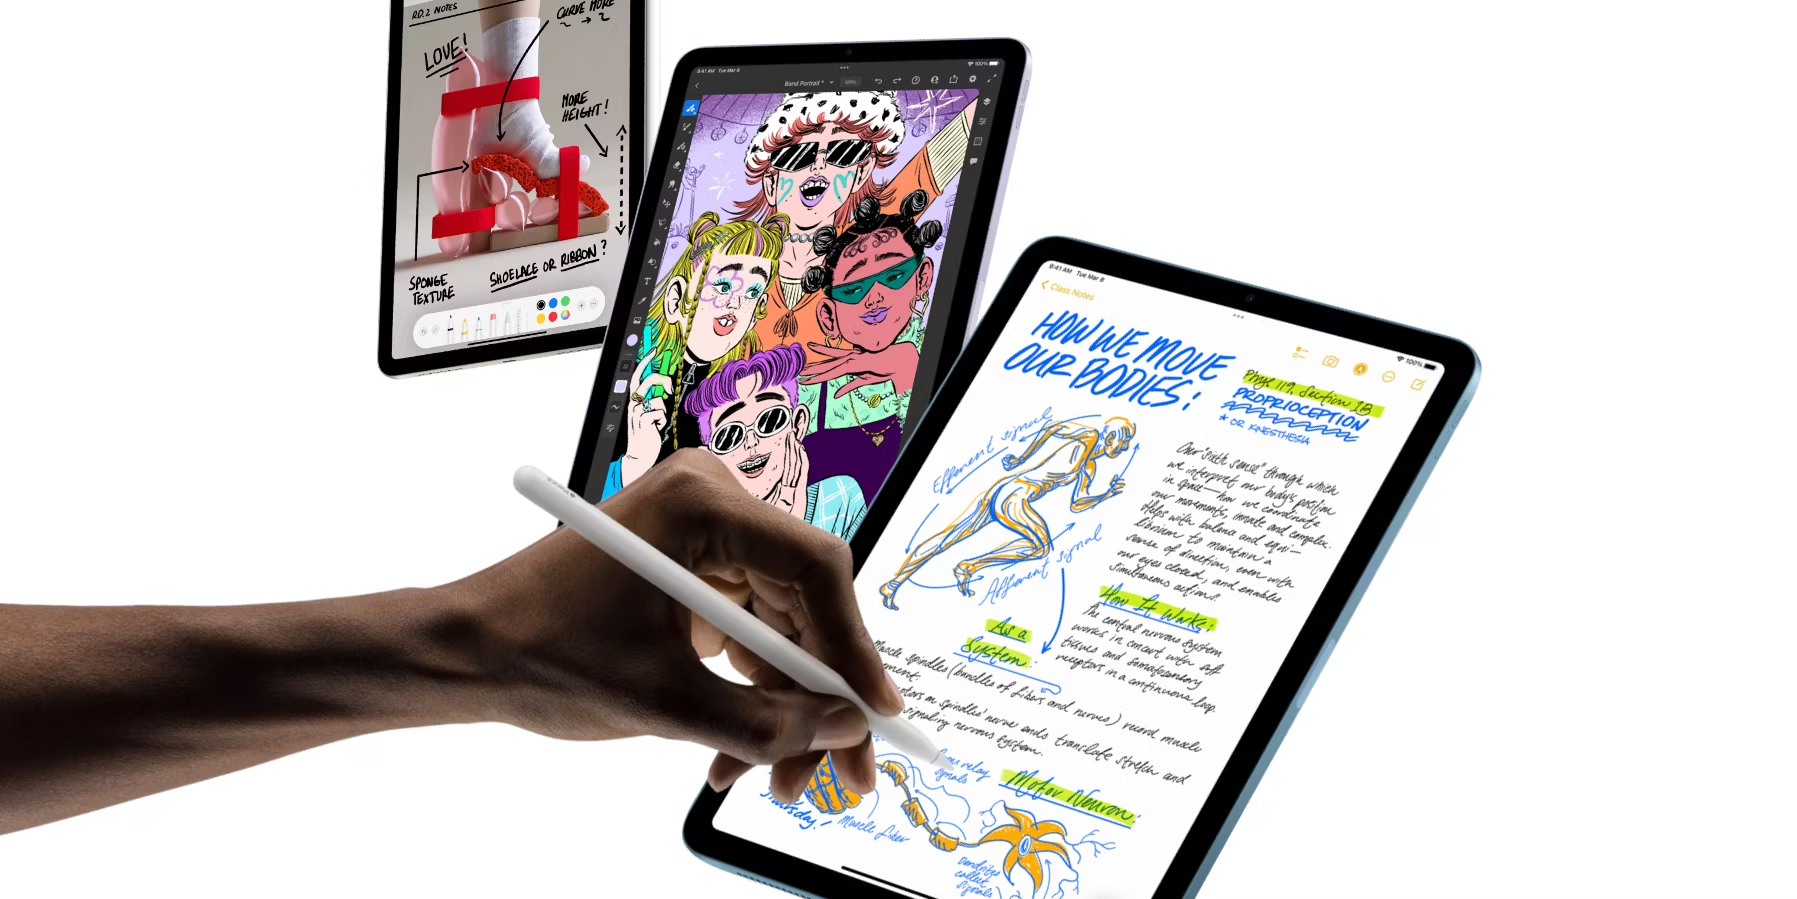
Welcome to the world of Apple Pencil, a powerful tool that adds a whole new level of versatility to your iPad experience. Whether you’re an artist looking to express your creativity or a student needing precise note-taking capabilities, the Apple Pencil is designed to meet your needs. In this article, we’ll explore the various settings and functionality options available for the Apple Pencil, allowing you to personalize and optimize your usage.
Setting up your Apple Pencil is a breeze. Simply connect it to your iPad’s charging port, and it will automatically pair and become ready to use. Once connected, you’ll gain access to a plethora of customization options, allowing you to fine-tune your pencil’s behavior to your liking. Modify the sensitivity, pair it with different iPad models, adjust the double-tap functionality, and even connect it to specific apps; the possibilities are endless.
If you’re an artist, you can adjust the sensitivity of the Apple Pencil to match your drawing style. With a few simple tweaks in the settings, you’ll be able to achieve the perfect balance between responsiveness and precision. Furthermore, if you own multiple iPad models, the Apple Pencil can seamlessly switch between them, making it a versatile tool for all your devices.
Checking the battery status of your Apple Pencil is essential to ensure uninterrupted usage. No need to worry; the iPad provides you with a convenient way to keep track of your pencil’s battery life. In just a few taps, you can easily monitor the remaining charge and plan your usage accordingly. Additionally, enabling or disabling the double-tap functionality allows you to customize how the Apple Pencil behaves with different gestures, giving you even greater control over your workflow.
To take your creativity even further, connect your Apple Pencil to specific apps. Whether you’re using it for digital painting, note-taking, or annotating documents, compatibility with various applications enhances your productivity and unleashes your creative potential.
Like any technical device, you may encounter connectivity issues with your Apple Pencil. Don’t worry; we’ll cover some troubleshooting steps to help you reconnect and ensure a seamless experience.
With the Apple Pencil, you have a powerful tool at your fingertips that can transform your iPad into a digital canvas or a powerful note-taking device. Through customization and personalization, you can enhance your creativity and productivity. So, let’s dive in and explore the incredible world of the Apple Pencil!
Setup Apple Pencil
Setting up your Apple Pencil is quick and easy, allowing you to begin using it in no time. Follow these simple steps to get your Apple Pencil connected to your iPad:
- Remove the cap from your Apple Pencil.
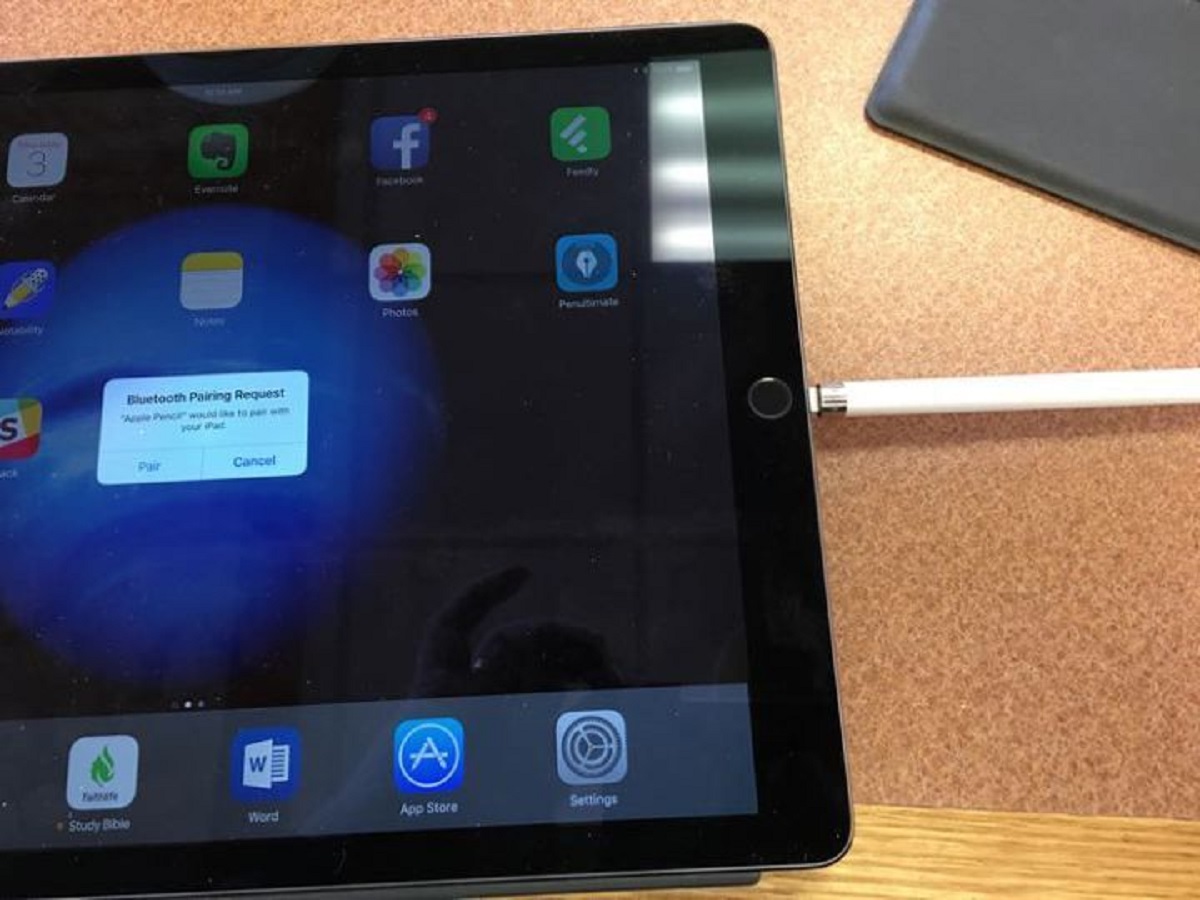
- Insert the Lightning connector located at the end of the Apple Pencil into the Lightning port on your iPad.
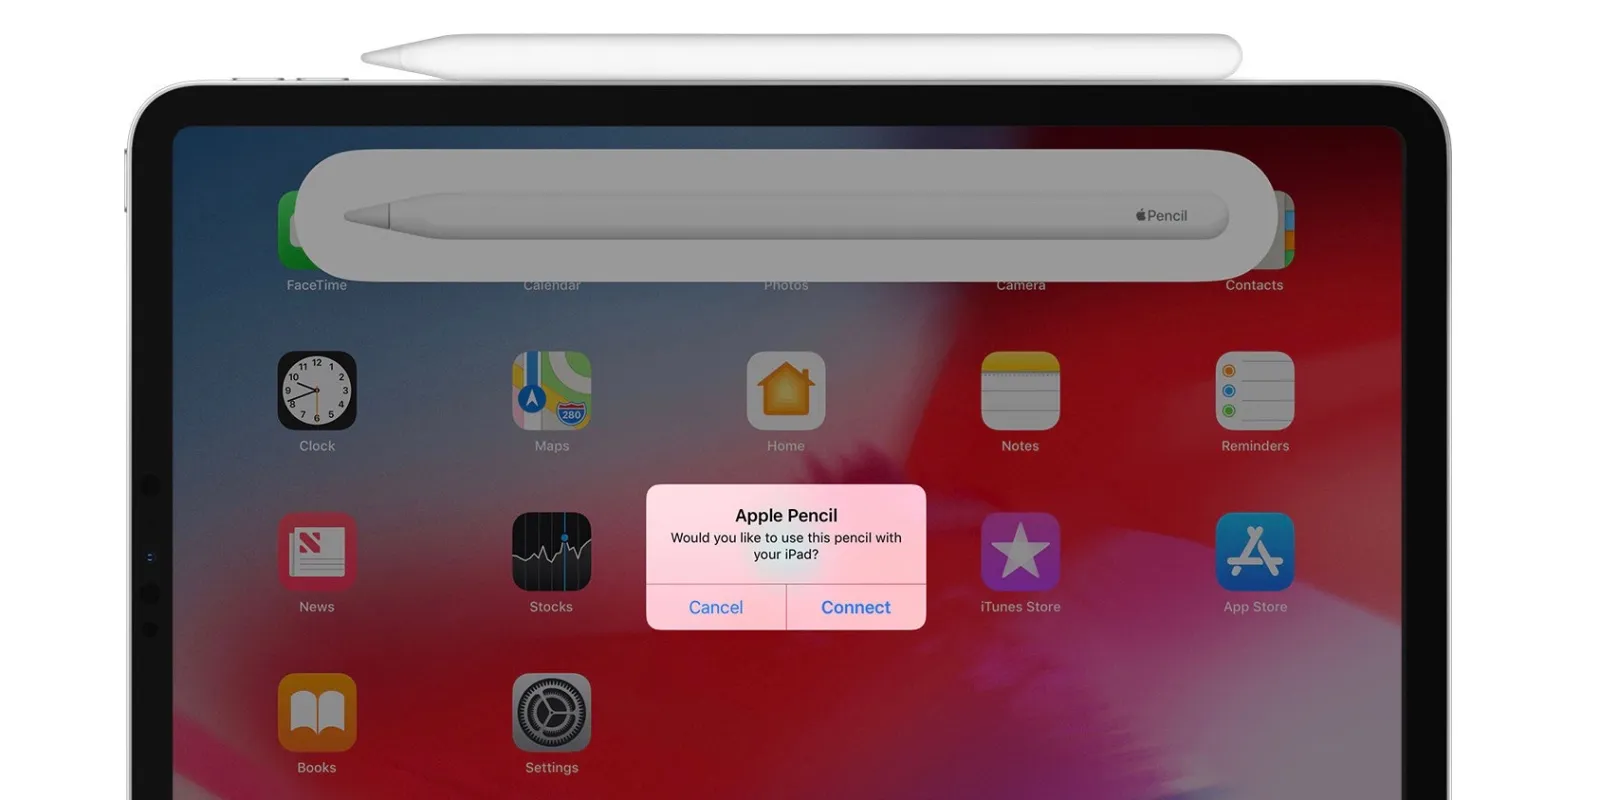
- A pop-up notification will appear on your iPad, indicating that it has detected the Apple Pencil. Tap the “Connect” button to pair the two devices.
- Your Apple Pencil is now connected, and you’re ready to start using it.
Once you have set up your Apple Pencil, it is recommended to charge it to ensure uninterrupted usage. To charge your Apple Pencil, simply attach it to the Lightning port of your iPad. Alternatively, you can use the supplied adapter to charge it using a standard USB port or a wall adapter.
It is important to note that the Apple Pencil is only compatible with certain iPad models. The first-generation Apple Pencil is compatible with the following iPad models:
- iPad Pro 12.9-inch (1st and 2nd generation)
- iPad Pro 10.5-inch
- iPad Pro 9.7-inch
- iPad (6th, 7th, and 8th generation)
For those with the second-generation Apple Pencil, it is compatible with the following iPad models:
- iPad Pro 12.9-inch (3rd and 4th generation)
- iPad Pro 11-inch (1st and 2nd generation)
Before purchasing an Apple Pencil, ensure that your iPad model supports it to avoid any compatibility issues.
Now that you have successfully set up your Apple Pencil, you’re ready to explore the various customization options and functions available. In the next section, we will delve into how you can personalize your Apple Pencil to suit your preferences.
Customize Apple Pencil Functions
The Apple Pencil offers a range of customizable functions that allow you to tailor its behavior to your needs. By accessing the settings on your iPad, you can modify various aspects of the Apple Pencil’s functionality. Let’s explore some of the customizations you can make:
2B. Adjust Apple Pencil Sensitivity:
Every artist has a unique drawing style, and the Apple Pencil sensitivity settings allow you to fine-tune its response to match your preference. You can adjust the sensitivity to customize the pressure required to create thicker or thinner lines. Experiment with different sensitivity levels to find the setting that feels most comfortable and natural for you. With this level of precision, you’ll be able to create beautiful artwork that reflects your artistic style.
2C. Enable or Disable Apple Pencil Double-Tap:
The Apple Pencil is equipped with a double-tap feature, allowing you to quickly access specific functions without leaving your creative flow. By default, double-tapping the pencil switches between the current tool and the eraser. However, you can customize this feature to perform different actions. For example, you can set the double-tap to activate the color picker or switch to another brush. Select the most convenient action for your workflow and make the most out of this time-saving feature.
2D. Connect Apple Pencil to Different Apps:
The Apple Pencil’s versatility extends beyond drawing apps. Many other applications, such as note-taking apps and document annotation tools, are compatible with the Apple Pencil. By connecting your Apple Pencil to these apps, you can leverage its precision and functionality for various tasks. Simply navigate to the Apple Pencil settings on your iPad, and choose which apps you want to enable Apple Pencil support for. This will allow you to enjoy a seamless and enhanced experience across different applications.
By customizing the settings of your Apple Pencil, you can truly make it your own, adapting it to your unique style and preferences. Take the time to explore the settings on your iPad and experiment with different options to find the perfect setup for your creative endeavors.
Now that we’ve covered how to customize the Apple Pencil’s functions, let’s move on to adjusting its sensitivity to achieve the perfect drawing experience.
Adjust Apple Pencil Sensitivity
When it comes to creating digital artwork, the sensitivity of your Apple Pencil plays a crucial role in achieving the desired effect. The sensitivity settings allow you to control the responsiveness of your Apple Pencil, enabling you to adapt it to your unique drawing style. Follow these steps to adjust the sensitivity of your Apple Pencil:
- Open the “Settings” app on your iPad.
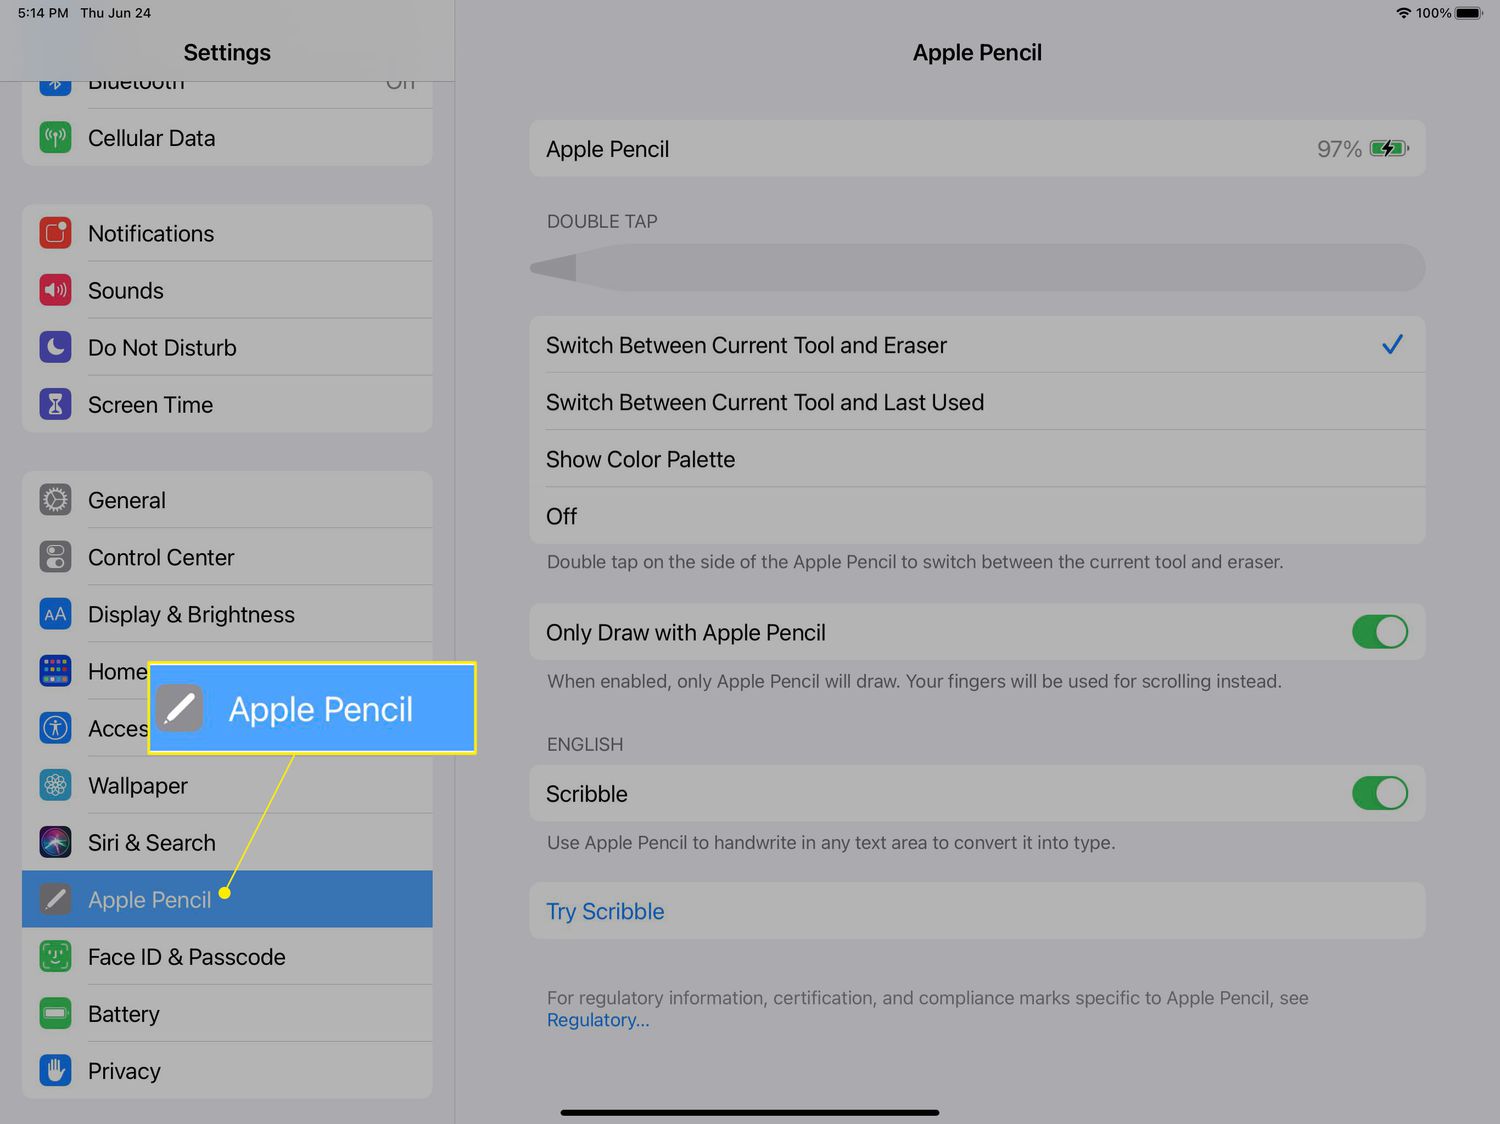
- Scroll down and tap on “Apple Pencil” in the sidebar.
- Under the “Apple Pencil” settings, you will find the option to adjust the sensitivity. Slide the bar towards “Firm” for a firmer touch, or towards “Light” for a lighter touch.
- As you move the slider, you will notice a preview line in the box below, demonstrating the width of the stroke based on the current sensitivity setting.
- Experiment with different sensitivity levels and observe how it affects your drawing strokes. Find the setting that feels most comfortable and natural for your drawing style.
By adjusting the sensitivity, you can achieve the desired thickness and opacity of your strokes. If you prefer to have more control and variation in your artwork, a firmer touch setting may be ideal. On the other hand, if you prefer lighter and more subtle strokes, a lighter touch setting may be more suitable.
It’s important to note that the sensitivity settings may vary depending on the application you’re using. Some drawing apps have their own sensitivity settings, which can further fine-tune the Apple Pencil’s behavior within that specific app. Make sure to explore the settings within your preferred drawing app to fully optimize the Apple Pencil’s performance.
Adjusting the sensitivity of your Apple Pencil allows you to personalize your drawing experience and create artwork that matches your unique style. Take the time to experiment with different settings and find the perfect balance between responsiveness and precision.
Now that you’ve mastered adjusting the sensitivity of your Apple Pencil, let’s move on to exploring how to pair it with different iPad models.
Pairing Apple Pencil with Different iPad Models
The Apple Pencil is a versatile tool that can be used with various iPad models. Whether you own the first-generation or the second-generation Apple Pencil, it’s important to ensure compatibility with your specific iPad model. Here’s how you can pair your Apple Pencil with different iPad models:
First-Generation Apple Pencil:
The first-generation Apple Pencil is compatible with the following iPad models:
- iPad Pro 12.9-inch (1st and 2nd generation)
- iPad Pro 10.5-inch
- iPad Pro 9.7-inch
- iPad (6th, 7th, and 8th generation)
To pair the first-generation Apple Pencil with your iPad, follow these steps:
- Remove the cap from your Apple Pencil.
- Insert the Lightning connector located at the end of the Apple Pencil into the Lightning port on your iPad.
- A pop-up notification will appear on your iPad, indicating that it has detected the Apple Pencil. Tap the “Connect” button to pair the two devices.
Second-Generation Apple Pencil:
The second-generation Apple Pencil is compatible with the following iPad models:
- iPad Pro 12.9-inch (3rd and 4th generation)
- iPad Pro 11-inch (1st and 2nd generation)
Pairing the second-generation Apple Pencil with your iPad is slightly different due to its magnetic attachment and charging method. Here’s what you need to do:
- Remove the cap from your Apple Pencil.
- Attach the magnetic side of the Apple Pencil to the iPad’s magnetic connector, located on the side or back of the iPad, depending on the model.
- A pop-up notification will appear on your iPad, confirming that the Apple Pencil is connected and charging.
By following these simple steps, you can successfully pair your Apple Pencil with the corresponding iPad model, ensuring a seamless and efficient drawing experience.
Now that you’ve learned how to pair your Apple Pencil with different iPad models, let’s move on to checking the battery status of your Apple Pencil.
Check Apple Pencil Battery Status
Monitoring the battery life of your Apple Pencil is essential to ensure uninterrupted usage. Thankfully, checking the battery status of your Apple Pencil is a simple and convenient process. Here’s how you can do it:
On iPad with Apple Pencil (2nd generation):
- Swipe down from the top-right corner of the screen to open the Control Center.
- Look for the battery widget, which displays the remaining battery percentage of your Apple Pencil.
On iPad with Apple Pencil (1st generation):
- Swipe down from the top of the screen to reveal the Notification Center.
- Scroll down to find the Batteries widget.
- The Batteries widget will display the battery percentage of your Apple Pencil.
Additionally, you can also monitor the battery status of your Apple Pencil by adding the Batteries widget to your Today View. This allows you to view the battery percentage of your Apple Pencil with a single swipe to the right from the lock screen or home screen.
Remember to charge your Apple Pencil regularly to avoid running out of battery during important tasks. To charge your Apple Pencil, connect it to your iPad’s Lightning port. Alternatively, you can use the supplied adapter to charge it using a standard USB port or a wall adapter.
If you notice that your Apple Pencil’s battery is draining quickly, consider adjusting the Auto-Lock setting on your iPad. By reducing the duration until your iPad automatically locks, you can conserve the battery life of both your iPad and Apple Pencil.
Regularly checking the battery status of your Apple Pencil ensures that you have enough power to complete your creative endeavors. Stay on top of your Apple Pencil’s battery life and enjoy uninterrupted usage.
Now that you know how to monitor the battery status of your Apple Pencil, let’s move on to enabling or disabling the double-tap functionality.
Enable or Disable Apple Pencil Double-Tap
The Apple Pencil is equipped with a handy double-tap feature that allows you to quickly access specific functions without interrupting your creative flow. By default, the double-tap gesture toggles between the current tool and the eraser. However, you have the flexibility to customize this functionality according to your preference. Here’s how you can enable or disable the Apple Pencil double-tap feature:
- Open the “Settings” app on your iPad.
- Scroll down and tap on “Apple Pencil” in the sidebar.
- Under the “Double-Tap” section, you can choose between “Switch Between Current Tool and Eraser” or “Off” to disable the double-tap feature entirely.
- Select “Switch Between Current Tool and Eraser” to keep the default behavior, or tap on “Off” to disable the double-tap functionality.
If you choose to disable the double-tap feature, the Apple Pencil will no longer register the double-tap gesture. This can be useful if you find yourself accidentally triggering the double-tap while drawing or if you prefer not to use this feature in your workflow.
On the other hand, if you opt to keep the double-tap feature enabled, you can take it a step further by customizing the double-tap action within certain applications. Some apps allow you to assign specific functions to the double-tap gesture, such as switching brushes, accessing a color picker, or toggling different drawing modes. Within each compatible app, follow their respective settings to configure the double-tap action to your liking.
By enabling or disabling the Apple Pencil double-tap feature, you can tailor the pencil’s behavior to suit your workflow. Whether you rely on the convenience of the default functionality or prefer to turn it off, the choice is yours.
Now that you know how to enable or disable the double-tap feature on the Apple Pencil, let’s explore how to connect it to different apps to maximize your productivity.
Connect Apple Pencil to Different Apps
The Apple Pencil is not limited to just drawing apps; it can be used across a wide range of applications to enhance your productivity and creativity. Many apps support the unique capabilities of the Apple Pencil, allowing you to leverage its precision and functionality for various tasks. Here’s how you can connect your Apple Pencil to different apps:
Drawing and Art Apps:
If you’re an artist or enjoy sketching, painting, or digital illustration, there are numerous drawing and art apps that are compatible with the Apple Pencil. These apps offer an array of features and tools specifically designed to take advantage of the Apple Pencil’s capabilities. Some popular drawing apps include Procreate, Adobe Illustrator, and Autodesk SketchBook. Explore these apps and find the one that suits your creative needs the best.
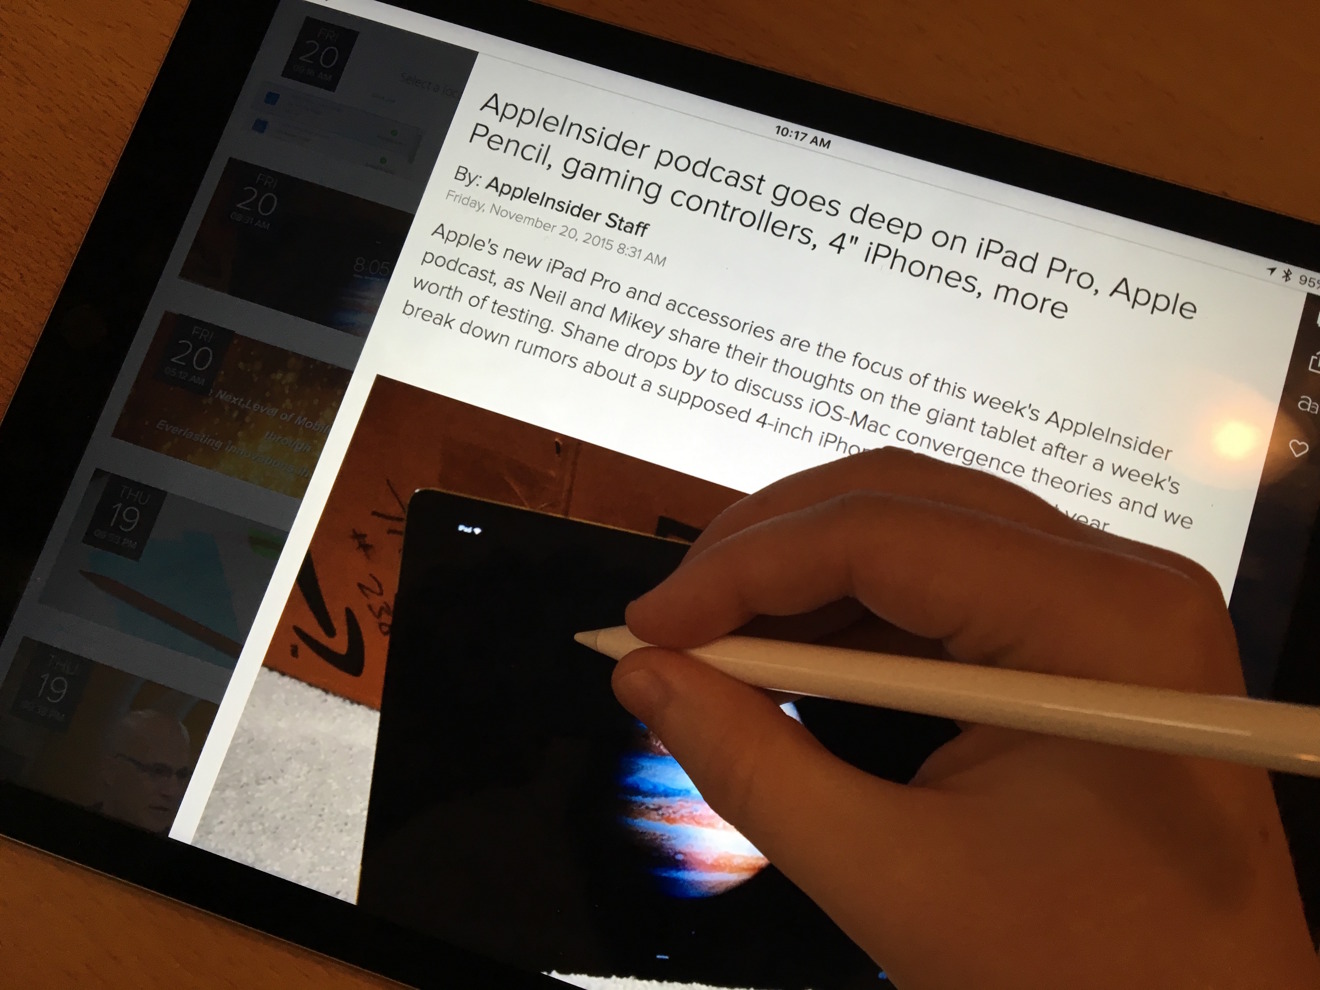
Note-taking Apps:
The Apple Pencil is also a fantastic tool for taking handwritten notes on your iPad. Many note-taking apps, such as Notability, GoodNotes, and Microsoft OneNote, support Apple Pencil functionality. By connecting your Apple Pencil to these apps, you can write, annotate, and organize your notes with ease. Enjoy the natural feel of handwriting while benefitting from the convenience of digital note-taking.
Document Annotation Apps:
For those who need to review and annotate documents, the Apple Pencil can greatly streamline the process. Document annotation apps, like Adobe Acrobat Reader and PDF Expert, allow you to highlight, underline, and add comments directly onto the documents using your Apple Pencil. This makes reviewing and collaborating on documents more efficient and intuitive.
Design and Productivity Apps:
In addition to drawing and note-taking, the Apple Pencil can be used in various design and productivity apps. Apps like Concepts, Graphic, and OmniGraffle provide a platform for creating detailed diagrams, charts, and illustrations. With the Apple Pencil, you can effortlessly sketch out ideas and bring your designs to life.
When using any of these apps, ensure that you have enabled Apple Pencil support within the app settings. Typically, this can be found within the app’s preferences or tools section. Once connected, you can enjoy a seamless and enhanced experience, taking advantage of the precise input offered by the Apple Pencil.
The Apple Pencil’s compatibility with different apps expands its usefulness beyond drawing, making it an indispensable tool for a wide variety of tasks. Connect your Apple Pencil to different apps that suit your needs and unlock its full potential.
Now that you understand how to connect your Apple Pencil to different apps, let’s move on to troubleshooting common connection issues that you may encounter.
Troubleshooting Apple Pencil Connection Issues
While the Apple Pencil is a reliable tool, you may encounter occasional connection issues. If you’re experiencing difficulties with your Apple Pencil, don’t worry; there are some troubleshooting steps you can take to resolve the problem. Here are some common connection issues and their potential solutions:
1. Ensure Bluetooth is enabled:
Make sure that Bluetooth is enabled on your iPad. You can check this by going to the “Settings” app, selecting “Bluetooth,” and ensuring that the toggle switch is turned on.
2. Check for software updates:
Ensure that your iPad’s software is up to date. Software updates often include bug fixes and improvements, so keeping your iPad updated can help resolve any compatibility issues with the Apple Pencil. Go to the “Settings” app, select “General,” then “Software Update” to check for and install any available updates.
3. Restart your iPad and Apple Pencil:
Try restarting both your iPad and your Apple Pencil. To restart your iPad, press and hold the power button until the “slide to power off” slider appears. Swipe the slider to turn off your iPad, then press and hold the power button again to turn it back on. To restart your Apple Pencil (1st generation), detach it from your iPad, then firmly attach it back to the charging port. For the second-generation Apple Pencil, detach it from the iPad and then reattach it magnetically.
4. Check Apple Pencil battery level:
Ensure that your Apple Pencil has enough battery power. If its battery is depleted, the connection may be affected. Check the battery status using the methods described earlier in this article and charge the Apple Pencil if necessary.
5. Re-pair your Apple Pencil:
If the previous steps didn’t resolve the issue, try unpairing and re-pairing your Apple Pencil. Go to the “Settings” app, select “Bluetooth,” and look for your Apple Pencil in the list of paired devices. Tap the “i” icon next to the Apple Pencil and choose “Forget This Device.” Then, follow the setup steps outlined in the “Setup Apple Pencil” section of this article to re-pair your Apple Pencil with your iPad.
If the problem persists, it may be worth contacting Apple Support or visiting an Apple Store for further assistance. They can provide additional troubleshooting steps or determine if there is a hardware issue with your Apple Pencil.
By following these troubleshooting steps, you can resolve common connection issues and ensure a smooth and reliable experience with your Apple Pencil.
Now that you’re equipped with troubleshooting knowledge, you can confidently address any connection issues you may encounter. Let’s wrap up this article and reflect on the incredible versatility and functionality that the Apple Pencil brings to your iPad experience.
Conclusion
The Apple Pencil is undoubtedly a game-changer for iPad users, revolutionizing the way we create, draw, take notes, and annotate documents. Throughout this article, we’ve explored various aspects of the Apple Pencil, from setting it up and customizing its functions to adjusting sensitivity, pairing it with different iPad models, checking battery status, connecting it to various apps, and troubleshooting connection issues.
By following the setup instructions, you can quickly connect your Apple Pencil to your iPad and begin exploring its full potential. The ability to personalize the Apple Pencil’s functions and adjust its sensitivity allows you to create a flawless drawing experience tailored to your preferences.
Moreover, the Apple Pencil’s compatibility with different iPad models offers flexibility and versatility, enabling users to enjoy its features across a wide range of devices.
Monitoring the battery life of your Apple Pencil ensures uninterrupted usage, and customizing the double-tap feature enhances efficiency and workflow. Connecting the Apple Pencil to various apps opens up endless possibilities for creativity, note-taking, document annotation, and design tasks.
Should you encounter any connection issues, the troubleshooting steps discussed in this article can help you resolve them and get your Apple Pencil back in action.
With the Apple Pencil in your hands, you have a powerful tool to unleash your creativity and productivity on your iPad. Whether you’re an artist, student, professional, or just someone who loves exploring new possibilities, the Apple Pencil brings a new level of precision and functionality to your fingertips.
So, go ahead and connect your Apple Pencil, adjust the settings to your liking, and dive into a world of limitless creative possibilities. Let your imagination run wild, and make the most of your iPad and Apple Pencil combo.
Enjoy the journey of creating, drawing, and exploring with your Apple Pencil!