Introduction
Welcome to the world of digital art! If you’re a creative enthusiast looking to explore the fascinating realm of drawing on an iPad, you’re in the right place. In this article, we’ll dive into the exciting world of using the Apple Pencil on your iPad to bring your artistic visions to life.
With the advent of technology, traditional art mediums are being revolutionized, and the Apple Pencil has become a game-changer for digital artists and enthusiasts. Whether you’re a beginner or have some experience with drawing, the Apple Pencil offers a whole new level of precision and creativity.
In this guide, we’ll cover everything you need to know to get started with the Apple Pencil on your iPad. We’ll discuss how to set up your iPad for drawing, explore the essential features of the Apple Pencil, and delve into various drawing techniques, from the basics to more advanced concepts.
Additionally, we’ll highlight some of the best drawing apps available for iPad users and guide you on how to edit and enhance your drawings to take your artwork to the next level. And of course, we’ll also provide tips and troubleshooting advice to ensure a smooth drawing experience.
So, whether you’re an aspiring artist, a doodler, or simply want to try your hand at digital drawing, grab your iPad and Apple Pencil, and let’s embark on this exciting journey together!
Getting Started with Apple Pencil
If you’re new to using an Apple Pencil, here’s a step-by-step guide to help you get started:
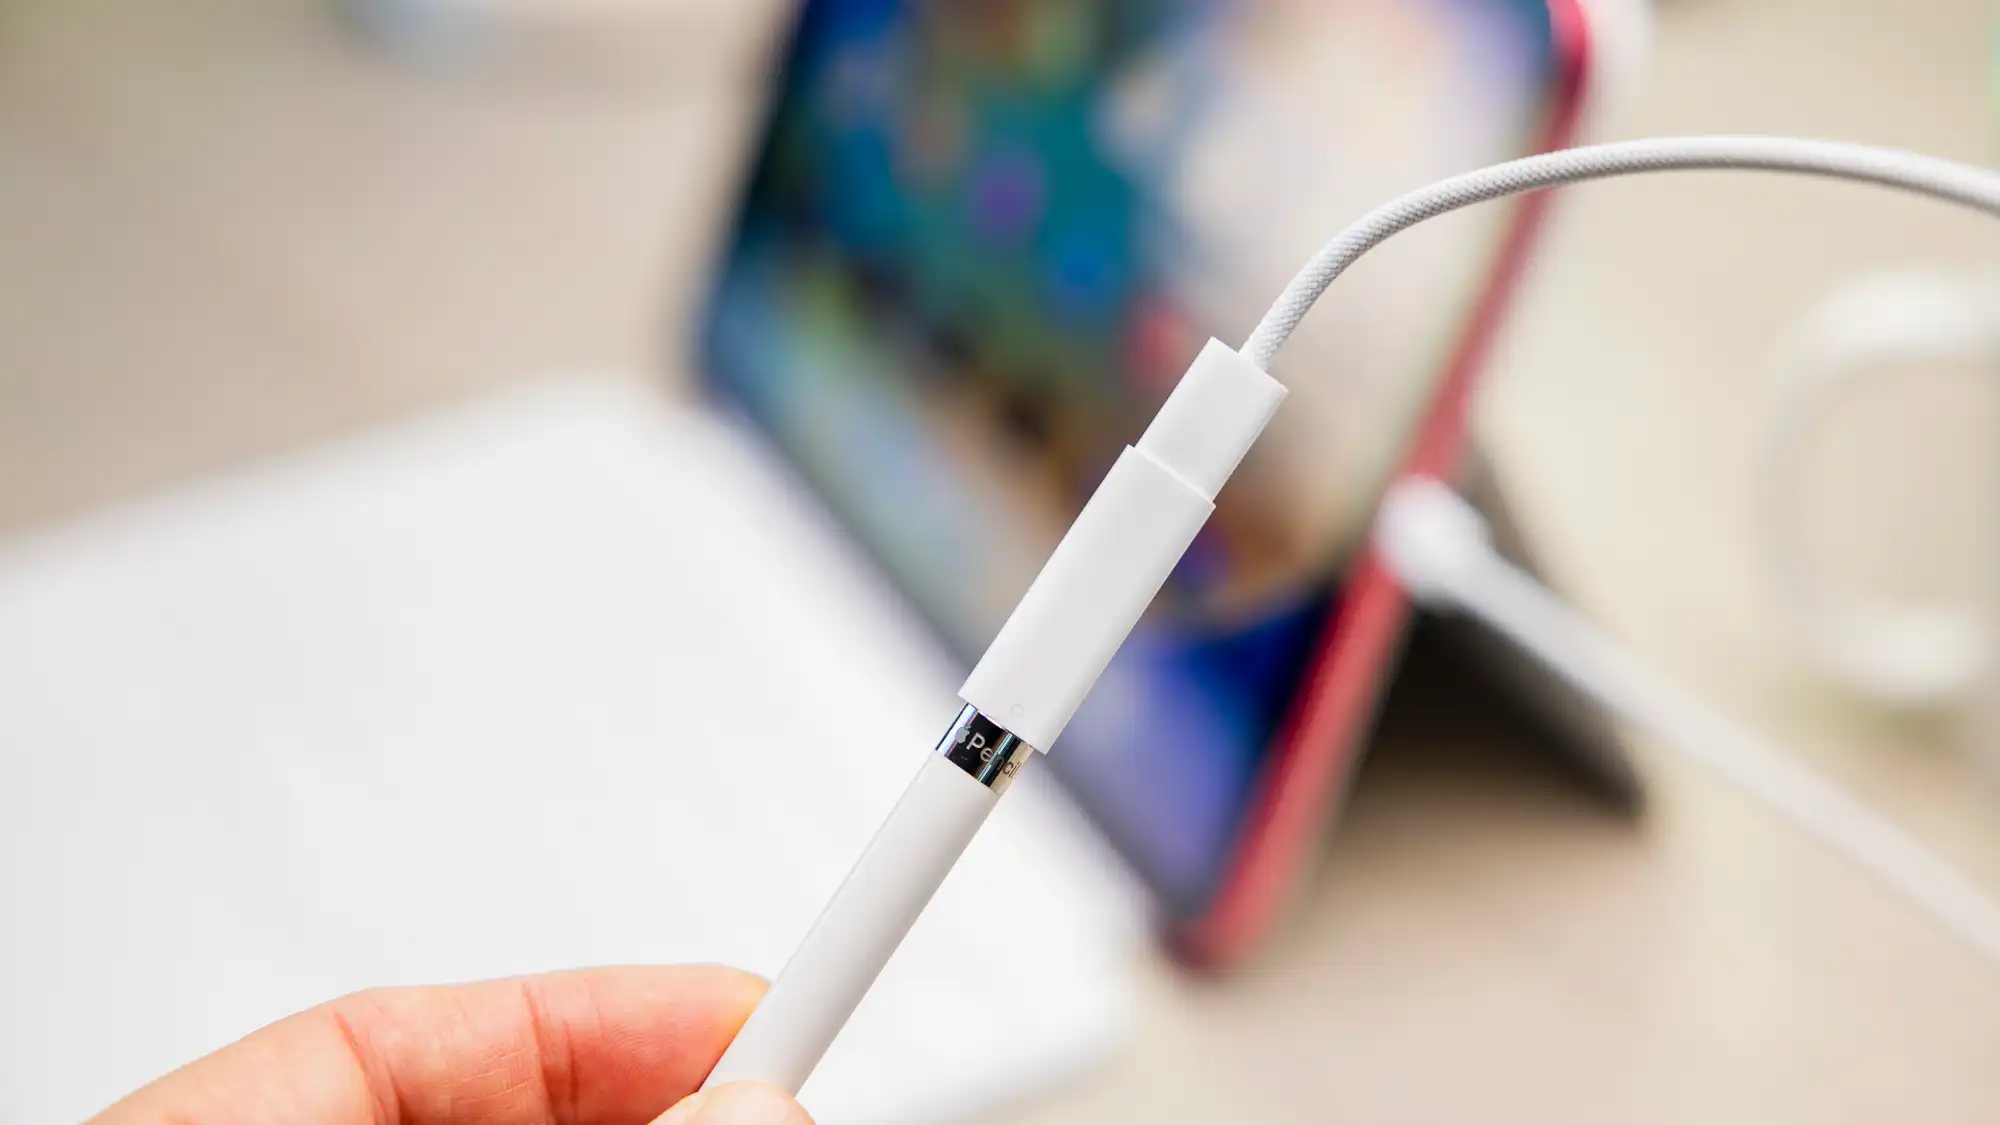
- Pairing your Apple Pencil: To connect your Apple Pencil to your iPad, simply remove the cap on the back of the pencil and plug it into the charging port. Alternatively, if you have an iPad Pro, you can pair the Apple Pencil wirelessly by tapping it against the side of the iPad.
- Checking the battery status: To check the battery level of your Apple Pencil, swipe down from the top-right corner of the iPad screen to access the Control Center. Here, you’ll find the battery widget that displays the remaining charge of your Apple Pencil.
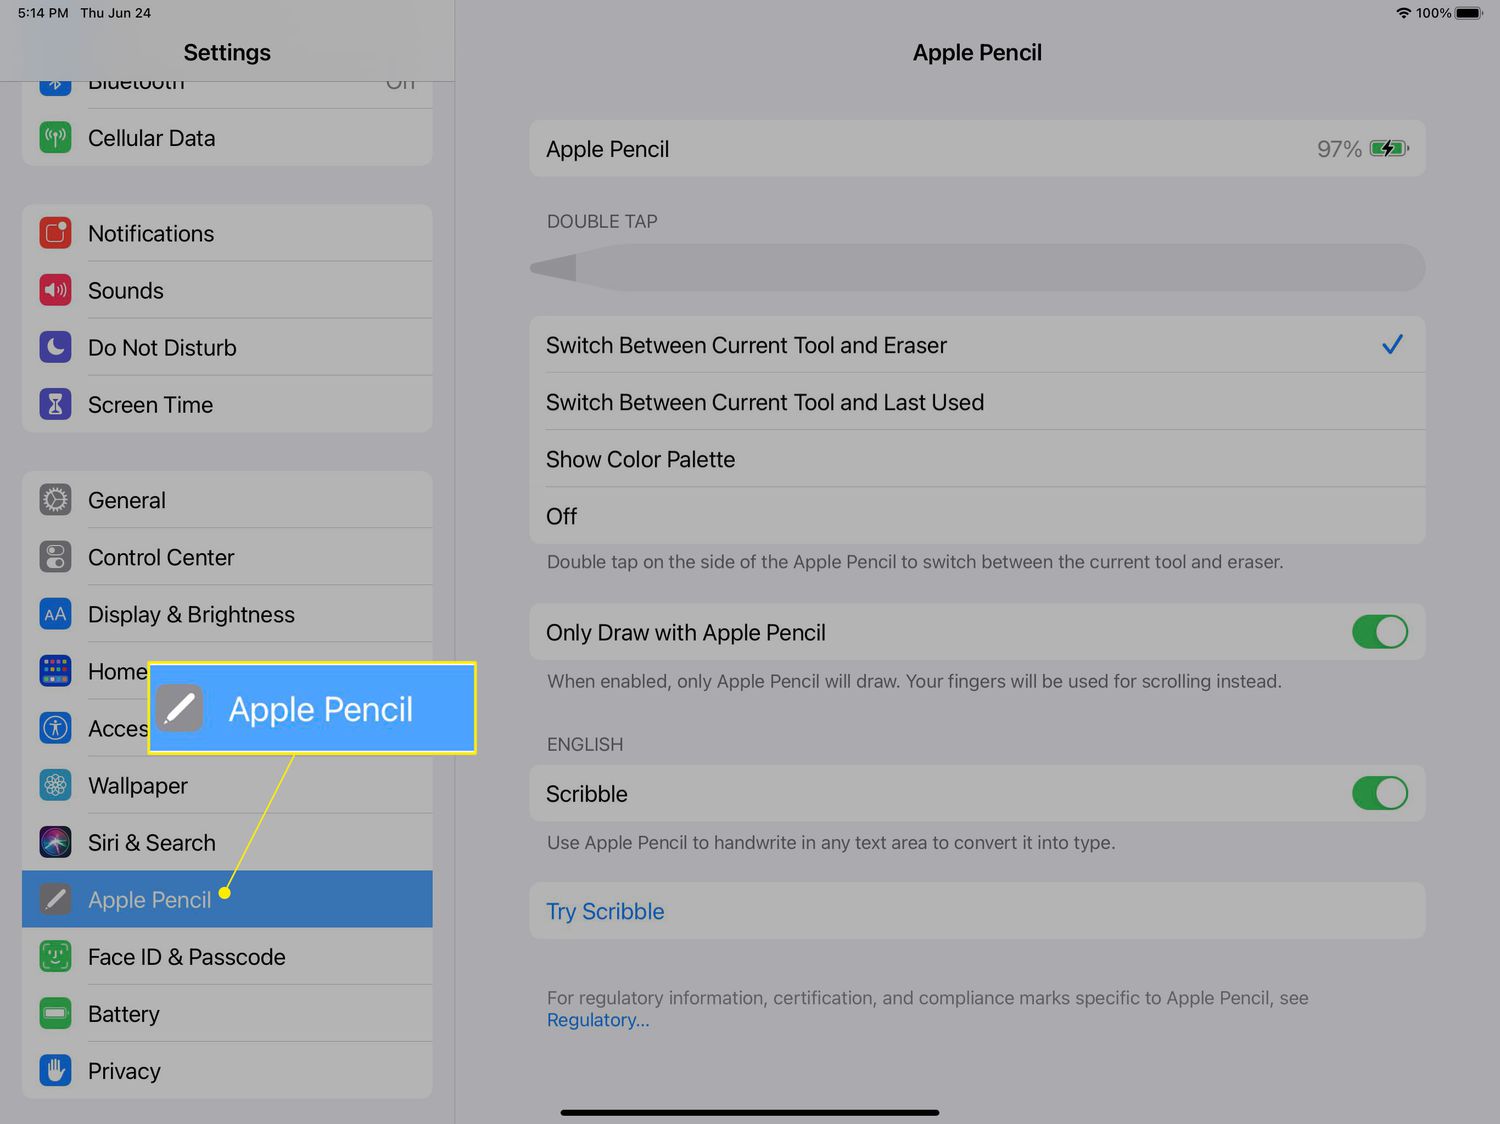
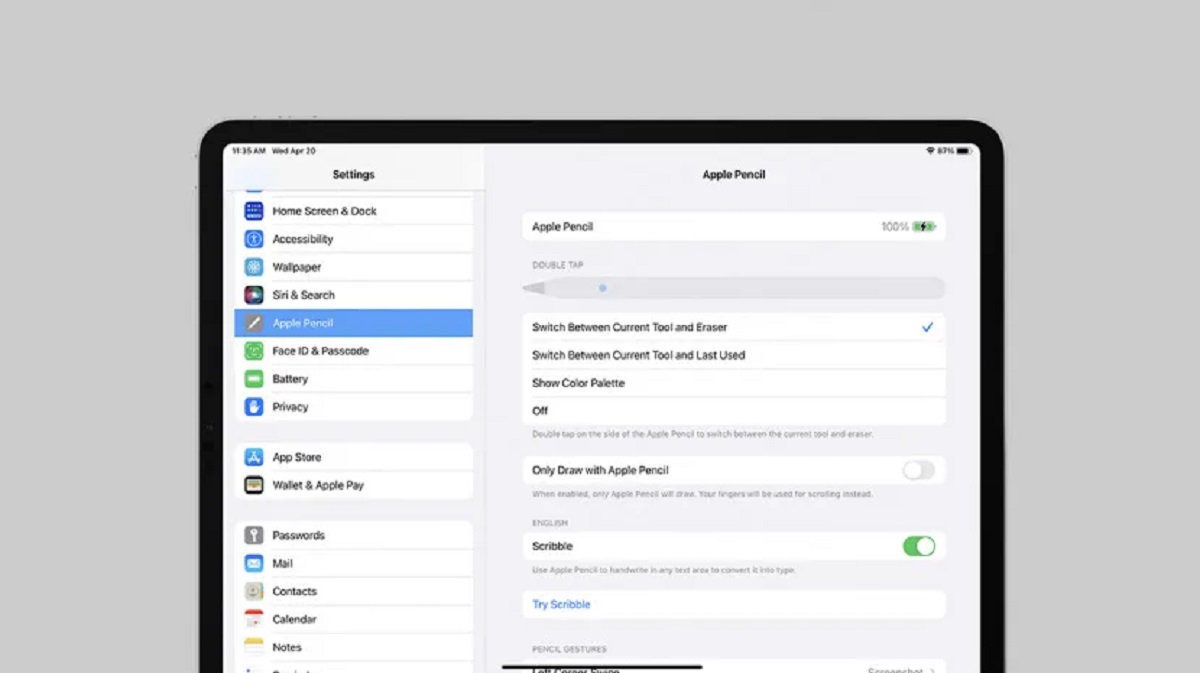
- Adjusting settings: To customize the settings of your Apple Pencil, go to the iPad’s Settings app and tap on “Apple Pencil”. Here, you can adjust options such as double-tap functionality, drawing precision, and palm rejection.
- Understanding touch gestures: The Apple Pencil not only allows you to draw and sketch but also incorporates touch gestures. For example, you can double-tap on the pencil to switch between tools or activate specific functions within a drawing app.
- Exploring pressure sensitivity: The Apple Pencil is designed to be pressure-sensitive, meaning that the harder you press while drawing, the thicker and darker the lines will appear. This feature allows for greater control and precision in your artwork.
- Using tilt functionality: Another fantastic feature of the Apple Pencil is its ability to detect tilt. This means that you can change the angle of the pencil to create shading effects or vary the width of your strokes, just like with traditional drawing tools.
- Charging your Apple Pencil: When your Apple Pencil needs a charge, simply plug it into the charging port on your iPad, or use a USB adapter and Lightning cable. The pencil charges quickly, and a full charge should provide ample drawing time.
- Keeping your Apple Pencil clean: To maintain the performance and longevity of your Apple Pencil, it’s essential to clean it regularly. Use a soft, lint-free cloth to wipe the tip and body of the pencil, removing any smudges or fingerprints.
By following these steps and familiarizing yourself with the basic functionality of the Apple Pencil, you’ll be well-equipped to begin your journey into the world of digital drawing. Let’s move on to the next section to set up your iPad specifically for drawing.
Setting Up Your iPad for Drawing
Before you start creating digital masterpieces with your Apple Pencil, it’s essential to optimize your iPad settings for the best drawing experience. Here’s how you can set up your iPad specifically for drawing:
- Update your iPad: Ensure that your iPad is running the latest version of iOS or iPadOS to have access to the most up-to-date features and improvements for drawing apps.
- Choose the right drawing app: There are numerous drawing apps available on the App Store, each with its own set of features and compatibility with the Apple Pencil. Research and choose an app that aligns with your artistic needs and preferences.
- Enable pencil mode: Some drawing apps have a pencil mode or palm rejection feature that allows you to rest your hand on the screen while drawing without any accidental marks. Enable this feature within your chosen app for a more comfortable drawing experience.
- Adjust the screen brightness: Consider reducing the screen brightness of your iPad when drawing. Lower brightness can reduce eye strain and provide better visibility of your artwork, especially in dimly lit environments.
- Configure display settings: Within the iPad’s settings, explore the display settings to adjust aspects such as True Tone, Night Shift, and color temperature. Experiment with these settings to find the display configuration that suits your artistic preferences.
- Set up a comfortable workspace: Find a comfortable and well-lit area to work in that allows you to focus on your artwork without distractions. Consider using a stand or case to prop up your iPad at an angle that feels comfortable for drawing.
- Explore additional accessories: Depending on your drawing style and preferences, you may want to invest in additional accessories such as a screen protector, a matte texture film, or a grip holder for your Apple Pencil. These accessories can enhance precision and provide a more tactile drawing experience.
- Save and backup your artwork: As you create artwork on your iPad, remember to regularly save and back up your files. You can utilize cloud storage services like iCloud, Dropbox, or Google Drive to ensure your artwork is protected and accessible from multiple devices.
By implementing these iPad setup tips, you’ll create an optimal environment for your digital drawings. Now that you’ve set up your iPad, let’s move on to the next section, where we’ll explore some of the best drawing apps for your artistic endeavors.
Choosing the Right Drawing App
When it comes to digital drawing on your iPad with the Apple Pencil, the choice of drawing app plays a crucial role in your artistic experience. There is a wide range of drawing apps available, each offering unique features and tools. Here are some key considerations to help you choose the right drawing app:
- Features and tools: Look for drawing apps that offer a comprehensive set of features and tools that align with your artistic style. Consider the availability of brushes, layers, blending modes, selection tools, and other advanced functions that can enhance your creativity.
- User interface: The user interface of a drawing app should be intuitive and user-friendly. It should allow easy access to various tools and functions without overwhelming the user. Consider apps that offer customizable menus and shortcuts for a more personalized workflow.
- Compatibility with Apple Pencil: Ensure that the drawing app you choose is fully compatible with the Apple Pencil and takes advantage of its features, such as pressure sensitivity and tilt functionality. This will allow you to fully exploit the capabilities of your Apple Pencil.
- Export options: Consider the export options provided by the drawing app. It should offer various file formats, such as JPEG, PNG, and PSD, to ensure compatibility with other software and platforms. Additionally, look for apps that support exporting high-resolution images for printing or sharing your artwork.
- Community and support: Research the user community and support available for the drawing app. Look for active forums, tutorials, and resources that can help you learn and grow as an artist. A vibrant community can provide inspiration and valuable feedback on your artwork.
- Pricing model: Drawing apps can range from free to paid, with different pricing models. Consider your budget and evaluate whether the features and benefits offered by a paid app justify the cost. Some drawing apps also offer free trials or lite versions for you to test before making a purchase.
- Reviews and ratings: Take the time to read reviews and ratings of different drawing apps. Pay attention to feedback regarding stability, performance, and overall user satisfaction. This will give you a better idea of the app’s quality and suitability for your needs.
Remember, every artist has unique requirements and preferences, so take your time to explore different drawing apps and find the one that best fits your style and workflow. Now that you have an understanding of what to consider when choosing a drawing app, let’s move on to the next section, where we’ll explore and discover the various features of the Apple Pencil.
Exploring Apple Pencil’s Features
The Apple Pencil is a powerful tool that offers several features designed to enhance your digital drawing experience. Let’s take a closer look at some of the key features and functionalities of the Apple Pencil:
- Pressure sensitivity: One of the standout features of the Apple Pencil is its ability to detect varying levels of pressure. By pressing harder or softer on the iPad’s screen, you can create thicker or thinner lines, allowing for more expressive and dynamic drawings.
- Tilt recognition: The Apple Pencil is also tilt-sensitive, which means it can detect the angle at which you hold the pencil. This feature allows you to create shading effects and achieve a more traditional, natural drawing experience.
- Palm rejection: When you’re drawing with the Apple Pencil, the iPad’s screen is cleverly programmed to ignore any touch input from your palm or fingers. This palm rejection technology ensures that your hand can rest comfortably on the screen without interfering with your artwork.
- Double-tap functionality: With a quick double-tap on the Apple Pencil, you can access different functions within supported drawing apps. For example, you can switch between brushes, activate the eraser, or toggle other commonly used tools, making your workflow more efficient.
- Instant pairing: Pairing the Apple Pencil with your iPad is a seamless process. Simply attach the pencil magnetically to the side of your iPad or plug it into the charging port, and your device will recognize the pencil automatically without any complicated setup.
- Low latency: The Apple Pencil offers a remarkably low latency rate, which means there is minimal delay between your pen strokes and their appearance on the screen. This real-time response allows for a smooth and immersive drawing experience.
- Smart annotation features: The Apple Pencil supports various smart annotation features within compatible apps. These features enable you to highlight, underline, or annotate text or images directly on the iPad, making it an excellent tool for educators, students, or anyone working with digital documents.
- Accessibility features: The Apple Pencil is also equipped with a range of accessibility features. For instance, it can be used as an alternative input method for individuals with mobility or dexterity challenges, enabling them to navigate and interact with the iPad more easily.
These are just a few of the remarkable features that make the Apple Pencil a versatile and powerful tool for digital artists. Now that you’re familiar with the capabilities of the Apple Pencil, let’s move on to the next section where we’ll delve into basic drawing techniques to help you get started with your artistic journey.
Basic Drawing Techniques
Now that you have a firm grasp of the Apple Pencil’s features, it’s time to explore some basic drawing techniques. These techniques will help you get started with your digital artwork and build a strong foundation for your artistic skills. Here are a few essential techniques to consider:
- Line art: Practice drawing clean, smooth lines using different pressures and strokes. Experiment with varying line weights to add depth and dimension to your artwork.
- Contour drawing: Contour drawing involves outlining the basic shape and structure of an object. Focus on capturing the edges and curves, paying attention to proportion and perspective.
- Sketching: Use light, loose strokes to create quick sketches. This technique allows you to explore compositions, shapes, and proportions before refining your artwork.
- Shading and hatching: Learn to create different shading effects using the Apple Pencil’s tilt sensitivity. Experiment with hatching and cross-hatching techniques to add texture and dimension to your drawings.
- Coloring and blending: Explore the different color options available in your chosen drawing app. Learn how to create smooth color transitions and blend different shades to achieve realistic or stylized effects.
- Layering: Take advantage of layers in your drawing app to separate different elements of your artwork and make editing easier. Use layers to experiment with different compositions or add depth to your drawings.
- Refining details: Use zoom functionality in your drawing app to focus on intricate details in your artwork. Make use of precise strokes to add fine details and bring your drawings to life.
- Experimenting with brushes: Explore different brush options available in your drawing app. Each brush has its own unique texture and stroke characteristics, allowing you to create a wide variety of effects.
- Developing a personal style: As you practice and experiment with different techniques, you’ll start to develop your own personal style. Embrace your individuality and allow your unique artistic voice to shine through in your artwork.
Remember, mastering these basic drawing techniques takes time and practice. Dedicate regular time to hone your skills, and don’t be afraid to experiment and try new things. As you become more comfortable with the basics, you can begin exploring more advanced drawing techniques to further refine your artistic abilities. In the next section, we’ll delve into some of these advanced techniques to help you take your digital art to the next level.
Advanced Drawing Techniques
Once you have a good grasp of basic drawing techniques, you can start exploring more advanced techniques to elevate your digital artwork. These techniques will help you add depth, realism, and complexity to your drawings. Here are some advanced drawing techniques to consider:
- Composition: Experiment with different compositions to create visually appealing artwork. Learn about the rule of thirds, leading lines, and focal points to create balanced and engaging compositions.
- Perspective: Explore different types of perspective, such as one-point, two-point, and three-point perspective. Understanding perspective will add depth and realism to your drawings by properly depicting space and dimension.
- Light and shadow: Study how light interacts with objects and learn to accurately depict highlights, shadows, and gradients. Understanding the interplay between light and shadow will bring depth and dimension to your artwork.
- Textures and details: Experiment with different techniques to represent various textures and details in your drawings. Whether it’s the roughness of a tree bark or the softness of a fluffy cloud, adding realistic textures can greatly enhance your artwork.
- Figure drawing: Practice drawing human figures in various poses and perspectives. Study anatomy to understand the proportions and structure of the human body, allowing you to create dynamic and accurate figure drawings.
- Color theory: Deepen your understanding of color theory and how different colors interact with each other. Learn about color harmonies, contrast, and the emotional impact of colors to create striking and visually appealing artwork.
- Mixed media techniques: Experiment with combining traditional art techniques with digital drawing. Incorporate elements such as watercolor, ink, or texture overlays to add unique and interesting effects to your artwork.
- Conceptualization: Take your drawings beyond mere representation and explore conceptual art. Develop concepts, tell stories, and convey emotions through your artwork, pushing the boundaries of your creativity.
- Experimentation: Be open to trying new tools, techniques, and styles in your digital art. Don’t be afraid to step out of your comfort zone and embrace experimentation, as this can lead to unexpected and exciting artistic discoveries.
Remember, advanced drawing techniques require ongoing practice and exploration. Keep challenging yourself to grow as an artist and continually seek inspiration from other artists and art forms. The more you explore and push yourself, the more your artistic skills and style will evolve. In the next section, we’ll explore how you can edit and enhance your digital drawings to take them to the next level.
Editing and Enhancing Your Drawings
Editing and enhancing your digital drawings can transform them from great to outstanding. With the right tools and techniques, you can refine and polish your artwork to make it truly shine. Here are some tips for editing and enhancing your drawings:
- Adjusting levels and contrast: Use adjustment tools in your drawing app to fine-tune the levels and contrast of your artwork. This can help bring out the details and enhance the overall visual impact of your drawing.
- Color correction: If needed, make color adjustments to correct any inaccuracies or imbalance in your artwork. This can involve adjusting the saturation, hue, or brightness levels to achieve the desired color balance and mood.
- Layer blending modes: Experiment with different layer blending modes to create interesting and unique effects. Blending modes can help you achieve transparency, overlay colors, or create texture variations in your artwork.
- Adding effects: Explore the various effects available in your drawing app, such as gradients, filters, or textures. These effects can add depth, dimension, or visual interest to your drawings.
- Refining details: Zoom in and meticulously refine the details of your drawing. Pay close attention to areas that may benefit from additional texture, highlights, or shadows to make your artwork more polished and realistic.
- Cropping and composition: Consider cropping your artwork to improve the composition or to focus on specific details. Sometimes, a slight adjustment of the composition can dramatically enhance the overall impact of your drawing.
- Adding text or captions: If your artwork narrates a story or conveys a message, consider adding text or captions to complement your drawing. This can provide context or further emphasize the themes in your artwork.
- Experimenting with different styles: Don’t be afraid to experiment with different artistic styles or techniques during the editing process. Playing with different effects or filters can help you discover new ways to enhance your artwork.
- Asking for feedback: Seek feedback from fellow artists, friends, or online communities to gain fresh perspectives on your artwork. Constructive criticism can provide valuable insights and suggestions to improve your drawings.
- Saving multiple versions: Save multiple versions of your artwork as you progress through the editing process. This allows you to experiment with different edits or go back to a previous version if needed.
Remember, the editing and enhancing process is subjective, and it’s up to you to decide the final look and feel of your artwork. Don’t be afraid to trust your instincts and make bold choices. The goal is to create a finished piece that reflects your unique vision and artistic style. In the next section, we’ll guide you on how to share and showcase your artwork with others.
Sharing Your Artwork
Sharing your artwork with others can be a fulfilling and exciting experience. It allows you to showcase your creativity, receive feedback, and connect with fellow artists and art enthusiasts. Here are some tips for effectively sharing your digital drawings:
- Online platforms: Take advantage of social media platforms, art communities, and portfolio websites to share your artwork with a wide audience. Platforms like Instagram, Behance, and DeviantArt provide great opportunities to gain exposure and connect with other artists.
- Build an online portfolio: Create an online portfolio to showcase your best artwork. A well-organized portfolio website or a dedicated section on an art platform will allow viewers to explore your drawings and learn more about your artistic journey.
- Engage with the art community: Participate in online art communities, forums, and groups. Share your artwork, provide feedback to other artists, and join discussions to build connections and learn from fellow artists.
- Collaborate with others: Collaborate with other artists or participate in art challenges and prompts. Collaborations and challenges can provide opportunities to explore new themes, techniques, and styles while also expanding your network and gaining new perspectives on your artwork.
- Attend art events and exhibitions: Seek out local art events, exhibitions, and galleries where you can showcase your artwork in a physical space. These events can help you connect with the local art community and potential buyers.
- Watermark your artwork: To protect your artwork from unauthorized use, consider adding a discreet watermark to your digital drawings before sharing them online. A watermark can help identify your work and prevent others from using it without permission.
- Share your artistic process: Document your artistic process through photos, videos, or time-lapse recordings. Sharing your process not only provides insight into your artwork but also engages viewers and helps them develop a deeper appreciation for your skills and creativity.
- Encourage feedback and interaction: When sharing your artwork, invite viewers to leave comments, ask questions, or share their thoughts. Engaging with your audience fosters a sense of community and allows you to gain valuable feedback and insights that can further enhance your artistic growth.
- Showcase your artwork offline: Consider printing your digital drawings and displaying them in local cafes, community centers, or art exhibitions. Physical displays can attract a different audience and provide a tangible experience of your artwork.
- Protect your rights: Be aware of copyright laws and take steps to protect your artwork. Keep records of your original files, consider registering your work, and always be cautious when granting permissions for the use of your artwork.
Sharing your artwork is a wonderful way to expand your artistic journey and connect with others who appreciate and admire your talent. Embrace the various platforms and opportunities available to you, and don’t hesitate to put yourself out there. In the final section, we’ll provide some troubleshooting tips to overcome common challenges you may encounter while using the Apple Pencil and drawing on your iPad.
Troubleshooting Tips
While drawing with the Apple Pencil on your iPad is generally a smooth and enjoyable experience, you may encounter some common issues or challenges along the way. Here are a few troubleshooting tips to help you overcome them:
- Unresponsive Apple Pencil: If your Apple Pencil is not responding or seems unresponsive, try restarting your iPad and re-pairing the Apple Pencil. Also, ensure that your Apple Pencil is charged adequately.
- Interference with screen protectors: Some screen protectors can interfere with the Apple Pencil’s functionality. If you’re using a screen protector, make sure it is compatible with the Apple Pencil and does not hinder its touch sensitivity. Consider using a screen protector specifically designed for the Apple Pencil.
- Unwanted palm or finger marks: If you find that your hand or finger touches the screen while drawing, causing accidental marks, consider using an app that has a palm rejection feature. Alternatively, you can wear a stylus-compatible glove to eliminate any unintended touches.
- Tracking issues with the Apple Pencil: If you experience tracking or precision issues with your Apple Pencil, try cleaning the tip using a soft cloth or replace the tip if it shows signs of wear and tear. Additionally, ensure that the tip is securely screwed on to the Apple Pencil.
- App crashes or lag: If you encounter frequent app crashes or experience lag while using drawing apps, make sure that both your iPad’s operating system and the drawing app are up to date. Closing any unused apps running in the background can also help improve performance.
- Storage and backup: Ensure that you regularly back up your drawings and artwork to prevent data loss. Utilize cloud storage options or external storage devices to create backups of your valuable artwork.
- Low battery or charging issues: If you notice that your Apple Pencil’s battery drains quickly, reduce battery consumption by adjusting settings like brightness or background app refresh. If there are charging issues, ensure that both the iPad and the Apple Pencil’s charging ports are clean and free from debris.
- Compatibility issues: Check the compatibility of the drawing app you’re using with your specific iPad model and operating system. Some apps may have limitations or require specific iPad versions to function optimally.
- Seeking support: If you’re facing persistent issues or need further assistance, reach out to the support team of your iPad or the drawing app. They can provide additional troubleshooting steps or guidance specific to your situation.
By following these troubleshooting tips, you can address common issues that arise while using the Apple Pencil and drawing on your iPad. Remember, practice patience and persistence, as technical issues can sometimes be resolved with a few adjustments or software updates. Now armed with these troubleshooting tips, you can enjoy a smoother drawing experience.
Conclusion
Congratulations on embarking on your journey into the world of drawing with the Apple Pencil on your iPad! By following the steps outlined in this guide, you’ve gained valuable knowledge on how to get started, set up your iPad, choose the right drawing app, explore the Apple Pencil’s features, master basic and advanced drawing techniques, edit and enhance your artwork, share your creations, and troubleshoot common issues.
Remember, becoming proficient in digital drawing takes practice and patience. As you continue to hone your skills, don’t be afraid to experiment, explore different styles, and push the boundaries of your creativity. Seek inspiration from other artists and engage with the vibrant online art community to grow and learn from others.
Whether you’re a beginner or have some experience in traditional art, the Apple Pencil offers a whole new world of possibilities for your creative expression. With its pressure sensitivity, tilt recognition, and other advanced features, the Apple Pencil allows you to create stunning and intricate artwork right on your iPad. The versatility and precision of the Apple Pencil combined with the limitless capabilities of digital drawing apps enable you to explore different styles, techniques, and artistic concepts.
So, grab your iPad, charge up your Apple Pencil, and let your imagination run wild. Experiment, learn from mistakes, and most importantly, enjoy the process of creating digital art. With dedication and practice, you’ll continue to develop as an artist and create incredible masterpieces.
Now that you have a solid foundation in using the Apple Pencil on your iPad, it’s up to you to take what you’ve learned and embark on your artistic journey. So, go forth, unleash your creativity, and let your digital drawings captivate the world!