Introduction
Writing neatly on an iPad with the Apple Pencil has become increasingly popular among digital note-takers and artists. The Apple Pencil offers a seamless and precise writing experience, making it a great tool for those who prefer the feel of pen and paper but also crave the convenience of digital technology.
In this article, we will explore the various techniques and tips to help you write neatly on your iPad using the Apple Pencil. Whether you are a student taking notes, a professional jotting down ideas, or an artist creating digital artwork, these tips will elevate your writing experience and improve your overall productivity.
We will delve into the nuances of choosing the right app for handwriting, adjusting writing settings on your iPad, holding the Apple Pencil for better control, and practicing proper handwriting techniques. Additionally, we will discuss using different stroke styles and sizes, making corrections, and organizing and saving your handwritten notes for easy access.
Writing neatly on an iPad may seem challenging at first, especially if you are accustomed to traditional pen and paper. However, with the right techniques and tools, you can achieve legible and precise handwriting that rivals the experience of putting pen to paper.
So, if you are ready to unlock the full potential of your Apple Pencil and start writing neatly on your iPad, let’s dive into the world of digital handwriting and explore the tips and tricks that will help you master this art form.
Getting started with Apple Pencil
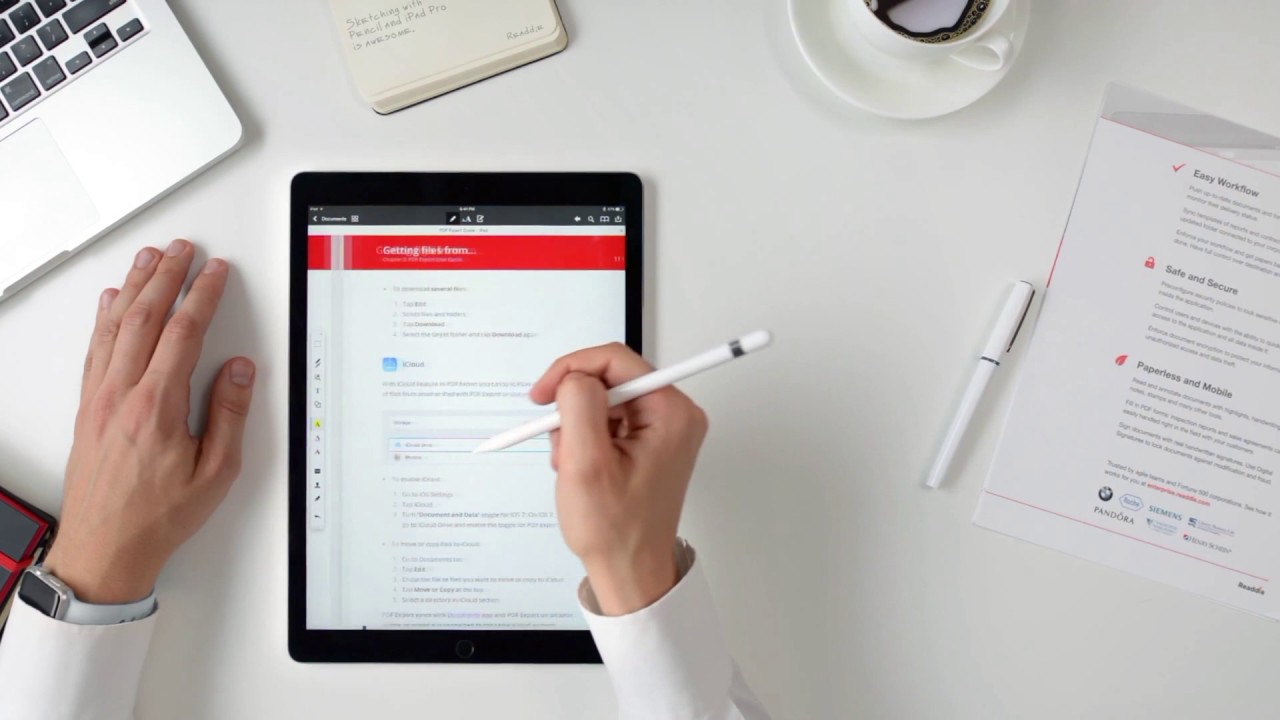
Before you begin writing neatly on your iPad with the Apple Pencil, you need to ensure that it is properly paired with your device. To do this, simply attach the Apple Pencil to the magnetic connector or connect it via Bluetooth on newer models. Once connected, you’re ready to start using your Apple Pencil for writing and drawing.
Next, you’ll need to familiarize yourself with the basic functions of the Apple Pencil. The Apple Pencil offers pressure sensitivity, tilt recognition, and palm rejection, allowing for a more natural and fluid writing experience. This means you can vary the line thickness and shading by adjusting the pressure applied to the screen, just as you would with a traditional pen or pencil.
Depending on your iPad model, you may also have additional features such as double-tapping the Apple Pencil to switch between tools or activating the eraser by flipping the pen around. Take some time to explore these features and customize them to your preferences by going to the settings of your iPad.
Once you’re comfortable with the basics of using the Apple Pencil, it’s time to choose the right app for handwriting. There are plenty of options available in the App Store, each with its own unique features and interface. Some popular choices include Notability, GoodNotes, and OneNote, which offer tools specifically designed for handwriting and note-taking.
When selecting an app, consider features such as palm rejection, pressure sensitivity, and the ability to import and export files. Additionally, choose an app that feels intuitive and suits your writing style, as this will greatly impact your overall handwriting experience.
Now that you’re familiar with the initial steps of getting started with Apple Pencil and selecting the right app, it’s time to dive into the details of adjusting the writing settings on your iPad to optimize your handwriting experience. Let’s explore the next section to uncover the key settings you should be aware of.
Choosing the right app for handwriting
When it comes to writing neatly on your iPad with the Apple Pencil, choosing the right app is crucial. With a wide range of options available, it’s important to consider your specific needs and preferences in order to find the app that best suits your handwriting style.
One of the key factors to consider when selecting an app is palm rejection. This feature prevents accidental touches from your palm or wrist while writing, ensuring a seamless and uninterrupted experience. Without proper palm rejection, your handwriting may become distorted or interrupted by unintended marks on the screen.
Another important feature to look for is pressure sensitivity. This allows your iPad to detect the varying levels of pressure you apply with the Apple Pencil, resulting in thicker or thinner lines. Pressure sensitivity adds depth and realism to your handwriting, closely mimicking the experience of using a traditional pen or pencil.
The ability to import and export files is another crucial consideration. It allows you to easily transfer your handwritten notes to other devices or share them with colleagues and friends. Look for apps that offer compatibility with popular file formats such as PDF or JPEG, as this will ensure that your notes can be accessed across different platforms.
Furthermore, consider the organization and syncing capabilities of the app. A well-organized interface will make it easier to categorize your notes and find them when you need them. Additionally, if you use multiple devices, look for apps that offer seamless syncing across platforms, allowing you to access your notes from anywhere.
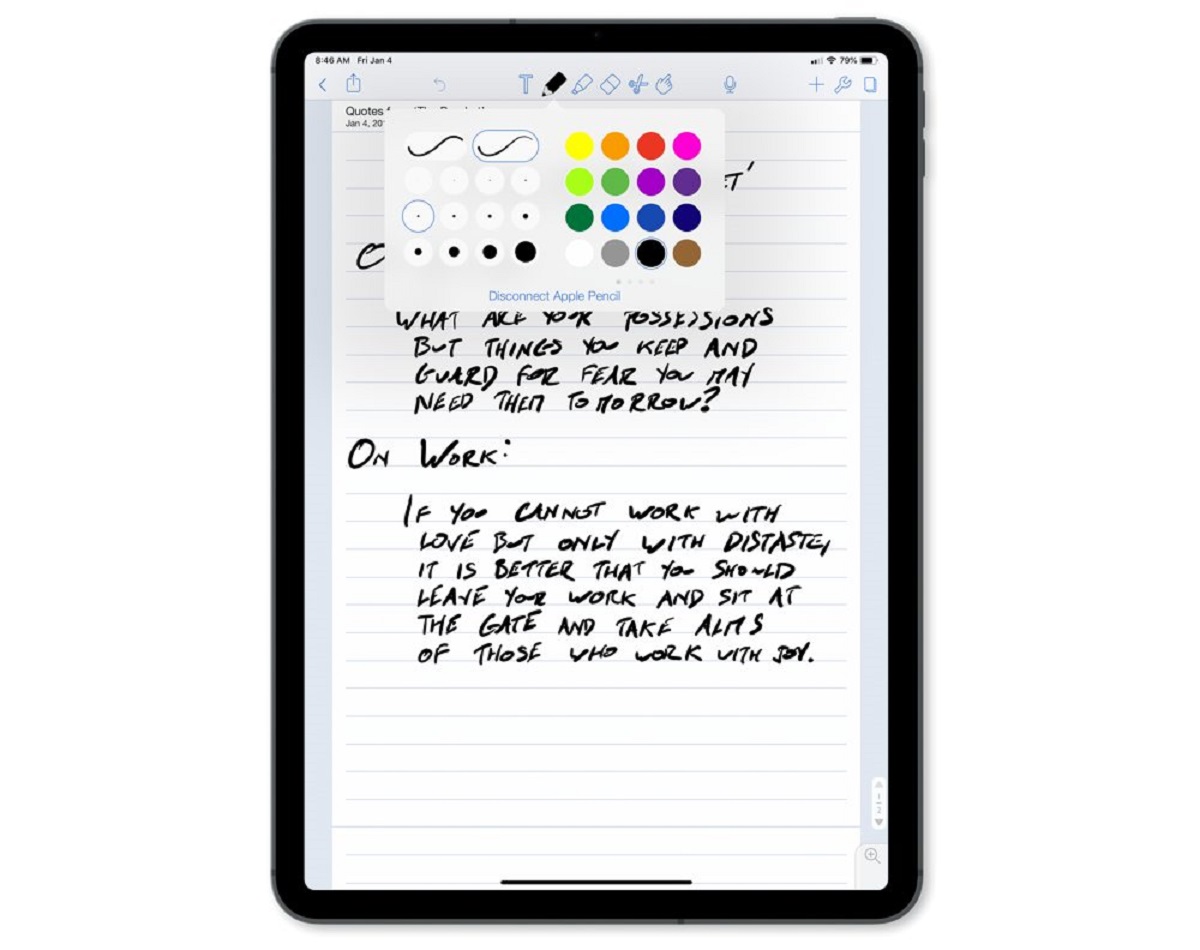
Aesthetics and customization options are also worth considering. Some apps offer different paper styles, such as lined, grid, or blank pages, allowing you to choose the layout that best suits your writing style. Customizable pen colors and types can further enhance your writing experience, allowing for personalization and creativity.
Ultimately, the best app for handwriting is the one that suits your specific needs and preferences. Consider trying out a few different apps before settling on one that feels comfortable and intuitive to use. Remember, finding the right app will greatly enhance your ability to write neatly on your iPad with the Apple Pencil.
Adjusting writing settings on your iPad
Customizing the writing settings on your iPad is essential for achieving the best handwriting experience with the Apple Pencil. By adjusting these settings, you can fine-tune various aspects of your writing, such as line thickness, pressure sensitivity, and palm rejection.
Start by opening the settings app on your iPad and selecting the “Apple Pencil” or “Apple Pencil & Scribble” option. Here, you’ll find a range of customizable settings that can be adjusted to meet your specific requirements.
One of the most important settings to adjust is the line thickness. This determines the width of your strokes when writing or drawing. Experiment with different line thicknesses to find the one that feels most comfortable and natural for your handwriting style.
Pressure sensitivity is another crucial setting that can greatly impact your writing experience. By adjusting this setting, you can control how much pressure is required to create thicker or thinner lines. Play around with the sensitivity levels to find the right balance for your writing style and preferences.
Palm rejection is a vital feature that prevents accidental touches from interfering with your writing. It’s important to ensure that this setting is properly enabled to avoid unwanted marks on the screen. Adjust the palm rejection sensitivity to strike a balance between rejecting accidental touches and allowing intentional touches to be recognized.
The writing angle can also affect the precision and accuracy of your handwriting. Some apps allow you to adjust the angle at which the Apple Pencil interacts with the screen. Experiment with different writing angles to find the one that works best for you.
Additionally, explore other settings such as double-tap functionality, which allows you to customize the Apple Pencil’s behavior when you double-tap the side of the pen. You can set it to switch between tools, activate the eraser, or perform other actions based on your preferences.
Remember to regularly check for software updates on your iPad, as these updates may include new features or improvements to the Apple Pencil’s functionality. Keeping your device up to date ensures that you have access to the latest enhancements for a seamless and optimized writing experience.
By adjusting the writing settings on your iPad, you can personalize your Apple Pencil experience and create a writing environment that is tailored to your needs. Take the time to explore and experiment with these settings, and don’t hesitate to make changes as you fine-tune your handwriting on your iPad.
Holding your Apple Pencil for better control
The way you hold your Apple Pencil can significantly impact the control and precision of your handwriting on your iPad. By adopting the proper grip, you can enhance your writing experience and achieve neater and more accurate results.
When holding the Apple Pencil, it’s important to find a grip that feels comfortable and natural for you. Start by holding it in a relaxed manner, making sure not to grip it too tightly. This allows for greater flexibility and fluidity in your writing movements.
Position your fingers slightly above the tip of the Apple Pencil, near the middle of the pen. This will help you maintain better control and stability while writing. Avoid gripping the pen too close to the tip, as this may result in less control and more pressure on the screen.
Another important aspect to consider is the angle at which you hold the Apple Pencil. It’s generally recommended to hold it at a slight angle, roughly 45 degrees, to achieve smooth and consistent strokes. Experiment with different angles to find the one that works best for your handwriting style.
Practice maintaining a light touch on the screen, as excessive pressure can lead to thicker and less controlled lines. By applying just enough pressure to register your strokes, you can achieve more precise and legible handwriting.
Pay attention to your hand and wrist position as well. Keep your wrist relaxed and avoid resting it on the screen, as this may trigger unwanted touches. Instead, hover your hand slightly above the surface or rest it on a nearby support, such as a table or a pillow.
Regular practice is key to improving your grip and control over the Apple Pencil. Dedicate some time each day to practice writing with the pencil and focus on maintaining a consistent grip and angle. Over time, you’ll notice improvements in your handwriting as your muscle memory develops.
Remember that everyone’s handwriting style is different, and it may take some experimentation to find the grip and angle that works best for you. Embrace your unique style and adapt the techniques to suit your comfort and preference.
By holding your Apple Pencil with the right grip and maintaining proper control, you can elevate your handwriting experience on the iPad and create neater, more precise writing that closely mimics the feel of pen and paper.
Practicing handwriting techniques
Just like with traditional pen and paper, practicing proper handwriting techniques is crucial for writing neatly on your iPad with the Apple Pencil. By developing good habits and consistently practicing these techniques, you can improve the legibility and overall appearance of your digital handwriting.
One of the fundamental techniques to focus on is maintaining a steady hand. This involves minimizing unnecessary movement and keeping your hand and arm relaxed while writing. Unnecessary shaking or wobbling can result in messy and uneven lines. Practice writing slowly and deliberately to develop control and stability.
Consistency in letter size and spacing is also essential for neat handwriting. Aim for uniformity in the height and width of your letters, as well as equal spacing between words and lines. Take your time to ensure each stroke is deliberate and well-formed.
In addition to letter formation, pay attention to the slant of your writing. Consistent slanting can give your handwriting a more cohesive and professional look. Decide on a slight slant that feels comfortable to you and practice maintaining it throughout your writing.
Another technique to consider is the use of proper letter connections. Connecting letters smoothly and without interrupting the flow can greatly enhance the readability of your handwriting. Practice joining letters in a way that feels natural and reduces the need to lift the Apple Pencil frequently.
Experiment with different writing pressures to achieve the desired line thickness. Applying more pressure can result in a bolder line, while lighter pressure will yield a thinner line. Practice varying your pressure as needed to add emphasis or distinction to certain words or characters.
While practicing handwriting techniques, it can be helpful to use writing guides or templates available in some apps. These guides provide visual cues for consistent letter size, spacing, and slant. Utilize these tools to train your muscle memory and develop a more consistent and polished handwriting style.
Remember to be patient with yourself and allow for some trial and error as you work on improving your handwriting techniques. Consistent practice and conscious effort will yield noticeable improvements over time.
Continuously seeking feedback and making adjustments to your technique will also contribute to your progress. Ask others for their input on the legibility and appearance of your handwriting, and utilize their suggestions to refine your style.
By devoting time and effort to practice handwriting techniques, you can elevate the quality of your digital handwriting and achieve a clean and professional look. With consistency and perseverance, you’ll soon see significant improvements in your ability to write neatly on your iPad with the Apple Pencil.
Using different stroke styles and sizes
One of the advantages of writing on your iPad with the Apple Pencil is the ability to experiment with different stroke styles and sizes, allowing you to add variety and creativity to your digital handwriting.
Most note-taking and drawing apps offer a range of pen styles, such as ballpoint, marker, brush, or fountain pen. Each style has its own unique characteristics, allowing you to choose the one that best suits your writing or drawing needs.
Try out different pen styles to see how they affect the appearance of your handwriting. A ballpoint or marker pen style may provide a bolder and more solid line, while a brush or fountain pen style can give your writing a softer and more fluid look.
In addition to pen styles, you can also experiment with different stroke sizes. Some apps allow you to adjust the thickness of your strokes, giving you the flexibility to create bold or delicate lines. By varying the stroke sizes, you can add emphasis to certain words, create contrast, or simply enhance the visual appeal of your handwriting.
When using different stroke sizes, consider their functionality within your writing. For headings and titles, a larger stroke size can make them stand out. On the other hand, using a smaller stroke size for the main body of text can help maintain legibility and streamline your writing.
Be mindful of not overusing different stroke styles and sizes, as it may distract from the clarity and readability of your handwriting. Use them strategically to enhance specific elements or add visual interest, but ensure that the overall result remains clear and easily readable.
While experimenting with stroke styles and sizes, keep in mind the context and purpose of your writing. Different settings, such as note-taking, doodling, or sketching, may call for different stroke styles and sizes. Adjust accordingly to achieve the desired effect for each specific use case.
Remember to practice with the different stroke styles and sizes to become comfortable and proficient in using them effectively. It may take some time and experimentation to find the ones that best complement your handwriting style and preferences.
By utilizing different stroke styles and sizes, you can add variety and creative flair to your digital handwriting. Explore the options available in your chosen app and experiment to find the perfect combination that enhances the visual appeal of your writing while still maintaining clear and legible text.
Making corrections and erasing mistakes
Even with the convenience of digital handwriting on an iPad with the Apple Pencil, mistakes are bound to happen. Fortunately, correcting errors and erasing mistakes is a breeze with the various tools and features available.
Most note-taking apps offer an eraser tool specifically designed for the Apple Pencil. Simply select the eraser tool and swipe it over the areas you want to erase. This allows you to quickly and seamlessly remove any unwanted marks or mistakes.
For more precision, some apps provide a smaller eraser size option. This allows you to erase specific characters, lines, or even tiny details with ease. Take advantage of this feature to correct mistakes without affecting the surrounding content.
If you prefer a more traditional approach, undo and redo functions are usually available in note-taking apps. These functions allow you to quickly revert to a previous state or redo an action, giving you the flexibility to correct mistakes or explore different options during the writing process.
In some cases, for minor errors or small handwriting adjustments, simply using the Apple Pencil to overwrite the mistake with the correct stroke can be sufficient. This method allows you to seamlessly incorporate corrections without disrupting the flow of your writing.
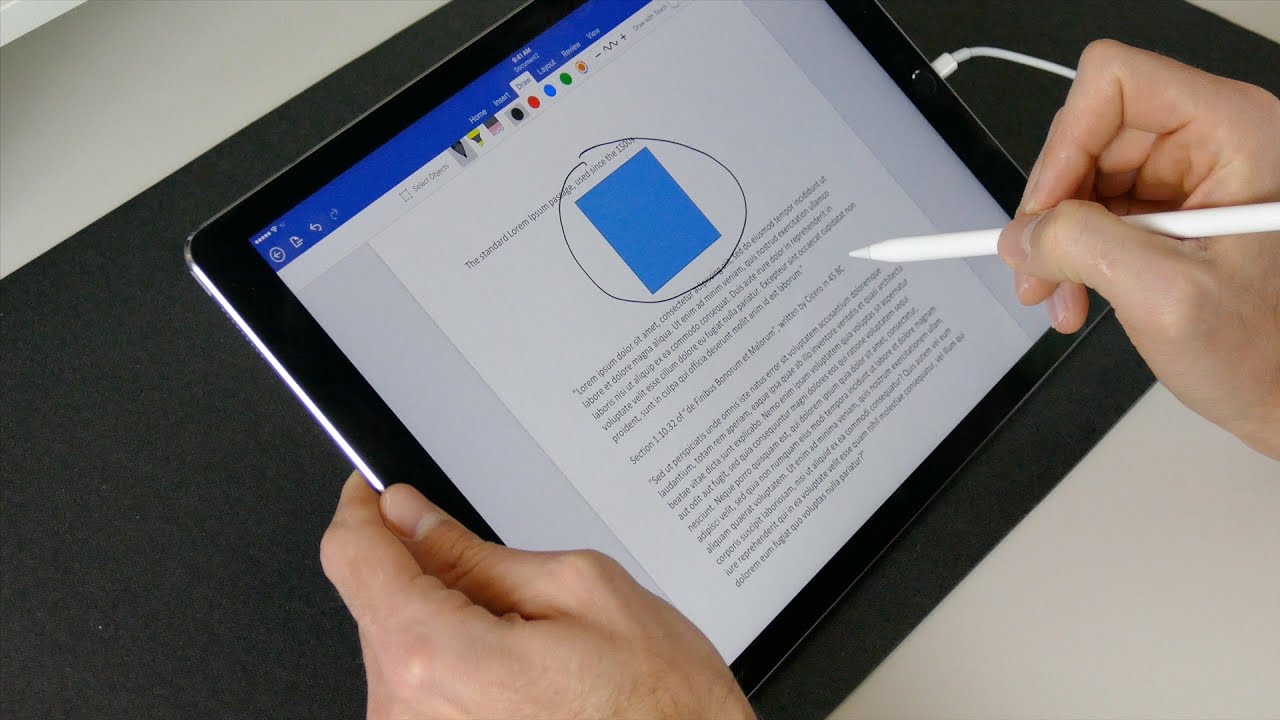
Another helpful tool is the lasso selection feature, available in some apps. This feature enables you to select and move or delete specific parts of your handwriting. It can be especially useful when editing or rearranging content within your notes.
To avoid the need for frequent corrections and erasures, consider utilizing the editing tools available in your chosen app. These tools allow you to cut, copy, and paste sections of your writing, enabling you to make changes or rearrange content with greater efficiency and accuracy.
Practice good editing habits, such as proofreading your work before finalizing it. Taking a moment to review your writing can help catch any minor errors or inconsistencies before they become more difficult to correct.
Remember to save your work periodically to prevent the loss of any important changes or alterations you’ve made. Auto-save features are usually available in note-taking apps, but it’s always a good idea to manually save your work after significant edits or before exiting the app.
By utilizing the various correction tools and features available, you can quickly and easily fix mistakes and make adjustments to your digital handwriting. Embrace these tools as valuable assets that help you maintain neat and precise writing.
Organizing and saving your handwritten notes
Keeping your handwritten notes organized and easily accessible is essential for efficient digital note-taking with the Apple Pencil. Fortunately, there are several methods and features available to help you organize and save your digital handwritten notes.
Many note-taking apps provide the ability to create multiple notebooks or folders to categorize your notes. Utilize this feature to create separate sections for different subjects, projects, or topics, making it easier to locate specific notes when needed. Consider using clear and descriptive titles for your notebooks or folders to further streamline the organization process.
Within each notebook or folder, you can create individual pages or sections for different topics or subtopics. This hierarchical structure allows for a more organized and intuitive note-taking experience. Grouping related notes together helps you quickly find and reference information when needed.
In addition to notebooks and folders, note-taking apps often provide the option to add tags or labels to your notes. This allows you to assign specific keywords or categories to each note, making it easier to search for and retrieve them later. Take advantage of this feature to create a comprehensive tagging system that suits your organizational needs.
Most apps have a search function that enables you to quickly find specific handwritten notes based on keywords, phrases, or tags. This powerful feature saves time and effort when you need to locate specific information within your digital handwritten notes.
Cloud syncing is an invaluable feature that ensures your notes are accessible across multiple devices. By syncing your notes to cloud storage, such as iCloud or Google Drive, you can seamlessly access and edit your handwritten notes from your iPad, iPhone, or computer. This not only provides convenience but also acts as a backup solution, protecting your notes from loss or accidental deletion.
To further protect your valuable notes, consider setting up automatic backups within your note-taking app. Regularly backing up your handwritten notes to a location of your choice provides an extra layer of security and peace of mind.
Some note-taking apps even offer the option to export your handwritten notes as PDF or image files. This allows you to share your notes with others or import them into other applications as needed. Exporting your notes in a portable format ensures that your handwritten content remains accessible even beyond the confines of the note-taking app.
Remember to periodically declutter and organize your notes by archiving or deleting those that are no longer needed. This helps maintain a clean and manageable note-taking environment, making it easier to locate and work with your most relevant and up-to-date handwritten notes.
By utilizing the organizational features and saving options available in your chosen note-taking app, you can ensure that your handwritten notes remain well-organized, easily retrievable, and protected for future reference and use.
Tips for improving handwriting on iPad
Writing neatly on an iPad with the Apple Pencil is a skill that can be developed and refined with practice. If you’re looking to enhance your digital handwriting, consider implementing these tips to improve the quality and legibility of your writing.
1. Practice regularly: Consistent practice is key to improving your handwriting on the iPad. Dedicate time each day to write or doodle, focusing on maintaining control and forming each letter with precision.
2. Use a comfortable grip: Find a grip that feels natural and comfortable for you. Avoid gripping the Apple Pencil too tightly, as this can restrict your movement and result in less controlled strokes.
3. Experiment with different apps and settings: Explore different note-taking apps and adjust the settings to find the ones that best suit your writing style. Experiment with line thickness, pen styles, and other customization options to find the combination that enhances your handwriting.
4. Write slowly and deliberately: Take your time when writing on the iPad. Writing slowly allows you to focus on maintaining control and forming each letter accurately. Rushing can lead to messy or illegible handwriting.
5. Pay attention to letter formation: Focus on forming each letter clearly and consistently. Pay attention to the shape, size, and slant of each letter to ensure uniformity throughout your writing.
6. Practice proper spacing: Leave equal spacing between words and lines to improve the readability of your handwriting. Consistent spacing helps avoid overcrowding and makes your writing appear more organized.
7. Utilize grid or lined paper templates: Some note-taking apps provide the option to use grid or lined paper templates. These templates can help guide your writing and maintain consistent alignment and proportions.
8. Maintain a light touch: Apply just enough pressure with the Apple Pencil to register your strokes. Avoid pressing too hard, as this can result in thicker and less controlled lines. A light touch allows for smoother and more precise writing.
9. Study and learn from examples: Take the time to analyze and study samples of handwriting that you admire. Pay attention to letter forms, spacing, and overall style. Incorporate elements that you like into your own handwriting and adapt them to suit your unique style.
10. Embrace digital editing features: Take advantage of the editing features in your note-taking app. Use the eraser tool or undo feature to correct mistakes and make adjustments easily. Digital editing can save you time and allow for a cleaner final result.
11. Review and refine: Regularly review your handwriting and look for areas of improvement. Seek feedback from others and be open to making changes. Continuous refinement is key to developing and enhancing your digital handwriting skills.
By implementing these tips, you can steadily improve your digital handwriting on the iPad. Remember that everyone’s handwriting style is unique, so embrace your individuality and focus on progress rather than perfection. With practice and patience, you’ll enhance your ability to write neatly and legibly on your iPad with the Apple Pencil.
Conclusion
Writing neatly on an iPad with the Apple Pencil offers a dynamic and convenient way to digitize your handwritten notes. By following the tips and techniques outlined in this article, you can enhance your digital handwriting skills and achieve neater, more precise writing that closely replicates the experience of pen and paper.
Getting started with the Apple Pencil and selecting the right app are key steps in the process. Adjusting the writing settings on your iPad allows for customization and optimization of your handwriting experience. Holding the Apple Pencil with the proper grip and practicing handwriting techniques help improve control and consistency.
Using different stroke styles and sizes adds variety and creativity to your writing, while making corrections and erasing mistakes ensures the cleanliness of your notes. Organizing and saving your handwritten notes promotes efficient retrieval and keeps your work well-structured.
To improve your handwriting, commit to regular practice and be open to experimenting with various techniques. Embrace the editing features available in note-taking apps and strive for continuous refinement of your style.
Remember, handwriting on the iPad with the Apple Pencil is a journey of improvement and personalization. Each person has a unique style, and the goal is to find what works best for you. With patience, dedication, and a willingness to adapt, your digital handwriting skills will continue to evolve and flourish.