Introduction
A Roku remote is a key component of the Roku streaming device, allowing users to control various functions and navigate through channels and content. However, there may be instances where your Roku remote becomes unresponsive or fails to connect to your Roku device. In such cases, it is necessary to sync your Roku remote to ensure seamless functionality.
Synchronization, or pairing, is the process of establishing a wireless connection between your Roku remote and your Roku device. This enables you to control your Roku device effortlessly and enjoy your favorite shows, movies, and apps without any interruptions.
Whether you are experiencing technical issues with your current Roku remote or have purchased a new one, syncing the remote is a straightforward process that can typically be completed within a few minutes. In this article, we will guide you through the necessary steps to sync your Roku remote successfully.
Before we delve into the steps, let’s first understand why you might need to sync your Roku remote.
Why do you need to sync your Roku remote?
Syncing your Roku remote is essential for several reasons:
- Initial setup: When you first set up your Roku device, you need to sync the remote to establish a connection. This allows you to control the Roku device and navigate through the user interface.
- Re-pairing after battery replacement: If you have recently replaced the batteries in your Roku remote, you may need to sync it again with your Roku device. This ensures that the remote can communicate effectively with the device and operate without any glitches.
- Resolving connectivity issues: If you’re experiencing connectivity issues with your Roku remote, such as delays in response or unresponsiveness, syncing the remote can often resolve these problems. By re-establishing the connection between the remote and the Roku device, you can ensure smooth operation and a seamless user experience.
- Using a new Roku remote: If you have purchased a new Roku remote, it needs to be synced with your Roku device before you can start using it. This ensures that the new remote is correctly paired and can control your Roku device effectively.
- Replacing a lost or damaged remote: In the unfortunate event that you’ve lost or damaged your Roku remote beyond repair, syncing a new remote becomes necessary. By syncing the new remote with your Roku device, you can resume enjoying your favorite shows and apps.
Overall, syncing your Roku remote is crucial for establishing a seamless and efficient connection between the remote and the Roku device. It ensures smooth navigation, responsive controls, and an enjoyable streaming experience.
Steps to sync your Roku remote
Syncing your Roku remote with your Roku device is a fairly simple process. Follow these steps to ensure a successful synchronization:
- Step 1: Start by ensuring that both your Roku device and your Roku remote have power. Make sure the batteries in the remote are fresh and properly inserted.
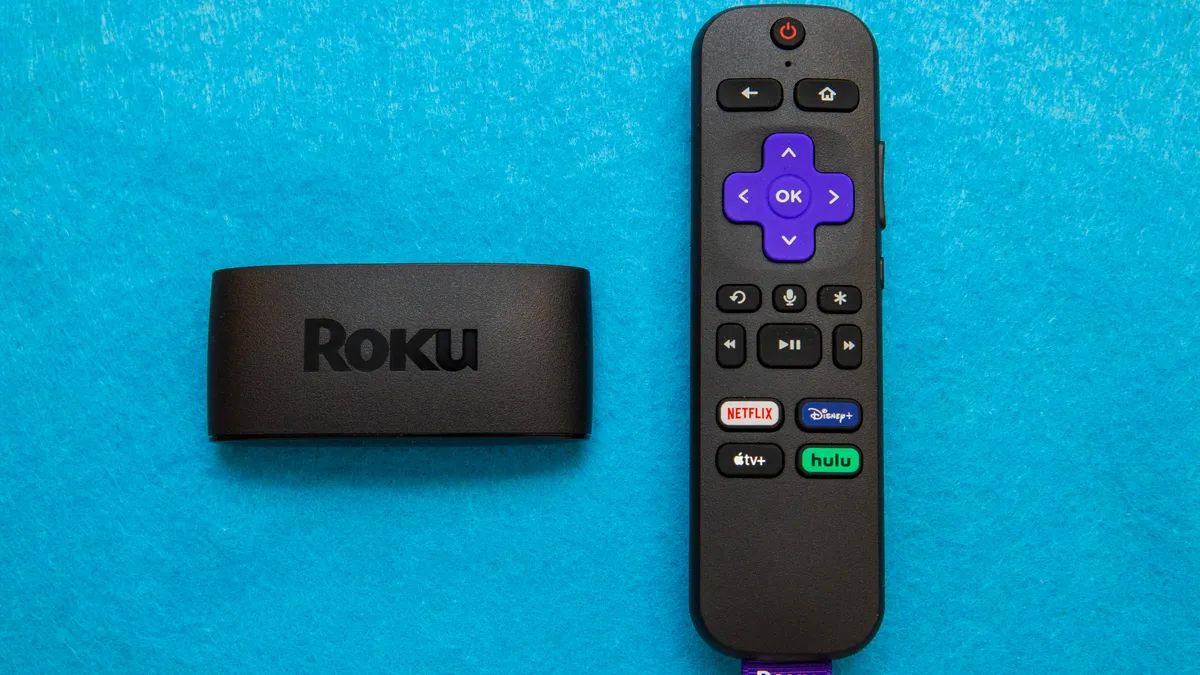
- Step 2: Locate the pairing button on your Roku device. The location of this button may vary depending on the model of your Roku device. It is typically a small button located either on the back or the side of the device.
- Step 3: Press and hold the pairing button on your Roku device for a few seconds until the pairing light starts blinking. This indicates that the device is in pairing mode and ready to establish a connection with the remote.
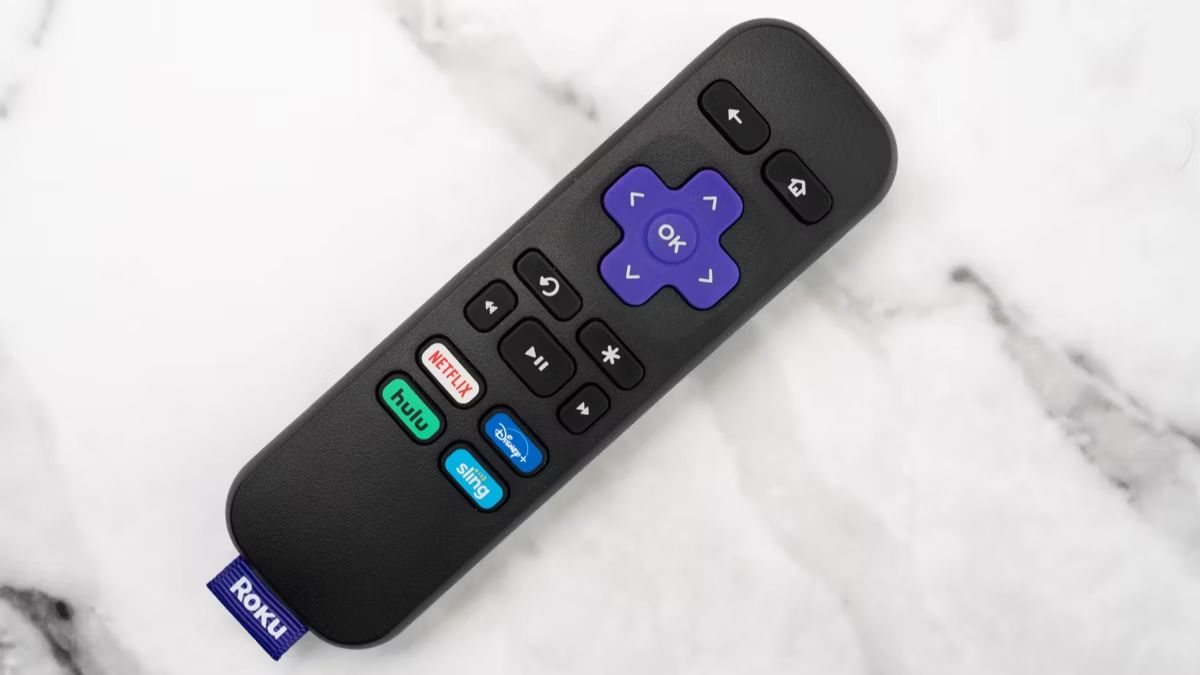
- Step 4: Now, grab your Roku remote and remove the battery cover. You should see a small button or reset hole labeled “Pairing” or “Reset”.
- Step 5: Press and hold the pairing button on the remote for a few seconds. The pairing light on the remote should start blinking, indicating that it is also in pairing mode.
- Step 6: Wait for the Roku device and remote to establish a connection. Once the remote is successfully paired, the pairing light on both the device and the remote should stop blinking and remain solid.
- Step 7: Test the remote by pressing a few buttons to ensure that it is functioning properly. If the Roku device responds to your commands, it means that the remote is successfully synced.
That’s it! Your Roku remote is now synced with your Roku device, and you can start enjoying your favorite entertainment.
If for some reason the syncing process does not work, don’t worry. There are a few troubleshooting steps you can try before considering additional options, such as resetting or replacing your Roku remote.
Option 1: Re-pairing your Roku remote with your Roku device
If you are experiencing connectivity issues with your Roku remote, re-pairing it with your Roku device can often resolve the problem. This process involves establishing a new connection between the remote and the device. Follow these steps to re-pair your Roku remote:
- Step 1: Start by removing the batteries from your Roku remote.
- Step 2: Unplug your Roku device from the power source and wait for about 10 seconds before plugging it back in. This step helps to reset the device.
- Step 3: Once your Roku device is powered on and connected to the TV, insert the batteries back into the Roku remote.
- Step 4: Allow the remote and the Roku device to establish a connection. The remote should automatically pair with the device.
- Step 5: Test the remote by pressing various buttons to ensure that it is functioning properly and controlling your Roku device.
If the re-pairing process is successful, your Roku remote should be working as expected. If not, you can consider trying the other options mentioned in this article to resolve the issue.
Re-pairing your Roku remote is often the go-to solution for minor connectivity issues. It allows you to re-establish a strong and reliable connection between the remote and the Roku device, ensuring smooth navigation and responsiveness.
Option 2: Resetting your Roku remote
If re-pairing your Roku remote did not resolve the connectivity issues, you can try resetting the remote. Resetting the remote can help clear any temporary glitches or settings that could be causing the problem. Here’s how you can reset your Roku remote:
- Step 1: Remove the batteries from your Roku remote.
- Step 2: Locate the reset button on your remote. The location of the reset button might vary depending on the model of your Roku remote. It is usually a small button located either near the battery compartment or on the back of the remote.
- Step 3: Using a paperclip or a similar object, press and hold the reset button for about 10 seconds.
- Step 4: Release the reset button and reinsert the batteries into the Roku remote.
- Step 5: Allow the remote to power on and establish a connection with your Roku device.
- Step 6: Test the reset remote by pressing various buttons to ensure it is working correctly and controlling your Roku device.
If the reset process is successful, your Roku remote should be functioning properly again. However, keep in mind that resetting the remote will also erase any personalized settings or programmed buttons. You may need to reconfigure these settings after the reset.
Resetting your Roku remote is a useful step to try if re-pairing your remote did not solve the connectivity issues. It helps to reset the remote to its default state, allowing for a fresh start and potential resolution of any underlying problems with the device.
Option 3: Replacing your Roku remote
If re-pairing or resetting your Roku remote did not solve the connectivity issues, it may be time to consider replacing the remote. While this option requires an additional investment, it can be worth it if your current remote is damaged or beyond repair. Here’s what you need to do to replace your Roku remote:
- Step 1: Identify the model of your Roku device. This information is usually available on the bottom or the back of the device.
- Step 2: Visit the official Roku website or authorized retailers to find a compatible replacement remote for your specific Roku device model.
- Step 3: Purchase the replacement remote from a trusted source. Ensure that the remote is genuine and compatible with your specific Roku device model.
- Step 4: Once you have the replacement remote, follow the manufacturer’s instructions for pairing the new remote with your Roku device. The pairing process may vary depending on the model of your Roku device and the remote.
- Step 5: After successfully pairing the new remote, test it by pressing various buttons to ensure that it is controlling your Roku device effectively.
Replacing your Roku remote can be a simple and effective solution if your current remote is malfunctioning, lost, or damaged. It provides you with a fresh remote that is specifically designed for your Roku device, ensuring optimal functionality and seamless navigation.
Remember to dispose of your old remote properly, following local recycling guidelines for electronic devices. This way, you can contribute to environmental sustainability while enjoying your new Roku remote.
Tips for a successful sync
Here are some helpful tips to ensure a successful sync between your Roku remote and your Roku device:
- Check the battery: Ensure that the batteries in your Roku remote are fully charged and properly inserted. Weak or improperly inserted batteries can cause connectivity issues.
- Clear obstructions: Make sure there are no physical obstructions between your Roku remote and your Roku device. Objects like furniture, walls, or other devices can interfere with the remote’s signal.
- Restart your Roku device: Sometimes, a simple restart of your Roku device can resolve any temporary issues. Unplug your Roku device from the power source, wait for a few seconds, and then plug it back in.
- Ensure a direct line of sight: Position your Roku device and remote to have a clear line of sight. Minimize any obstacles that may block the communication between the remote and the device.
- Use genuine Roku products: When replacing your Roku remote, make sure to use genuine Roku products. Knock-off or third-party remotes may not sync properly with your Roku device.
- Follow the instructions: Read and follow the manufacturer’s instructions carefully when syncing your Roku remote. Each model might have specific steps or requirements that you need to follow for a successful sync.
- Update your Roku software: Ensure that your Roku device is running the latest software version. Regular software updates can improve compatibility and fix any bugs that may affect the remote’s functionality.
- Contact Roku support: If you have tried all the troubleshooting steps but still cannot sync your Roku remote, don’t hesitate to reach out to Roku support for further assistance. They can provide specific guidance tailored to your situation.
By following these tips, you can increase the chances of a successful sync between your Roku remote and your Roku device. Enjoy uninterrupted control and navigation as you explore the wide range of entertainment options available on your Roku device.
Conclusion
Syncing your Roku remote with your Roku device is a necessary step to ensure smooth and uninterrupted control over your streaming experience. Whether you’re setting up your Roku device for the first time, troubleshooting connectivity issues, or replacing a lost or damaged remote, syncing is essential to establish a seamless connection.
In this article, we discussed three options for syncing your Roku remote. Re-pairing the remote with your Roku device can often resolve minor connectivity issues. If that doesn’t work, resetting the remote can help clear any temporary glitches. And if all else fails, replacing the remote with a compatible one ensures optimal functionality.
Remember to follow the recommended steps and tips for a successful sync. Checking the battery, removing obstructions, restarting the device, and using genuine Roku products are some key factors to consider. Following manufacturer instructions and keeping your Roku software updated are also crucial.
If you encounter difficulties during the sync process, don’t hesitate to seek assistance from Roku support. They can provide expert guidance tailored to your specific situation.
By syncing your Roku remote correctly, you can enjoy a seamless streaming experience, effortless navigation, and easy access to your favorite shows, movies, and apps. Take the time to sync your Roku remote properly, and get ready to immerse yourself in endless entertainment possibilities.