Introduction
Welcome to the world of Samsung tablets! Whether you’re a first-time user or upgrading to a newer model, setting up your Samsung tablet can be an exciting process. From selecting the language and region to personalizing your home screen, this article will guide you through the essential steps to get your Samsung tablet up and running smoothly. So, grab your tablet and let’s dive in!
Setting up your Samsung tablet is a straightforward process that typically involves a series of prompts and configurations tailored to your preferences. By following these steps, you can ensure that your tablet is customized to your liking and ready to take on any task or entertainment you throw its way. Along the way, we’ll also explore optional features, such as biometric security, transferring data from another device, and setting up additional accounts, allowing you to make the most of your Samsung tablet experience.
It’s important to note that the steps provided in this guide are applicable to most Samsung tablet models, including the popular Samsung Galaxy Tab series. However, there may be slight variations depending on your specific tablet model and software version. If you encounter any specific differences, refer to your tablet’s user manual or the Samsung support website for more detailed instructions.
Without further ado, let’s embark on this setup journey and unlock the full potential of your Samsung tablet. From initial language settings to personalized home screens, we’ll cover all the necessary steps to make your Samsung tablet feel like an extension of yourself. Let’s get started!
Step 1: Powering on the Samsung Tablet
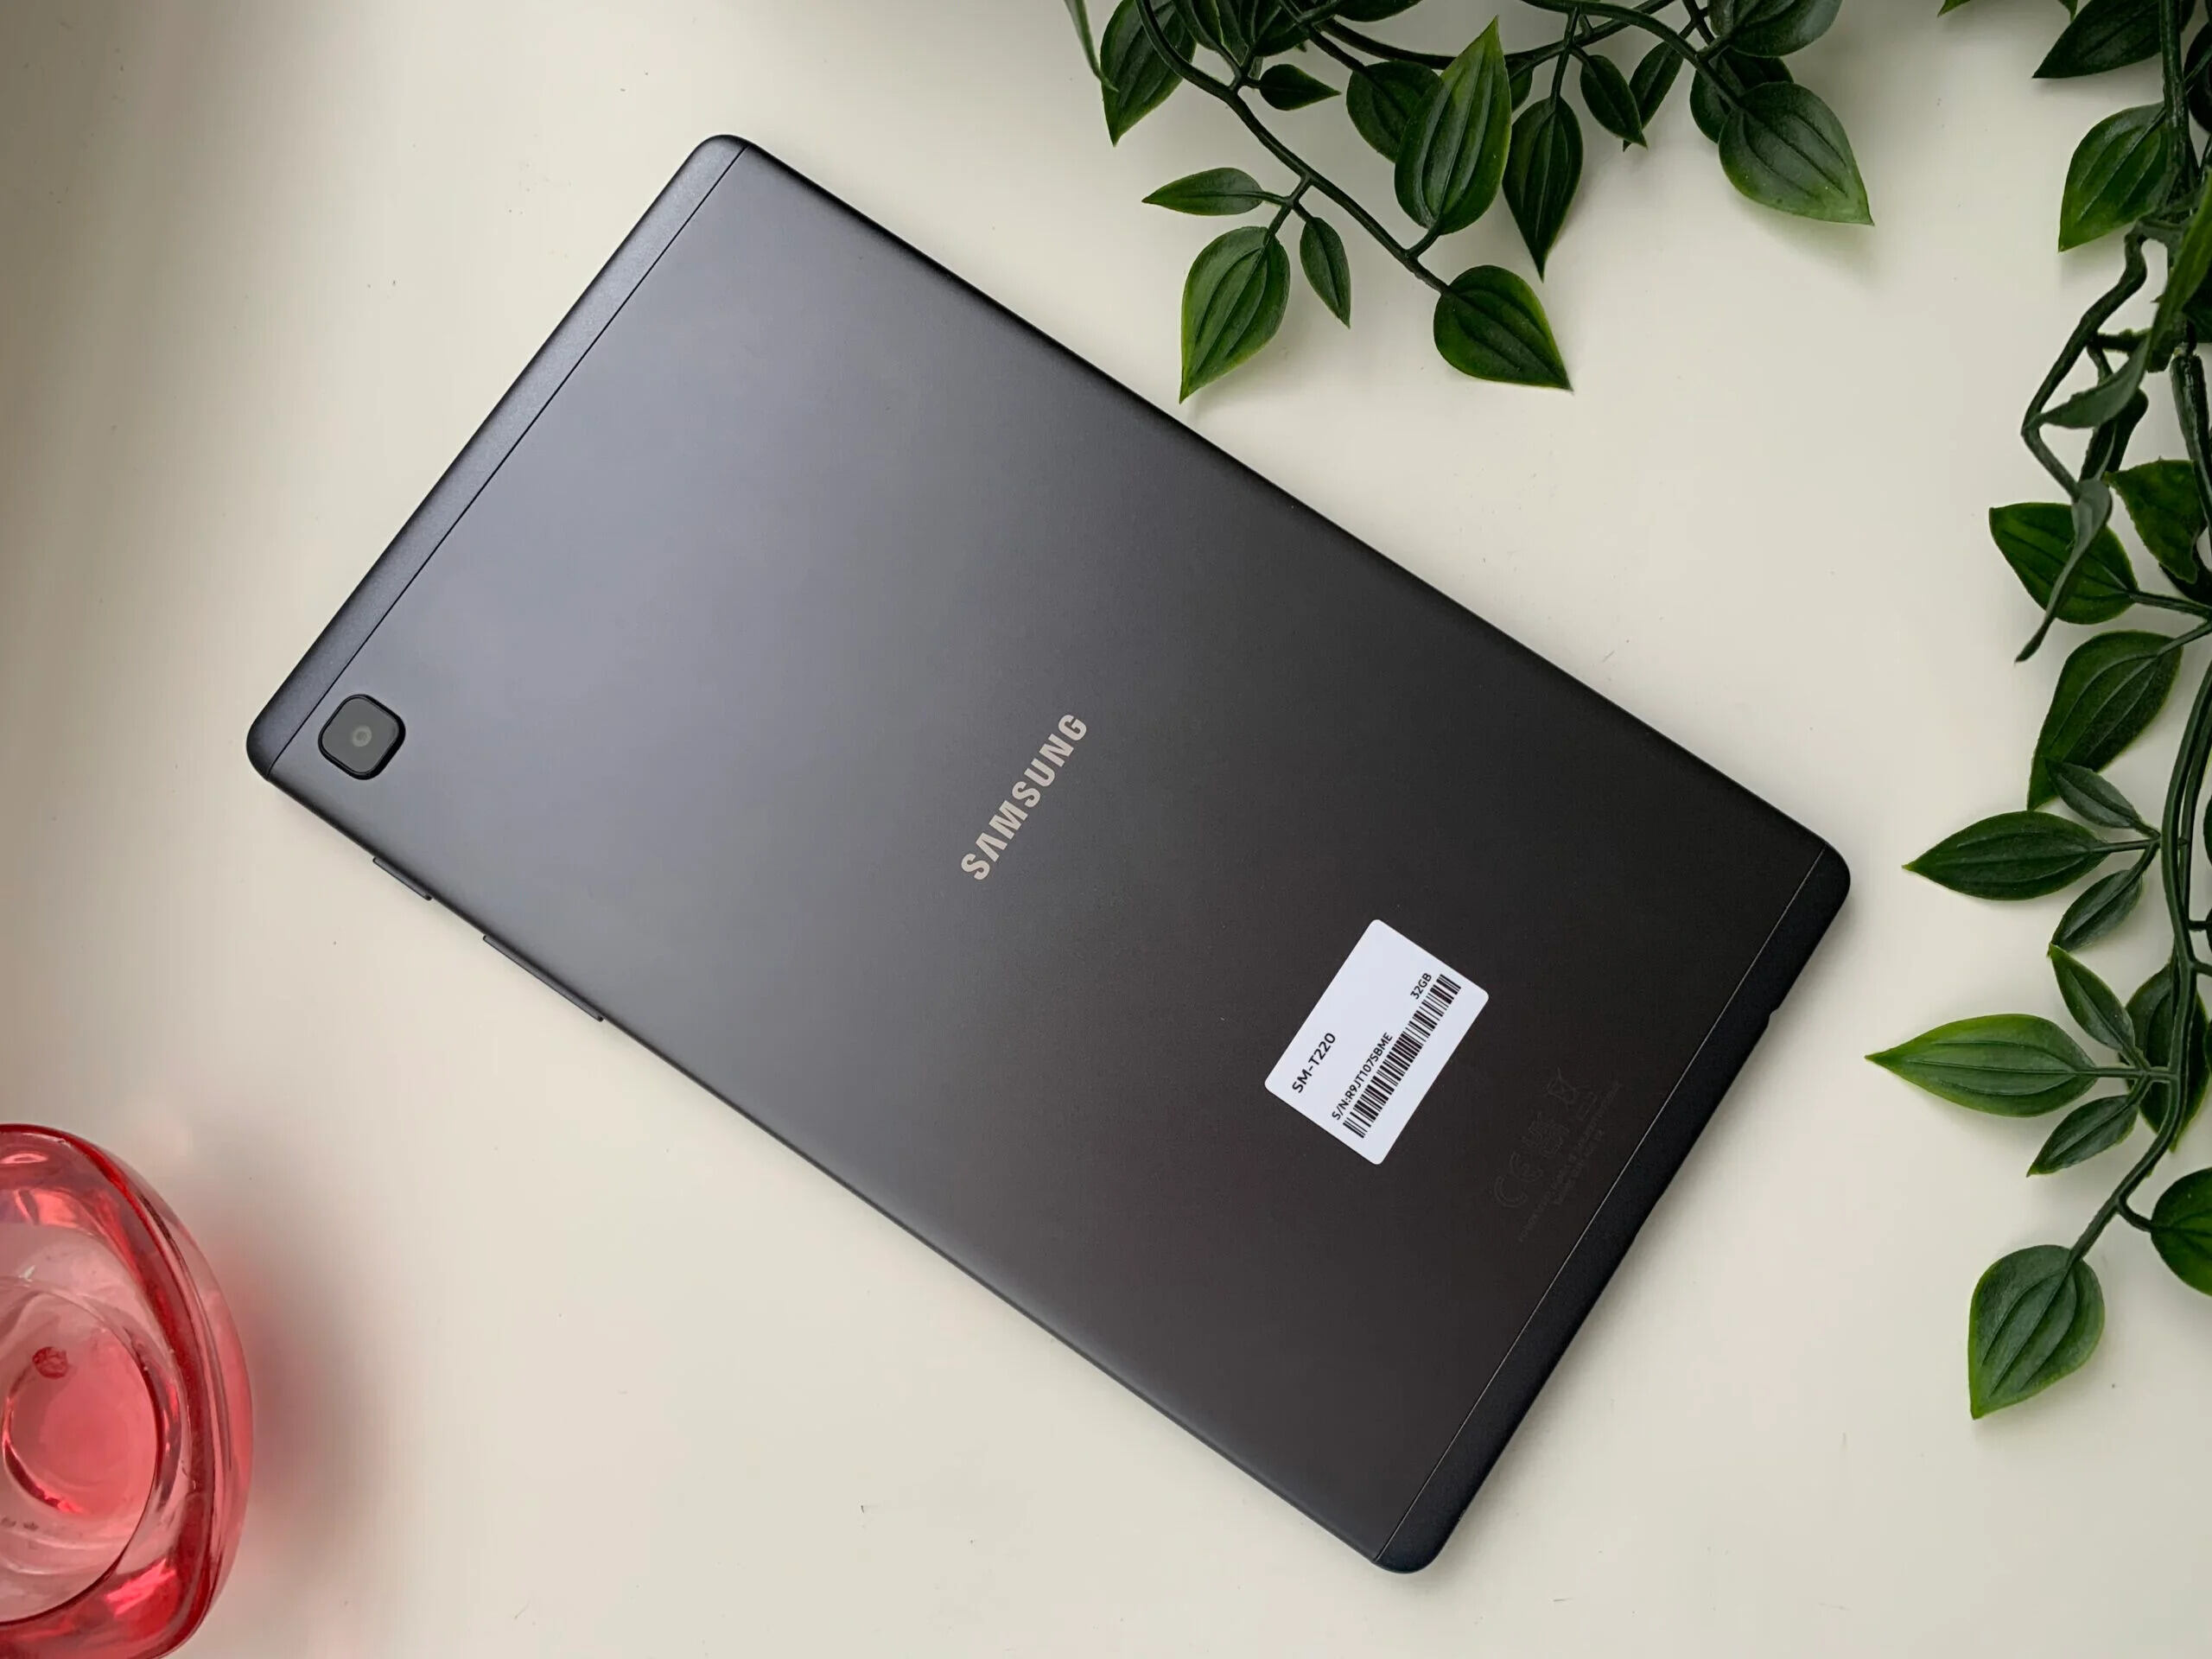
The first step in setting up your Samsung tablet is to power it on. Locate the power button on your tablet, which is typically found on the side of the device or at the top. Press and hold the power button until the screen lights up and the Samsung logo appears. Once the device boots up, you’ll be greeted with the initial setup screen.
On some newer Samsung tablet models, you may need to press and hold the power button and the volume up or down button simultaneously to power on the device. Refer to your tablet’s user manual for specific instructions if needed.
After powering on your tablet, you’ll be prompted to select your language preference. Samsung tablets support a wide range of languages, so choose the language that you’re most comfortable with. Simply tap on the desired language and proceed to the next step.
Next, you’ll be asked to choose your region. This setting determines certain device functionalities, such as date and time formats, currency symbols, and regional-specific apps. Scroll through the list of available regions and tap on your desired location. If you don’t find your exact region listed, select the one that is closest to your location.
Once you’ve selected the language and region, you’re ready to move on to the next step: connecting your Samsung tablet to Wi-Fi. This is an essential step as it allows your tablet to access the internet and download necessary updates and apps.
So far, so good! Your Samsung tablet is now powered on, and you’ve selected your preferred language and region. In the next step, we’ll explore how to connect to a Wi-Fi network and continue the setup process.
Step 2: Language and Region Settings
After powering on your Samsung tablet, the next step in the setup process is to configure the language and region settings. This allows you to set your preferred language for the tablet’s user interface and customize region-specific settings.
To begin, you’ll be prompted to select your preferred language. Samsung tablets offer a wide range of language options, so choose the one that best suits your needs. Simply tap on the desired language from the list, and the tablet will adjust accordingly.
Once you’ve set the language, you’ll move on to selecting your region. This step helps the tablet determine region-specific settings, including date and time formats, currency symbols, and potentially region-specific apps.
To choose your region, scroll through the list of available options and select the one that corresponds to your current location or the region you prefer. If you don’t see your exact region listed, choose the closest match.
It’s important to note that selecting the correct region is crucial as it may impact certain functionalities and app availability. For example, if you choose the United States as your region, you may have access to region-specific apps and services that are not available in other regions.
Once you’ve set your preferred language and region, you can proceed to the next step in the setup process. Now that we’ve customized the language and region settings, it’s time to connect your Samsung tablet to a Wi-Fi network so that you can access the internet and download any necessary updates and apps.
By following these simple language and region settings, you can personalize your Samsung tablet to better suit your needs and preferences. In the next step, we’ll walk you through the process of connecting your tablet to Wi-Fi for seamless online connectivity.
Step 3: Connecting to Wi-Fi
Now that you have configured the language and region settings on your Samsung tablet, it’s time to connect it to a Wi-Fi network. By connecting to Wi-Fi, you can access the internet, download updates, and explore a wide range of online content.
To connect to Wi-Fi, navigate to the settings menu on your Samsung tablet. You can usually find the settings icon represented by a gear or cogwheel-shaped icon on your home screen or within the app drawer.
Once you’re in the settings menu, look for the “Wi-Fi” option and tap on it. This will display a list of available Wi-Fi networks within range of your tablet. If Wi-Fi is already enabled, the tablet will automatically scan for networks.
Locate your desired Wi-Fi network from the list and tap on it. If the network is secured with a password, you will be prompted to enter it. Use the on-screen keyboard to enter the password and ensure that it is entered correctly.
After entering the password, tap on the “Connect” button, and your tablet will attempt to establish a connection to the Wi-Fi network. Once connected, you will see a “Connected” status next to the Wi-Fi network name.
It’s important to ensure that you connect to a secure and trusted Wi-Fi network to safeguard your device and data. Avoid connecting to public or unsecured networks whenever possible, as they can pose security risks.
If you are unable to find any available Wi-Fi networks or experiencing connectivity issues, ensure that your Wi-Fi router is turned on and working correctly. Additionally, check that you are within the range of the Wi-Fi network and that the network name and password are entered correctly.
Now that you have successfully connected your Samsung tablet to a Wi-Fi network, you can enjoy uninterrupted internet access and proceed with the next steps of setting up your tablet. In the next step, we’ll guide you through the process of signing in with your Google account, which is essential for downloading apps and accessing Google services.
Step 4: Signing in with a Google Account
Signing in with a Google Account is an important step in setting up your Samsung tablet as it allows you to access a wide range of Google services, download apps from the Play Store, and sync your data across multiple devices. If you already have a Google Account, you can sign in using your existing credentials. If not, you can create a new account directly from your tablet.
To begin, navigate to the Settings menu on your Samsung tablet. Look for the “Accounts” option and tap on it. Then, select the “Add Account” or “Google” option, depending on your tablet’s software version.
A list of account types will appear. Choose “Google” from the list, and you will be prompted to enter your email address associated with your Google Account. If you don’t have a Google Account, tap on the “Create Account” option to set up a new account.
Enter your email address and tap “Next.” If your email address is already associated with a Google Account, you will be asked to enter the password for that account. If not, you will be directed to the account creation process, where you will set up a new Google Account by entering the required information.
Once you’ve entered the correct email address and password or completed the account creation process, your Samsung tablet will attempt to sign in to your Google Account. It may take a few moments to set up and sync your account data.
During the sign-in process, you may be prompted to review and accept Google’s terms of service and privacy policy. It’s important to read and understand these terms before proceeding.
After signing in with your Google Account, you will have access to various Google services, including Gmail, Google Drive, and the Play Store. You can now download your favorite apps, sync your contacts and calendar, and enjoy a seamless experience across multiple devices.
If you have multiple Google Accounts, you can add them to your Samsung tablet by repeating the steps mentioned earlier. This allows you to switch between accounts and manage them independently on your tablet.
Now that you’ve signed in with your Google Account, you’re one step closer to unlocking the full potential of your Samsung tablet. In the next step, we’ll explore the option of setting up biometric security to enhance the privacy and security of your device.
Step 5: Setting up Biometric Security (optional)
To ensure the privacy and security of your Samsung tablet, you have the option to set up biometric security. Biometric security features, such as fingerprint recognition or facial recognition, provide an added layer of protection and convenience when accessing your device.
Setting up biometric security is a simple process. Start by navigating to the Settings menu on your Samsung tablet and look for the “Biometrics and Security” or “Lock Screen and Security” option. Tap on it to access the security settings.
Within the security settings, you will find options for various biometric security features, such as fingerprint recognition or facial recognition. The availability of these features may vary depending on your tablet model and software version.
For fingerprint recognition, tap on the “Fingerprint” option and follow the on-screen instructions to register your fingerprint. You will be prompted to place your registered finger on the fingerprint sensor on your tablet multiple times to ensure accuracy.
If your tablet supports facial recognition, tap on the “Face Recognition” or “Face Unlock” option. Follow the instructions to capture your face from different angles to facilitate accurate recognition.
During the setup process, you may also be prompted to set up an alternative method of unlocking your device, such as a PIN or pattern. This serves as a backup option in case the biometric recognition fails or is unavailable.
Once you’ve completed the biometric security setup, you can now use your registered fingerprint, facial features, or both to unlock your Samsung tablet and authorize various actions, such as app installations or purchases.
It’s important to note that biometric security features provide convenience and quick access to your device but may have limitations. For example, facial recognition may not work well in low-light situations, and fingerprint recognition may require clean and dry fingers for optimal performance.
If you change your fingerprint or appearance, such as growing a beard or wearing glasses, you may need to update your biometric information to ensure accurate recognition.
By setting up biometric security on your Samsung tablet, you can enjoy the peace of mind that comes with knowing your device is protected and easily accessible to you alone. In the next step, we’ll explore how to personalize your home screen to make your tablet feel truly yours.
Step 6: Personalizing the Home Screen
One of the advantages of owning a Samsung tablet is the ability to personalize the home screen according to your preferences. Customizing the home screen not only adds a personal touch but also allows for easier navigation and quick access to your favorite apps and widgets.
To begin personalizing your home screen, start by pressing the home button or swiping up from the bottom of the screen. This will take you to the default home screen layout.
On the home screen, you can add, remove, or rearrange app icons, widgets, and wallpapers to create your desired layout. To add an app icon, tap and hold on an empty area of the home screen, then select “Add apps” or “Widgets” from the options that appear.
From the app or widget list, select the items you want to add to the home screen, then drag and drop them to the desired location. You can also drag and drop app icons and widgets on top of each other to create folders, allowing you to organize your apps into categories.
To remove an app icon or widget from the home screen, tap and hold on the item you want to remove, then drag it to the “Remove” or “Delete” option that appears at the top or bottom of the screen.
For further customization, you can change the wallpaper of your home screen. Tap and hold on an empty area of the home screen, then select “Wallpapers” from the options. Choose from the available wallpapers or select “Gallery” to use your own photos.
Additionally, you can customize the layout and appearance of your home screen by accessing the “Home screen settings” from the Settings menu. Here, you can adjust the grid size, enable or disable the app drawer, and customize various other home screen settings.
Remember, personalizing your home screen is a matter of preference, so feel free to experiment and create a layout that suits your needs and style. Whether it’s organizing your apps, adding widgets, or selecting a unique wallpaper, the possibilities are endless.
By personalizing your home screen, you can make your Samsung tablet feel truly yours and enhance your overall user experience. In the next step, we’ll explore how to install and update apps to expand the functionality of your tablet.
Step 7: Installing and Updating Apps
Installing and updating apps on your Samsung tablet allows you to access a wide range of features, services, and entertainment. The Google Play Store is the primary platform for downloading and installing apps on Android devices, including Samsung tablets.
To install apps, open the Google Play Store app on your Samsung tablet. You can find it in the app drawer or on the home screen. Once the Play Store is open, you can explore various categories, top charts, or search for specific apps using the search bar at the top.
When you find an app you want to install, tap on it to open its download page. Here, you can read the app description, check user reviews, and view screenshots to get a better understanding of the app’s features and quality.
If you decide to proceed with the installation, tap on the “Install” button. You may be required to grant certain permissions for the app to function properly. Read the permissions and tap on “Accept” to proceed with the installation.
Once the app is installed, you’ll find its icon on the home screen or in the app drawer, depending on your home screen settings. Tap on the app icon to launch and start using the installed app.
Updating your apps is equally important, as updates often include bug fixes, feature enhancements, and security patches. To update apps, open the Google Play Store app, tap on the menu icon (usually represented by three horizontal lines) in the top-left corner, and select “My Apps & Games” from the menu.
Under the “Installed” tab, you’ll find a list of apps that have updates available. Tap on the “Update” button next to each app to initiate the update process. You can also tap on the “Update All” button at the top to update all apps with available updates.
It’s advisable to keep your apps up to date to ensure optimal performance and security. You can also enable automatic app updates by going to the Google Play Store settings and selecting the “Auto-update apps” option.
Remember to download and update apps only from trusted sources, such as the Google Play Store, to avoid potential security risks.
By installing and updating apps on your Samsung tablet, you can expand its functionality and enjoy a wide range of useful and entertaining experiences. In the next step, we’ll explore how to transfer data from another device to your Samsung tablet, making the transition smoother and more convenient.
Step 8: Transferring Data from Another Device (optional)
If you’re switching from an old device to your new Samsung tablet, you may want to transfer your data, such as contacts, photos, videos, and apps, to ensure a seamless transition. Samsung offers various methods to transfer data from your old device to your new tablet, making the process effortless.
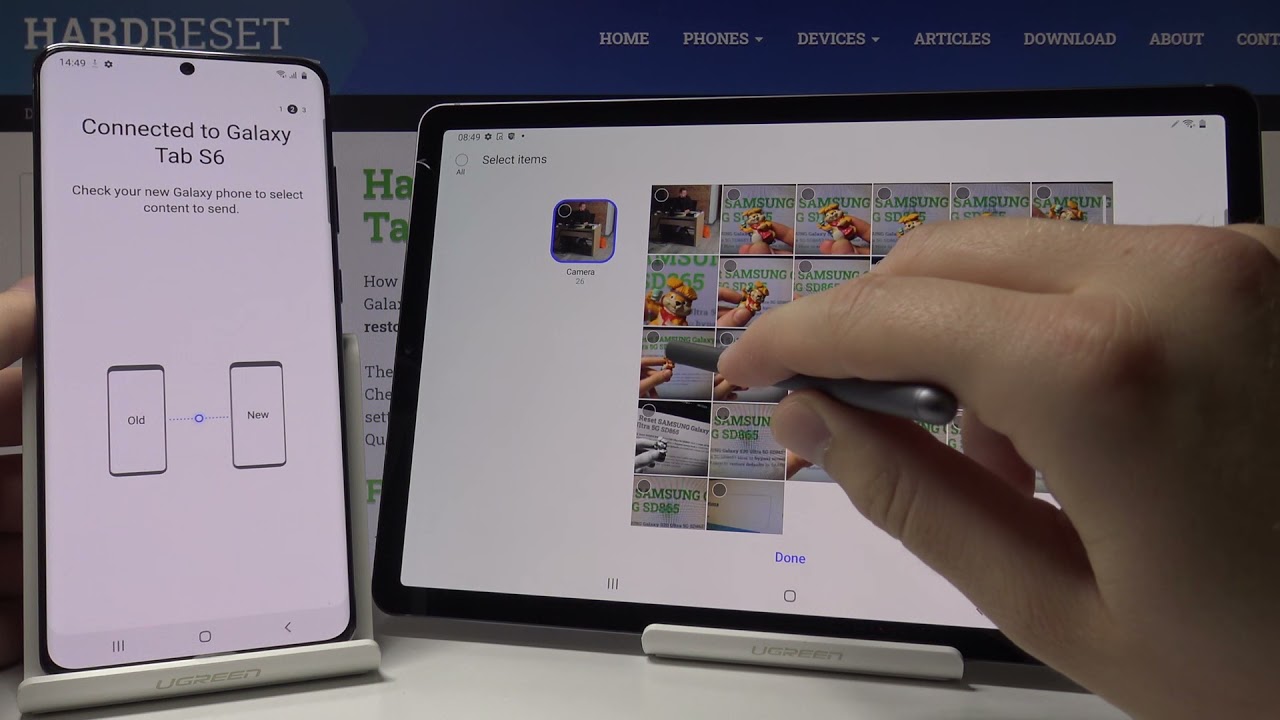
One of the easiest ways to transfer data is by using the Samsung Smart Switch app. This app allows you to transfer content from an old device, regardless of its operating system, to your Samsung tablet wirelessly or using a cable connection. Both devices need to have the Smart Switch app installed.
To start the transfer, download the Samsung Smart Switch app from the Google Play Store on your old device and open it. If your old device is an iPhone, you can download the app from the App Store. On your Samsung tablet, open the Smart Switch app as well.
Follow the on-screen instructions on both devices to establish a connection. You can use methods such as Wi-Fi direct, cable connection using USB OTG, or even a backup file from a cloud service.
Once the connection is established, you can select the specific data you want to transfer, such as contacts, messages, photos, videos, and even apps. Simply check the boxes next to the data categories and tap the “Transfer” or “Import” button.
The transfer process may take some time, depending on the amount of data being transferred. Once completed, you’ll find the transferred data on your Samsung tablet, ready to be accessed and used.
If you prefer a wired connection, you can also use a USB cable to connect your old device to the Samsung tablet. In this case, you’ll need an appropriate USB OTG (On-The-Go) adapter to connect the devices.
Another option is to manually transfer the data by backing up your old device to a computer or cloud service and then restoring the backup data on your Samsung tablet. This method may require additional steps and software, depending on the devices and services involved.
Remember to ensure that both devices are fully charged or connected to a power source during the data transfer process to avoid any interruptions.
Whether you prefer the convenience of the Smart Switch app or choose to manually transfer data, the ability to transfer your data from an old device to your new Samsung tablet ensures a smooth transition and allows you to continue where you left off. In the next step, we’ll explore how to set up additional accounts on your tablet, providing you with access to various services and features.
Step 9: Setting Up Additional Accounts (optional)
In addition to your Google Account, you have the option to set up additional accounts on your Samsung tablet. This allows you to access various services and features associated with those accounts, such as email, social media, cloud storage, and more.
To set up additional accounts, navigate to the Settings menu on your Samsung tablet. Look for the “Accounts” or “Users & accounts” option and tap on it. From here, you can manage and add new accounts.
Tap on the “Add Account” option, and you’ll be presented with a list of account types you can add, such as email, social media, and cloud storage providers. Choose the type of account you want to add and follow the on-screen prompts to sign in or create a new account.
If you’re adding an email account, such as Gmail or Microsoft Exchange, you’ll need to provide the necessary login credentials, including your email address and password. Once signed in, your email account will be synced, and you can access your emails directly from the pre-installed email app on your Samsung tablet.
For social media accounts, such as Facebook or Twitter, you’ll be prompted to enter your login credentials or sign up for a new account. Once connected, you can access and interact with your social media feeds, post updates, and stay connected with friends and followers.
Cloud storage accounts, such as Dropbox or Google Drive, allow you to easily access and manage your files and documents across multiple devices. Adding these accounts on your Samsung tablet enables seamless syncing and access to your cloud-stored data.
Remember to review the permissions and privacy settings associated with each added account to ensure that your data is protected and shared according to your preferences.
By setting up additional accounts on your Samsung tablet, you can enhance your productivity, stay connected, and have easy access to multiple services all in one place. In the next step, we’ll explore how to adjust the display settings of your tablet for optimal viewing comfort.
Step 10: Adjusting Display Settings
Adjusting the display settings on your Samsung tablet allows you to optimize the visual experience and customize it according to your preferences. Whether you want to enhance readability, conserve battery life, or modify color settings, the display settings offer a range of options to suit your needs.
To access the display settings on your Samsung tablet, navigate to the Settings menu. Look for the “Display” or “Screen” option and tap on it. Here, you’ll find various settings related to the display and screen appearance.
One of the primary display settings to consider is the brightness level. You can adjust the brightness manually by sliding the brightness slider or enable the “Auto” option for the tablet to automatically adjust the brightness based on ambient lighting conditions. Adjusting the brightness can help reduce eye strain and conserve battery life.
Another important setting to consider is the screen timeout. This determines how long your tablet’s screen stays on when inactive. You can choose a shorter duration to save battery or a longer duration for convenience. Adjusting this setting can help prolong battery life when your tablet is not in use.
For users who prefer to read for extended periods, the “Blue light filter” setting can be beneficial. Enabling this setting reduces blue light emitted by the screen, which can help reduce eye fatigue and promote better sleep quality, especially when using the tablet in the evening or before bed.
Depending on your tablet model and software version, you may also have options to adjust screen resolution, font size, and font style. These options allow you to fine-tune the display to your liking and improve the readability of your tablet.
Some Samsung tablets also offer display enhancement features, such as Adaptive Display or Vivid Mode, which enhance colors and contrast for a more vibrant viewing experience. You can enable or adjust these settings to suit your visual preferences.
Remember to explore the display settings and experiment with different configurations to find the combination that provides the best viewing experience for you. Every user has unique preferences, and adjusting the display settings allows you to personalize your Samsung tablet accordingly.
By adjusting the display settings, you can optimize the visual experience of your Samsung tablet, making it more comfortable and enjoyable for your eyes. In the next step, we’ll explore how to configure sound and notification settings to tailor the audio experience on your tablet.
Step 11: Configuring Sound and Notifications
Configuring sound and notification settings on your Samsung tablet allows you to personalize the audio experience and tailor it to your preferences. Whether you want to adjust volume levels, customize ringtones, or manage app notifications, these settings provide control over how your tablet sounds and alerts you.
To access the sound and notification settings, navigate to the Settings menu on your Samsung tablet. Look for the “Sound” or “Sound & vibration” option and tap on it. Here, you’ll find various settings related to audio and notifications.
One of the primary sound settings to consider is the volume level. You can adjust the volume for different types of audio, such as media playback, ringtones, and notification sounds, using separate sliders. Test and adjust the volume settings to ensure they are comfortable and meet your preferences.
If you enjoy personalizing ringtones and notification sounds, you can choose from a selection of pre-installed options or use your own audio files. Tap on the “Ringtone” or “Notification sound” option to browse and select the desired sound from the available options or your device storage.
For users who prefer a more discreet audio experience, the “Do not disturb” mode can be useful. This mode allows you to silence incoming calls, notifications, and alerts for a specific duration or indefinitely. You can customize “Do not disturb” settings to allow certain contacts or events to override the silent mode if needed.
Another notification-related setting to consider is app notifications. By going to the “Notifications” or “Apps” section within the settings, you can manage which apps can send you notifications and control the types of notifications they can send. This allows you to prioritize key apps and reduce unnecessary interruptions.
If you want your tablet to vibrate when receiving calls or notifications, you can enable the “Vibrate” option. Additionally, you can customize the vibration pattern or intensity based on your preferences.
Some Samsung tablets offer additional sound enhancement features, such as equalizer settings or Dolby Atmos support. These options allow you to fine-tune the audio output and optimize it for different types of content, such as music, movies, or games.
Remember to explore the sound and notification settings and experiment with different configurations to find the combination that suits your auditory preferences. Every user has unique preferences, and these settings allow you to personalize the audio experience on your Samsung tablet.
By configuring sound and notification settings, you can create a customized audio experience that is tailored to your liking on your Samsung tablet. In the next step, we’ll explore how to manage battery and power-saving settings to optimize the tablet’s battery life.
Step 12: Managing Battery and Power Saving Settings
Managing the battery and power-saving settings on your Samsung tablet is crucial for optimizing battery life and ensuring that your device lasts as long as possible between charges. By taking advantage of features such as power-saving modes and optimizing app usage, you can extend your tablet’s battery life and enhance its overall performance.
To manage battery and power-saving settings, go to the Settings menu on your Samsung tablet. Look for the “Battery” or “Device care” option and tap on it. Here, you’ll find various settings related to battery usage and power management.
One of the first settings to check is the battery usage statistics. This feature provides insights into which apps and services are consuming the most battery power. Identify any power-hungry apps and consider limiting their usage or optimizing their settings to minimize their impact on battery life.
Your Samsung tablet may offer different power-saving modes, such as “Medium power saving” or “Ultra power saving.” These modes limit certain features, reduce performance, and tweak various settings to extend battery life. Enable the appropriate mode based on your preference and battery usage needs.
Another effective way to manage power usage is to control background app activity. By restricting app background activity, you can prevent certain apps from running in the background and consuming battery power unnecessarily. You can customize this setting under the “Battery” or “App power management” section.
Consider enabling the “Adaptive battery” feature, if available, which uses artificial intelligence to learn your app usage patterns and prioritize power allocation accordingly. This feature helps optimize the tablet’s power usage and prolong battery life.
Reducing screen brightness, shortening the screen timeout duration, and disabling unnecessary connectivity options like Bluetooth and GPS when not in use can also help conserve battery power.
Many Samsung tablets also offer a “Power mode” or “Performance mode” option. These modes allow you to balance between performance and battery life, giving you the flexibility to choose a setting that matches your usage requirements.
It’s important to periodically check for software updates for your tablet. These updates often include optimizations and bug fixes that can improve battery performance and overall efficiency. Make sure your tablet is running the latest software version to take advantage of these enhancements.
By actively managing battery and power-saving settings on your Samsung tablet, you can optimize battery life, reduce energy consumption, and prolong the usability between charges. In the next step, we’ll explore how to enable Samsung Account features, providing access to additional services and functionalities.
Step 13: Enabling Samsung Account Features (optional)
If you have a Samsung Account, you can enable additional features on your Samsung tablet that are exclusive to Samsung device users. Enabling these features provides access to services like Samsung Cloud, Find My Mobile, and synchronization of data across Samsung devices.
To enable Samsung Account features, start by navigating to the Settings menu on your Samsung tablet. Look for the “Accounts” or “Cloud and accounts” option and tap on it. From here, you’ll find the option to add and manage accounts.
If you already have a Samsung Account, tap on “Add Account” and select “Samsung Account” from the list of available account types. You’ll be prompted to enter your Samsung Account credentials, including your email address and password.
Once you’ve signed in, you can enable various Samsung Account features. These may include services like Samsung Cloud, which allows you to back up and restore your data to the cloud, including contacts, calendar events, photos, and more.
Another useful feature is Find My Mobile, which helps you locate, lock, or wipe your Samsung tablet remotely in case it gets lost or stolen. This feature provides peace of mind and ensures the safety of your device and personal data.
By enabling Samsung Account features, you can also enjoy seamless data synchronization across multiple Samsung devices. This allows you to access your data and settings on different devices without losing any information or customization.
Additionally, Samsung Account features may offer exclusive benefits and privileges, such as discounts on apps and services, early access to new features, and personalized recommendations based on your usage patterns.
If you don’t have a Samsung Account, you can create one directly from your tablet. Simply tap on “Create Account” and follow the on-screen prompts to set up a new Samsung Account. Once created, you can sign in and enable the features mentioned above.
Remember to review the terms and conditions as well as privacy policies associated with your Samsung Account and services to ensure that your data is handled and protected according to your preferences.
By enabling Samsung Account features, you can unlock a range of additional services and functionalities that enhance your Samsung tablet experience. In the next step, we’ll explore backup and restore options, which are crucial for safeguarding your data.
Step 14: Backup and Restore Options
Backing up and restoring your Samsung tablet is a vital step to protect and safeguard your data. By creating regular backups, you can easily recover your important files, settings, and app data in case of accidental data loss, device malfunction, or when transitioning to a new device.
Samsung tablets offer several backup and restore options, ensuring that your data remains safe and accessible. Here are a few options to consider:
1. Samsung Cloud: Samsung tablets come with built-in support for Samsung Cloud, a cloud-based service that allows you to backup and restore various types of data, including contacts, calendar events, photos, videos, and documents. You can enable Samsung Cloud backup from the Settings menu, under the “Accounts” or “Cloud and accounts” section.
2. Google Account Backup: Your Google Account also provides backup and restore options for certain types of data, such as app data, Wi-Fi passwords, and device settings. Ensure that the “Backup and restore” option is enabled under the Google Account settings to take advantage of this feature.
3. Third-Party Backup Apps: There are numerous third-party backup apps available on the Google Play Store that offer advanced backup and restore functionalities. These apps allow you to create full device backups, schedule automatic backups, and even store your data on external storage or cloud services of your choice.
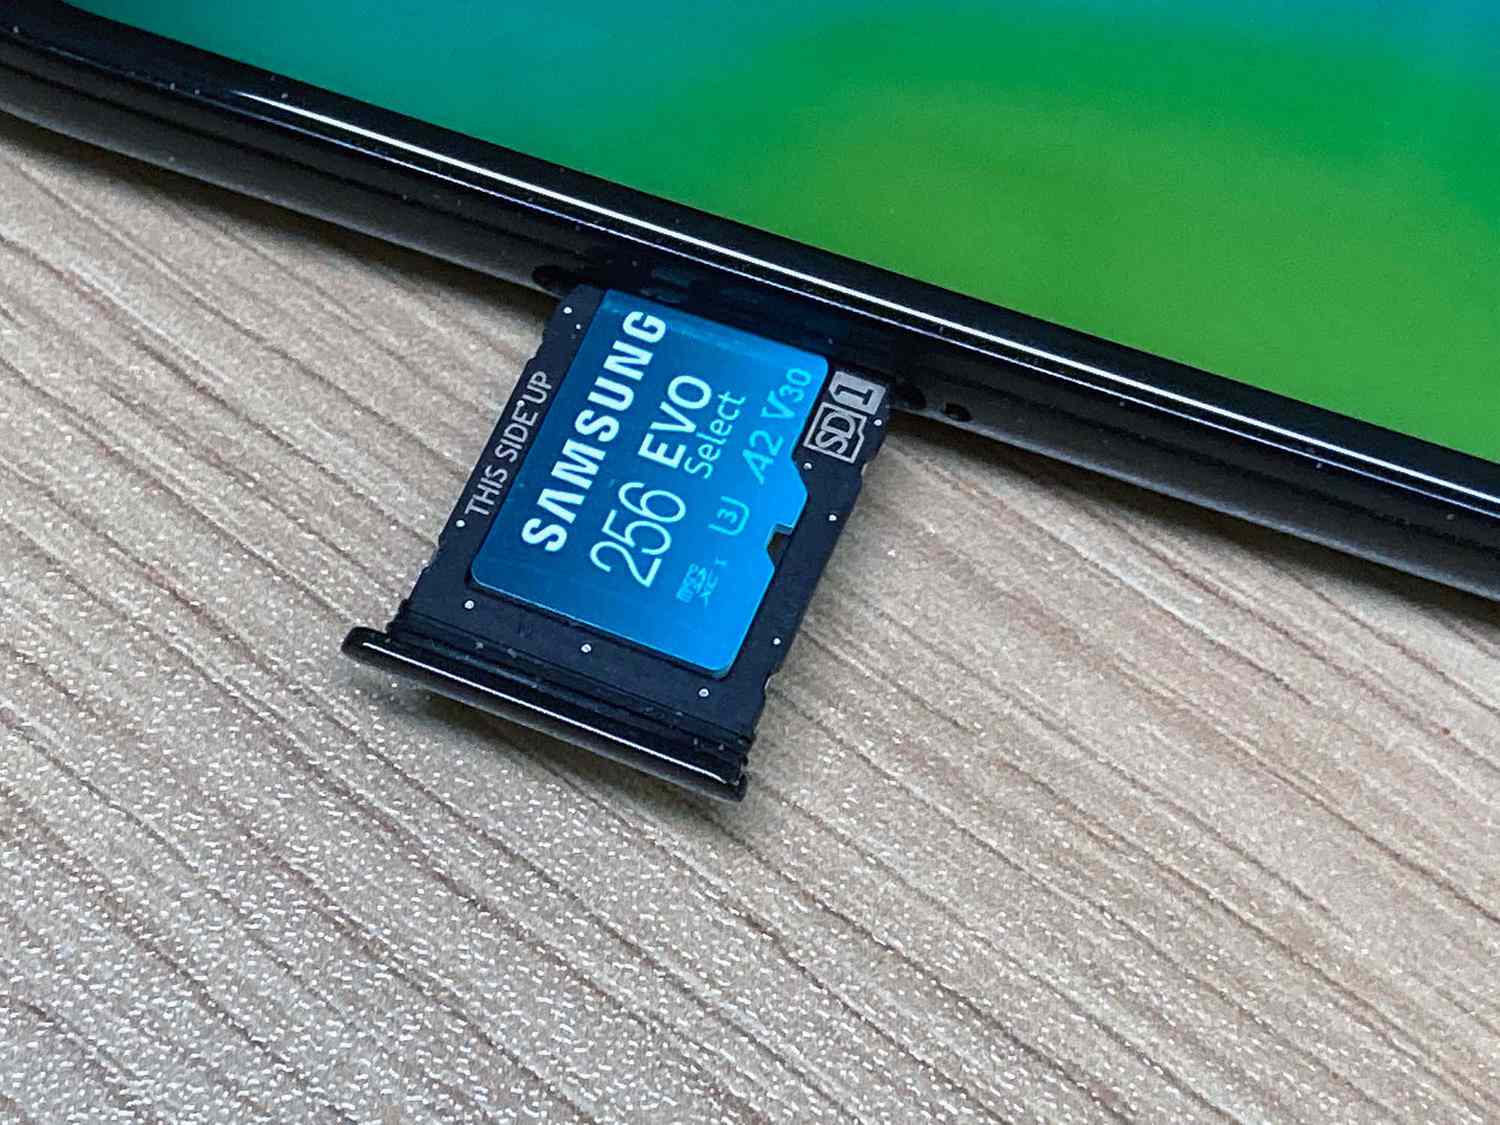
4. Manual Backup: If you prefer more control over your backups, you can manually copy your files, photos, videos, and documents to an external storage device, such as a computer, USB drive, or microSD card. This ensures that you have a physical copy of your data that can be easily restored when needed.
When it comes to restoring your data, simply follow the appropriate process for the backup method you used. For Samsung Cloud and Google Account backups, you can typically restore your data during the initial device setup process or by accessing the respective backup settings within the Settings menu.
Remember to periodically create new backups to ensure that your data is up to date. It’s also a good practice to test the restore process occasionally to verify that your backups are functioning correctly.
By regularly backing up your Samsung tablet and knowing how to restore your data, you can have peace of mind knowing that your important files and settings are protected and can be easily recovered. This allows for a seamless transition when upgrading to a new device or recovering from unforeseen data loss.
Conclusion
Congratulations! You have successfully set up your Samsung tablet by following these essential steps. From powering on the tablet to configuring display and sound settings, you have personalized your device to suit your preferences and needs. Additionally, you have explored optional features like biometric security, data transfer, additional account setup, and backup options, further enhancing your tablet experience.
Remember to regularly update your apps, manage battery and power-saving settings, and take advantage of Samsung Account features for additional services and functionalities. By staying mindful of these aspects, you can optimize the performance, security, and usability of your Samsung tablet.
Keep in mind that these setup steps provide a foundation to get started with your tablet. As you continue to use your tablet and explore its capabilities, you may discover additional features and settings that suit your preferences and enhance your overall experience. Don’t be afraid to experiment and make the most out of your Samsung tablet.
If you have any further questions or encounter any difficulties while using your Samsung tablet, consult the user manual provided with your device or visit the Samsung support website for comprehensive guidance and troubleshooting assistance.
Now that you’re well-equipped with the knowledge to set up and customize your Samsung tablet, go ahead and enjoy the countless possibilities it offers. Whether you use it for work, entertainment, or staying connected with loved ones, your Samsung tablet is an invaluable tool that brings convenience and productivity to your fingertips. Embrace its potential and make it an integral part of your everyday life!


