Introduction
Welcome to the world of entertainment at your fingertips with your Samsung Smart TV! Whether you’re a cord cutter, looking to save on cable fees, or simply want to enjoy a variety of antenna channels, scanning for antenna channels on your Samsung Smart TV is a simple and straightforward process.
With the advancement of technology, modern televisions like Samsung Smart TVs come equipped with built-in digital tuners, allowing you to receive over-the-air antenna channels without the need for a separate set-top box. By performing a channel scan, you can unlock an array of free and high-definition channels, including local news, sports, sitcoms, movies, and much more.
Scanning for antenna channels on your Samsung Smart TV is especially beneficial if you live in an area with strong OTA (Over-The-Air) signals or if you want to supplement your streaming services with live broadcast television. Whether you have a newer Samsung Smart TV or an older model, the process to scan for antenna channels remains relatively similar.
In this guide, we will walk you through the steps to scan for antenna channels on your Samsung Smart TV. You’ll be enjoying your favorite shows and local news in no time. So, grab your remote control, let’s get started!
Why do you need to scan for antenna channels on your Samsung Smart TV?
Scanning for antenna channels on your Samsung Smart TV opens up a world of entertainment options for you to enjoy. Here are a few reasons why you should consider performing a channel scan:
- Access to free channels: Scanning for antenna channels allows you to access a wide range of free channels that are available over-the-air. This includes local broadcasts of popular networks, such as ABC, NBC, CBS, FOX, and more. By tuning into these channels, you can enjoy your favorite shows, news, and sports without the need for cable or satellite subscriptions.
- High-definition picture quality: Many broadcast channels now transmit their content in high-definition (HD) format. By scanning for antenna channels, you can enjoy your favorite shows and movies in stunning clarity and detail, providing a more immersive viewing experience than standard-definition channels. Remember, to receive HD channels, make sure to use an HD antenna.
- Local news and weather updates: One of the main advantages of scanning for antenna channels is the ability to access local news broadcasts. By tuning into your local news channel, you can stay informed about current events, weather updates, traffic reports, and other important local happenings specific to your area.
- Supplement your streaming services: If you are a cord cutter who relies on streaming services for your entertainment needs, scanning for antenna channels can be a valuable addition. It allows you to complement your on-demand content with live broadcast television, ensuring that you don’t miss out on live events, sports games, and other real-time programming.
- Enjoy a diverse range of content: Antenna channels offer a diverse range of programming beyond just the major network broadcasts. Depending on your location, you may discover specialty channels featuring genres like movies, lifestyle, cooking, music, and more. Scanning for antenna channels expands your choices and lets you explore new content you might not have discovered otherwise.
By scanning for antenna channels on your Samsung Smart TV, you can unlock a multitude of free, high-quality content that will enhance your viewing experience without incurring any additional costs. It’s a simple and convenient way to access local broadcasts, stay informed, and enjoy a wide variety of shows and events.
Step 1: Connect the antenna to your Samsung Smart TV
The first step in scanning for antenna channels on your Samsung Smart TV is to connect the antenna to your television. Here’s how to do it:
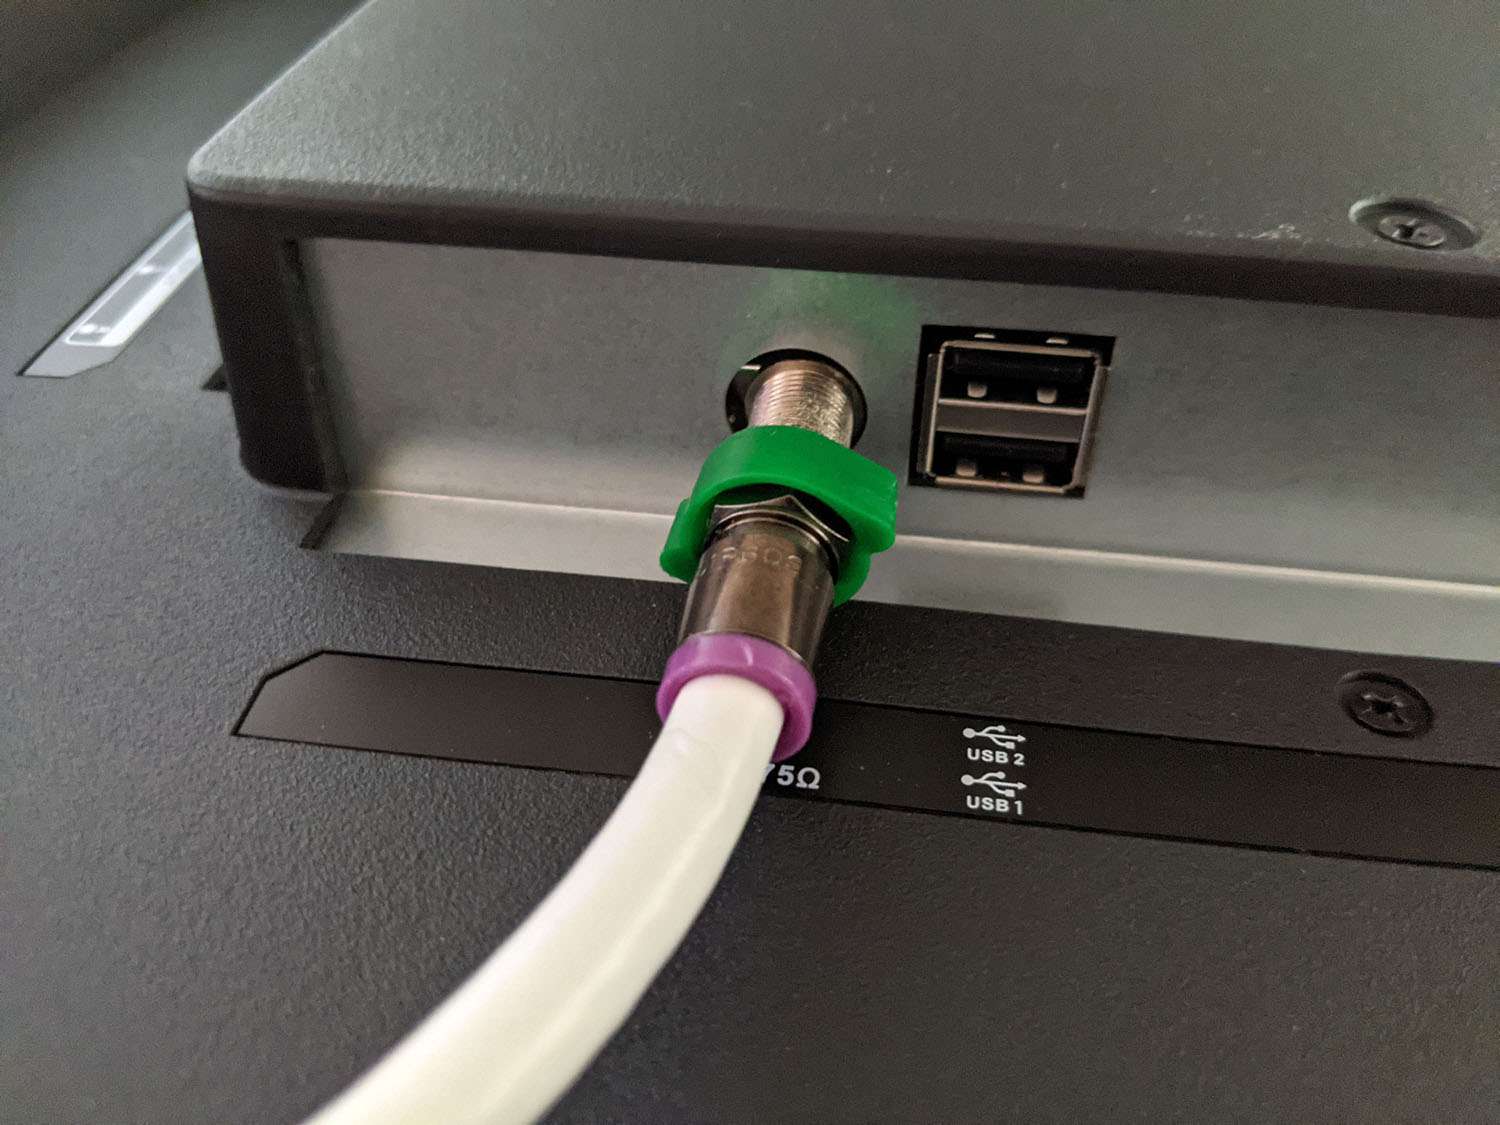
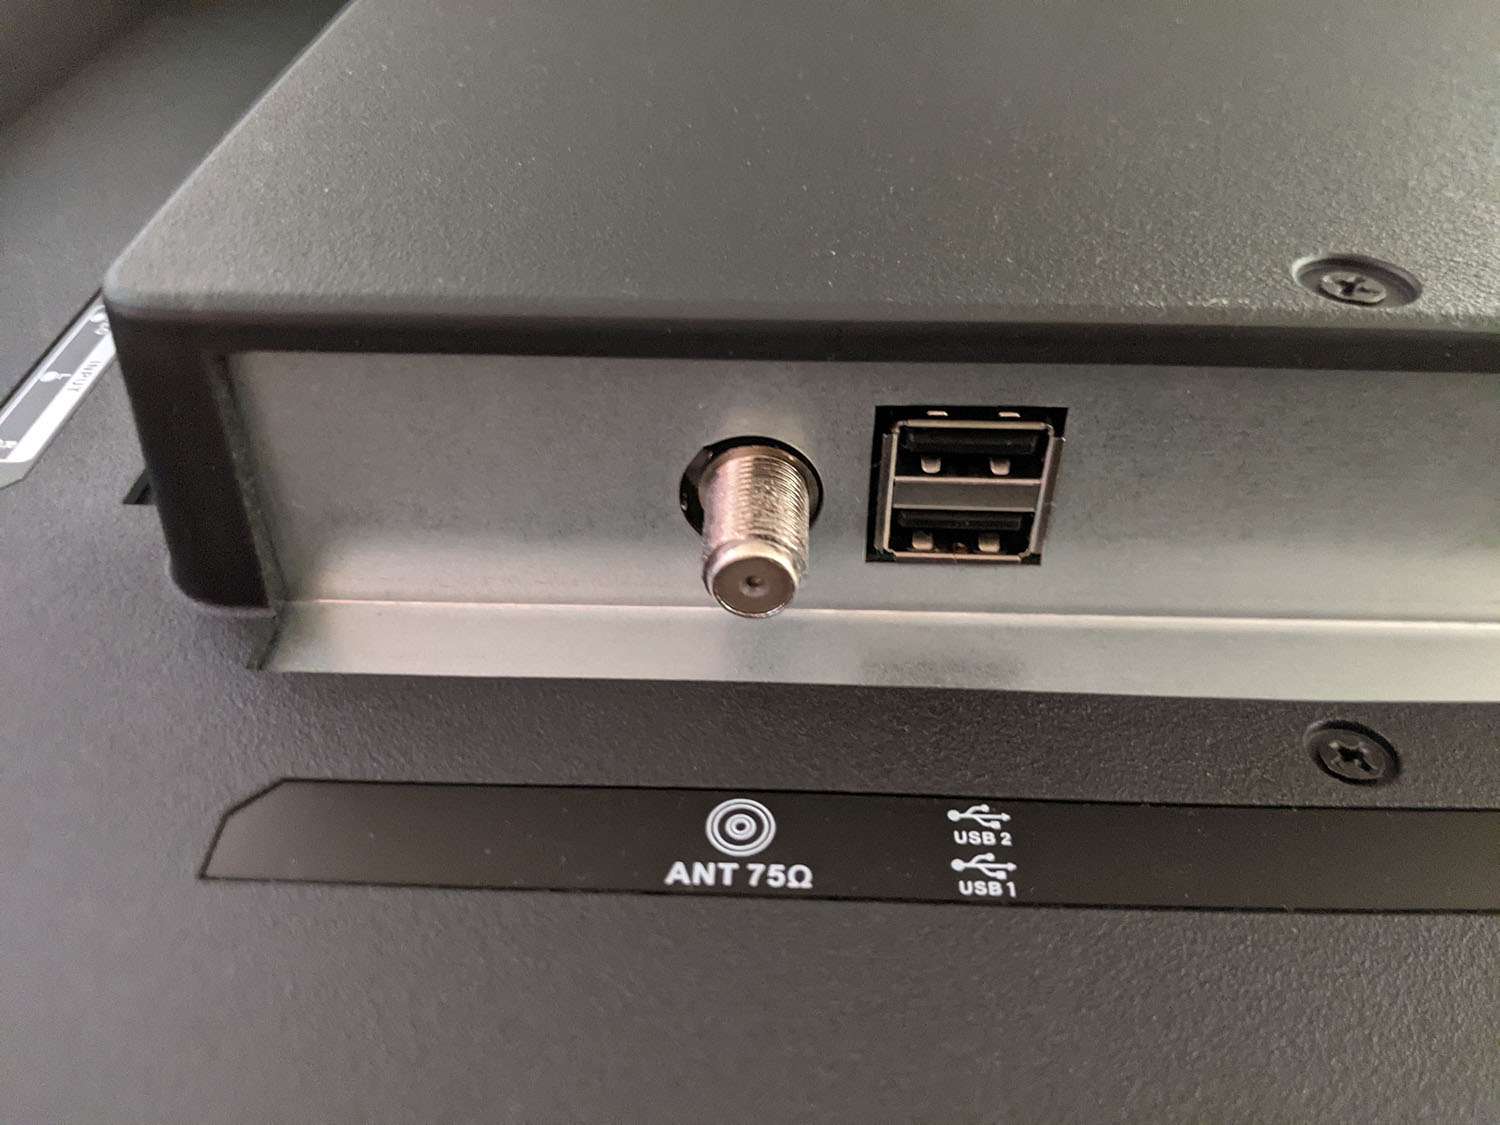
- Locate the antenna input: Look for the coaxial antenna input on the back of your Samsung Smart TV. It is usually labeled as “ANT IN” or “RF IN”. The input may be a round threaded connector or a small coaxial jack.
- Unplug your TV: Before connecting the antenna, ensure that your Samsung Smart TV is unplugged or turned off. This will prevent any accidental damage while connecting the antenna.
- Connect the antenna: Take the coaxial cable from your antenna and insert it into the antenna input on your Samsung Smart TV. Make sure the cable is securely connected by twisting it clockwise until it is tight.
- Tighten the connection: Once the cable is inserted, gently turn the connector clockwise to secure the connection. Be careful not to overtighten, as this may damage the input or the cable.
- Position the antenna: Find a suitable location for your antenna where it can receive a strong signal. Ideally, place it near a window or in an elevated position for better reception. You may need to experiment with different locations to achieve optimal signal strength.
- Adjust the antenna: Position the antenna for the best possible signal reception. You can try rotating or angling the antenna to find the optimal position. Some antennas also come with adjustable dials or switches to fine-tune the reception.
- Secure the antenna: Once you have found the best position for your antenna, secure it in place using the provided adhesive or any other suitable method. This will ensure that the antenna remains in position and avoids any interference due to movement.
Once you have successfully connected the antenna to your Samsung Smart TV, you are ready to move on to the next step – accessing the Menu to begin the channel scan process.
Step 2: Access the Menu on your Samsung Smart TV
Now that you’ve connected the antenna to your Samsung Smart TV, it’s time to access the Menu to navigate through the settings and initiate the channel scanning process. Follow these steps to access the Menu:
- Turn on your Samsung Smart TV: Press the power button on your remote control or directly on the TV to power on the television.
- Locate the Menu button: Look for the Menu button on your Samsung Smart TV remote control. The button is typically represented by an icon with three horizontal lines or as a dedicated “Menu” button. Press it to access the Menu options.
- Navigate to the TV settings: Use the arrow buttons on your remote control to navigate through the Menu options. Look for the options related to settings or setup. Depending on your Samsung Smart TV model, the exact location of the TV settings may vary, but it is usually under the “Settings” or “Setup” category.
- Select the TV settings: Once you have located the TV settings, press the OK or Enter button on your remote control to select it. This will take you to a submenu with various options.
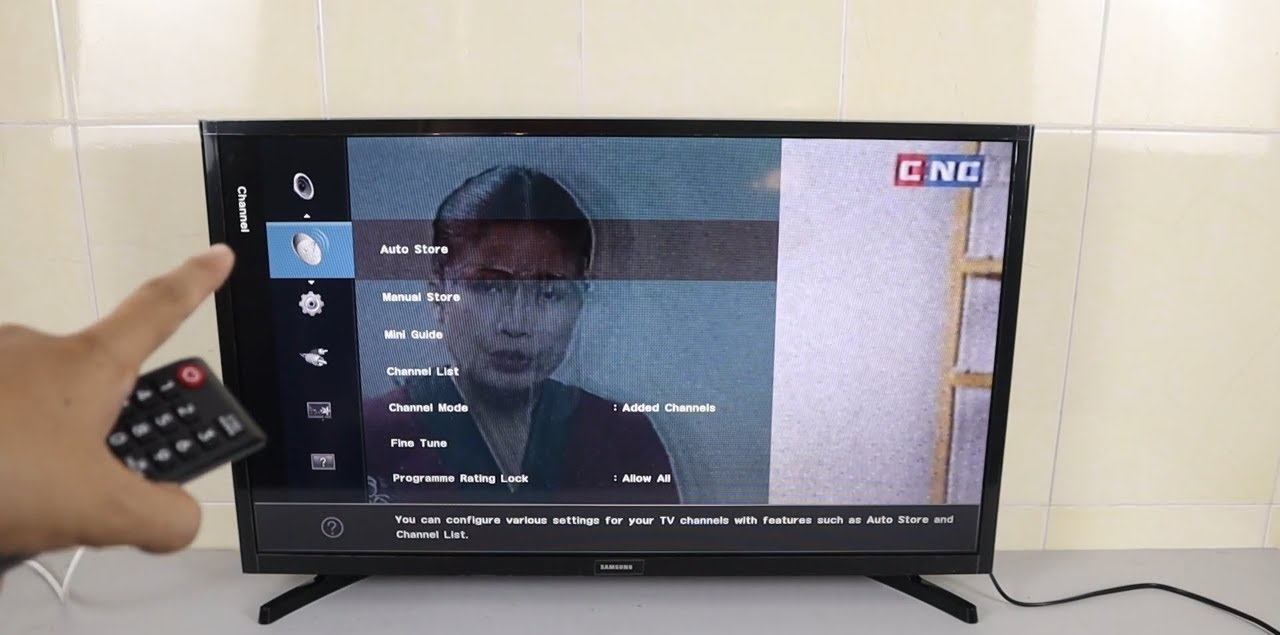
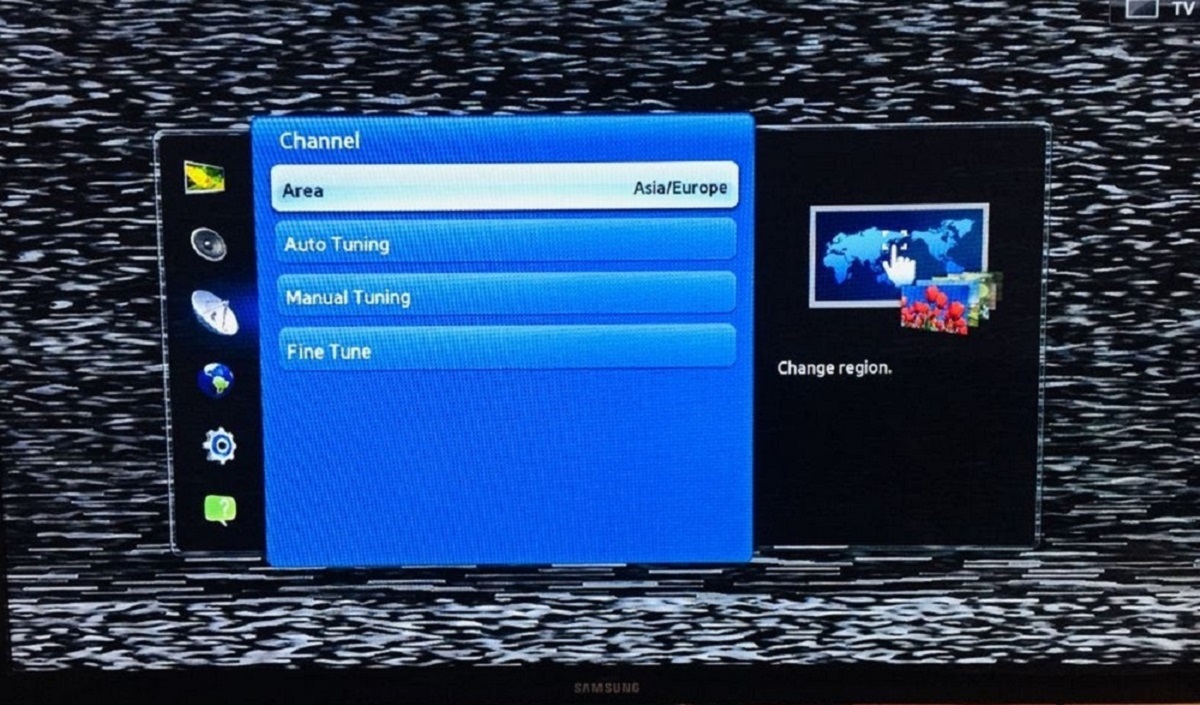
- Choose the Broadcasting option: Look for the option that is related to broadcasting or channels. It may be labeled as “Broadcast,” “Channel Setup,” or something similar. Use the arrow buttons to highlight the option and press the OK/Enter button to select it.
- Access the channel setup: In the Broadcasting or Channel Setup submenu, look for the option that allows you to set up or scan for channels. It may be labeled as “Channel Scan,” “Auto Tuning,” or a similar term. Select this option by pressing the OK/Enter button.
By following these steps, you will have successfully accessed the Menu on your Samsung Smart TV and navigated to the channel setup or scanning options. In the next step, we will guide you through the process of starting the automatic channel scan.
Step 3: Select the Broadcasting option
After accessing the Menu on your Samsung Smart TV, it’s time to select the Broadcasting option to proceed with the channel scanning process. Follow these steps to select the Broadcasting option:
- Navigate to the TV settings: Use the arrow buttons on your remote control to navigate through the Menu options. Look for the options related to settings or setup. Depending on your Samsung Smart TV model, the exact location of the TV settings may vary, but it is usually under the “Settings” or “Setup” category.
- Select the TV settings: Once you have located the TV settings, press the OK or Enter button on your remote control to select it. This will take you to a submenu with various options.
- Find the Broadcasting option: Look for the option that is related to broadcasting or channels. It may be labeled as “Broadcast,” “Channel Setup,” or something similar. Use the arrow buttons to highlight the option and press the OK/Enter button to select it.
- Enter the Broadcasting settings: After selecting the Broadcasting option, you will be taken to a submenu specifically for broadcasting settings. Here, you will find various options related to channel scanning and tuning.
- Select the channel scanning option: Look for the option that allows you to start the channel scan or auto-tuning process. It may be labeled as “Channel Scan,” “Auto Tuning,” or something similar. Use the arrow buttons to highlight the option and press the OK/Enter button to select it.
By following these steps, you will have successfully selected the Broadcasting option on your Samsung Smart TV. In the next step, we will guide you through starting the automatic channel scan, which will search for available antenna channels in your area.
Step 4: Start the automatic channel scan
Now that you have accessed the Broadcasting settings on your Samsung Smart TV, it’s time to initiate the automatic channel scan. Follow these steps to start the channel scan:
- Select the channel scanning option: In the Broadcasting settings submenu, locate the option that allows you to start the channel scan or auto-tuning process. It may be labeled as “Channel Scan,” “Auto Tuning,” or a similar term. Use the arrow buttons on your remote control to highlight the option and press the OK/Enter button to select it.
- Choose the type of scan: Upon selecting the channel scanning option, you will be presented with different types of scans to choose from. The most common options are “Air” or “Antenna” for over-the-air channel scanning. Highlight the desired scan type and press the OK/Enter button to proceed.
- Confirm the scan initiation: Before starting the channel scan, you may be prompted with a confirmation message or a warning about the potential changes to your channel lineup. Read the message carefully, and if you’re ready to proceed, select “Yes” or “Confirm” using the OK/Enter button.
- Wait for the scan to complete: Once you have confirmed the scan initiation, your Samsung Smart TV will start scanning for available antenna channels in your area. The scan may take a few minutes to complete, depending on the signal strength and the number of channels being scanned. During this time, do not turn off your TV or interrupt the scanning process.
- Monitor the progress: While the channel scan is in progress, you may see a progress bar or an on-screen message indicating the number of channels found. This will give you an idea of the scan’s progress and the number of channels the TV has detected.
- Scan completion: Once the automatic channel scan is complete, your Samsung Smart TV will display a message informing you that the scan has finished. It may also provide you with the total number of channels found during the scan.
By following these steps, you will have successfully started the automatic channel scan on your Samsung Smart TV. In the next step, we will guide you through the process of saving the scanned channels and organizing your channel lineup.
Step 5: Wait for the channel scan to complete
After initiating the automatic channel scan on your Samsung Smart TV, it’s time to be patient and wait for the scan to complete. During this time, your TV will search for available antenna channels in your area. Here’s what you need to do:
- Stay on the channel scanning screen: Once you have started the channel scan, it’s important to stay on the scanning screen and avoid changing the channel or navigating away from the menu. Interrupting the scan may result in incomplete channel detection or scanning errors.
- Monitor the scan progress: While the scan is in progress, your Samsung Smart TV may display a progress bar or an on-screen message indicating the number of channels found. This can give you an idea of the scan’s progress and the number of channels your TV has detected so far. However, keep in mind that the scan may take a few minutes to complete, so be patient.
- Avoid turning off your TV: It’s crucial to avoid turning off your Samsung Smart TV or disconnecting the power supply while the scan is in progress. Doing so can interrupt the scanning process and may result in incomplete channel detection or loss of scan data.
- Ensure a stable antenna connection: During the channel scan, it’s important to maintain a stable connection between your antenna and your Samsung Smart TV. Make sure the antenna is securely plugged into the antenna input on your TV and that it’s properly positioned for optimal signal reception.
- Be patient: Depending on the signal strength in your area and the number of channels being scanned, the channel scan may take a few minutes to complete. It’s important to be patient and allow your TV enough time to scan all available channels properly.
By waiting for the channel scan to complete and following these steps, you will ensure that your Samsung Smart TV detects all available antenna channels in your area. Once the scan is finished, you’ll be ready to save the scanned channels and start enjoying your favorite programs!
Step 6: Save the scanned channels
Once the channel scan on your Samsung Smart TV is complete and all available antenna channels have been detected, it’s time to save the scanned channels. Follow these steps to save the channels you want to watch:
- Review the scanned channels: After the scan is complete, your Samsung Smart TV will display a list of detected channels. Take a moment to review the list and ensure that all the desired channels are present.
- Organize and arrange the channels: Depending on your Samsung Smart TV model, you may have the option to rearrange the scanned channels. This allows you to prioritize your favorite channels and arrange them in a preferred order. Use the arrow buttons on your remote control to select a channel and the OK/Enter button to move it to a new position. Repeat this process to rearrange other channels if needed.
- Delete unwanted channels: If you come across any unwanted channels during the channel scan, you can delete them from your channel lineup. Select the channel you want to remove and look for the option to delete or remove it. Follow the on-screen instructions to confirm the removal.
- Save the changes: Once you have organized and deleted any unwanted channels, it’s time to save the changes. Look for the “Save” or “Done” option on your Samsung Smart TV’s screen and select it. This will store the newly arranged channel lineup and remove any deleted channels from your TV’s channel list.
- Exit the channel settings: After saving the channel changes, you can exit the channel settings menu. Use the arrow buttons to navigate back to the main Menu screen or look for an “Exit” or “Back” option to return to normal TV viewing mode.
By following these steps, you will have successfully saved the scanned channels on your Samsung Smart TV. Now, you can sit back, relax, and start enjoying your favorite antenna channels in the order you prefer. Remember, you can always revisit the channel settings to make further changes if needed.
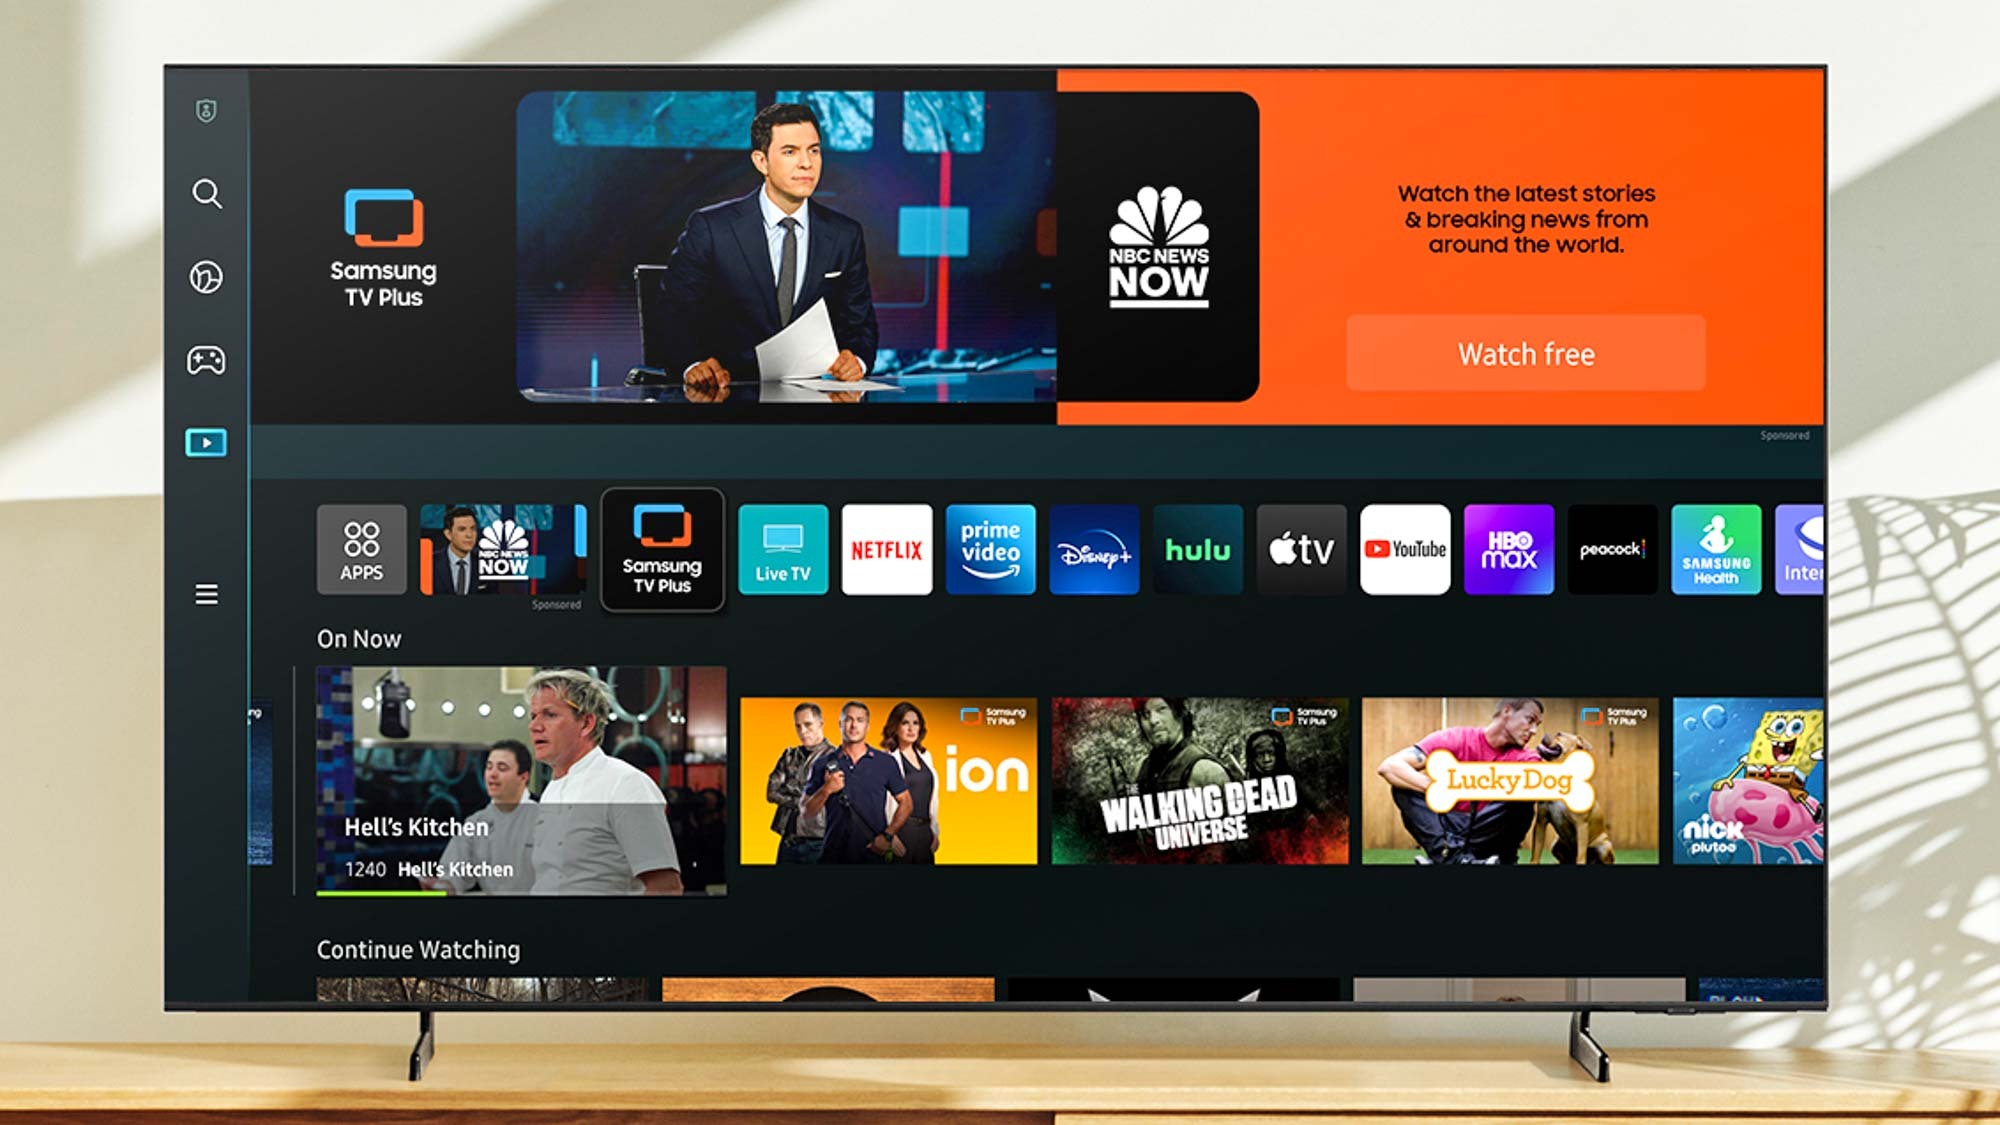
Step 7: Enjoy watching antenna channels on your Samsung Smart TV
Now that you have successfully completed the channel scan and saved the scanned channels on your Samsung Smart TV, it’s time to sit back, relax, and enjoy watching your favorite antenna channels. Here’s how to make the most of your viewing experience:
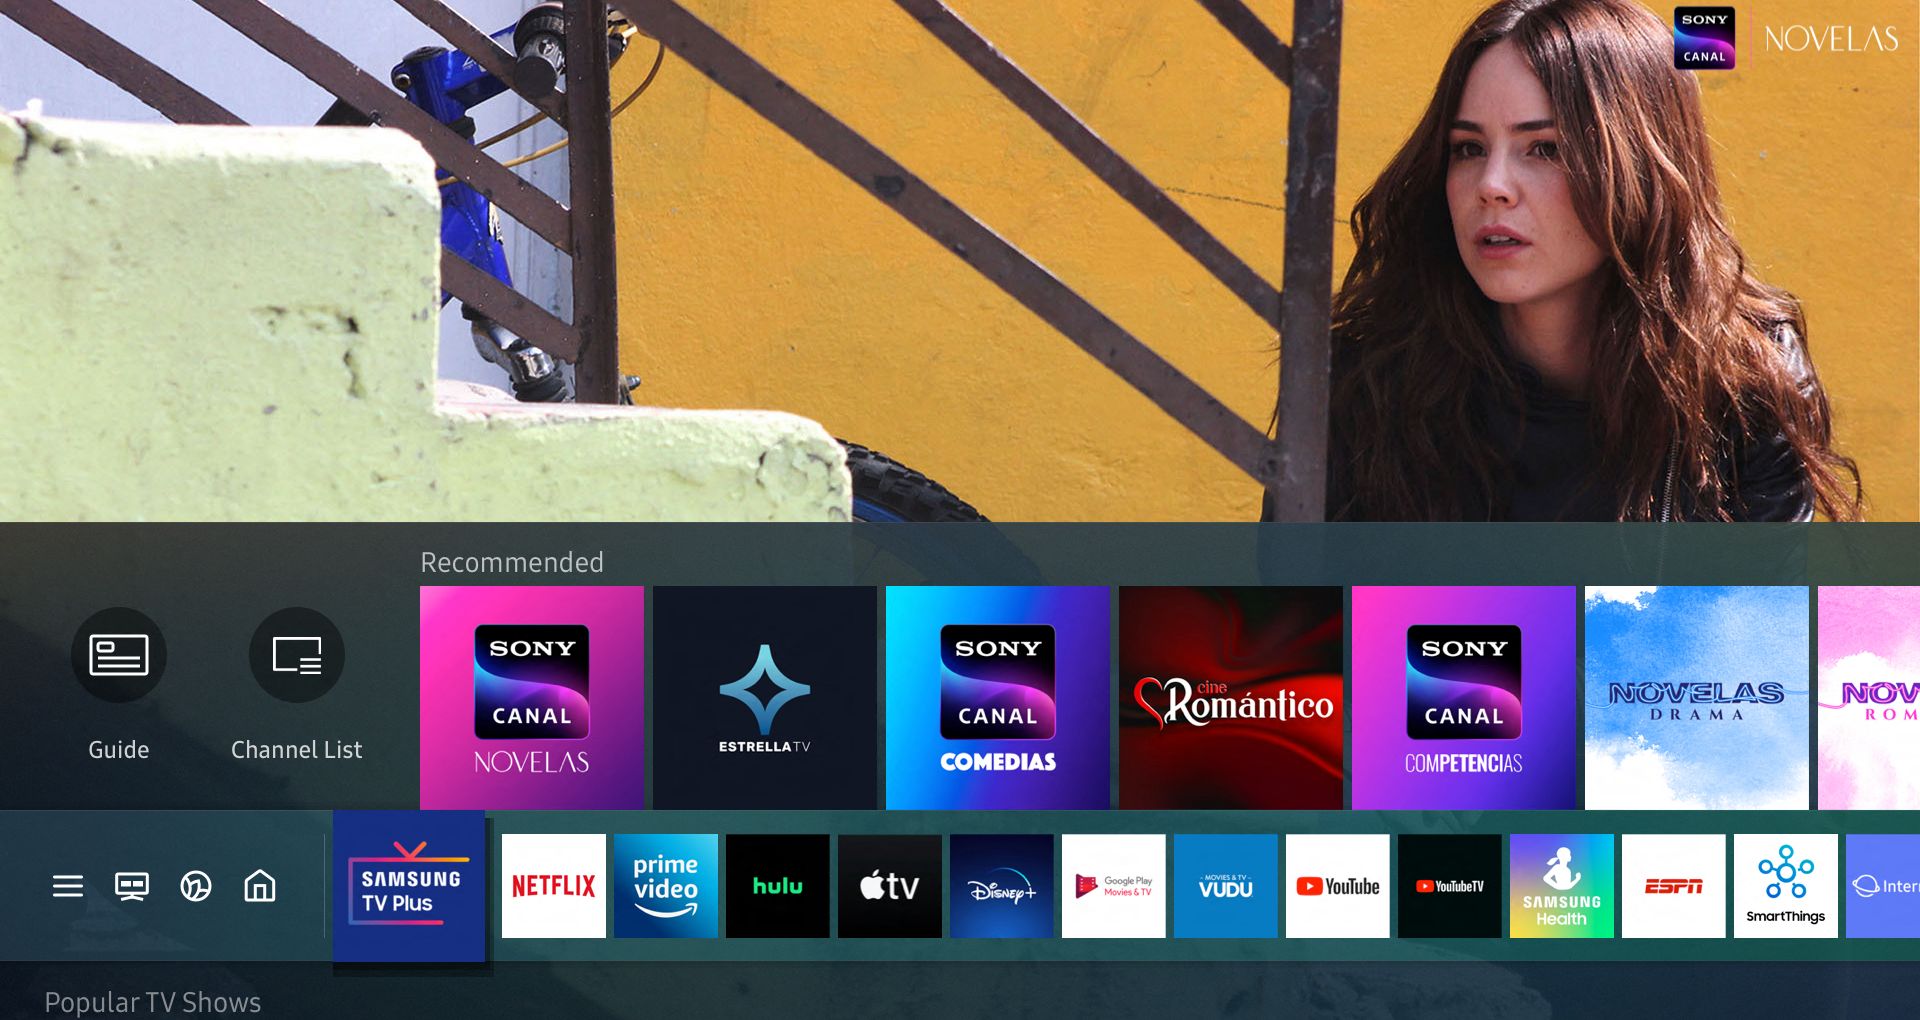
- Navigate to the channel list: To access the scanned antenna channels, go to the channel list on your Samsung Smart TV. Depending on your TV model, you may need to press the “Home” or “Menu” button on your remote control and select the “Live TV” or “Channel” option to open the channel list.
- Select a channel: Use the arrow buttons on your remote control to navigate through the list of available channels. Highlight the desired channel and press the OK/Enter button to tune into it.
- Explore channel features: While watching an antenna channel, you can explore additional features and options provided by your Samsung Smart TV. Depending on your TV model, you may have access to features like closed captions, audio settings, picture adjustments, and more. Refer to your TV’s user manual or on-screen menu for specific instructions on accessing these features.
- Switch between channels: You can easily switch between antenna channels by using the channel up/down buttons on your remote control. This allows you to explore and watch different channels without having to go back to the channel list.
- Enjoy the programming: Sit back, relax, and enjoy your favorite shows, news, sports, and other content on the antenna channels. Whether you’re catching up on the latest episodes, following live sports events, or enjoying local news and weather updates, your Samsung Smart TV provides a seamless viewing experience.
- Revisit the channel settings: If you ever need to make changes to your channel lineup, rearrange channels, or add/delete channels, you can revisit the channel settings on your Samsung Smart TV. Follow the previous steps mentioned in Step 6 to access and modify the channel settings as desired.
With your scanned antenna channels saved and ready to watch on your Samsung Smart TV, you can now fully enjoy the versatile content options and the convenience of over-the-air broadcasting. Whether you’re cutting the cord or simply supplementing your streaming services, antenna channels provide a wide range of entertainment and informational content right at your fingertips.
Tips for troubleshooting common scanning issues
While scanning for antenna channels on your Samsung Smart TV is usually a straightforward process, you may encounter some common issues along the way. Here are some tips to help troubleshoot and overcome these scanning issues:
- Check the antenna connection: Ensure that your antenna is securely connected to the antenna input on your Samsung Smart TV. A loose or improper connection can lead to weak or no signal reception, resulting in incomplete channel scans. Double-check the cable connection and consider repositioning the antenna for better signal strength.
- Verify the signal strength: Low signal strength can lead to incomplete or missing channels during the scan. Check the signal strength in your area by using websites or apps that provide information on OTA signal reception. If the signal is weak, consider using a more powerful indoor or outdoor antenna to improve signal reception.
- Rescan with different settings: If the initial scan does not yield satisfactory results, you can try rescanning with different settings. For example, you can switch between “Air” and “Cable” scan types, or you can try a manual scan instead of an automatic scan. Experimenting with different scan settings can help in detecting channels that were missed during previous scans.
- Perform a factory reset: In some cases, performing a factory reset on your Samsung Smart TV can resolve scanning issues. Keep in mind that a factory reset will erase all your settings and customizations, so be sure to back up any important data before proceeding. Consult your TV’s user manual or the manufacturer’s website for instructions on how to perform a factory reset.
- Update your TV’s firmware: Outdated firmware can sometimes cause scanning issues. Check for any available firmware updates for your Samsung Smart TV and install them if necessary. Firmware updates often include bug fixes and improved performance, which can help resolve scanning problems.
- Seek professional assistance: If you have tried all the troubleshooting steps and are still experiencing scanning issues, it may be necessary to seek professional assistance. Contact Samsung support or consult with a qualified technician who can diagnose the problem and provide a solution specific to your TV model.
By following these tips, you can troubleshoot common scanning issues on your Samsung Smart TV and ensure a successful channel scan. Remember, proper antenna connection, signal strength verification, and experimenting with scan settings can often resolve most scanning problems. With a little patience and troubleshooting, you’ll be enjoying a wide range of antenna channels on your Samsung Smart TV in no time.
Conclusion
Scanning for antenna channels on your Samsung Smart TV is a simple and essential step to unlock a world of free and high-definition content. By following the step-by-step guide we’ve provided, you can easily connect your antenna, access the Menu, select the Broadcasting option, start the automatic channel scan, save the scanned channels, and begin enjoying a wide range of programming.
With the ability to access local news, sports, entertainment, and more, antenna channels offer a cost-effective way to enhance your viewing options without the need for cable or satellite subscriptions. Whether you’re a cord cutter looking to save on monthly fees or someone who wants to supplement their streaming services with live broadcast television, scanning for antenna channels provides a versatile and convenient solution.
Remember to troubleshoot common scanning issues if you encounter any problems during the process. Checking your antenna connection, verifying signal strength, and exploring different scan settings can help ensure a successful scan and improve your channel coverage.
Once you have saved the scanned channels on your Samsung Smart TV, you can customize the channel lineup, rearrange channels, and explore additional features provided by your TV. With a stable antenna connection and proper positioning, you can enjoy high-quality, free-to-air content delivered straight to your television.
So, grab your remote control, connect your antenna, and embark on a journey through a diverse range of antenna channels. Enjoy your favorite shows, stay informed through local news, experience live sports, and explore new content right from the comfort of your own living room with your Samsung Smart TV.