Choosing the Right Internet Connection for Your Gaming Laptop
When it comes to gaming on your laptop, having a reliable and fast internet connection is crucial. The type of internet connection you choose can significantly affect your gaming experience, so it’s important to make the right decision. Here are some factors to consider when choosing the right internet connection for your gaming laptop:
1. Broadband or Fiber Optic: Broadband or fiber optic connections are typically the best options for gamers. They offer high-speed internet access, low latency, and ample bandwidth, allowing you to play games without any interruptions or lag. If these options are available in your area, consider subscribing to them.
2. Speed and Bandwidth: Look for an internet plan that offers high download and upload speeds. Gaming requires a fast and stable connection to ensure smooth gameplay and minimize lag. Additionally, check the data limits on your plan. Some ISPs may throttle your connection or charge extra fees if you exceed your monthly data allowance, which can affect your gaming experience.
3. Latency: Latency, also known as ping, is the time it takes for data to travel back and forth between your laptop and the game server. The lower the latency, the better your gaming experience will be. Look for an internet connection with low latency to minimize delay and input lag during gameplay.
4. Connection Type: You have several options for connecting your gaming laptop to the internet. Wi-Fi, Ethernet, and mobile hotspots are the most common methods. Wi-Fi is convenient but can be prone to interference and latency issues. Ethernet connections provide a more stable and reliable connection, but they may not be suitable for those who need to game on the go. Mobile hotspots are ideal for gaming on the move but may have limitations on speed and data usage.
5. ISP Reliability: Do some research on different internet service providers (ISPs) in your area and read reviews from gamers. Look for an ISP with a reputation for strong and stable connections. Unreliable internet can lead to disruptions, lag, and frustration during your gaming sessions.
6. Cost: Consider your budget when selecting an internet connection for your gaming laptop. High-speed options like fiber optic connections may be more expensive, but they can provide a better gaming experience. Compare the costs and features of different internet plans before making your decision.
7. Test Your Connection: Once you’ve chosen an internet connection, test its speed and reliability. Various online tools and websites can help you measure your connection’s speed, latency, and stability. This will give you an idea of how well your internet connection is performing and if any improvements can be made.
By considering these factors and choosing the right internet connection for your gaming laptop, you can ensure an enjoyable gaming experience with minimal disruptions and lag. Remember to regularly monitor your connection’s performance and make any necessary adjustments to optimize your gaming experience.
Connecting to Wi-Fi Networks on Your Gaming Laptop
Connecting your gaming laptop to a Wi-Fi network is essential to access online gaming services, download updates, and play multiplayer games. Here’s a step-by-step guide on how to connect to Wi-Fi networks on your gaming laptop:
1. Check your Wi-Fi adapter: Ensure that your gaming laptop comes equipped with a Wi-Fi adapter that supports the latest standards, such as 802.11ac or 802.11ax. This will allow you to connect to faster and more reliable Wi-Fi networks.
2. Turn on Wi-Fi: Most laptops have a physical switch or dedicated key combination to enable Wi-Fi. Look for the Wi-Fi symbol on your keyboard or refer to your laptop’s user manual to locate the switch or key combination.
3. Locate available Wi-Fi networks: Click on the network icon in the system tray or taskbar to view the available Wi-Fi networks in your vicinity. The icon usually resembles a series of vertical bars or a Wi-Fi symbol.
4. Select the desired Wi-Fi network: From the list of available networks, choose the Wi-Fi network you want to connect to. If the network is secured, you will be prompted to enter the network password.
5. Enter the Wi-Fi password: If the Wi-Fi network is password protected, enter the network password when prompted. Ensure that you enter the correct password to establish a successful connection.
6. Wait for the connection to be established: After entering the correct password, your gaming laptop will attempt to establish a connection with the selected Wi-Fi network. This process may take a few moments, so be patient.
7. Test the Wi-Fi connection: Once connected, open a web browser or an online gaming platform to test your internet connection. Visit a website or initiate an online game to ensure that your gaming laptop is successfully connected to the Wi-Fi network.
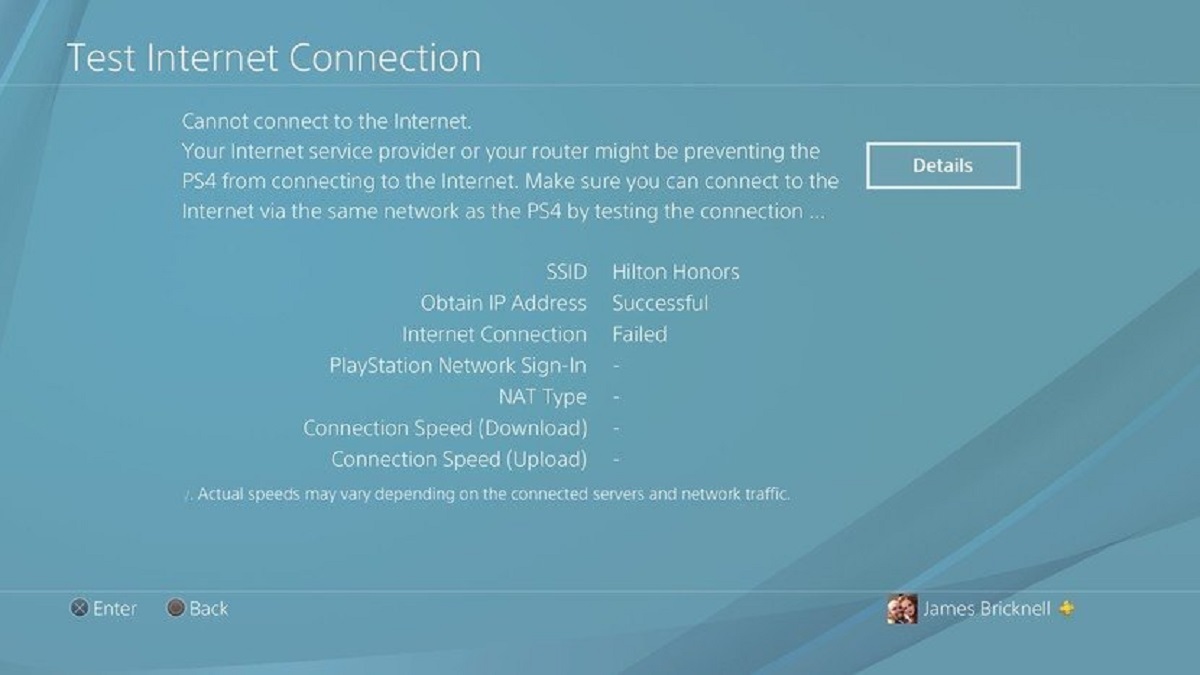
8. Troubleshoot connection issues: If you encounter any connection issues, make sure that your Wi-Fi adapter is enabled, your Wi-Fi password is correct, and your router is functioning properly. You can also try restarting your laptop or router to resolve any temporary connectivity problems.
Remember to regularly update your Wi-Fi drivers to ensure compatibility with the latest Wi-Fi standards and improve connection stability. Additionally, if you frequently experience slow or unreliable Wi-Fi, try moving closer to the router or consider investing in a Wi-Fi range extender to boost your signal strength.
By following these steps, you can easily connect your gaming laptop to Wi-Fi networks and enjoy a seamless online gaming experience.
Troubleshooting Wi-Fi Connection Issues on Your Gaming Laptop
Dealing with Wi-Fi connection issues on your gaming laptop can be frustrating, as it can disrupt your gaming sessions. Here are some troubleshooting tips to help you resolve Wi-Fi connection problems:
1. Check the basics: Ensure that your Wi-Fi adapter is enabled on your gaming laptop. Look for the Wi-Fi icon in the system tray or taskbar and make sure it’s not disabled. Furthermore, verify that your Wi-Fi router is powered on and functioning correctly.
2. Restart your devices: Sometimes, Wi-Fi connectivity issues can be resolved by simply restarting your gaming laptop and Wi-Fi router. Turn off both devices, wait for a few seconds, and then turn them back on. This can help refresh the connection and resolve any temporary glitches.
3. Move closer to the router: If you’re experiencing a weak Wi-Fi signal, try moving your gaming laptop closer to the router. Physical obstructions and distance can interfere with the signal, causing a weak or unstable connection. By reducing the distance between your laptop and the router, you can improve the signal strength.
4. Check for interference: Wi-Fi signals can be affected by interference from other electronic devices, such as cordless phones, microwave ovens, or Bluetooth devices. Keep these devices away from your gaming setup and router to minimize interference.
5. Update your Wi-Fi drivers: Outdated or incompatible Wi-Fi drivers can cause connectivity issues. Visit the manufacturer’s website for your gaming laptop’s Wi-Fi adapter and download the latest drivers. Updating your drivers can improve performance and resolve connection problems.
6. Reset network settings: If your gaming laptop is having trouble connecting to a specific Wi-Fi network, try resetting your network settings. Go to the network settings on your laptop, find the option to reset network settings, and confirm the action. This will clear any saved network configurations and allow you to establish a fresh connection.
7. Change the Wi-Fi channel: If you’re experiencing slow or inconsistent Wi-Fi speeds, changing the Wi-Fi channel on your router can help. Many routers have an option to switch between different channels to avoid interference from other Wi-Fi networks in your area. Experiment with different channels to find the one that provides the best performance.
8. Try a wired connection: If all else fails, consider using an Ethernet cable to connect your gaming laptop directly to the router. Wired connections generally offer better stability and faster speeds compared to Wi-Fi. This can be a temporary solution until you resolve the Wi-Fi issues.
By following these troubleshooting tips, you can diagnose and resolve Wi-Fi connection issues on your gaming laptop. If the problem persists, it’s recommended to contact your internet service provider for further assistance.
Using Ethernet for a Stable Internet Connection on Your Gaming Laptop
When it comes to online gaming, a stable and reliable internet connection is essential for a smooth gaming experience. While Wi-Fi is convenient, it can sometimes be prone to interference and latency issues. In such cases, using an Ethernet connection can provide a more stable and consistent internet connection for your gaming laptop. Here’s how you can use Ethernet for a stable internet connection:
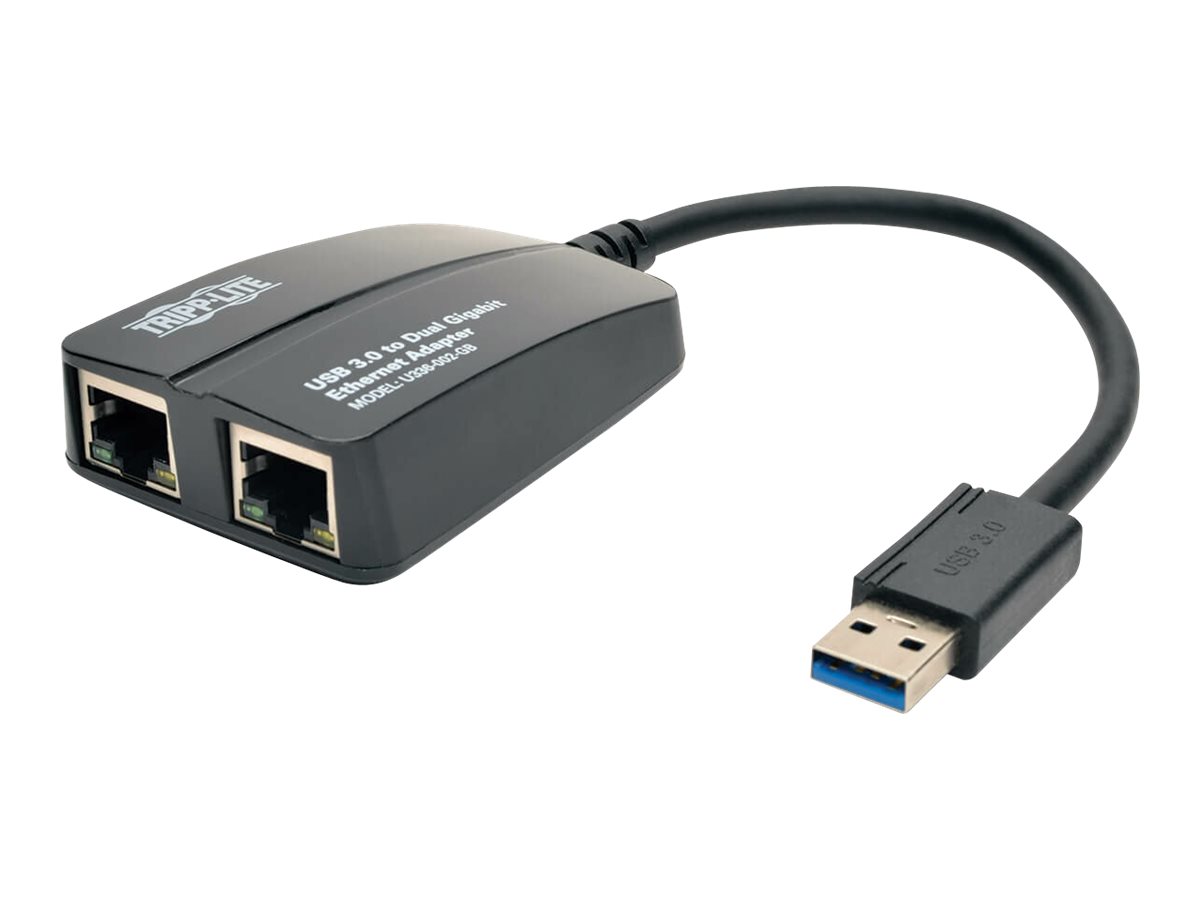
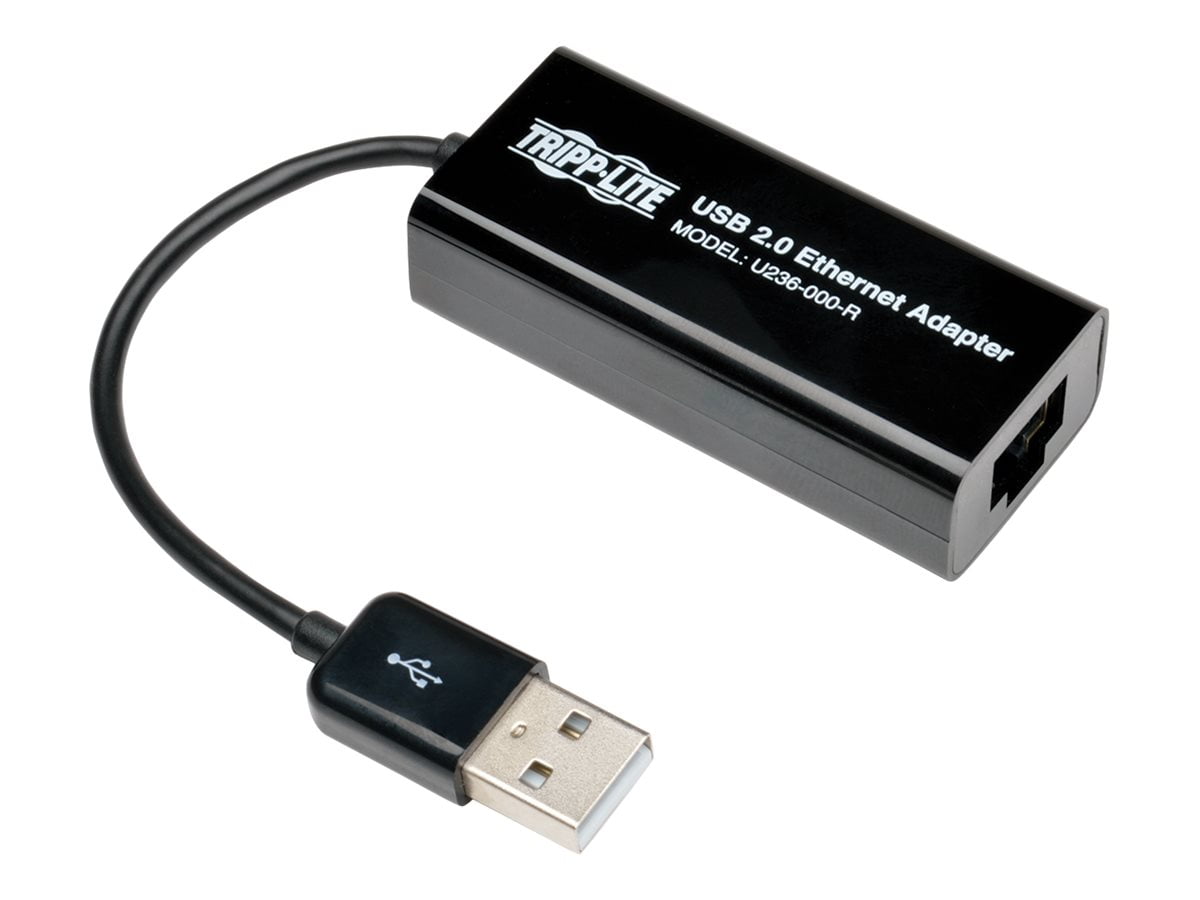
1. Check your gaming laptop’s Ethernet port: Ensure that your gaming laptop has an Ethernet port. Most laptops have an Ethernet port either on the side or back of the device. If your laptop doesn’t have an Ethernet port, you may need to use a USB-to-Ethernet adapter.
2. Connect your gaming laptop to the router: Locate the Ethernet cable that came with your router. Connect one end of the cable to the Ethernet port on your gaming laptop and the other end to an available Ethernet port on your router.
3. Disable Wi-Fi on your gaming laptop: To ensure that your gaming laptop uses the Ethernet connection as the primary source of internet, disable Wi-Fi on your laptop. This can usually be done by turning off the Wi-Fi switch or through the network settings on your laptop.
4. Restart your gaming laptop and router: After connecting the Ethernet cable, restart both your gaming laptop and router. This can help establish a stable connection and ensure that any temporary issues are resolved.
5. Test your Ethernet connection: Once your gaming laptop is connected via Ethernet, open a web browser or an online gaming platform to test your internet connection. Visit a website or initiate an online game to ensure that your gaming laptop is successfully using the Ethernet connection.
6. Enjoy a stable gaming experience: Using Ethernet for your internet connection can provide a stable and reliable connection for your gaming laptop. Ethernet connections are less prone to interference and offer lower latency compared to Wi-Fi. This can result in improved gameplay with reduced lag and smoother online experiences.
7. Consider cable management: As Ethernet cables can be quite long, it’s a good idea to keep them neatly organized and secured to prevent any accidents or tripping hazards. Use cable management solutions such as cable clips or cable sleeves to keep your gaming setup tidy.
8. Troubleshoot Ethernet connection issues: If you experience any issues with your Ethernet connection, ensure that both ends of the Ethernet cable are securely plugged in, check for any damage to the cable, and verify that your router and Ethernet port are functioning correctly. If problems persist, try using a different Ethernet cable or contact your internet service provider for assistance.
By using an Ethernet connection for your gaming laptop, you can enjoy a stable and reliable internet connection, minimizing delays and providing a smooth gaming experience. Whether you’re engaging in intense multiplayer battles or exploring vast virtual worlds, a stable connection is key to unlocking the full potential of your gaming laptop.
Setting up a Personal Hotspot on Your Smartphone for Internet Access on your Gaming Laptop
When you’re on the go and don’t have access to a Wi-Fi network, setting up a personal hotspot on your smartphone can provide a convenient solution for connecting your gaming laptop to the internet. With a personal hotspot, you can use your smartphone’s cellular data to establish an internet connection on your gaming laptop. Here’s how to set up a personal hotspot:
1. Check your smartphone’s capabilities: Ensure that your smartphone supports the personal hotspot feature. Most modern smartphones, regardless of the operating system (Android or iOS), have this feature available in the settings.
2. Enable the personal hotspot: Go to the settings on your smartphone and locate the personal hotspot or tethering option. Enable it to activate the personal hotspot feature on your smartphone.
3. Set up a Wi-Fi hotspot: Once the personal hotspot is enabled, you’ll have the option to set up a Wi-Fi hotspot. Give your hotspot a name (SSID), and if available, secure it with a password to protect your connection from unauthorized access.
4. Connect your gaming laptop to the personal hotspot: On your gaming laptop, access the Wi-Fi settings and select the name of the hotspot created by your smartphone. If you secured it with a password, enter it to establish the connection.
5. Verify the connection: Once connected, open a web browser or an online gaming platform on your gaming laptop to confirm that you have internet access. Visit a website or start an online game to ensure that the connection is working correctly.
6. Monitor your data usage: Keep track of your data usage while using the personal hotspot. Playing online games and streaming videos can consume a significant amount of data, so it’s important to be mindful of your data limits and adjust your usage accordingly.
7. Adjust hotspot settings: Depending on your smartphone, you may have additional settings to adjust the hotspot performance. This includes choosing the frequency band, limiting the number of connected devices, or enabling data saving modes. Explore these options to optimize your hotspot experience.
8. Ensure good signal strength: To maintain a stable connection, ensure that your smartphone and gaming laptop are within a reasonable distance from each other. A strong cellular signal on your smartphone will result in better internet connectivity on your gaming laptop.
Using a personal hotspot on your smartphone can be a convenient way to access the internet on your gaming laptop when you’re away from traditional Wi-Fi networks. However, it’s important to note that using a personal hotspot consumes cellular data, so make sure you have a sufficient data plan or consider using Wi-Fi networks whenever possible.
By following these steps, you can quickly set up and use a personal hotspot on your smartphone, allowing you to enjoy online gaming or other internet activities on your gaming laptop while on the go.
Enhancing Internet Speed on Your Gaming Laptop
Having a fast and stable internet connection is vital for an optimal gaming experience on your laptop. Slow internet speeds can lead to lag, delays, and frustration while playing online games. Fortunately, there are several steps you can take to enhance the internet speed on your gaming laptop. Here’s what you can do:
1. Check your internet plan: Start by verifying the internet plan you’re subscribed to. Contact your internet service provider (ISP) to ensure that you’re receiving the speeds you’re paying for. If necessary, consider upgrading to a higher-speed plan.
2. Connect directly to the router: If you’re currently using Wi-Fi, consider connecting your gaming laptop directly to the router using an Ethernet cable. Wired connections generally provide faster speeds and more stable connections compared to Wi-Fi, resulting in a better gaming experience.
3. Position your router strategically: Ensure that your router is placed in a central location, away from physical obstructions and interference. Positioning the router higher at around eye level can also help improve signal strength and coverage throughout your home.
4. Reduce interference: Wi-Fi signals can be disrupted by other electronic devices, such as cordless phones, microwave ovens, or Bluetooth devices. Keep these devices away from your router and gaming setup to minimize interference and improve internet speed.
5. Update router firmware: Check if there are any firmware updates available for your router. Manufacturers periodically release updates to fix bugs, improve performance, and add new features. Updating your router’s firmware can help enhance its overall performance and speed.
6. Secure your Wi-Fi network: If your Wi-Fi network is left unsecured, unauthorized users could be accessing your network and causing slower speeds. Secure your Wi-Fi network with a strong password to prevent others from leeching off your bandwidth.
7. Limit connected devices: Excessive devices connected to your Wi-Fi network can strain your bandwidth and slow down your internet speed. Limit the number of devices connected simultaneously to ensure optimal performance for your gaming laptop.
8. Close bandwidth-hungry applications: Background applications consuming a significant amount of bandwidth can slow down your internet speed. Before gaming, close any unnecessary applications or downloads running in the background on your laptop.
9. Consider Quality of Service (QoS) settings: Depending on your router, you may have access to QoS settings. QoS allows you to prioritize the traffic from your gaming laptop over other devices on your network, ensuring a smoother gaming experience with reduced lag.
10. Upgrade your equipment: If you’re consistently experiencing slow internet speeds, it may be time to consider upgrading your router or modem. Newer models often come with improved technology, faster speeds, and better overall performance.
By following these steps, you can enhance the internet speed on your gaming laptop and minimize lag during your gaming sessions. Remember, maintaining a fast and stable internet connection is essential for an enjoyable and competitive gaming experience.