Getting Started with Twitch Streaming
Streaming your games on Twitch can be a rewarding and exciting experience. It allows you to showcase your gaming skills, connect with a community of fellow gamers, and even potentially earn some income. If you’re new to Twitch streaming and wondering how to get started, fear not! With the right approach and tools, you’ll be streaming your gaming sessions in no time. Here are some essential steps to help you kickstart your Twitch streaming journey.
1. Define Your Purpose: Before diving into Twitch streaming, it’s important to identify your goals. Are you looking to entertain, educate, or compete? Understanding your purpose will help shape your streaming style and content.
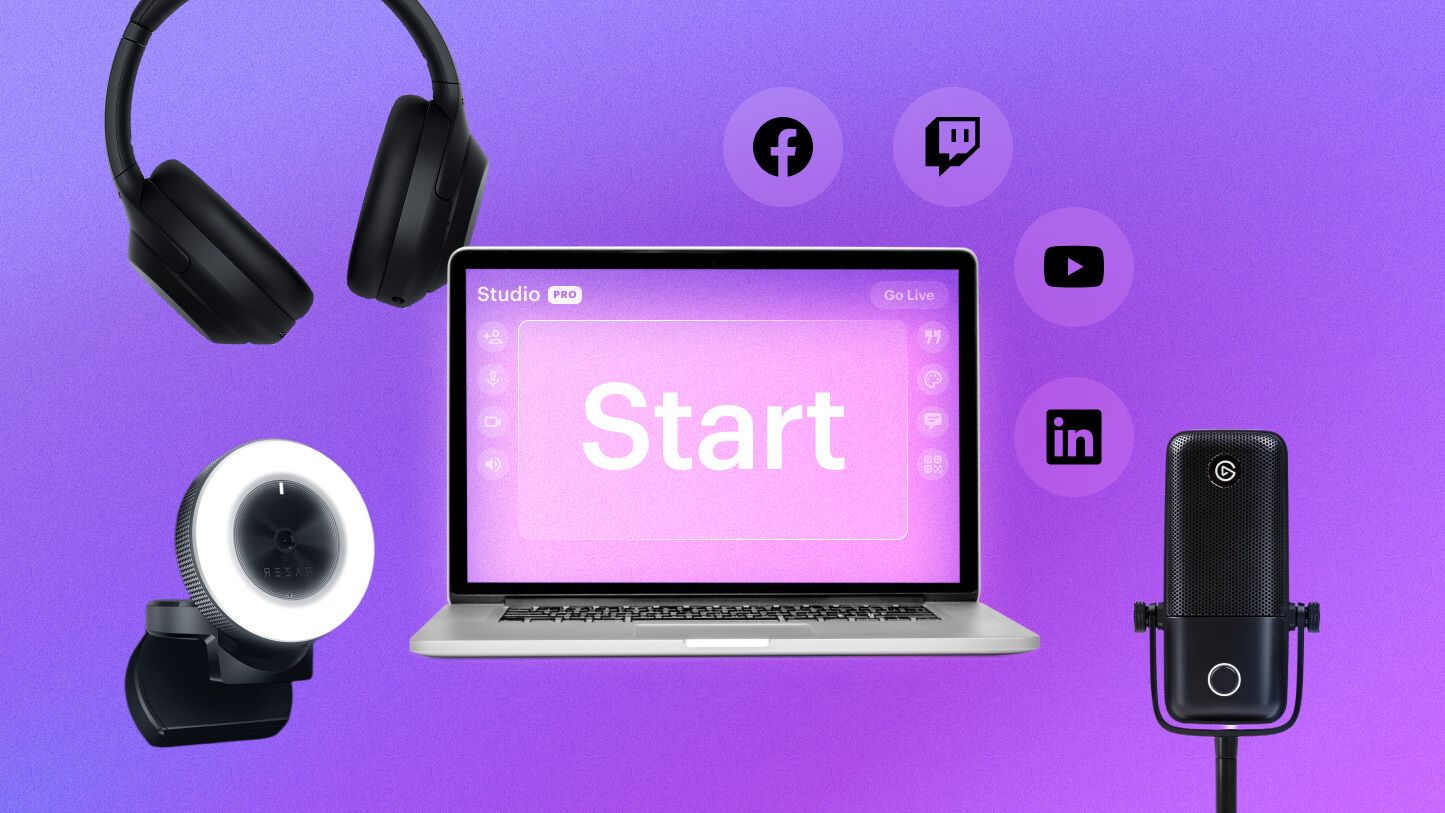
2. Acquire the Necessary Equipment: To stream games from your gaming laptop, you’ll need some basic equipment. This includes a reliable laptop, a webcam, a microphone, and a stable internet connection. Investing in a good quality webcam and microphone will enhance the production value of your stream.
3. Choose Your Streaming Software: Selecting the right streaming software is crucial for a smooth streaming experience. Popular options include OBS Studio, Streamlabs OBS, and XSplit. Research and try different software to find the one that suits your needs and offers the features you require.
4. Familiarize Yourself with the Software: Once you’ve chosen your streaming software, take the time to familiarize yourself with its features and settings. Explore the different customization options and learn how to set up scenes, overlays, and alerts to enhance your stream’s visual appeal.
5. Create a Twitch Account: Head over to the Twitch website and create an account if you don’t already have one. Choose a unique and memorable username that reflects your brand or personal identity. Customizing your profile with a catchy bio and eye-catching banner will help attract viewers.
6. Optimize Your Stream Settings: Configure your streaming software’s settings according to your laptop’s specifications and internet connection. Adjust the video resolution, frames per second (FPS), and bitrate to strike a balance between visual quality and smooth performance.
7. Promote Your Stream: Share your Twitch channel on social media platforms such as Twitter, Instagram, and Discord. Network with other streamers, join relevant communities, and engage with your audience to build a loyal viewer base.
Remember, successful Twitch streaming takes time and effort. Consistency, interaction, and providing unique and entertaining content will help you grow your stream’s popularity. So, get your gaming laptop ready, follow these steps, and embark on an exciting streaming journey on Twitch!
Setting Up Your Gaming Laptop for Twitch Streaming
Before you start streaming your games on Twitch, it’s essential to ensure that your gaming laptop is properly configured for a seamless streaming experience. Here are some key steps to set up your gaming laptop for Twitch streaming:
1. Update Your Operating System and Software: Make sure that your gaming laptop is running on the latest version of the operating system. Also, keep your streaming software, graphics card drivers, and any other streaming tools up to date to avoid any compatibility issues.
2. Check Your Hardware Specifications: Streaming requires a decent amount of processing power and RAM. Ensure that your gaming laptop meets the minimum system requirements to ensure smooth streaming performance. Consider upgrading your hardware, if needed, to prevent any lag or frame rate drops.
3. Clean Up Your System: Remove any unnecessary files, programs, or apps that may consume system resources. Run a disk cleanup or use disk cleaning software to free up space and optimize your laptop’s performance.
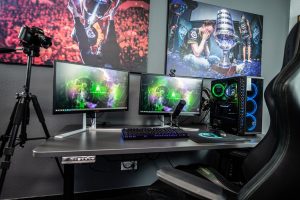
4. Set Up Dual Monitors: Consider using dual monitors for your streaming setup. This allows you to have one monitor dedicated to your game and the other for managing your stream, chat, and other streaming tools. It helps to keep your workflow organized and makes multitasking easier.
5. Configure Power Settings: Adjust your power settings to ensure that your gaming laptop doesn’t go into sleep or hibernate mode while streaming. Set it to high performance mode to make the most out of your laptop’s capabilities during streaming sessions.
6. Optimize Your Internet Connection: A stable and fast internet connection is crucial for streaming. Connect your gaming laptop to a wired Ethernet connection for a more reliable and consistent connection. If using Wi-Fi, ensure that you’re connected to a strong and stable network with minimal interference.
7. Manage Background Processes: Close any unnecessary programs or processes running in the background to free up system resources. This will help ensure that your gaming laptop can focus on the streaming software and game without any disruptions.
8. Test Your Stream: Before going live, it’s important to test your stream settings and video/audio quality. Conduct a test stream and monitor the stream’s performance, audio levels, and video clarity. Make necessary adjustments to your encoding settings if needed.
Setting up your gaming laptop correctly is crucial to ensure a smooth and enjoyable streaming experience on Twitch. Follow these steps, optimize your settings, and you’ll be ready to showcase your gaming skills to the world!
Choosing the Right Streaming Software for Your Gaming Laptop
When it comes to Twitch streaming, selecting the right streaming software is essential for a smooth and enjoyable streaming experience. The streaming software you choose should offer a user-friendly interface, customization options, and excellent performance. Here are some factors to consider when choosing the right streaming software for your gaming laptop:
1. User-Friendly Interface: Look for streaming software that has an intuitive and easy-to-navigate interface. A cluttered and complex interface can make the streaming process more challenging, especially for beginners. The software should allow you to access key features and settings without confusion.
2. Customization Options: The ability to customize your stream with overlays, alerts, and transitions is crucial for creating a unique and visually appealing stream. Choose streaming software that offers a wide range of customization options, allowing you to tailor your stream according to your branding or personal style.
3. Performance and Stability: Streaming software should be able to handle your gaming laptop’s specifications without causing any significant performance issues. It should utilize system resources efficiently and provide stable streaming without causing lag or frame rate drops during gameplay.
4. Platform Compatibility: Ensure that the streaming software is compatible with the operating system of your gaming laptop. Whether you’re using Windows, macOS, or Linux, make sure the software supports your chosen platform.
5. Encoder Options: Streaming software should offer access to various encoding options, such as x264, NVENC, or QuickSync. Different encoders have varying effects on stream quality, performance impact, and hardware utilization. Find software that allows you to choose the encoding option that best suits your needs.
6. Integration with Streaming Platforms: Consider software that seamlessly integrates with the streaming platform of your choice, such as Twitch, YouTube, or Mixer. This integration can simplify the setup process, provide access to essential features, and streamline the broadcasting process.
7. Community Support and Updates: Opt for streaming software that has an active and supportive user community. Look for software that regularly receives updates, bug fixes, and new feature additions. Supportive communities can provide assistance and guidance when facing technical issues.
Some popular streaming software options to consider for your gaming laptop include OBS Studio, Streamlabs OBS, and XSplit. These software solutions offer a wide range of features and have a large user base, making it easier to find tutorials, guides, and troubleshooting help.
Take your time to research and experiment with different streaming software options to find the one that suits your needs and preferences. Remember, selecting the right streaming software is crucial for a successful Twitch streaming experience on your gaming laptop.
Configuring the Streaming Software for Optimal Performance
Once you have chosen your streaming software for Twitch streaming on your gaming laptop, it’s important to configure it properly for optimal performance. Proper configuration ensures that your stream runs smoothly, delivers high-quality video and audio, and minimizes any potential issues that may arise. Here are some essential steps to configure your streaming software for optimal performance:
1. Video Settings: Adjust the video settings in your streaming software to achieve the desired balance between quality and performance. Set the output resolution and frame rate according to your laptop’s capabilities and the requirements of your viewers. Consider using the standard Twitch settings of 720p at 30 FPS to start with, and make adjustments based on your internet speed and hardware.
2. Encoder Settings: The encoder settings determine how your streaming software transcodes the video for broadcasting. Experiment with different encoder options, such as x264, NVENC, or QuickSync, to find the one that best suits your hardware and streaming needs. Balance the encoding preset between quality and performance, keeping in mind that faster presets will utilize less CPU power but may result in slightly lower video quality.
3. Bitrate: Set the bitrate of your stream based on your internet upload speed and the requirements of your stream quality. A higher bitrate will result in better video quality but may require a faster internet connection. Twitch recommends a maximum bitrate of 6000 Kbps for most streams, but adjust this according to your own network capabilities.
4. Audio Settings: Configure the audio settings in your streaming software to ensure optimal sound quality. Choose the appropriate audio devices, adjust the volume levels, and test the sound to ensure clear and balanced audio during your stream. Consider using a noise gate or noise suppression filter to reduce background noise.
5. Scene and Source Management: Organize your scenes and sources within your streaming software. Create separate scenes for different games or stream layouts, and add sources for your webcam, game capture, overlays, and alerts. Streamline your workflow by configuring hotkeys for quick scene transitions and source visibility toggles.
6. Network Settings: Optimize the network settings in your streaming software to minimize packet loss and connection issues. Ensure that your software is using the correct network adapter and select the closest streaming server location for better stability. Enable dynamic bitrate if available to automatically adjust the bitrate based on network conditions.
7. Test and Adjust: Before going live, thoroughly test your stream configurations. Monitor the stream preview to check for any issues and make adjustments as necessary. Pay attention to factors like stream delay, audio sync, and video quality to ensure a smooth streaming experience for your viewers.
Remember, configuring your streaming software for optimal performance may require some trial and error. Test different settings, monitor the results, and make adjustments based on your hardware capabilities and the preferences of your audience. With proper configuration, you can deliver high-quality streams that engage and captivate your viewers on Twitch.
Setting Up Your Twitch Account for Streaming
Before you can start streaming on Twitch, you need to set up your Twitch account. Your Twitch account serves as your channel, where viewers can find and interact with your streams. Properly setting up your Twitch account is important to attract and engage your audience. Here are the essential steps to get your Twitch account ready for streaming:
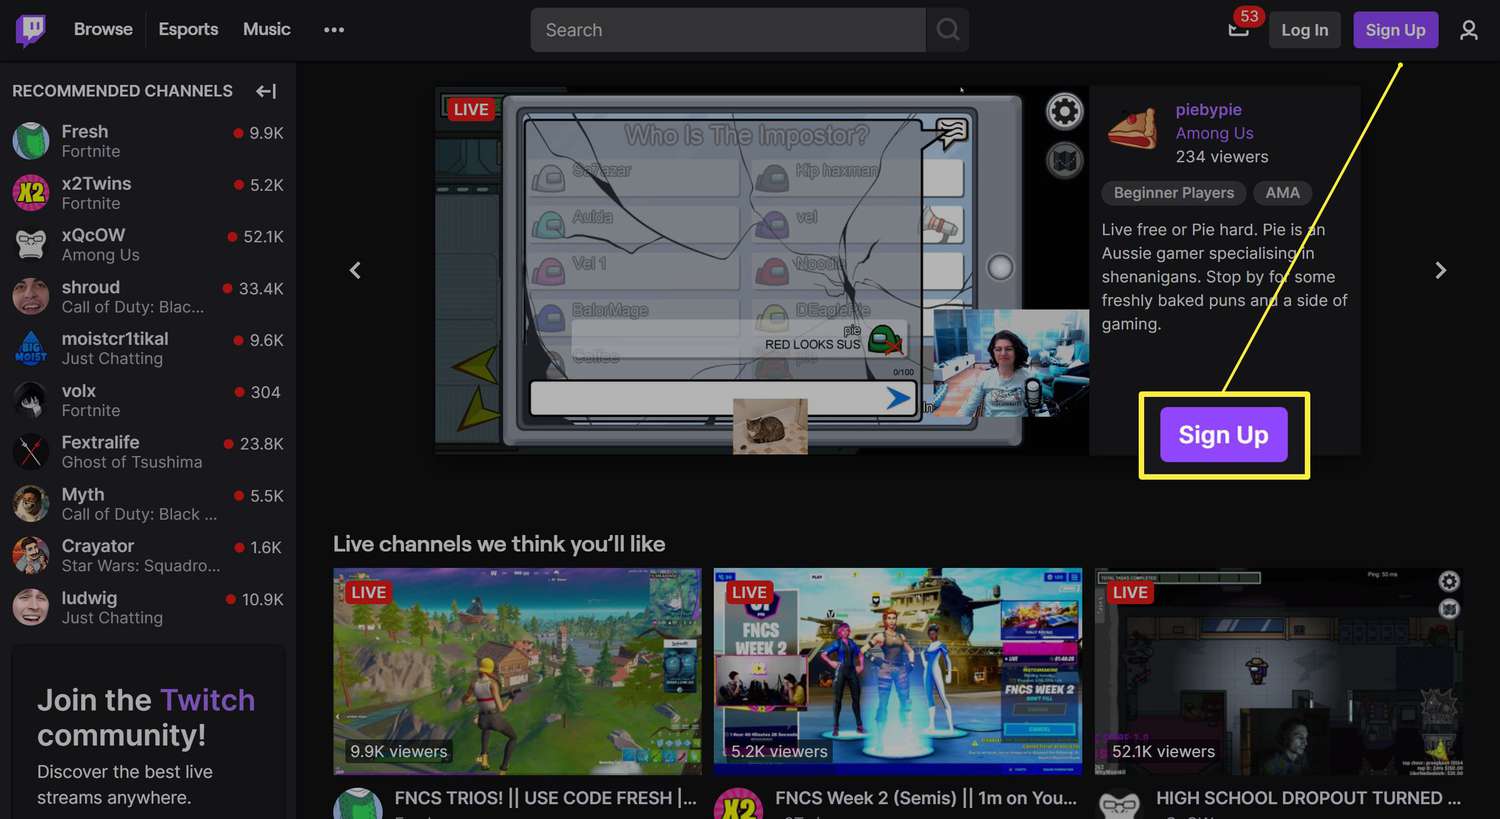
1. Create Your Twitch Account: Visit the Twitch website and click on the “Sign Up” button to create your account. You can sign up using your existing Amazon account or create a new one. Choose a unique and memorable username that reflects your brand or personal identity.
2. Set Up Two-Factor Authentication: Enable two-factor authentication (2FA) for your Twitch account to enhance its security. 2FA provides an extra layer of protection by requiring a verification code in addition to your password when logging in.
3. Customize Your Twitch Profile: Personalize your Twitch profile to make it appealing to viewers. Add a profile picture that represents you or your gaming brand and write a catchy and informative bio. You can also customize your channel’s banner and panels to reflect your style and provide important information about your stream.
4. Connect Your Streaming Software: Connect your chosen streaming software, such as OBS Studio or Streamlabs OBS, to your Twitch account. This allows your streaming software to communicate with the Twitch servers and broadcast your stream. Follow the software’s instructions to link your Twitch account successfully.
5. Enable Twitch Chat Moderation: Set up moderation tools for your Twitch chat to ensure a positive and safe streaming environment. Familiarize yourself with the moderation settings, such as automod filters and blocking certain words or phrases. Assign trusted moderators to help manage the chat during your streams.
6. Configure Stream Titles and Tags: When going live, give your stream an attention-grabbing title that accurately represents the content of your stream. Adding relevant tags can also help viewers find and discover your stream. Use descriptive and popular tags related to the game you are streaming or the type of content you provide.
7. Set Up Twitch Channel Points and Emotes: Take advantage of Twitch channel points and emotes to enhance viewer engagement. Customize your channel points rewards to provide unique interactions and rewards for your viewers. Consider designing custom emotes that viewers can unlock and use in your chat.
8. Promote Your Twitch Channel: Spread the word about your Twitch channel by promoting it on various platforms. Share your stream schedule and highlights on social media platforms like Twitter, Instagram, and Facebook. Join gaming communities and forums relevant to your content to connect with potential viewers.
By setting up your Twitch account properly, you lay the foundation for a successful streaming journey. Take the time to customize your profile, connect your streaming software, and engage with your audience. With a well-prepared Twitch account, you’ll be ready to start streaming and grow your viewer base on the platform!
Optimizing Your Gaming Laptop Settings for Streaming
Streaming games on Twitch requires your gaming laptop to perform at its best to deliver a smooth and high-quality stream. Optimizing your laptop’s settings specifically for streaming can help enhance performance, reduce lag, and ensure an enjoyable streaming experience for your viewers. Here are some important steps to optimize your gaming laptop settings for streaming:
1. Update Drivers and Software: Keeping your laptop’s drivers and software up to date is important for optimal performance. Update the graphics card drivers, chipset drivers, and any other relevant software to ensure stability and compatibility with streaming software.
2. Close Unnecessary Background Processes: Close any unnecessary background processes or applications running on your laptop to free up system resources. Resource-hungry applications can impact your laptop’s performance while streaming, causing lag or decreased frame rates. Use the Task Manager (Windows) or Activity Monitor (Mac) to identify and close resource-consuming processes.
3. Enable High-Performance Mode: Activate the high-performance power mode on your laptop to make the most out of its capabilities. This mode ensures that your laptop’s processor, graphics card, and other components run at their fastest speeds, providing optimal performance for streaming.
4. Manage System Cooling: Overheating can negatively impact your laptop’s performance while streaming. Ensure that your laptop’s cooling system is functioning properly and not obstructed by dust or debris. Consider using a laptop cooling pad or an external fan to aid in heat dissipation during long streaming sessions.
5. Adjust Display Settings: Streamlining your laptop’s display settings can help reduce the strain on its resources. Set the display resolution to match your streaming output for optimal performance. Consider disabling any unnecessary visual effects or animations to free up system resources.
6. Allocate Sufficient RAM: Streaming can be memory-intensive, so ensure that your laptop has enough RAM (Random Access Memory) to handle the workload. Close any unnecessary programs or browser tabs that may consume memory. If needed, consider upgrading your laptop’s RAM capacity for smoother streaming performance.
7. Configure Internet Settings: To ensure stable and uninterrupted streaming, optimize your internet settings. Connect your laptop to a wired Ethernet connection if possible, as it generally provides better stability and speed compared to wireless connections. If using Wi-Fi, ensure that you’re connected to a strong and reliable network.
8. Run Regular Maintenance: Perform regular maintenance tasks on your laptop to keep it running smoothly. This includes running disk cleanup, defragmenting your hard drive, and scanning for malware or viruses. A well-maintained laptop performs better and ensures a more reliable streaming experience.
By optimizing your gaming laptop settings for streaming, you can greatly improve the performance of your streams on Twitch. These steps will help you deliver high-quality gameplay without any technical hindrances. Take the time to fine-tune your laptop’s settings, and you’ll be on your way to providing top-notch streams for your viewers!
Adjusting Stream Settings for Optimal Video Quality
Delivering optimal video quality is crucial for a successful Twitch streaming experience. By adjusting your stream settings, you can ensure that your viewers enjoy a visually pleasing and smooth stream. Here are some key steps for adjusting stream settings to achieve optimal video quality:
1. Resolution: Set the video resolution for your stream based on your laptop’s capabilities and your viewers’ preferences. Twitch recommends starting with a resolution of 720p, also known as “HD,” as it strikes a good balance between quality and performance. If your laptop can handle higher resolutions, you can experiment with 1080p or even 1440p streaming.
2. Frames Per Second (FPS): Adjusting the FPS determines how smooth your stream appears to viewers. The standard FPS for Twitch is 30, and most viewers are accustomed to this frame rate. If your laptop can handle it, consider streaming at 60 FPS for an even smoother visual experience. Keep in mind that higher FPS requires more processing power from your laptop.
3. Bitrate: The bitrate influences the level of detail and overall quality of your stream. It is the amount of data transmitted per second. Twitch suggests a maximum bitrate of 6000 kbps, but you can adjust it based on your internet upload speed and viewers’ internet connections. Higher bitrates provide better image quality but require faster internet speeds.
4. Encoding: Choose the appropriate encoding option in your streaming software for optimal video quality. The most common options are x264 (software encoding) and NVENC (hardware encoding for NVIDIA GPUs). Experiment with different settings and presets to find the best balance between video quality and performance for your specific hardware.
5. Keyframe Interval: Keyframes are complete frames included in your stream, while the other frames are partial or only contain changes from the previous frame. Setting a higher keyframe interval (e.g., 2 seconds) can reduce the file size of your stream but may affect video quality during fast-paced scenes. For optimal quality, Twitch recommends a keyframe interval of 2 seconds or 1 second for fast-action games.
6. Video Filters and Effects: Some streaming software allows the use of video filters and effects to enhance your stream’s visual quality. Experiment with options like sharpening, color correction, and noise reduction to fine-tune the appearance of your stream. Use these features sparingly, as excessive filters or effects can degrade your stream’s quality or impact performance.
7. Preview Stream Quality: Take advantage of the preview function in your streaming software to monitor the quality of your stream. Regularly check the preview to ensure that the video appears clear, free from artifacts, and has consistent frame rates. Make necessary adjustments to settings if you notice any issues during the preview.
8. Test and Gather Feedback: Conduct test streams and gather feedback from viewers to fine-tune your video quality. Ask for input on the clarity, sharpness, and overall visual experience of your stream. Use this feedback to make informed adjustments to your stream settings to achieve optimal video quality.
Remember, finding the right balance between video quality and performance is essential. Adjust your stream settings based on your laptop’s capabilities, your internet connection, and viewer preferences. Regularly monitor and tweak these settings to provide the best possible video quality for your Twitch audience.
Connecting Your Gaming Laptop to the Internet for Stable Streaming
A stable internet connection is vital for a smooth and uninterrupted streaming experience on Twitch. To ensure a reliable connection between your gaming laptop and the internet, follow these important steps:
1. Wired Connection: Whenever possible, connect your gaming laptop to the internet using a wired Ethernet connection. Wired connections offer greater stability and faster speeds compared to wireless connections, minimizing the risk of signal interference or drops in connection during your stream.
2. Check Internet Speed: Assess the speed of your internet connection to ensure it meets the requirements for streaming. Use an online speed test tool to measure your upload speed, which should be at least 3-4 Mbps for standard streaming and higher for higher-quality streams. If your speed falls short, consider upgrading your internet plan or contacting your internet service provider for assistance.
3. Router Placement: Optimize the placement of your Wi-Fi router for maximum signal strength. Position it in a central location within your home, away from obstructions like walls or appliances that may hinder the signal. If possible, consider elevating the router to improve the coverage area and reduce interference.
4. Wi-Fi Signal Strength: If using Wi-Fi, ensure that your gaming laptop is within a reasonable range of your router. Check the Wi-Fi signal strength on your laptop and consider using a Wi-Fi analyzer app to identify and mitigate any interference from neighboring networks. If the signal is weak, you may need to reposition your router or invest in a Wi-Fi range extender.
5. Network Congestion: Avoid streaming during peak hours or when your network is heavily congested. Multiple devices connected to your network simultaneously can strain the bandwidth and affect your streaming quality. If possible, schedule your streams during off-peak hours or limit device usage during your streaming sessions.
6. Quality of Service (QoS): If your router supports Quality of Service (QoS), enable it to prioritize your streaming traffic. QoS allows you to allocate more bandwidth to streaming applications, ensuring a smoother and more stable connection. Consult your router’s manual or contact your internet service provider for instructions on enabling QoS.
7. Reduce Network Interference: Minimize network interference by minimizing the number of devices using your network concurrently. Close any unnecessary applications or browser tabs on your gaming laptop that may be consuming bandwidth. Additionally, ensure that other devices on your network, such as smartphones or smart home devices, are not performing data-intensive activities while you’re streaming.
8. Monitor Network Performance: Keep an eye on your network performance as you stream. Monitor the stream’s stability, buffering, and any drops in connection. Utilize tools like Twitch Inspector or streaming software’s built-in network statistics to troubleshoot and identify any issues that may arise during your stream.
By following these steps, you can ensure a stable internet connection for streaming on your gaming laptop. A reliable connection reduces the risk of buffering or disconnections during your stream, allowing you to deliver a seamless and enjoyable viewing experience for your Twitch audience.
Testing and Troubleshooting Your Twitch Stream from Your Gaming Laptop
Testing and troubleshooting your Twitch stream before going live is crucial for a successful streaming experience. By identifying and addressing potential issues beforehand, you can ensure a smooth and uninterrupted stream. Here are some important steps to test and troubleshoot your Twitch stream from your gaming laptop:
1. Test Stream Configuration: Before going live, conduct a test stream to confirm that your stream configuration is set up correctly. Check that your video and audio settings are properly configured, and ensure that your stream resolution, frame rate, and bitrate are appropriate for your internet connection and viewership.
2. Monitor Stream Performance: While streaming, closely monitor the performance of your stream. Keep an eye on metrics like video quality, frame rate stability, and audio synchronization. Use the preview function in your streaming software to assess the stream quality in real-time and make adjustments if necessary.
3. Check for Lag or Frame Drops: Pay attention to any lag or frame drops during your test stream. If you notice any issues, it may indicate that your hardware or internet connection is struggling to handle the stream settings. Consider lowering the resolution, adjusting encoding settings, or upgrading your hardware if needed.
4. Verify Audio Levels: Ensure that your microphone and other audio sources are properly balanced. Check that your voice is clear and easily audible over the game audio. Use the volume mixer in your streaming software or external audio equipment to adjust audio levels as required.
5. Test Chat Interaction: Interact with your stream’s chat feature to ensure it is functioning correctly. Send test messages, check if they appear on the stream, and ensure that you can read and respond to chat messages without any difficulties. Engaging with your viewers is an important aspect of streaming, so it’s essential to have a smooth chat experience.
6. Monitor Stream Delay: Observe the stream delay to determine its length. Stream delay refers to the lag between your real-time actions and their appearance on the stream. While a slight delay is normal, excessive delay may affect viewer engagement and interaction. Adjust your stream settings or consult with your streaming software’s support resources to minimize the delay if necessary.
7. Perform Bandwidth Tests: Run bandwidth tests to assess the stability and speed of your internet connection. Use online tools or the speed test features in your streaming software to measure your upload and download speeds. Ideally, you should have a consistent and robust internet connection to ensure a smooth streaming experience.
8. Utilize Twitch Inspector: Take advantage of Twitch Inspector, a tool provided by Twitch, to diagnose and troubleshoot stream-related issues. Twitch Inspector provides detailed information about your stream’s health, including video and audio bitrate, buffering, and network stability. Use this tool to identify potential problems and implement necessary adjustments.
Regularly test and troubleshoot your Twitch stream to minimize any technical issues and provide the best possible experience for your viewers. Consistently monitoring and optimizing your stream settings and addressing any issues promptly will enable you to deliver high-quality content and maintain viewer engagement on your Twitch channel.
Promoting and Growing Your Twitch Stream
Building an audience and growing your Twitch stream takes more than just going live. Promoting your stream and engaging with the Twitch community are key steps to attract viewers and create a loyal following. Here are some effective strategies to promote and grow your Twitch stream:
1. Create a Consistent Streaming Schedule: Establish a regular streaming schedule and stick to it. Consistency is crucial to attract and retain viewers. Let your audience know when to expect you live so they can plan to tune in. Consistency builds trust and helps you gain a dedicated viewer base.
2. Utilize Social Media: Leverage the power of social media platforms to promote your Twitch stream. Create accounts specifically for your Twitch channel and share updates, highlights, and upcoming streams. Engage with your followers, respond to comments, and use relevant hashtags to reach a wider audience.
3. Join Twitch Communities and Discords: Participate in Twitch communities and Discord servers related to your stream’s content or the games you play. Engage with other streamers and viewers, share your stream when appropriate, and offer support to fellow community members. Networking can help you gain exposure and build relationships within the Twitch community.
4. Collaborate with Other Streamers: Reach out to other streamers for collaboration opportunities. Collaborative streams, raids, or hosting each other’s streams can introduce your channel to new viewers. Look for streamers with similar interests or complimentary content, and work together to cross-promote each other’s channels.
5. Create Engaging Stream Titles and Thumbnails: Craft captivating stream titles and eye-catching thumbnails to grab the attention of potential viewers. Make your stream stand out by providing a glimpse of what viewers can expect. Use intriguing and descriptive titles that reflect the content of your stream and pique curiosity.
6. Engage with Your Viewers: Interact with your viewers during your stream to foster a sense of community. Respond to comments, acknowledge new followers, and engage in conversation. This creates a welcoming environment, encourages viewer loyalty, and attracts new viewers who appreciate active engagement.
7. Offer Channel Rewards and Incentives: Implement channel rewards and incentives to reward your viewers for their support and engagement. Twitch’s Channel Points feature allows you to create unique rewards, such as shoutouts, emote unlocks, or gameplay challenges. These rewards encourage viewers to stay engaged and recommend your channel to others.
8. Optimize Stream Titles, Tags, and Descriptions: Pay attention to the metadata surrounding your stream. Use relevant keywords in your stream titles, tags, and descriptions to improve discoverability in Twitch’s search algorithm. Think about what potential viewers might search for to find streams similar to yours, and incorporate those keywords in your metadata.
9. Showcase Stream Highlights: Create highlight reels or compilations of your best moments and share them on your Twitch channel and social media platforms. Highlight videos can capture the attention of potential viewers, giving them a taste of the entertaining content they can expect from your stream.
10. Attend Gaming and Streaming Events: Participate in online gaming events, conferences, or streaming competitions. These events provide networking opportunities, exposure to larger audiences, and a chance to showcase your skills. Building connections within the gaming and streaming community can open doors to new viewers and collaborations.
Promoting and growing your Twitch stream takes time, effort, and consistent engagement. Stay active, be genuine, and focus on creating quality content that resonates with your target audience. Implementing these strategies will help you attract more viewers, foster a supportive community, and ultimately expand your Twitch presence.