Clipchamp is a browser-based video editing tool for beginners with an excellent user interface and an extensive stock library. The tool partly relies on your PC’s resources to process videos, but the interface is entirely online. It is feature-rich and well-stocked with royalty-free videos, photos, and music files. In this article, we’ll explore how Clipchamp works to find out why so many people have made the switch.

What is Clipchamp?
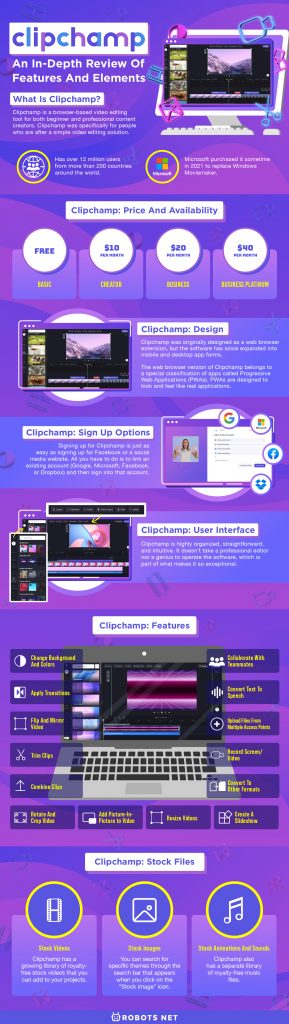
Clipchamp is a browser-based video editing tool for both beginner and professional content creators. Clipchamp was specifically for people who are after a simple video editing solution and has over 12 million users from more than 200 countries around the world. The app’s popularity has grown steadily over the years, prompting Microsoft to purchase it sometime in 2021 to replace Windows Moviemaker. As such, the program can be expected to appear in the incoming version of the Windows OS.
Clipchamp is a middle-tier video editing service, similar to the likes of Nero Video, VEED, InVideo, and PowerDirector. As a mid-tier service, its prices are below other expensive and professional options like the Adobe Premiere and its Pro version. Nonetheless, it is more than able to match these programs in terms of the quality and quantity of its tools. The software is also specifically designed to be simple, making it a lot less intimidating for beginners.
One of its principal features is letting users upload pre-recorded videos from files or record videos straight from the webcam or phone. And aside from standard features such as trimming and cutting, it also allows users to add music, text, photos, filters, and special effects. It also has an extensive stock library which consists of royalty-free images, videos, and music.
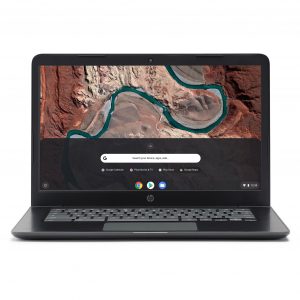
Clipchamp is first and foremost a web-based extension and a Chrome-based extension. It works exclusively with other Chrome-backed browsers such as Microsoft Edge and Google Chrome. Unfortunately, the software is incompatible with the likes of Firefox or Safari. The software also recently acquired a mobile and desktop counterpart for on-the-go and offline use.
Also Read: Top 15 Free Online Video Editors Perfect for Beginners
Clipchamp: Price and Availability

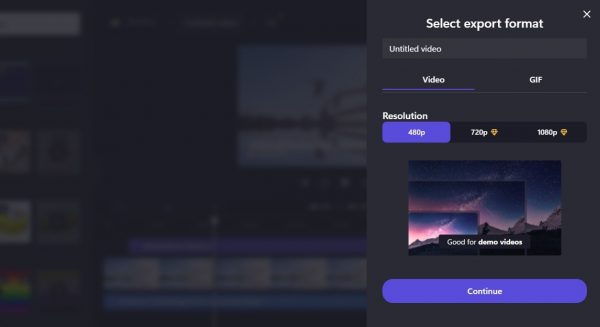
Clipchamp’s pricing system consists of four different plans. All users are automatically assigned to the free plan upon signing up. If that is not enough for you, you can upgrade to a variety of premium options to unlock more features. The premium plans are subscription-based, which means you’ll have to pay a certain amount each month to continue using the service. Allow us to explain each of the available plans in more detail:
Basic
The basic plan may be the simplest, but its feature set is still surprisingly robust. Or at least when compared to the free packages of other video editing software. There’s no limit to the number of projects that you can work on, but each video has to be below five minutes in duration. In addition, the exported videos have watermarks on them, and the maximum resolution for export is limited to 480p.
Creator
The Creator plan is the most popular option for beginners due to its affordable fee structure and better feature set compared to the Basic plan. The Creator plan offers an unlimited number of video exports. It comes with no restrictions regarding the duration of each project.
The plan also unlocks CloudSync, which allows you to upload your files to cloud storage run by Clipchamp. Access to CloudSync is unlimited at this level, which means you can upload as many files as you need. In addition, the stock media is unlocked and can be exported in a watermark or audiomark free form. The maximum resolution is also increased to a standard 720p.
For less than USD 10 per month, you can radically improve the quality of your videos as well as get access to auxiliary features.
Business
The Business plan is a little bit different since it was intended for creative professionals with brands and projects to promote. The package includes everything that the Creator plan has to offer, plus access to royalty-free audio stock as well as a brand kit.
A brand kit is a special toolbox where you can keep your go-to fonts, colors, and brand logos to keep a consistent image of your brand. Naturally, professional advertisements require ultra-resolution videos, and so this tier increases the maximum resolution to 1080p.
The Business package is not the most comprehensive, but it more than suffices for the marketing needs of small businesses self-employed entrepreneurs. It comes in a highly affordable package that will cost you less than USD 20 per month.
Business Platinum
The final and most comprehensive tier that you can get is Business Platinum. This tier comes with complete access to all the tools and effects offered by Clipchamp. It also comes with unlimited video exports, unlimited storage for video files, and a brand kit. The video quality is boosted upwards to a clear resolution of 1080p as well.
This plan, in particular, has everything that Clipchamp has to offer, and yet it is still surprisingly more affordable than other premium packages in the market. A monthly subscription can set you back USD 40 per month, at most.
Cost Benefits
Clipchamp has a very competitive pricing scheme and is cheaper on average compared to premium services like Adobe Premiere. Case in point, the basic package for Adobe Premiere weighs 20.99 monthly via the Creative Cloud. In comparison, the basic package for Clipchamp weighs in at less than ten dollars per month. If you compare the aggregate cost within ten years, you would be able to save around USD 1,000 by choosing Clipchamp over Adobe Premiere. Having said this, Clipchamp can easily top other middle-tier software when it comes to value for money.
Clipchamp: Design
Clipchamp was originally designed as a web browser extension, but the software has since expanded into mobile and desktop app forms.
The web browser version of Clipchamp belongs to a special classification of apps called Progressive Web Applications (PWAs). PWAs are designed to look and feel like real applications, except that they exist exclusively online. These apps do not require any download or installation, which means they do not take up any space on your hard drive. However, they still rely on your local storage to get at the files you want to edit.
Clipchamp is also cloud-based, which means that it allows you to use any device as the access point for your files. All you have to do is download the mobile or desktop versions of the app and then log in as you normally would on the web extension app. The app automatically syncs your files and updates them across all devices connected to your account and an internet connection.
Clipchamp: Sign Up Options
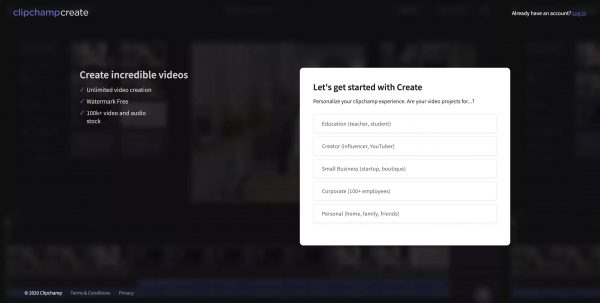
Signing up for Clipchamp is just as easy as signing up for Facebook or a social media website. All you have to do is to link an existing account (Google, Microsoft, Facebook, or Dropbox) and then sign into that account. The software doesn’t even ask for your name or contact information, which saves you a lot of time and makes the software remarkably unobtrusive.
However, the software will ask you about your purpose for creating the account, presumably so that they can give you a version of the software that has the tools you need. There’s an option for teachers, content creators, and creatives in the business and corporate sectors. Another option is designed specifically for individuals who want to learn how to edit videos within a more casual setting.
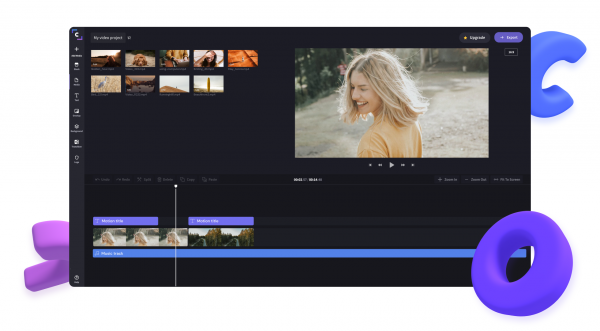
Clipchamp: User Interface

Clipchamp is highly organized, straightforward, and intuitive. It doesn’t take a professional editor nor a genius to operate the software, which is part of what makes it so exceptional.
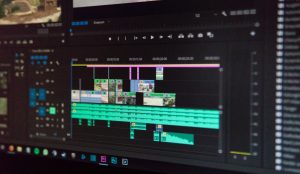
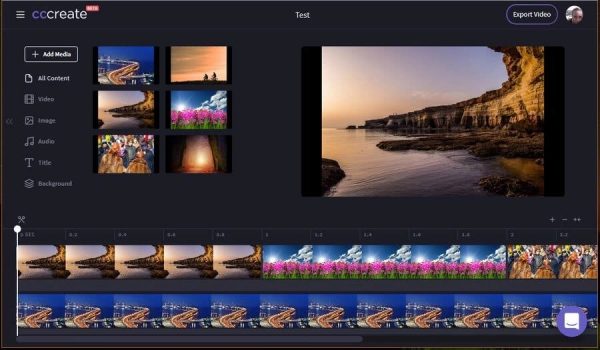
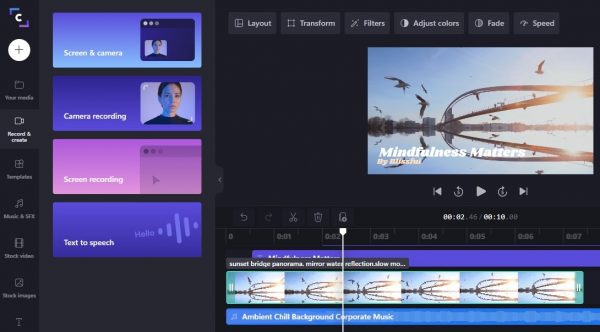
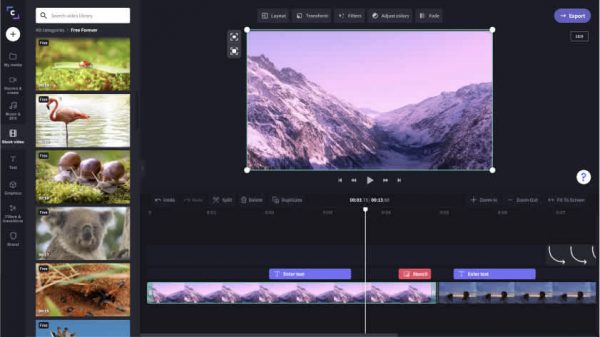
At the heart of the software is the editing interface, which is where all the magic happens. The interface has a horizontal timeline at the bottom that lays out all of your video inputs in sequential order. A small toolbar above the timeline gives you the options to add, delete, cut or crop portions of your file. A white ticker moves along the timeline when you play videos or music clips. You can move the ticker to any part of the timeline where you want a particular action to take effect.
The main toolbox cascades downwards from the left-hand side of the editing interface. Clipchamp organizes its tools into categories that even beginners can understand (i.e., templates, stock videos, music). Each category opens up to additional options for customization. For example, clicking on “Text” presents you with additional options like font, gradients, positioning, and so on.
Next to the toolbar is a special panel containing snapshots of the latest templates arranged into categories (i.e. YouTube, Gaming, Instagram). The panel displays all templates clearly and visually, so the user knows exactly what they are getting. A special section allows you to tap into your computer’s camera and microphone to record videos of your screen or yourself.
Clipchamp presents its tools in a very logical and practical way that doesn’t get in the way of the actual project. Not to mention, most of the effects, filters, and even stock files are presented visually so you can access them right off the bat.
Clipchamp: Features

Clipchamp’s name may not ring as loudly as more popular software, but that doesn’t mean that it can’t perform at the same level as that other software. Even with a free account, the software still offers a lot of extra features to make your videos look great. Let’s take a look at some of these features and what they’re for.
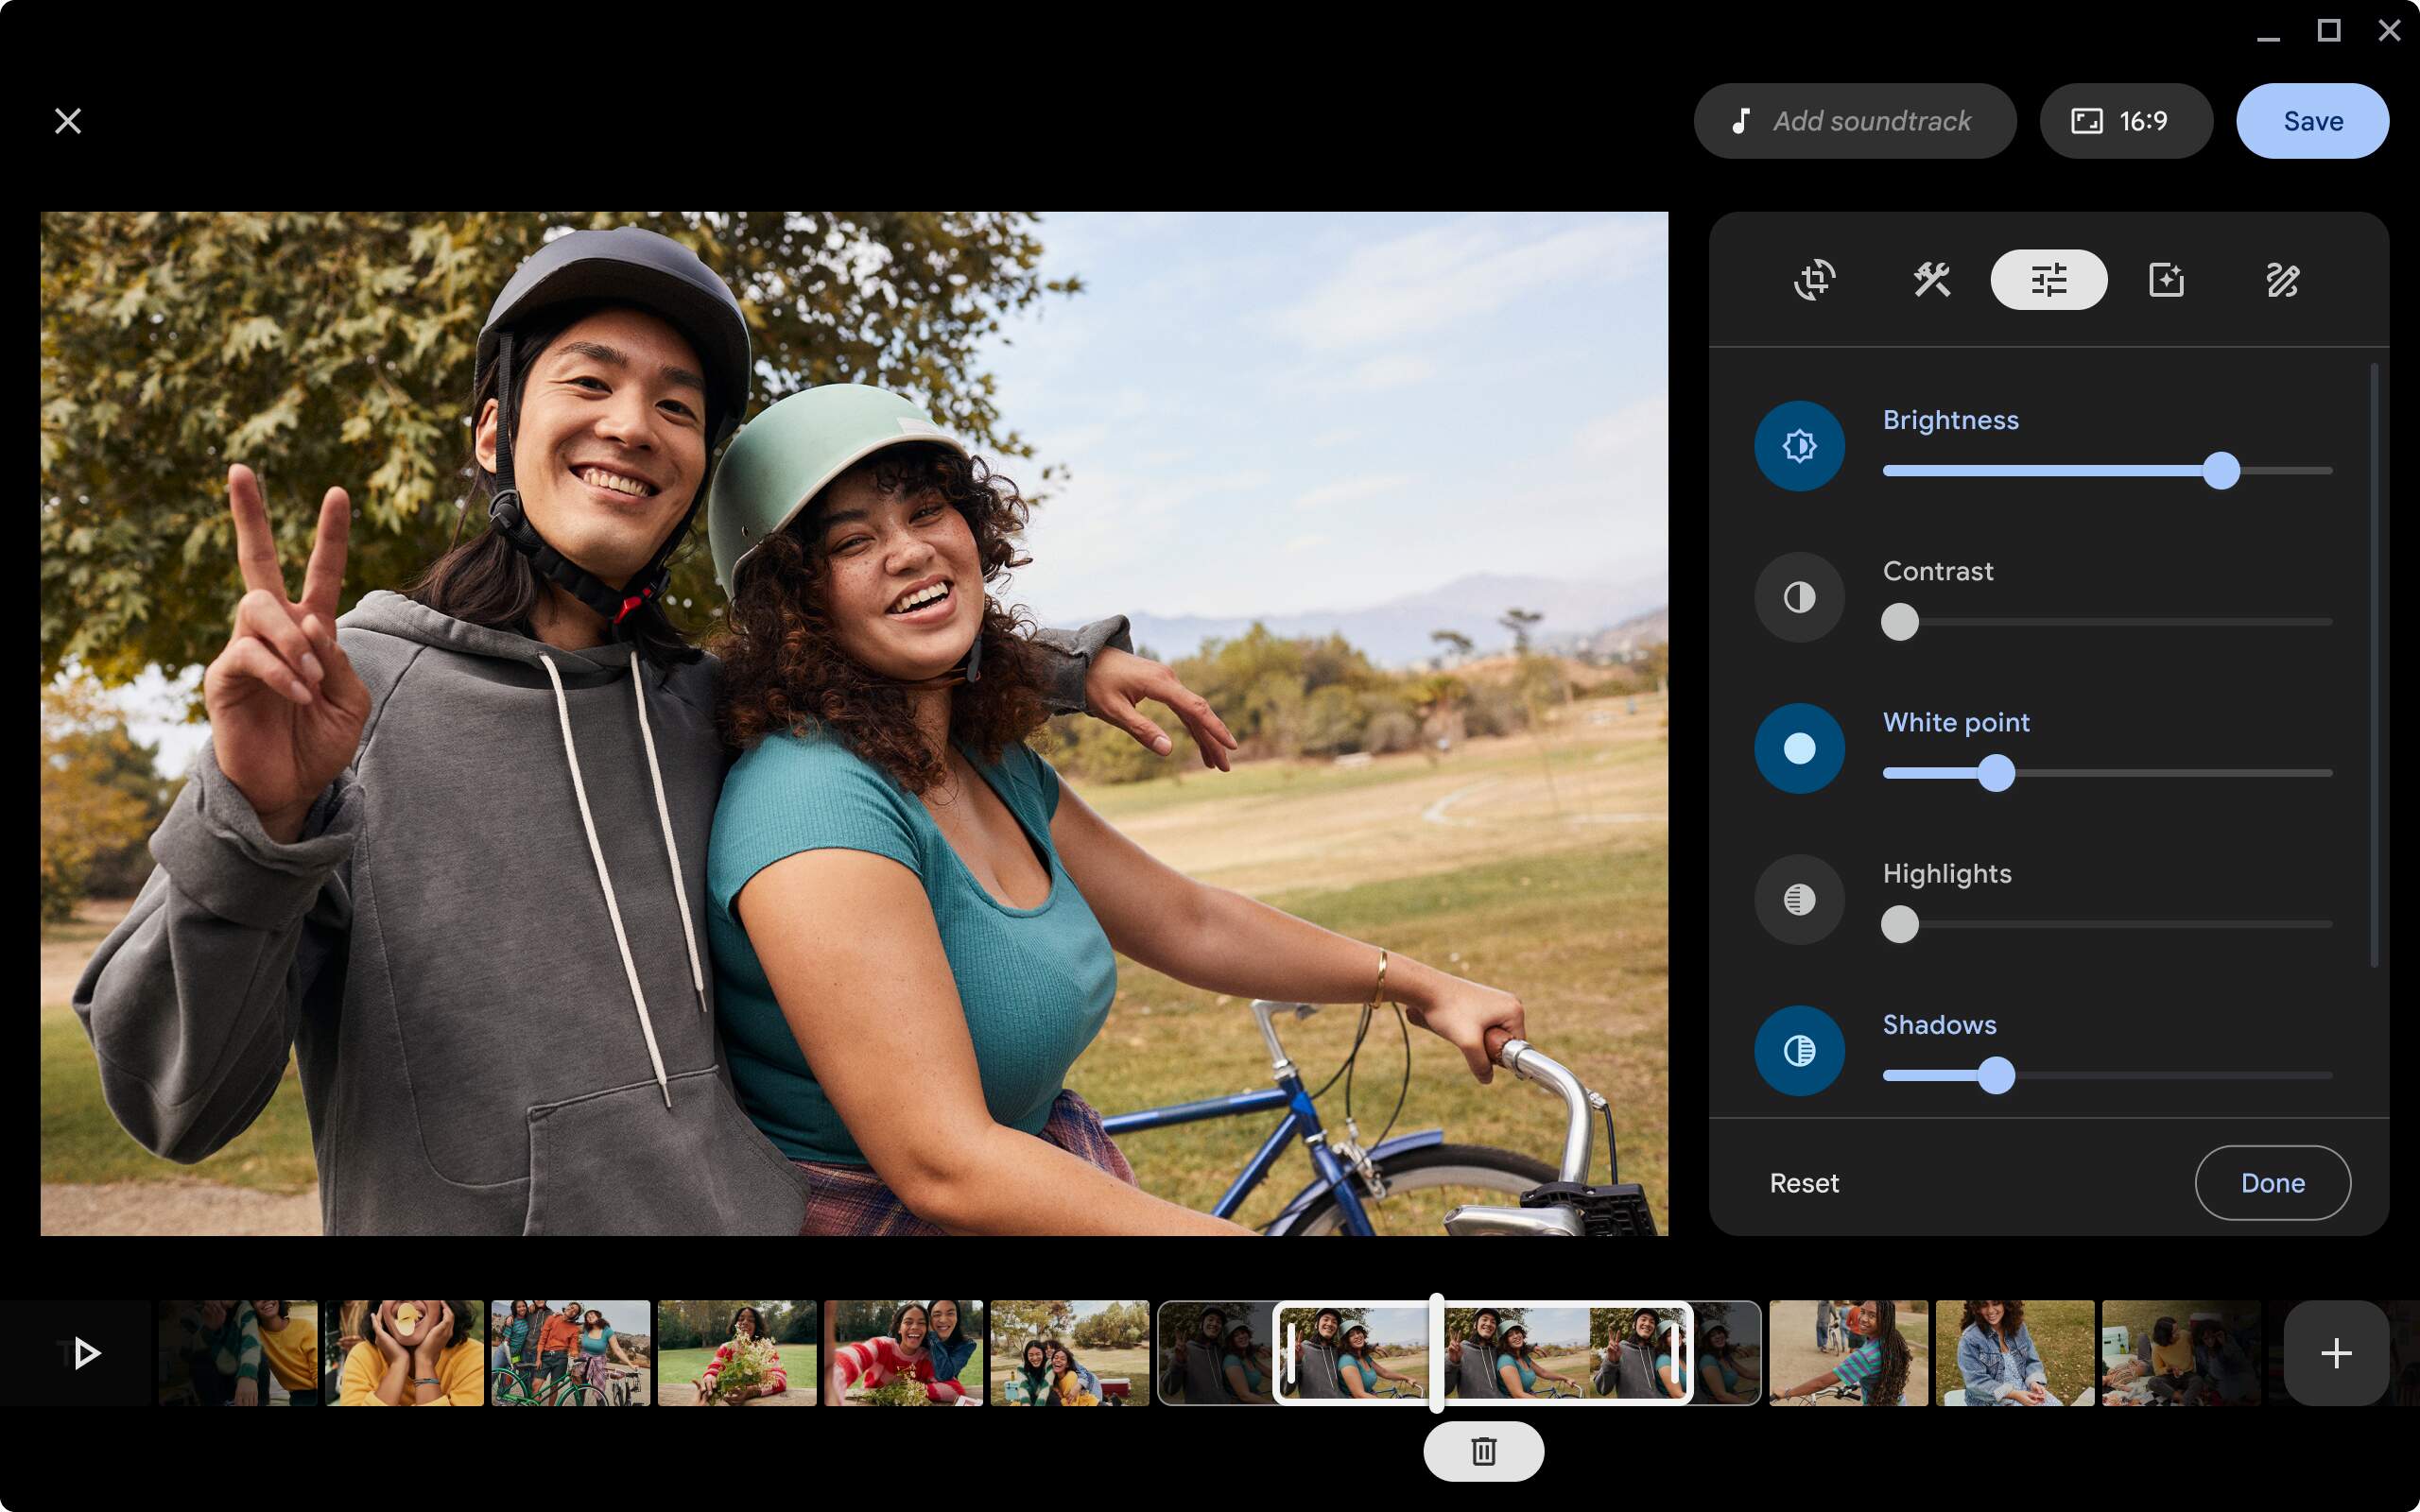
1. Change Background and Colors
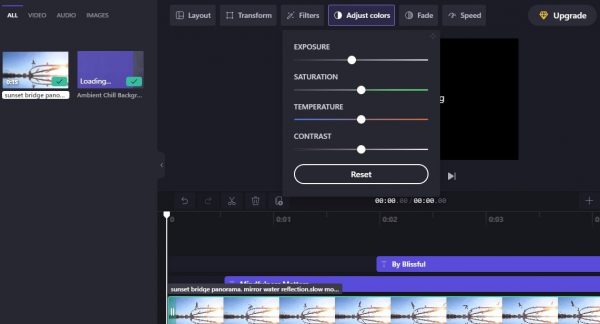
This particular group of features covers the brightness, saturation, and color features of a video. It makes it possible to take a video and replace its background photo. You can also re-color items within the photo (i.e., coloring a red shirt to make it blue). The software also features an advanced tool called the Green Screen Editor, which allows you to add special effects to your video.
2. Apply Transitions
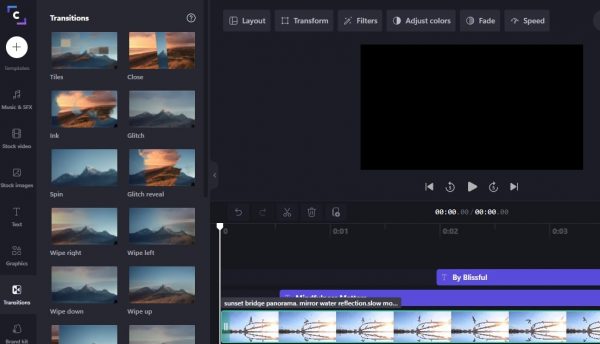
Most video projects consist of a handful of shorter videos linked together. But the absence of transitions or “cuts” in the video can make it hard to watch, especially if the viewer is sensitive to rapid changes in visual cues. These are what transitions are for. The app lets you add different transition styles in between smaller cuts to introduce the next video.
For example, you can have the next video clip ease into the current frame in the form of small tiles or other shapes. You can also slide the incoming frame into the current frame from different directions. You can use these transitions to smoothen out the split-second gaps between your clips.
3. Flip and Mirror Video
You can also use Clipchamp to flip videos to correct arrant elements such as text with letters that read backward or are otherwise upside down. These tend to happen with videocams where the images are mirrored. Thankfully, you can correct the problem either automatically or manually using Clipchamp. Suppose you use the webcam recording feature on Clipchamp. In that case, the app will automatically flip the inverted text in the final copy. As for pre-recorded videos, you can manually flip them using the Flip option under the Transform icon.
4. Trim Clips
Most videos have portions that you neither want nor need. You can cut out the unwanted parts of your video to emphasize the most important parts and shorten the overall duration of your video. The process is quite simple and intuitive. It is also one of the basic processes you need to learn when editing videos.
The trimming process consists of two parts; you would have to slice your videos into smaller pieces first before you can delete the parts you don’t want. The tool that you will need to cut the video into multiple parts is the white sticker on the timeline. The ticker is not that different from using a knife to cut your birthday cake.
You can drag and drop the ticker to any section of the video that you want to separate. A simple click of a keyboard shortcut (S) will split the section with the clicker in half. After separating the parts that you don’t need, you can easily delete them and reposition your video to fill in the gaps. The final cut will no longer reflect the chunks of video that you’ve removed.
5. Combine Clips
Combining smaller video clips into a single clip is another key skill in video editing. Most videos consist of multiple, smaller video clips that you need to tie together in the first place. The process integrates separate video files into one, so you only have to download one file instead of multiple files. Thankfully, the process for combining video files has been radically simplified in Clipchamp.
All you have to do is to upload videos on the media tray, transfer them into the timeline, and rearrange them. You can also add other elements, including text or special effects, as well as trim the videos down to size. Once you are ready to save the video’s final cut, simply click the “Export Video” option from the top-right corner. The video will automatically download to your computer as an MP4 file.
6. Rotate and Crop Video
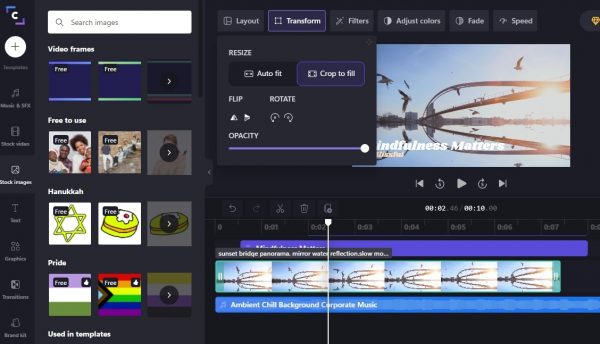
Sometimes videos recorded using mobile phones and tablets end up facing in the wrong direction, either sideways or upside down. Not only that, but some videos can also appear distorted due to a poorly designated aspect ratio. In these cases, you’re going to want to correct the problem by rotating your video into the proper position, or by adjusting its aspect ratio to make it fit in better with the video frame.
To rotate or crop a video, look for the “Rotate” and “Crop” buttons from the “Transform” toolbar on the upper panel. This panel appears after you select or highlight a video on your timeline. You can rotate the video in increments of 45-degree angles until you reach the correct positioning.
7. Add Picture-in-Picture to Video
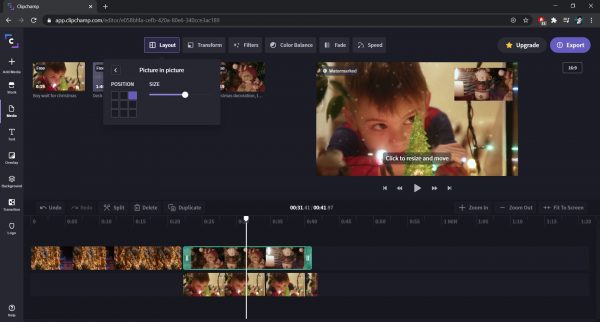
If you are someone who likes to produce reaction videos or video lectures, the Picture-in-Picture feature is perfect for you. This feature allows you to overlay videos or images in a project so that two videos are playing on top of each other at the same time. The second video is usually much smaller in size than the main video, with the second video serving as a supplement to the first. As mentioned, you would often find these types of setups with reaction videos as well as online tutorials, but it can also help when it comes to recording video call setups.
All you need to do is upload the video files you want to layer and drag them to the editing timeline. Superimpose the video that you want to appear on top of the other video and then click. Afterward, go to the Layout option from the menu and use the Picture in Picture tool. Select a position for your video from within the nine sections available and adjust the size of the video using the drag and drop method. You can then save the video or export it to your desktop normally.
8. Resize Videos
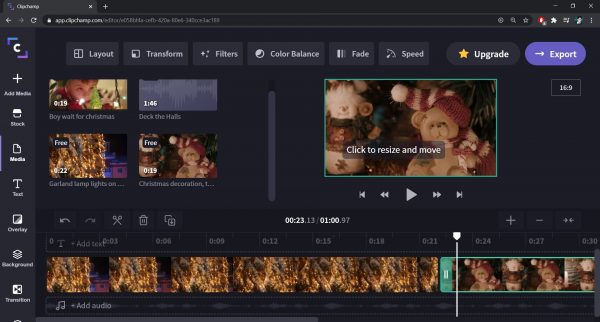
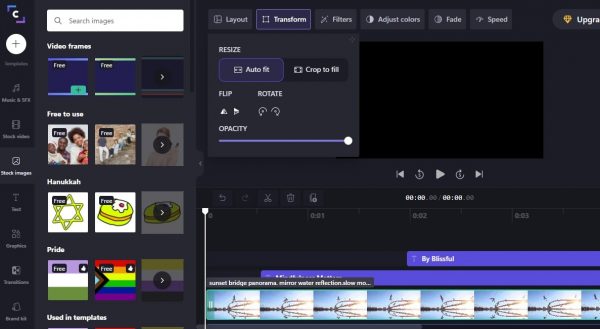
Another tool from the Transform menu is the Resizing option, which lets you crop or change the aspect ratio of a video. This tool is helpful, especially when you want a certain clip to fit into a certain project. There are various options for dimension so you can resize your video file however you want. For example, you have a video file with a wide format and you want to make a square video for Instagram, this will solve it.
From the mentioned example, you can either crop the wide video or fit it into a video with a square aspect ratio. If you choose to fit it into a square project, you will have black bars above and below your video clip. This maintains the entire frame, keeping all the data from your recording. On the other hand, your video will lose some parts of the frame if you choose to crop, but it will not have black bars. The same thing applies with other sizes, but the black bars would appear on their sides if you are going to fit a square into a wide video.
To do these, click the video clip and hover over the Transform option from the menu that will appear. Under Transform, there are two options to Resize which are Autofit and Crop to fill. The Autofit will preserve the entire frame of the video clip while the Crop to fill will occupy the entire project size. You can also change the aspect ratio of the entire project by clicking the ratio button beside the playback. It will then show you different ratio options that you can choose from.
9. Create a Slideshow
Slideshows are another great way to get your message across using largely visual cues. Whether you want to present a new project or a product, video slideshows can add an edge and impact your presentation. The process is essentially the same as compiling a video production, except that the final clip and its components are much shorter. Video slideshows also typically contain background music as well as a smattering of text.
10. Compress Files
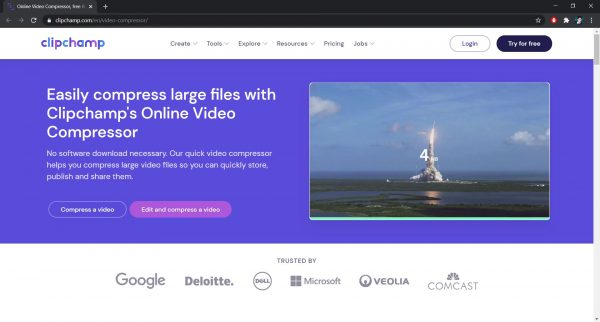
Files that are bulky or take up a lot of data are hard to manage since they are difficult to upload anywhere, whether it be through email or cloud storage. They cause the upload process to take a long time to complete, and it’s also harder to edit files that are larger compared to the small ones because changes are reflected much easier with the latter. One way to solve these common issues is by compressing your video clips to make them smaller in size without compromising their quality.
Clipchamp has a video compressor that lets you reduce the file size of your video using only your browser. It supports various file formats such as MP4, AVI, and even Webp so chances are that it will be able to convert your file right off the bat. However, it’s also important to note that different platforms have different requirements when it comes to file size. As such, you have to be familiar with not just the file size, but also the native resolution, aspect ratio, and so on.
You can also use the app to guide you through the individual settings of the video depending on which platform you want to use. For example, they offer a web setting that would fit in well with YouTube or Facebook, while a mobile setting would fit in better within a mobile environment.
The same tool will allow you to compress multiple video files at once, but they would have the same output specifications. The app will also allow you to upload videos straight into social media websites or even Google Drive.
11. Convert to Other Formats
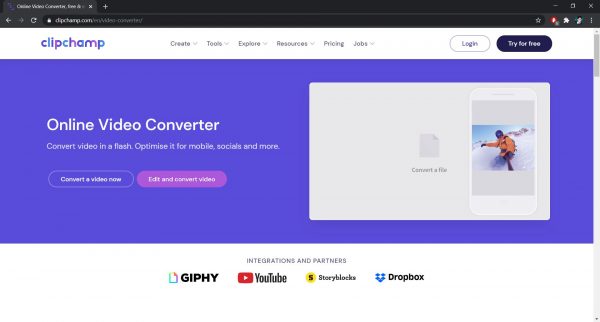
Videos come in different formats, and sometimes those formats do not match with the requirements of a particular site or device. In cases like these, you might receive an error message saying that the platform or device does not support the particular file type, or that the file is otherwise incompatible with the system. A quick fix for this problem would be to convert the file into the recommended format to make it readable to the particular platform or device.
Clipchamp’s utilities tool can help you convert files into the format that you need them to be. The feature supports a wide selection of video formats, including MP4, WebM, FLV, or even WMV. With a simple click of a button, you can convert your files into any format that you which. And the best part is, the software doesn’t interfere with the resolution of your inputs so you essentially get the same video quality as what you have imported. However, you can also choose to lower your resolution if the platform or device you are working with demands it.
You can upload the converted output directly into any of your social media accounts or to Google Drive. You can also save it to your computer or edit it with the Clipchamp Create tools. If you need to convert local files quickly and efficiently, there are a lot of free options that you can use online. Check out this list of the best online video converters for examples.
12. Record Screen/Video
A new type of content creation is emerging, and it has to do with capturing on-screen activity and posting it online. This type of content is most often exemplified through video tutorials as well as reaction videos. Luckily, ClipChamp has a tool that will allow you to record your on-screen activity (and voice) straight through the app.
This can save you a lot of time and effort from having to record and upload the video using another software. Mind you, the software only facilitates the recording process. The resolution and other specifications still depend entirely on your webcam’s capacity, so you can’t blame the software in case you end up with a low-resolution or problematic output.
If you have more than one webcam or microphone, Clipchamp will let you choose which one you want to use. The app saves the recorded output straight into the app’s library, so you can dive into editing right away. The editing part is not at all different from any other video software, meaning you do whatever you want with it. The export process is also the same and saves your file directly into a local folder on your computer.
13. Convert Text to Speech
Suppose you want to deliver an audio message in your video but are too timid to use your actual voice. In that case, you can use the ‘Text to Speech” feature as an alternative. This feature uses artificial intelligence (AI) to convert your script into a voice-over for your video.
The technology is very impressive in the way it makes voice-overs sound so human-like and natural. It mimics human voices and intonations, resulting in life-life, professional-sounding voice-overs with only the slightest hint at robotic expression. Unfortunately, the only language that is currently available is English. Nonetheless, we expect Microsoft to expand the language pack soon.
The Text to Speech feature is accessible through the ‘Record and Create” option on the main toolbox.
14. Edit Video with Green Screen
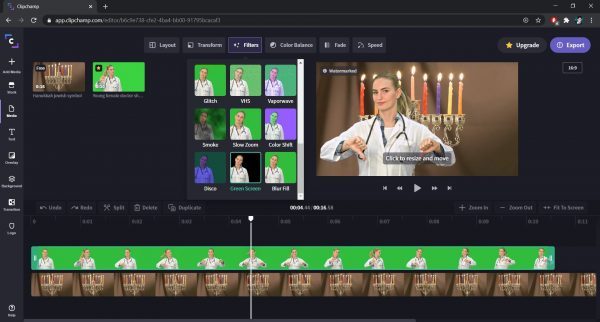
Green screens have increased in popularity because of Hollywood, but it’ still out-of-reach for most beginner editors. A green screen is simply a video editing technique that involves isolating or removing a specific color from a video and then replacing it with another video or image. It’s a lot like slapping a picture or a video on top of an object within a video to cover it up. The green in “green screen” is because it’s the most unusual color for anyone to be wearing within the shot.
While there are some technicalities with using a green screen, best believe that Clipchamp has simplified the process. The initial steps would require you to choose a green screen clip that you will superimpose on top of a background clip. You will also need to choose a background clip that will act as the “base” for your video. In other words, the green screen clip should be on top of the background-clip, like icing on top of a cake. The next few steps will require you to do a bit of technical maneuvering to combine the two videos. But by the end of it, you should have a realistic and well-integrated video clip.
In all honesty, though, this feature is not a walk in the park. It requires precision, such as when you are superimposing the screen clip on top of the background clip. You have to position the clip at just the right angle and use the right size. You will also need to make sure that the background is smooth and bright enough to incorporate the clip. If you find the process too complicated at first, you can practice using stock greens screen clips before working on your project.
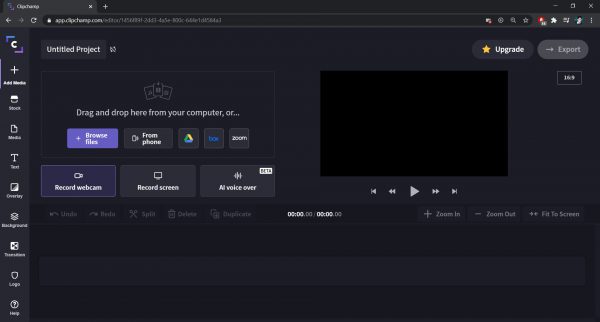
15. Upload Files from Multiple Access Points
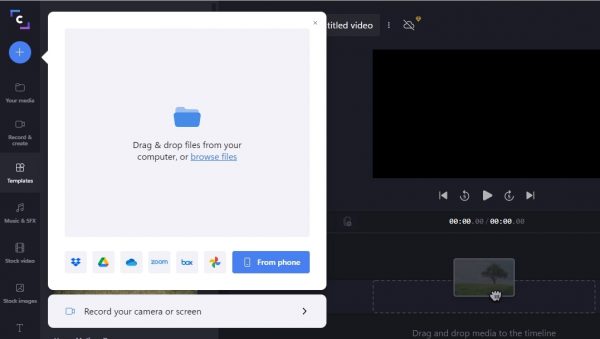
Clipchamp allows you to upload files from multiple access points, which in itself is something worth mentioning. The traditional route is to upload files straight from a local folder on your computer. But you can also upload files directly from an online storage space such as Google Drive, Dropbox, OneDrive, Zoom, Box, and Google Photos. Uploading files this way will not require you to download the file into your computer before uploading it; the connection is direct.
The software also offers a new way to upload files straight from your phone through the mobile app. The process is as simple as selecting the “Import from Phone” button from the “Add File” option on the main menu. The software will then generate a QR code which you have to scan using your phone.
In addition to uploading pre-recorded files from multiple sources, you can also capture video recordings using the software. It can tap into your computer’s camera and microphone to initiate a recording of yourself, your screen, or both.
16. Collaborate with Teammates

Inviting other people to work on a video project with you is possible. However, ease of use is rather limited since only one person at a time can access the user interface. You can provide access to a particular project is by sharing your log-in information with your collaborators. You would also have to create a shared cloud workspace with your collaborators.
Unlike Google Docs, Clipchamp cannot currently share individual projects for editing purposes. As such, the only way that a collaborator can gain access to your project is if you provide them with your sign-in information. Clipchamp only allows one person to access the editing interface at a time. In other words, you will have to take turns with your collaborators to edit projects using the app.
Uploading your file to the cloud is another crucial step. The cloud we are referring to can be Clipchamps’ cloud service or your own, like Google Drive or OneCloud. Remember, the software automatically stores and accesses your projects locally on your computer. In other words, the only way your collaborators can access the file is if you have uploaded it into the cloud beforehand.
Once you’ve uploaded the file to the cloud, you can simply copy the link to the file to share with your collaborators. Clipchamp should then allow them to access the file directly from the software. Naturally, you would also have to share your sign-in information.
Unfortunately, the cloud sync feature is only accessible to premium users and is paywalled in free tiers. Needless to say, you have to get a premium subscription if you need to collaborate with other people.
For additional features on Clipchamp, check out this article listing all Clipchamp features you can enjoy for free.
Clipchamp: Stock Files

If you don’t have much experience in editing videos or you need to create one entirely from scratch, using stock footage can make the process a lot easier. This is an area where Clipchamp truly excels. The software has over 40,000 video, audio, and image files in its stock library. All of these are accessible entirely through the web browser. Let’s take a closer look at this impressive collection:
Stock Videos
Clipchamp has a growing library of royalty-free stock videos that you can add to your projects. Clipchamp keeps the files organized into themes and displays them visually so you immediately know what you are getting.
You can treat stock videos in the same way as other templates. In other words, you can customize and edit the videos normally as you would with other projects. You can add the videos to your timeline by dragging and dropping them. Then, you can trim, combine, and rotate the files and add text, images, filters, and transitions to them. You can even combine pre-recorded videos with stock videos.
While it’s far from ideal to use stock files all the time, they do help get your point across without taking too much time. They are also great for telling stories or imparting abstract ideas to an audience.
Stock Images
Clipchamp also offers a growing collection of stock images arranged into categories similar to stock videos. You can search for specific themes through the search bar that appears when you click on the “Stock image” icon. On the other hand, you can simply scroll through different categories to look for images.
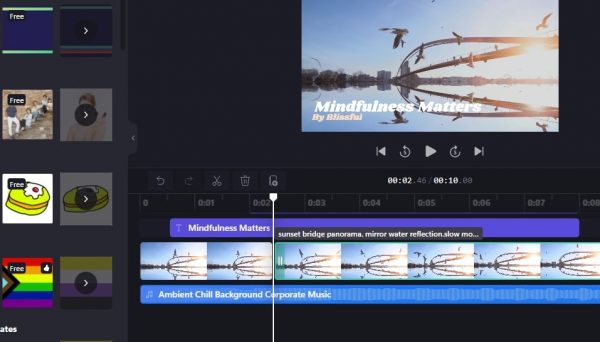
The drag and drop method still works for getting stock images from the stock panel and into your timeline. But perhaps you’re wondering, how will the photos fare within a video? In essence, the photos simply flash within the video for a pre-appointed duration, as PowerPoint slides in video mode.
After you have incorporated the photo into your timeline, you can reposition it at any point within the timeline to have it appear at a certain time mark. For example, you can reposition a photo to the 0:16 mark within the video. You can also compress or drag the image across the timeline to indicate how long you want the image to appear within the video. For example, you can drag the photo from the 0:16 to the 0:32 mark to have it appear for a total of 17 seconds.
Stock Animations and Sounds
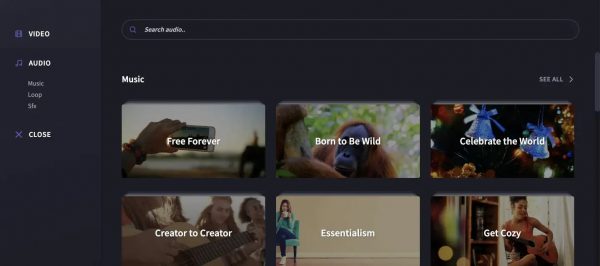
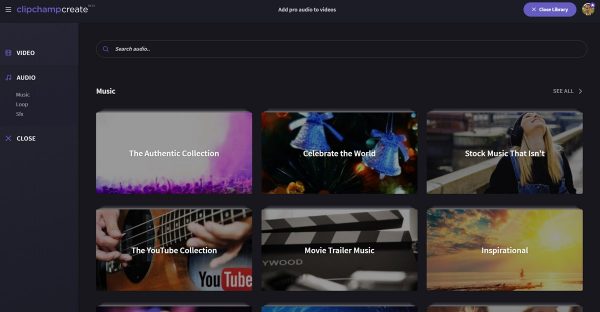
Most professionally-made videos contain some type of audio, and these are an essential part of the video editing process. In addition to featuring stock videos and photos, Clipchamp also has a separate library of royalty-free music files. These files can help you enhance both pre-recorded videos as well as stock videos.
Clipchamp groups their music files according to themes. These themes cover not only music but also vocals, nature sounds, or special effects. You can play the stock audio directly within the stock audio panel beside the video tray. Most of the files that appear on the panel are the latest or most in-demand clips, but you can search for your own.
The software also provides sub-categories which include, but are not limited to, music genres. Some clips are titled according to mood (Happy, Sad), while others are titled based on special occasions (Christmas, Halloween). There is also a sprinkling of pop culture references such as movie or game soundtracks.
However, it’s worth noting that most of the files on the music stock page are purely instrumental. This means that they are not accompanied by vocals or voiceovers. And while the duration of audio clips varies, most fall between the range of 30 seconds to 3 minutes
Additional Notes
Take note that there are limitations with the use of stock files within the free version. If you are using the free version, any stock, photo, or audio clip that you add to your video will have a watermark or audiomark by the time your export it. In other words, you may be able to apply stock files to your project in the free version. But you will still need an upgrade to remove the watermarks in the final cut.
ClipChamp: Target Audience

Clipchamp was specifically designed with beginners in mind. But it’s also very useful now for people who work in a professional setting. Teachers, social media influencers, small business owners, and creative professionals use the software to handle everyday projects. It’s also an ideal option for students as well as individuals who are looking to learn the skill of video editing.
Because in addition to being a straightforward solution, Clipchamp is also highly affordable. It is cheaper overall compared to other brands on a tier-per-tier basis. And yet it offers features to match that of its more expensive competitors. This high-quality service and affordable cost combination make the service ideal for people looking for an affordable, long-term video editing solution. Because even though monthly costs may be affordable, they still add up over time.
Final Thoughts on Clipchamp: An In-Depth Review of Features and Elements
Overall, Clipchamp is highly robust and flexible editing software that could be a great fit for all classifications of beginners and creative professionals. Since the software is browser-based, it will depend more on the quality of your internet connection than the speed of your computer to function properly. In addition, you won’t need to upgrade the components of your computer just to speed up the editing process. Granted, there are still lamentable limitations, such as the absence of options for 4K resolution or long-form content, as well as the absence of some advanced editing tools. Nonetheless, these limitations do not outweigh all other areas in which the software excels. That includes quality of tools and add-ons, ease of use, and affordability. For everything that Clipchamp offers, it is worth a closer look.
Also read: 10 Best Audio Editor Programs for Your Audio Projects