With so many video editing software already out there, what does a new player in the industry have to offer? How does it compare to giants such as say, iMovie and Adobe Premiere? VEED is a new online video editor that lets you create professional-looking videos. This guide will teach you how to use it.
Inside this article:
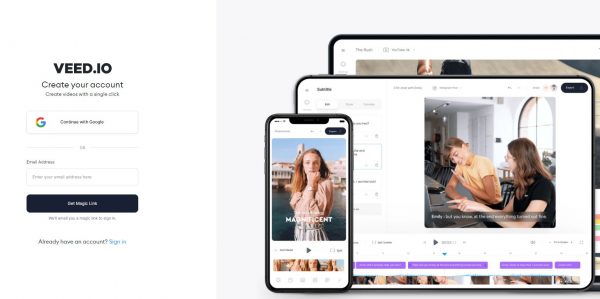
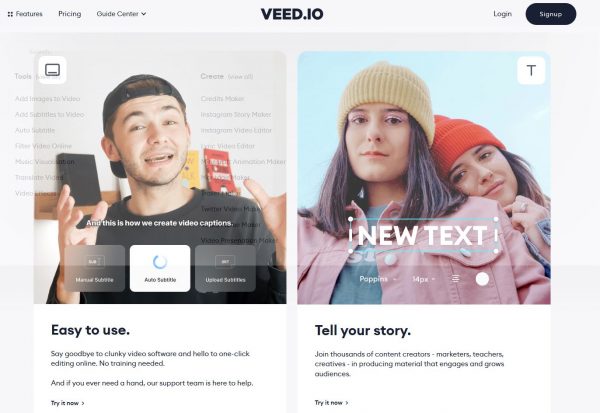
What Is VEED?
VEED is just like any video editing app, but what makes it stand out is the wide range of advanced features you can use that usually only comes with paid apps. It does have a Pro version, but the free tier lets you do a lot more than you can with other free online tools. It is a browser-based platform that has all the essentials you need for editing video content. The platform works on both Mac and PC.
The best thing about it is its incredibly user-friendly interface. The site is intuitive, most functionalities allow for a drag-and-drop operation, and it leaves a lot of room for creativity. You will learn about all its features and how to maximize them below.
How to Create Professional-Looking Videos on VEED
To use VEED, you will have to create an account. It is completely free, but you have the option to subscribe to its premium version later to gain access to all its features.
Signing Up
You can create an account using your email address or sign up with your Gmail account on VEED’s official site. You will receive a link on your email; verify it by clicking on the link, create a password, and you’re all set!
Creating a Project and Uploading Your Media
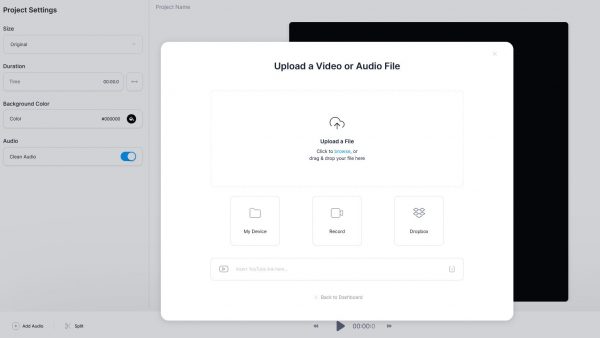
When you first log in, you will be taken to your dashboard where you can create a new project.
- Click on Create New Project and a popup will appear where you can upload your media. You can upload videos and audio files from your computer or from Dropbox. Choose your files and wait for them to upload.
- Take note that you can only upload videos of up to 50MB in size in the free tier.
- You also have the option to record a new video using its free online media recorder. You can record videos using your webcam or record your screen. There are four options if you choose to record fresh content:
- Screen and webcam
- Webcam only
- Screen only
- Audio only
- Give permission for the site to access your webcam and microphone by clicking Allow once you make your selection. Start recording by clicking on the red record button.
- Once your video or recorded media is uploaded, you will see it on the editing pane at the bottom of the screen.
If you don’t have or don’t want to upload your own audio, you can download some for free from royalty-free sound libraries. This is extremely useful if you are creating trailers or marketing videos and don’t have the means to record your own audio. You can download original music from iTunes but they are paid and your video may get flagged for copyright infringement.
Adjusting Your Video Settings
Once you have your videos and audios uploaded, it’s recommended that you adjust your video settings. This will optimize your video for the platform you want to upload it to.
- Click on Settings from the left menu of your VEED dashboard.
- You will see options to change your video’s size, limit its duration, and change the background color.
- For the video size, you can choose from a square or landscape video. You can also set it so that it’s optimized for YouTube or retain its original size.
- This panel is also where you can clean your audio. While there are no advanced audio editing options, the app will do minor editing to clean the sound automatically.
Uploading Images
You can add images to your video for special effects. This feature is also useful if you want to add photos for marketing purposes. It’s worth mentioning that VEED is not the type of tool that lets you create videos by combining images and audio alone. Primarily, you have to have a recorded video to work on then add images afterward. Here’s how you can add images.
- From the left menu, select Upload.
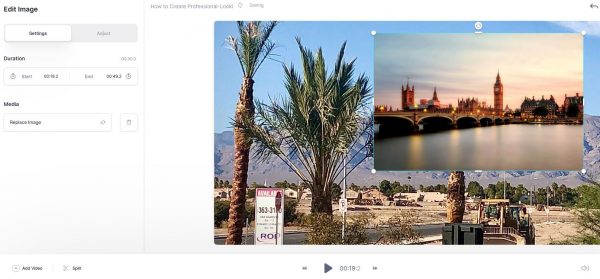
- Under Upload Media, you will see the option to upload either a video, audio, or an image. Click on Upload Image and it will open the default folder from your computer.
- Double-click on the file or click open and the image will appear on the video pane. It will always appear on the location you’re at on your video’s timeline.
- From there, you can resize or rotate your image.
- You will see a new layer on your editing pane with the filename of the image.
- If you want to move this image to a different part of the video, you have to move the image layer from the editing pane. You will learn more about using the editing pane under the Advanced Tips section below.
Adding Texts and Subtitles
Adding texts to your videos helps you tell a story. It’s also a great way to promote products or services; provide info on pricing, store hours, etc.
- Click on Subtitles from the left menu of your VEED dashboard. This will let you either add an automatic transcription to your video or manually add the subtitles. You can also upload a subtitle file and VEED will incorporate it with your video.
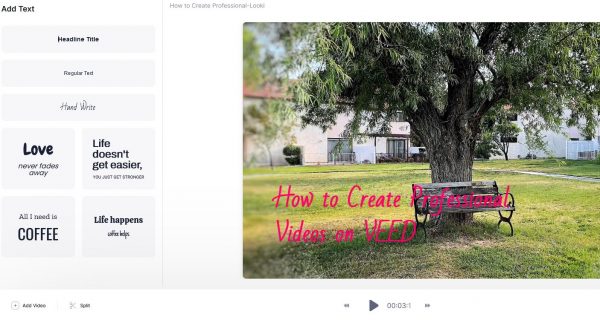
- To add texts, click on Text below Subtitles on the left menu.
- You can choose whether you want the text to be a headline or a regular text.
- Choose from the fonts from the dropdown and double-click on the placeholder text on the video pane to edit it.
- Drag and drop the text to any location on the video pane to set its location.
- You can move the location of the text to other parts of the video by dragging and dropping it from the editing pane—just as you would for images.
- To delete a text, you can either right-click on it from the video pane or on its layer on the editing pane and click Delete.
Adding Elements
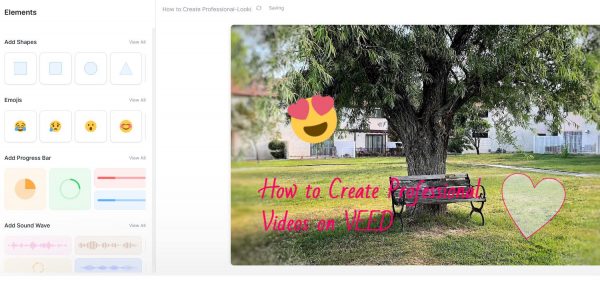
VEED also lets you add other elements such as emojis, shapes, and sound waves.
- Select Elements below Text on the left menu.
- Choose the element you want to add and it will automatically appear on the video pane.
- You can choose where it starts to appear either by indicating the time stamp or by dragging and dropping its layer on the editing pane.
- Drag and drop the element to any location on the video pane to set its location.
- For shapes, you can set their opacity, outline and fill color, and size.
- Follow the same steps above to move their location on the video or delete the layer.
Drawing Over Your Videos and Images
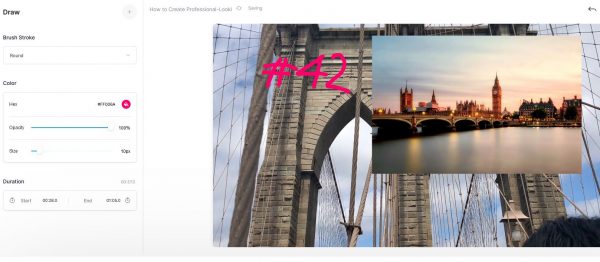
- To draw over your video and images, click on Draw which is the last option on the left menu of your dashboard.
- You will see two types of brush strokes to choose from. One is round and the other is sliced.
- Set its opacity, size, and color from the options and you can start drawing with your mouse.
- Follow the same steps above to move their location on the video or delete the layer.
Applying Filters
VEED offers two types of filters to enhance the appearance of your videos. You can choose between Color Grading and Effects but you can also combine the two. Some of the color grading filters include Clayton—which is a black and white filter, Daisy, which gives your images an ultra-HD look, and more. For the effects, you can add a VHS effect to your video, make it look like a dusty film, or add a fisheye or night vision effect.
Advanced Tips
Here are some pro tips to help you create professional-looking videos on VEED even if you have no expertise in video editing.
Understanding the Editing Pane
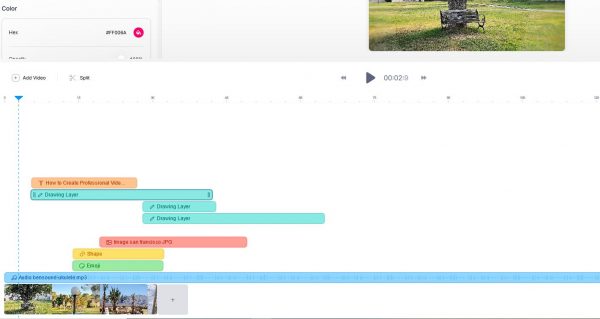
We’ve mentioned above that you can edit some elements of your video, also called “layers” in the editing pane. The editing pane is the lower-most section of your dashboard where you can see your video’s timeline or storyboard, as well as each layer that you’ve added.
In the example above, you can see the video file, audio file, the text layer, and all the other layers of elements that we’ve added to the video. This is where you can edit and move each layer which will be discussed below. You may notice, when you first use the app, that this section is collapsed so that you have more room to view the video pane. Thus, it makes it difficult to edit the layers. You can enlarge or expand your editing pane by hovering your mouse on the line on top of the Play button. Drag and drop it upward to expand the section.
Editing Per Layer
You can edit each element or layer within the editing pane. Some of the things you can do here are:
- Split or delete elements
- Move their location or timestamp on the video
- Bring a layer forward or backward
Splitting and Deleting
Why is this feature useful? You may want to split your video or audio and put them in two different locations. Or you may want to shorten them so you can split them and then delete the other parts.
- To split any element or layer, right-click on its from the editing pane and choose split or delete. Make sure you are clicking on the location where you want it to be split.
- If you split an audio layer, the other half will automatically be moved to a new layer. This gives you the option to drag and drop it to another location. The same will happen to all other elements except for the video layer.
- Right-click on any layer to delete it.
- Don’t worry if you make a mistake; you can hit Control + Z to undo your changes or Command + Z for Mac.
VEED also automatically saves your work periodically since it is an online tool so you don’t have to worry about losing your progress.
Saving and Exporting Your Video
Once you’re happy with your video, you can save it and start sharing it on various social channels.
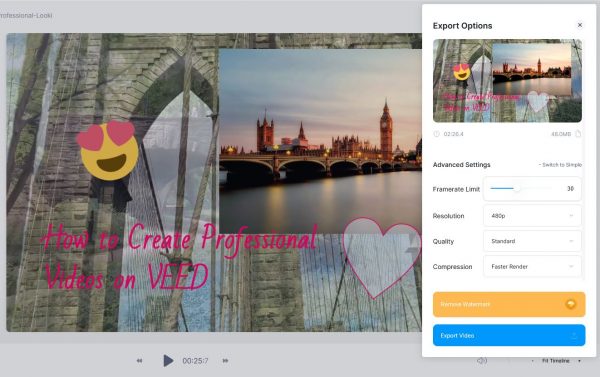
- Click on Export on the top-right of the screen.
- You will see the duration of your video as well as the file size.
- Click on Switch to Advanced to make changes to its resolution. You can set the resolution from 480p to 720p. You can also optimize it for Instagram or Twitter.
- Choose if you want to save your video on low, standard, or high quality. The higher the quality and resolution, the bigger your video’s file size will be.
- Other settings you can customize are the video’s compression and framerate limit.
- Click on the blue Export Video button below. VEED will start processing your video and it may take a few minutes.
- Once done, you download the video either in mp4 or GIF format. Of course, the GIF file will not have a sound.
- Choose the folder where you want your video to be saved, click on Save File, and wait for it to download.
- If you want to make changes to your video again, simply click on Edit Video on the right menu.
- This project will be automatically saved to your dashboard so you can access it and edit it anytime.
Where to Get Royalty-Free Audio
Here are some sites where you can download royalty-free audios that you can add to your videos. You can use the audio as background music or add sound effects on certain parts of the video.
Bensound
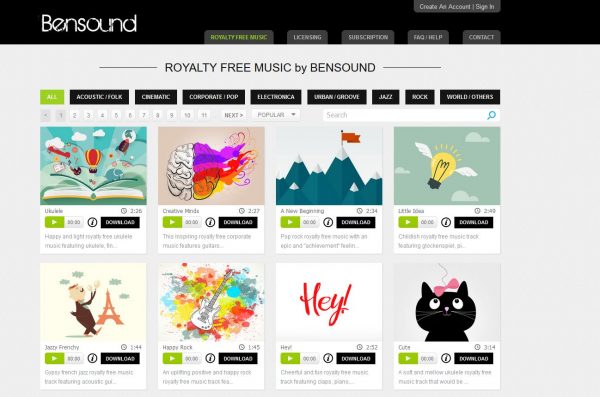
Here, you can choose sounds from different genres from acoustic, cinematic, to pop, jazz, rock, and more. You will see how long the audio clip is. Don’t worry if the clip is too long or too short for your video. You can cut, split, and loop it, and you will see all the steps below. Click on the Play button to hear a sample of the music and see if it fits your video. If you like it, just click on Download and you will receive the file on your device in mp4 format. You can also read a description of the music by clicking on the information (i) button.
Pixabay Music

Pixabay is not only a great place to download royalty-free images but royalty-free music as well. Select from thousands of tracks that you can add to your VEED videos. Some of these are eligible for commercial use as well. There are plenty of categories to choose from. You can browse through different genres, moods, and movement sound effects.
Videvo
Videvo offers several hundreds of royalty-free tracks, which can be used for social media clips or own productions. The library consists of many genres and the website is easy to use.
SoundCloud Audio Loops
The interesting thing about SoundCloud royalty-free audio loops is that most of them are created by independent artists who just want to put their work out there. From the dashboard, you can browse through popular tracks, albums, and playlists. You may have to sign in with your SoundCloud account or create one to download the tracks.
Why Use VEED?
Aside from being incredibly easy to use, VEED does not require you to download and install the app on your computer. This saves you a lot of storage space and all your projects are saved online. Though it’s relatively new, it has grown exponentially in users and market value in just a few months.
You can use this app if you want to start a podcast and later turn them into videos. It’s also a great tool if you want to edit your vlogs before sharing them on social media.
Apart from that, it’s a great way to support the developers who have made this app free to use for anyone who wants to create stunning videos. In fact, according to their Indihackers’ Profile, they even made their application programming interface (API) available to the public. This allows other developers to add similar video editing features to their apps.
The Pro version undoubtedly has plenty of benefits and advanced features. It also allows you to remove the VEED watermark from your videos.
VEED Pro
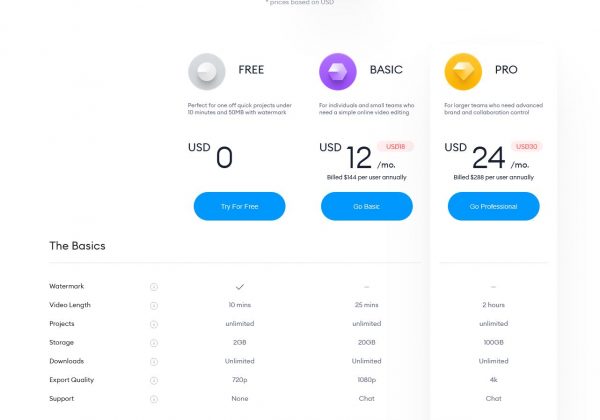
Here are the professional/premium plans of the app.
- Basic – Great for individual users or a small team who want to collaborate on editing videos. You can edit videos of up to 25 minutes in duration and export them in HD format. The monthly plan is $18/month and the annual plan is $12/month.
- Pro – Perfect for startups or bigger teams that need to focus on branding. You can edit videos of up to two hours in length and will have access to 100GB of storage. Additional features include subtitle translations, advanced video exporting options, and access to VEED’s Brand Kit features. The Pro plan costs $30/month if billed monthly or $24/month for the annual plan.
Final Word
VEED is a simple but powerful browser-based video editing app that lets you edit your videos like a pro. You can start with a free account and still gain access to its many awesome features. It is so intuitive that even the least experienced users can create impressive trailers, clips, and full feature videos. So sign up now and start creating professional-looking videos today!