Introduction
Safari, the sleek and intuitive web browser developed by Apple, offers a seamless and secure browsing experience for its users. With its robust features and user-friendly interface, Safari has become a popular choice for Mac and iOS users. One of the key functionalities that Safari provides is the ability to access the microphone for various web applications and services. Whether you want to make voice calls, participate in online meetings, or use voice recognition features, allowing Safari to access your microphone is essential for a smooth and efficient browsing experience.
In this comprehensive guide, we will walk you through the step-by-step process of enabling microphone access in Safari. By following these simple instructions, you can ensure that Safari is equipped to utilize your microphone for a wide range of online activities, enhancing your browsing experience and productivity.
So, if you've ever encountered the frustrating "Safari cannot access the microphone" message or simply want to proactively enable this feature, you've come to the right place. Let's dive into the easy-to-follow steps that will empower you to grant Safari the necessary permissions to access your microphone seamlessly.
Step 1: Open Safari Preferences
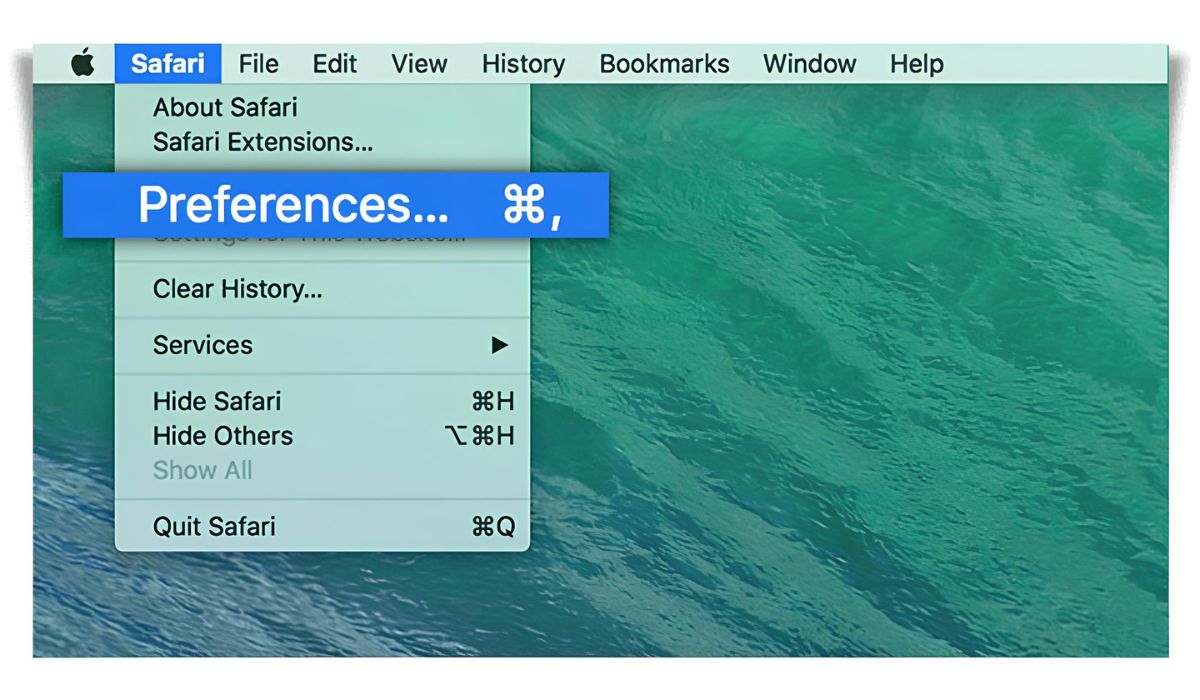
To begin the process of allowing Safari to access your microphone, the first step is to open the Safari Preferences. This can be easily accomplished by launching the Safari browser on your Mac or iOS device. Once Safari is open, navigate to the top-left corner of the screen and click on the "Safari" menu located in the menu bar. A drop-down menu will appear, and you should select "Preferences" from the options listed. Alternatively, you can use the keyboard shortcut "Command + ," to directly access the Preferences window.
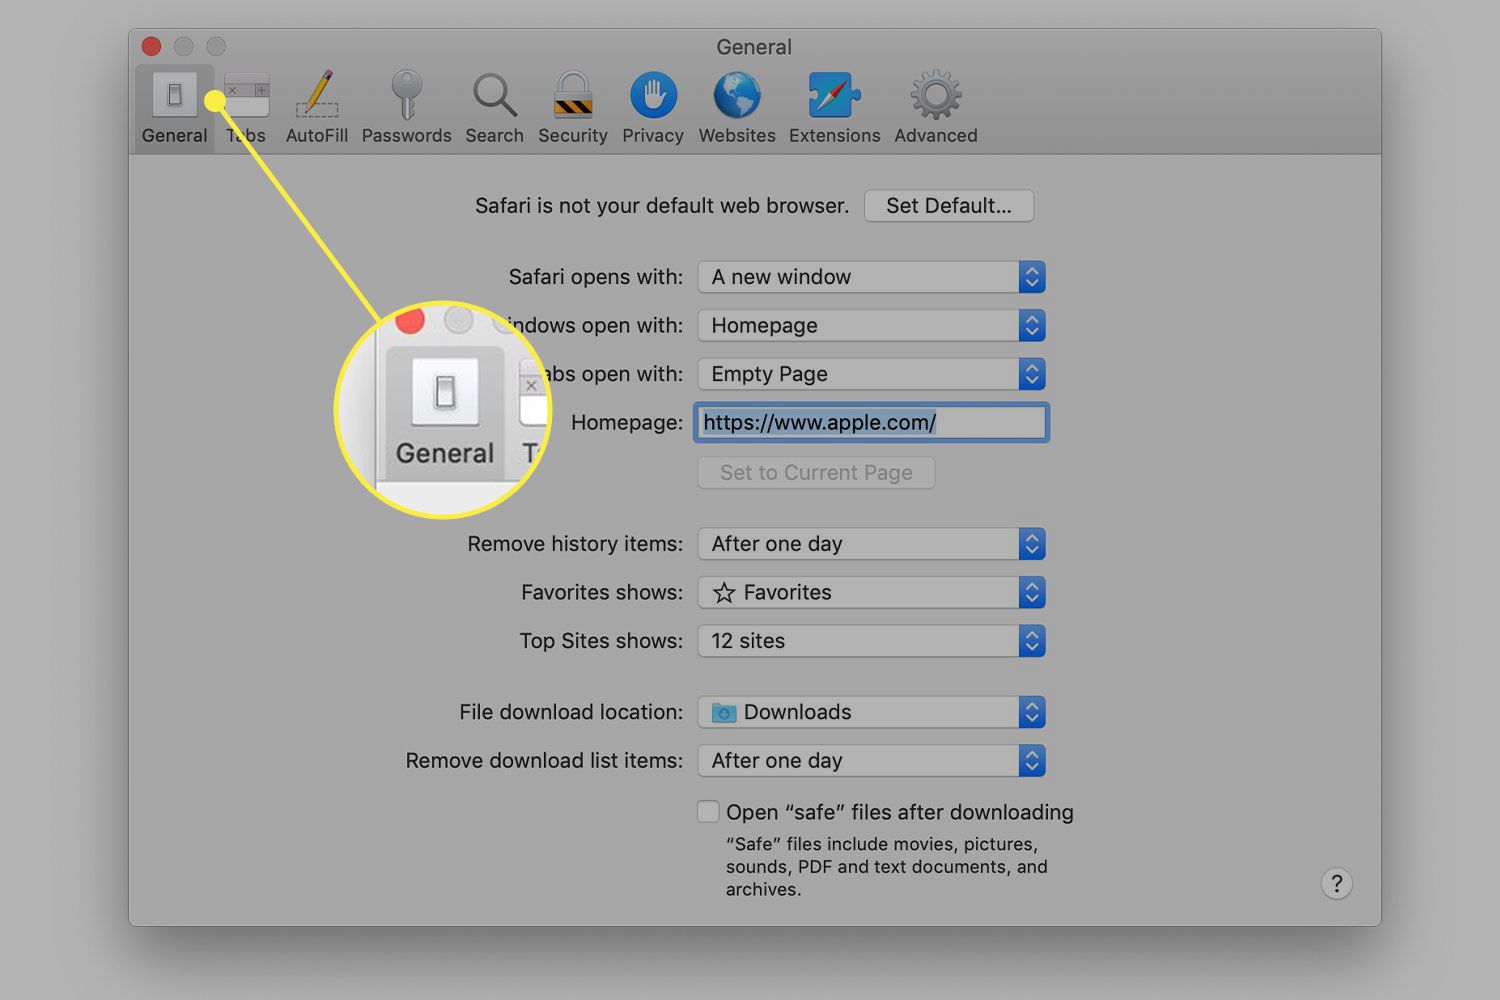
Upon selecting "Preferences," a new window will open, presenting a range of customizable settings and options for Safari. This window serves as the central hub for configuring various aspects of the browser, including privacy, security, and website permissions. The Preferences window is designed to provide users with comprehensive control over their browsing experience, empowering them to tailor Safari to their specific preferences and requirements.
Once you have accessed the Preferences window, you are now ready to proceed to the next step in the process of enabling microphone access for Safari. This initial step sets the stage for the subsequent actions that will ultimately allow you to grant Safari the necessary permissions to utilize your microphone effectively.
By following these straightforward instructions and navigating to the Safari Preferences, you have taken the crucial first step towards enabling microphone access in Safari. With the Preferences window now open, you are poised to delve into the subsequent steps that will lead you to successfully configure Safari to access your microphone, unlocking a host of interactive and productivity-enhancing features within the browser.
Step 2: Go to Websites Tab
After accessing the Safari Preferences window, the next pivotal step in the process of allowing Safari to access your microphone involves navigating to the "Websites" tab. This tab serves as a comprehensive hub for managing website-specific settings and permissions, empowering users to customize their browsing experience based on individual preferences and requirements.
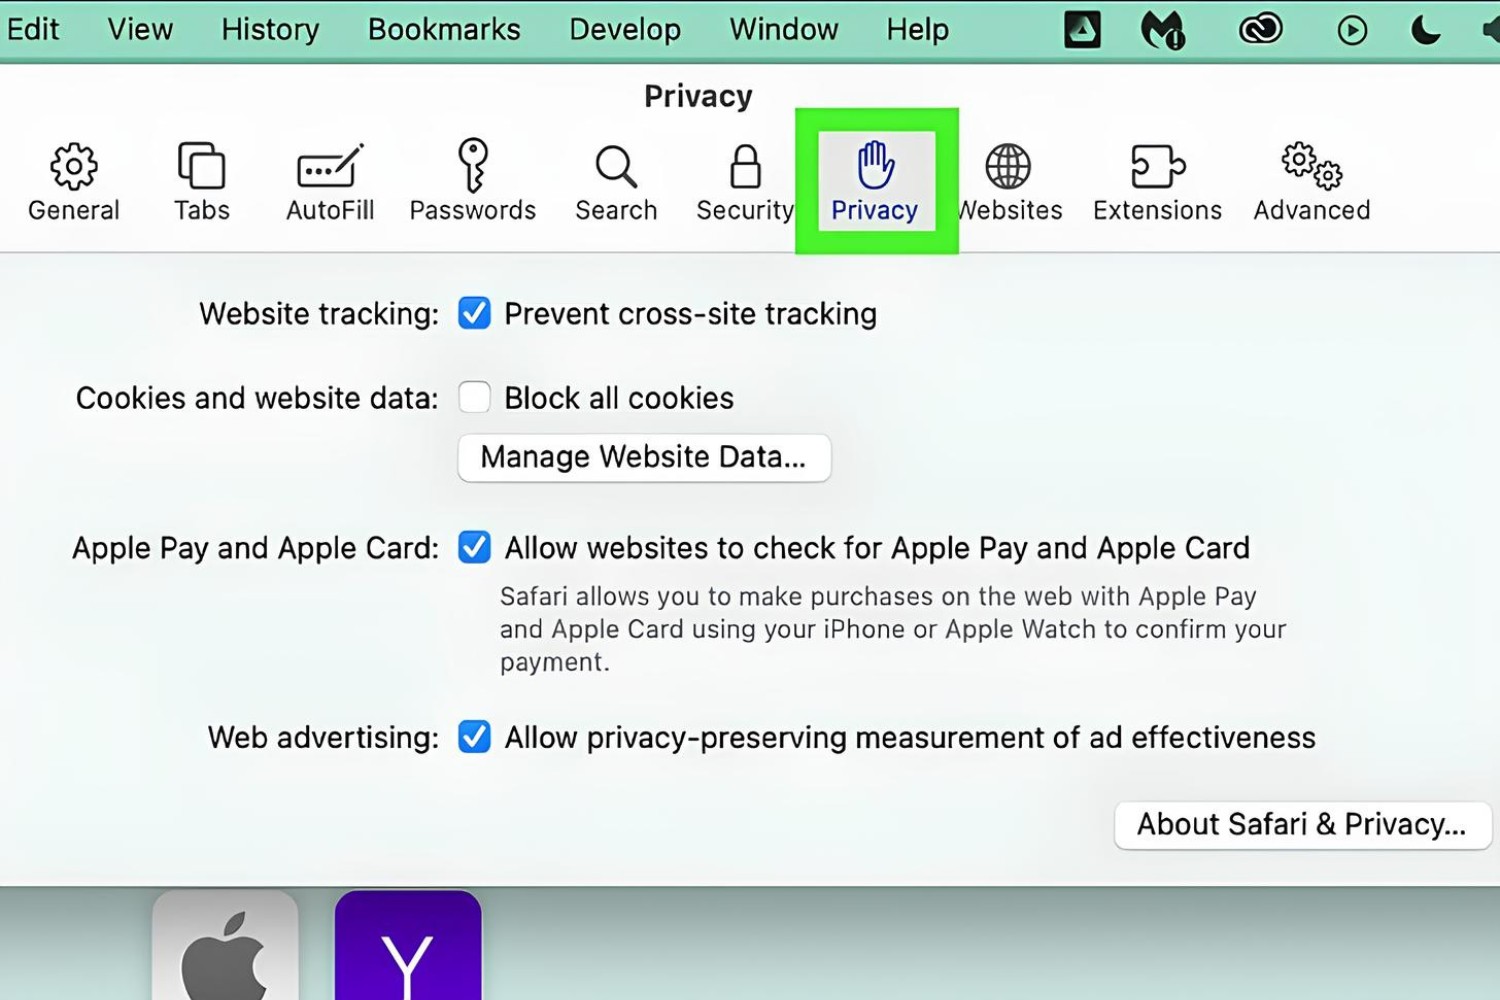
Upon entering the Preferences window, you will notice a series of tabs at the top of the window, including "General," "Tabs," "Search," "Extensions," "Privacy," "Security," and "Websites." To proceed with enabling microphone access, you should click on the "Websites" tab, which is strategically positioned to provide users with centralized control over various website-related settings and permissions within Safari.
Once you have selected the "Websites" tab, a diverse array of website-specific settings and permissions will be displayed, allowing you to fine-tune Safari's behavior when interacting with different websites. This intuitive interface is designed to offer users a high degree of flexibility and control, enabling them to manage permissions for features such as camera access, microphone access, location services, and more on a per-website basis.
The "Websites" tab is structured to provide a seamless and organized overview of the websites you visit, along with the corresponding permissions and settings associated with each site. This user-centric approach ensures that you can effortlessly manage and customize Safari's behavior when accessing different websites, tailoring the browsing experience to align with your preferences and privacy considerations.
By navigating to the "Websites" tab within the Safari Preferences window, you have positioned yourself to delve into the granular details of website-specific settings, including the crucial aspect of enabling microphone access. This strategic maneuver sets the stage for the subsequent steps that will lead you to effectively configure Safari to access your microphone, paving the way for a seamless and enriched browsing experience.
In summary, the "Websites" tab serves as a pivotal gateway to fine-tuning Safari's behavior when interacting with various websites, offering a user-friendly interface that empowers you to manage microphone access and other permissions with precision and ease. With this essential step completed, you are now ready to progress to the subsequent actions that will culminate in granting Safari the necessary permissions to utilize your microphone effectively.
Step 3: Select Microphone from the Left Sidebar
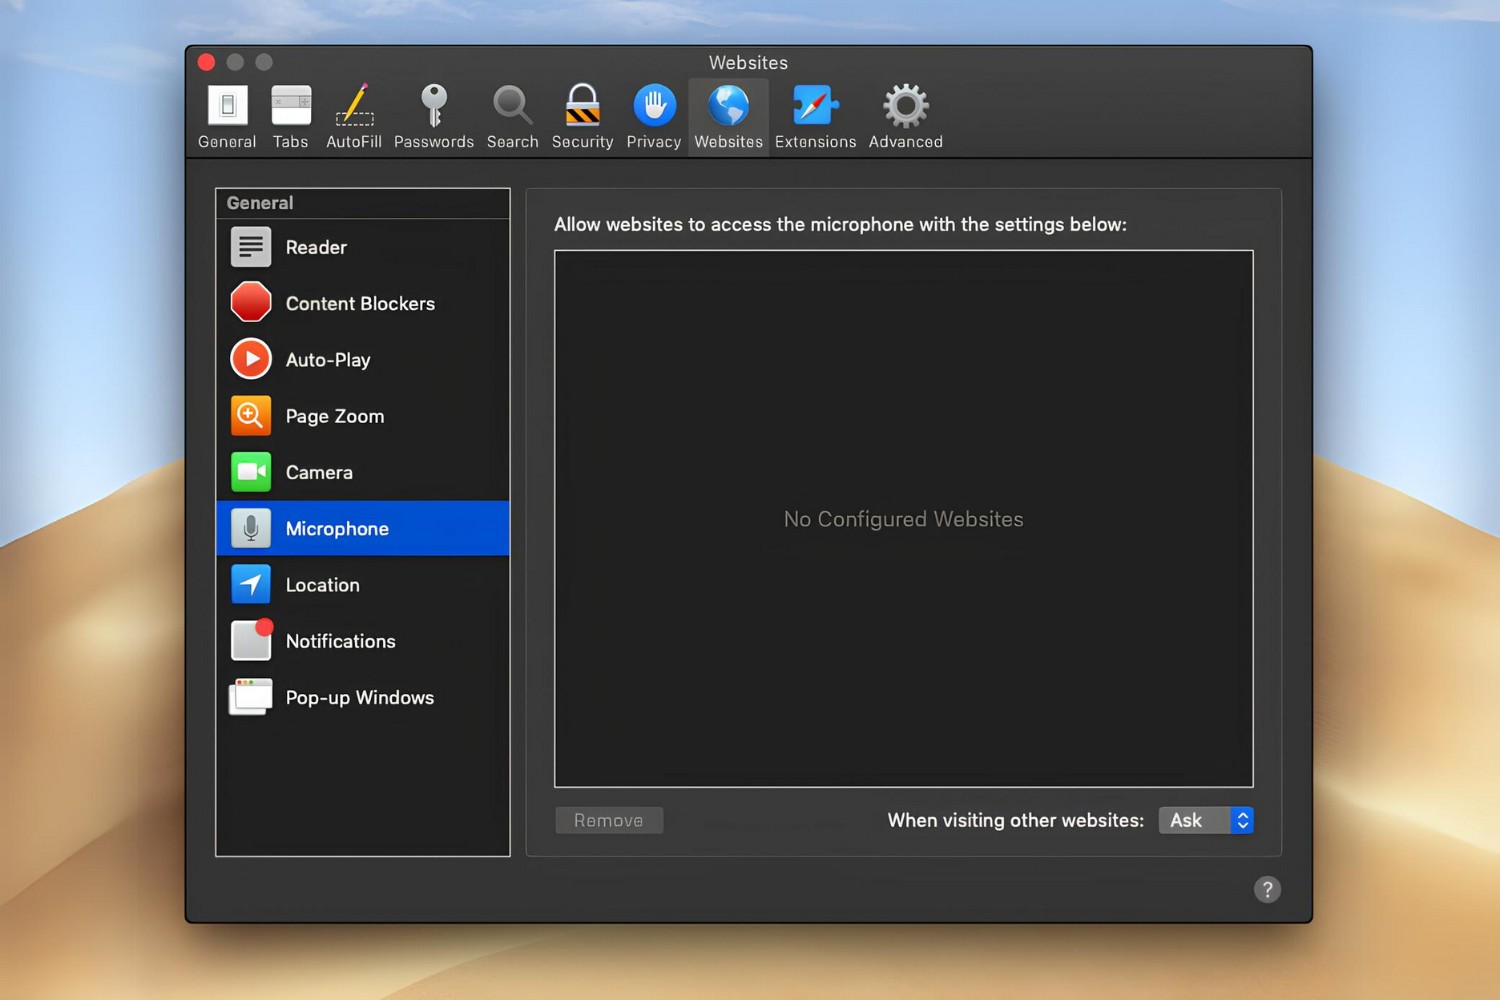
Upon reaching the "Websites" tab within the Safari Preferences window, you will encounter a well-organized interface that empowers you to manage a diverse array of website-specific settings and permissions. Positioned prominently within this tab is the left sidebar, a navigational aid that provides convenient access to a range of crucial features and functionalities. To proceed with enabling microphone access for Safari, your next decisive action involves selecting the "Microphone" option from the left sidebar, a pivotal maneuver that will pave the way for configuring Safari to utilize your microphone effectively.
As you direct your attention to the left sidebar within the "Websites" tab, you will notice a comprehensive list of website-specific permissions and settings, meticulously categorized to facilitate seamless navigation and customization. The left sidebar serves as a central hub for accessing and managing a host of essential features, including microphone access, camera access, location services, and more, enabling you to tailor Safari's behavior when interacting with different websites.
To proceed with selecting the "Microphone" option, simply locate and click on the "Microphone" entry within the left sidebar. This intuitive action will direct your focus to the corresponding settings and permissions associated with microphone access, presenting you with a range of configurable options that are designed to provide a high degree of control and flexibility.
Upon selecting the "Microphone" option, you will be presented with a detailed overview of websites that have requested microphone access, along with the corresponding permissions status for each site. This insightful display empowers you to make informed decisions regarding microphone access, allowing you to customize Safari's behavior based on your preferences and privacy considerations.
By selecting the "Microphone" option from the left sidebar, you have taken a crucial step towards configuring Safari to access your microphone seamlessly. This strategic maneuver positions you to delve into the granular details of microphone permissions, empowering you to manage and customize microphone access for different websites with precision and ease.
In summary, the process of selecting the "Microphone" option from the left sidebar within the "Websites" tab is a pivotal action that sets the stage for fine-tuning Safari's microphone access settings. With this essential step completed, you are now prepared to progress to the subsequent actions that will culminate in granting Safari the necessary permissions to utilize your microphone effectively, enhancing your browsing experience and productivity.
Step 4: Allow Safari to Access Microphone
After navigating to the "Microphone" settings within the left sidebar of the "Websites" tab in Safari Preferences, you are now poised to take the final decisive action of allowing Safari to access your microphone. This pivotal step involves configuring the microphone permissions for specific websites, granting Safari the necessary access to utilize your microphone seamlessly.
Upon selecting the "Microphone" option, you will be presented with a comprehensive list of websites that have requested microphone access. Each website entry is accompanied by a dropdown menu that allows you to specify the microphone access setting for that particular site. The dropdown menu provides three distinct options: "Deny," "Ask," and "Allow."
To enable microphone access for a specific website, simply click on the dropdown menu next to the respective site and select the "Allow" option. This affirmative action signals to Safari that the selected website is authorized to access your microphone, paving the way for a seamless and interactive browsing experience. By choosing the "Allow" option, you are effectively granting Safari the permission it needs to utilize your microphone when interacting with the designated website.
Furthermore, the "Ask" option provides a balanced approach by prompting Safari to request permission to access your microphone whenever you visit the corresponding website. This proactive mechanism ensures that you retain control over microphone access, allowing you to make informed decisions in real-time based on your preferences and privacy considerations.
In contrast, the "Deny" option empowers you to restrict microphone access for specific websites, thereby preventing Safari from utilizing your microphone when interacting with the designated sites. This granular control over microphone permissions aligns with Safari's commitment to user privacy and security, enabling you to tailor the browser's behavior to align with your individual preferences and requirements.
By leveraging the intuitive dropdown menu within the "Microphone" settings, you can effectively configure Safari to access your microphone in a manner that aligns with your privacy considerations and browsing habits. This user-centric approach empowers you to manage microphone permissions with precision and ease, ensuring that Safari interacts with websites in accordance with your preferences.
In summary, the process of allowing Safari to access your microphone involves selecting the appropriate microphone access setting for specific websites within the "Microphone" settings. By choosing the "Allow" option for designated sites, you are empowering Safari to utilize your microphone seamlessly, unlocking a host of interactive and productivity-enhancing features within the browser. With this essential step completed, you have successfully configured Safari to access your microphone, enhancing your browsing experience and enabling seamless interaction with a diverse range of web-based services and applications.
Conclusion
In conclusion, enabling microphone access in Safari is a straightforward yet pivotal process that empowers users to harness the full potential of the browser's interactive and productivity-enhancing features. By following the step-by-step instructions outlined in this comprehensive guide, you have gained the knowledge and insights necessary to configure Safari to access your microphone seamlessly, unlocking a host of capabilities that enrich your browsing experience.
From navigating to the Safari Preferences and accessing the Websites tab to selecting the Microphone option within the left sidebar and configuring microphone permissions for specific websites, each step in the process plays a crucial role in empowering you to tailor Safari's behavior to align with your individual preferences and privacy considerations.
By allowing Safari to access your microphone, you open the door to a myriad of possibilities, including making voice calls, participating in online meetings, utilizing voice recognition features, and engaging with a diverse range of web-based services and applications that leverage microphone functionality. This seamless integration of microphone access enhances your ability to interact with websites in a dynamic and immersive manner, fostering a more engaging and productive browsing experience.
Furthermore, the user-centric approach adopted by Safari in managing microphone permissions reflects the browser's commitment to privacy and security. By providing users with granular control over microphone access for specific websites, Safari empowers individuals to make informed decisions and tailor their browsing experience to align with their unique preferences and requirements.
As technology continues to evolve and web-based interactions become increasingly integral to our daily lives, the ability to enable microphone access in Safari assumes greater significance. Whether for personal or professional use, the seamless integration of microphone functionality within Safari enhances the browser's versatility and empowers users to leverage the full spectrum of interactive features available on the web.
In essence, by following the steps outlined in this guide and allowing Safari to access your microphone, you have taken a proactive step towards enhancing your browsing experience and embracing the myriad opportunities for seamless and immersive interactions on the web. With microphone access configured to align with your preferences, you are well-equipped to leverage the full potential of Safari, embracing a dynamic and engaging browsing experience that caters to your individual needs and preferences.