To allow mic on Safari, you need to grant microphone permission to a website in Safari on your Mac, iPhone, or iPad by adjusting both system-level and per-website settings. The exact steps differ slightly depending on your device, but the process takes less than a minute once you know where to look.
Allow microphone access on Mac
On a Mac, microphone permissions work at two levels: macOS itself must allow Safari to use the mic, and Safari must allow the specific website to access it. You need to check both places.
Check system-level permission
- Open the Apple menu and select System Settings (or System Preferences on older macOS versions).
- Click Privacy & Security in the sidebar.
- Select Microphone from the list.
- Confirm that the toggle next to Safari is switched ON. If it's off, toggle it on.
This system-level setting is the gatekeeper: even if Safari's own settings allow a website, macOS will block mic access if Safari isn't enabled here.
Configure per-website permissions in Safari
- Open Safari and click Safari in the top menu bar.
- Select Settings (or Preferences on older macOS versions).
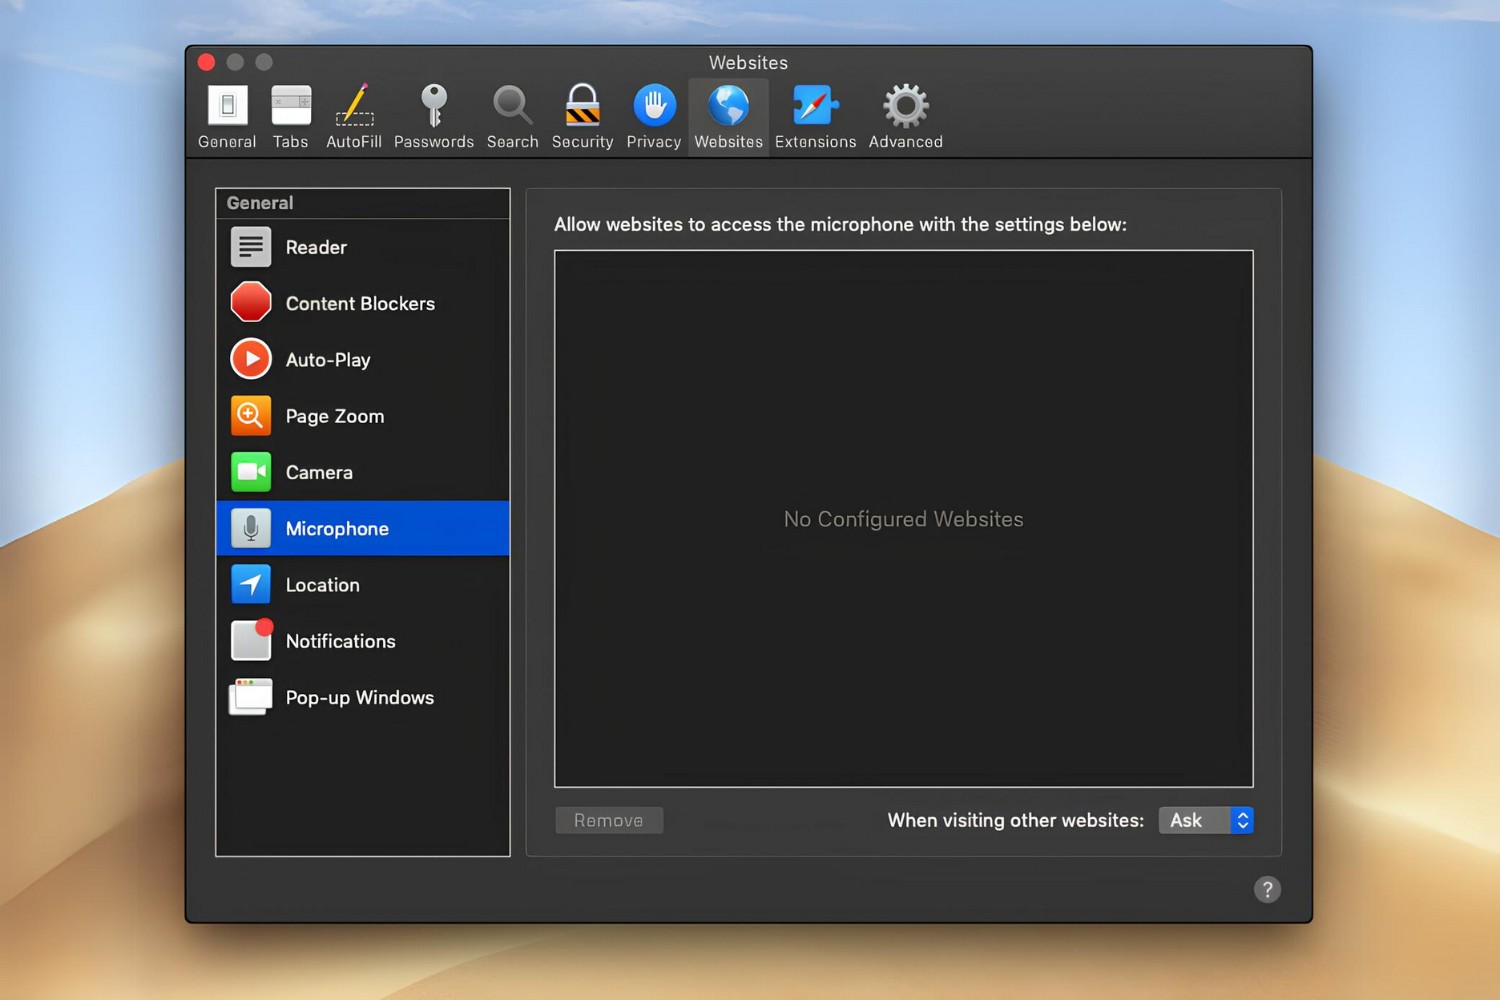
- Click the Websites tab at the top of the window.
- In the left sidebar, select Microphone.
- Find the website you want to allow in the list on the right, then choose Allow, Deny, or Ask from its dropdown menu.
Choosing Allow grants that website continuous microphone access, Deny blocks it entirely, and Ask prompts for permission each time the site requests the mic. To set a default for all websites not already listed, use the When visiting other websites pop-up menu at the bottom right of the Microphone settings and pick Allow, Deny, or Ask.
Allow microphone access on iPhone or iPad
On iOS and iPadOS, Safari's microphone settings are managed through the system Settings app, not within Safari itself. You'll set a global policy first, then optionally configure per-website exceptions.
Set the global Safari microphone policy
- Open the Settings app on your iPhone or iPad.
- Scroll down and tap Safari.
- Under the SETTINGS FOR WEBSITES section, tap Microphone (or Camera & Microphone Access on older iOS versions).
- Choose one of three options: Ask, Deny, or Allow.
Ask will prompt you for permission each time a website requests microphone access, Allow grants all websites mic access without further confirmation, and Deny completely restricts microphone access for all websites in Safari. This global setting applies to every site unless you create a specific exception.
Configure per-website exceptions
- Open the website in the Safari app on your iPhone or iPad.
- Tap the Page Menu button (often represented by Aa in the address bar on iOS 15+).
- Tap Website Settings.
- Adjust the microphone setting for that specific site.
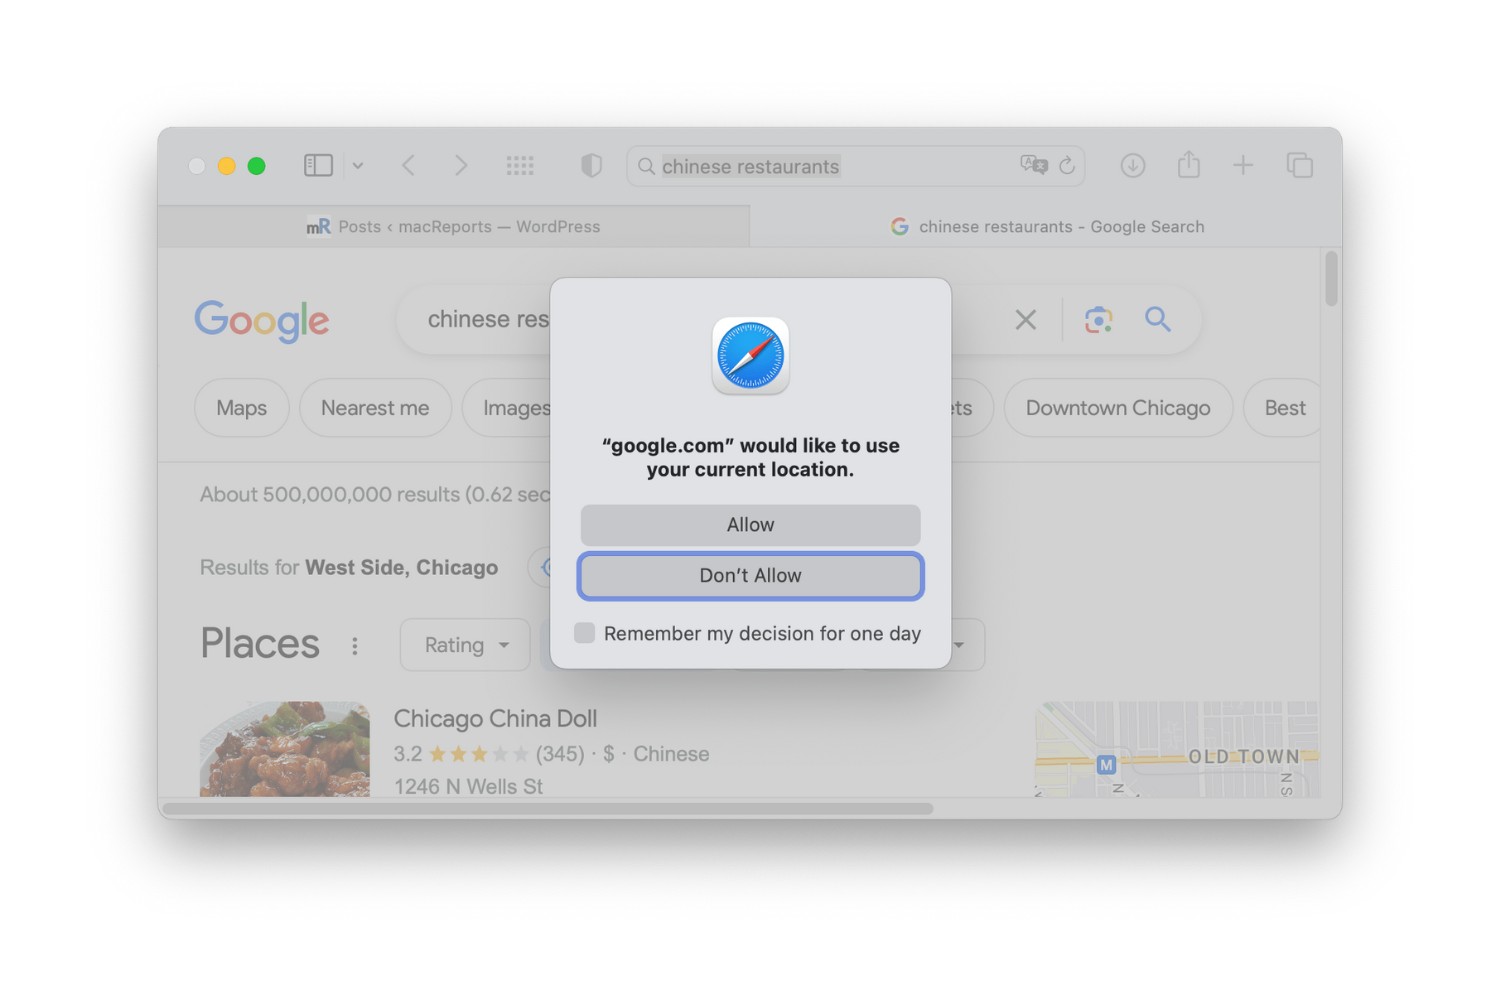
This per-site override lets you allow mic access for a trusted video conferencing site while keeping the global setting on Ask or Deny for everything else. When a website initially requests microphone access, a pop-up prompt should appear; tapping Allow grants permission for that site.
Test your microphone and apply changes
After making changes on any device, quit and reopen Safari to apply them. This ensures the new permissions take effect before you test. Then visit a reliable online microphone testing tool or the website you were trying to use, and speak into your mic to verify audio input is captured.
If the microphone prompt doesn't appear when you visit a site that needs it, go back to the settings described above and confirm both the system-level and per-website permissions are set to Allow or Ask, not Deny. On Mac, also double-check that Safari is toggled ON in System Settings > Privacy & Security > Microphone, since a system-level block will silently prevent Safari from ever showing the prompt. On iPhone or iPad, verify the global Safari microphone setting isn't set to Deny, which would suppress all mic requests.