Introduction
Safari, the default web browser for Apple devices, offers a seamless and intuitive browsing experience. It allows users to access a wide range of websites and web applications while ensuring a secure and efficient browsing environment. One of the key features of Safari is its ability to deliver notifications, keeping users informed about important updates, messages, and alerts from their favorite websites.
In this article, we will explore the process of enabling and managing notifications from Safari on your iPhone. Whether you want to stay updated on the latest news, receive real-time updates from your favorite blogs, or stay connected with your social media accounts, Safari notifications can enhance your browsing experience by providing timely and relevant information.
By understanding how to effectively manage Safari notifications, you can tailor your browsing experience to suit your preferences and stay informed about the content that matters most to you. Additionally, we will address common troubleshooting steps to help you overcome any potential issues related to Safari notifications, ensuring a smooth and uninterrupted browsing experience.
Let's delve into the world of Safari notifications and discover how you can make the most of this feature to stay connected and informed while browsing the web on your iPhone.
Enabling Notifications for Safari
Enabling notifications for Safari on your iPhone is a straightforward process that allows you to stay informed about updates and alerts from your favorite websites. By enabling this feature, you can receive timely notifications for a variety of content, including news updates, social media interactions, and website-specific alerts. Here's how you can enable notifications for Safari on your iPhone:
-
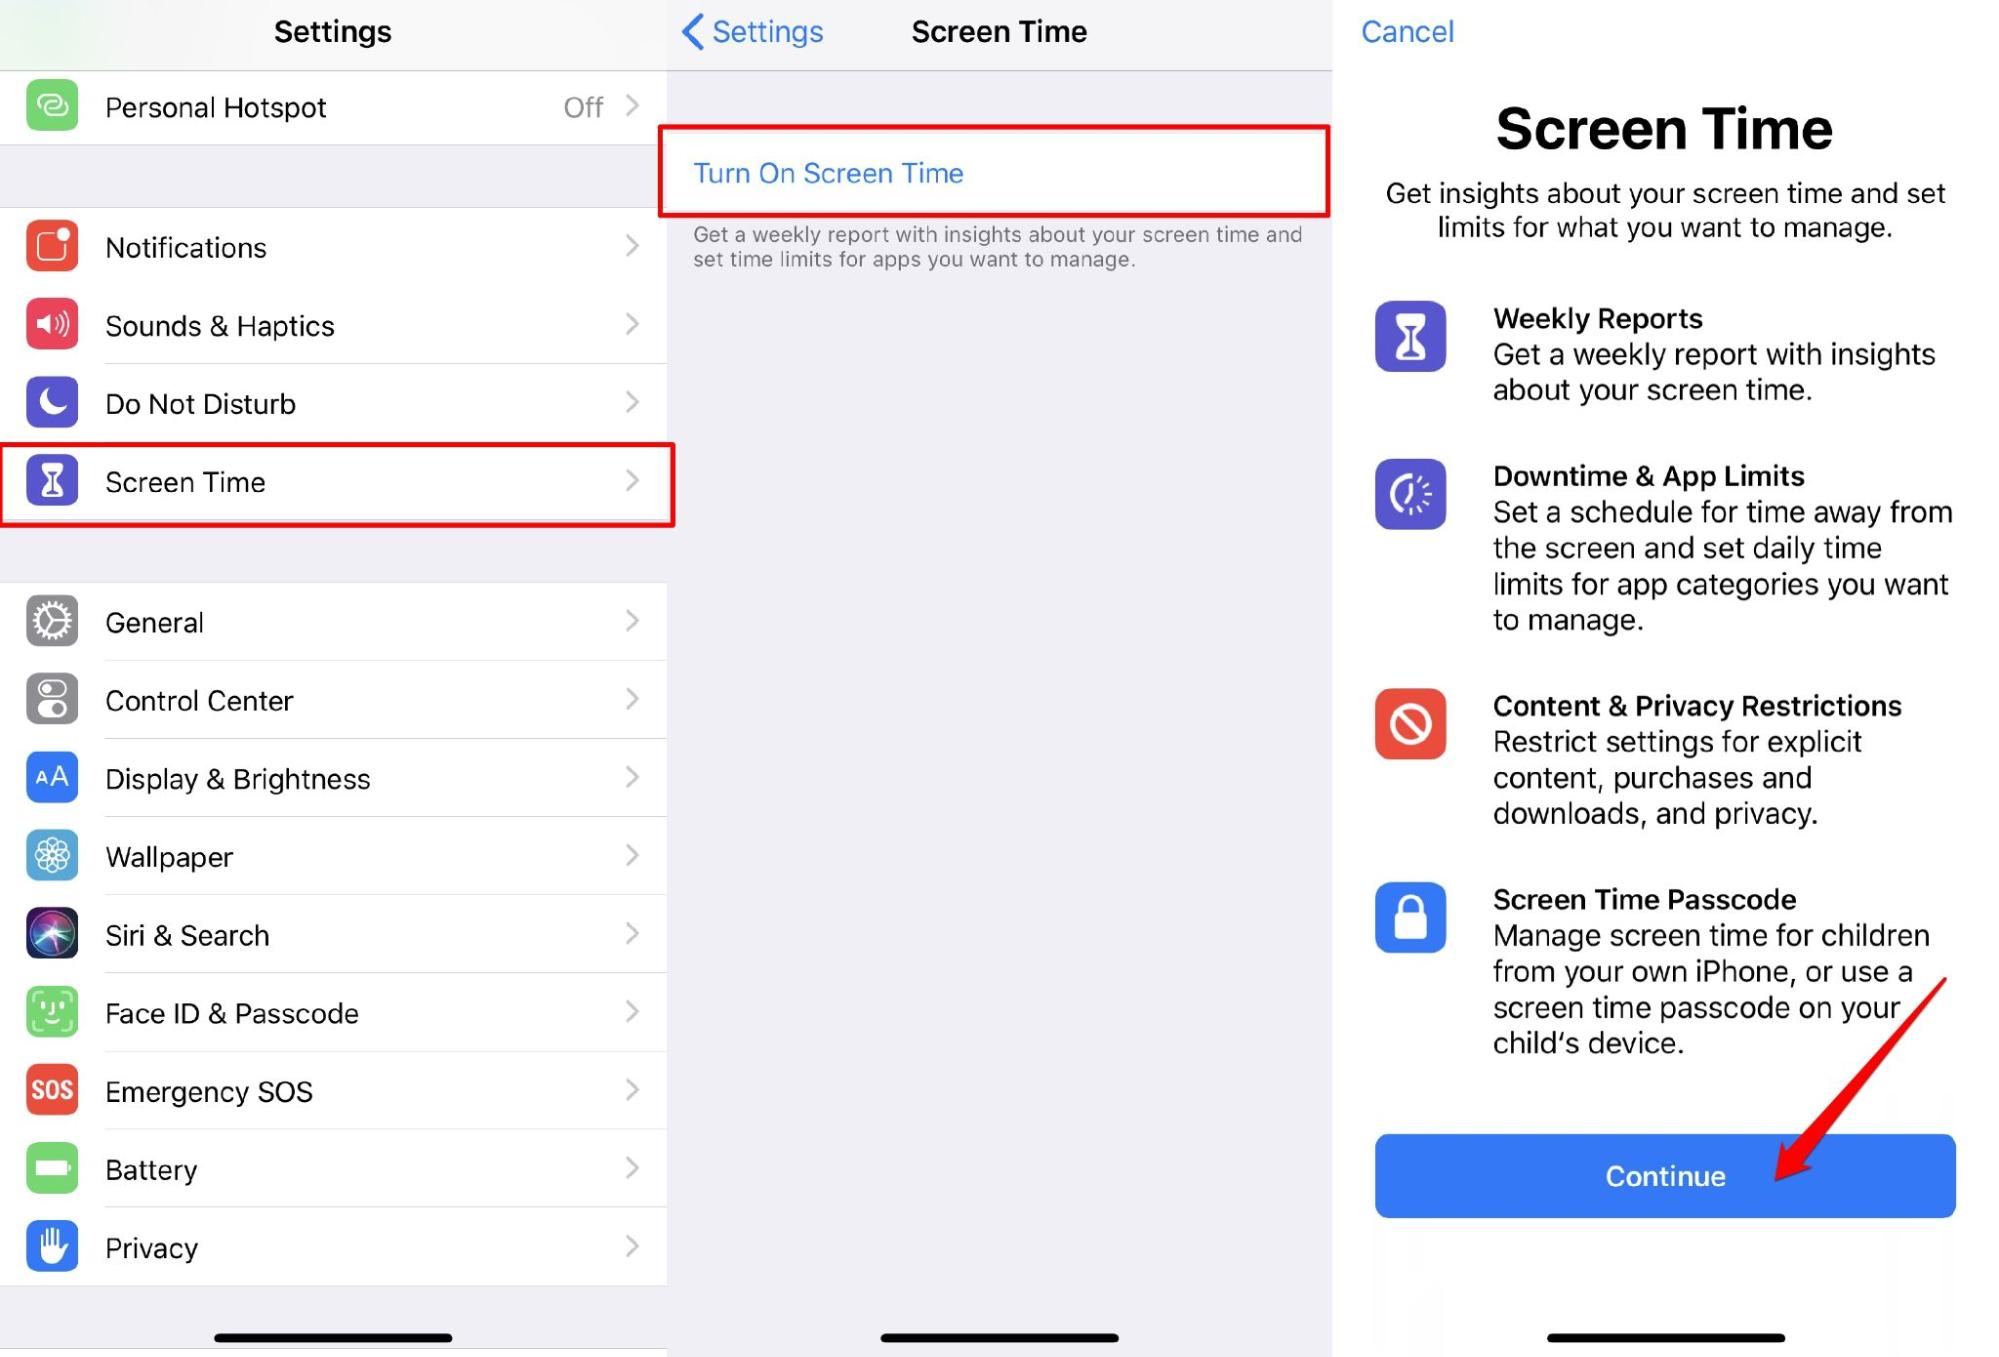
Accessing Safari Settings: To begin, open the "Settings" app on your iPhone and scroll down to find "Safari" in the list of installed apps. Tap on "Safari" to access its settings.
-
Enabling Notifications: Within the Safari settings, locate the "Notifications" option and ensure that it is toggled on. This step activates the notification feature for Safari, allowing websites to send you notifications.
-
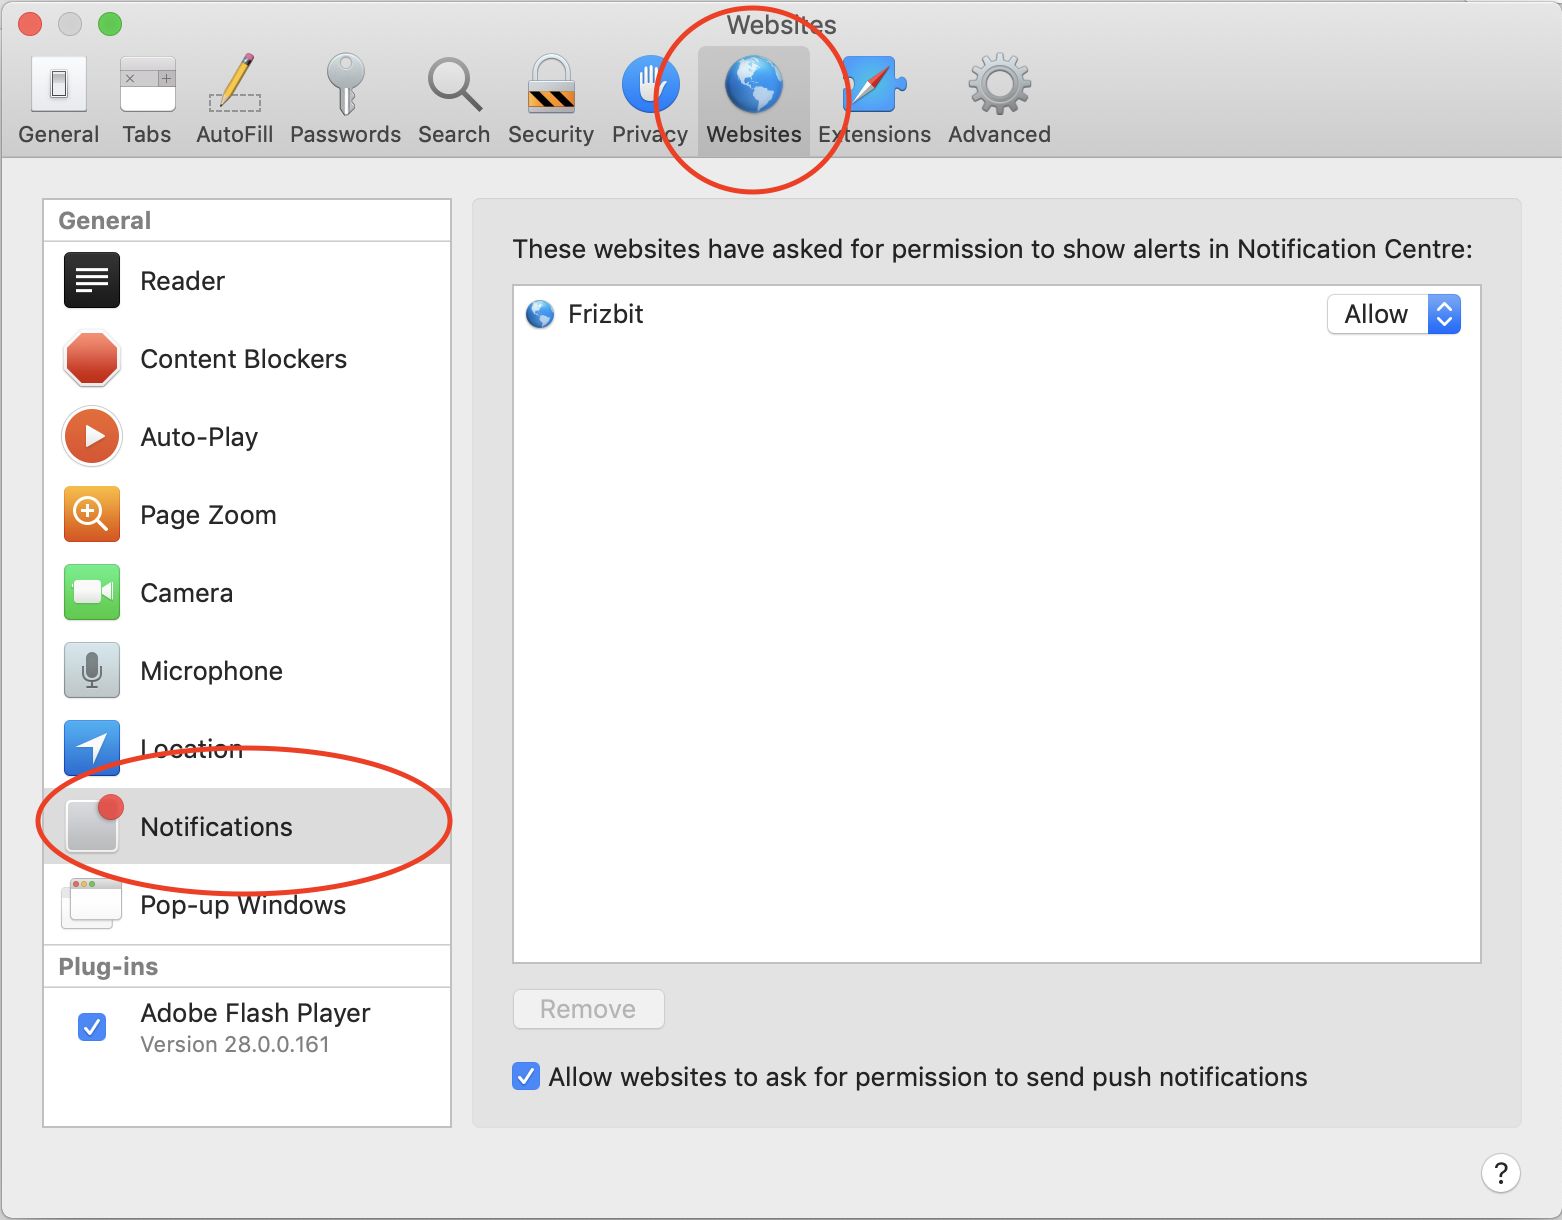
Website-Specific Notifications: To receive notifications from specific websites, you can further customize your preferences. Navigate to the "Websites" section within Safari settings and select "Notifications." Here, you can manage notifications for individual websites by allowing or blocking them from sending notifications.
-
Permission Requests: When you visit a website that offers notifications, Safari will prompt you to allow or block notifications from that site. You can choose to enable notifications for websites that you frequently visit and wish to stay updated on.
-
Notification Preferences: Safari also allows you to customize notification preferences for each website, giving you control over the type of notifications you receive. You can choose to receive alerts for new articles, updates, messages, or any other relevant content based on the website's offerings.
By following these steps, you can effectively enable notifications for Safari on your iPhone, empowering you to stay connected and informed while browsing the web. Once notifications are enabled, Safari will seamlessly deliver updates and alerts from your preferred websites, enhancing your browsing experience and keeping you in the loop with the latest content.
Enabling notifications for Safari is a valuable feature that enhances your browsing experience, ensuring that you never miss out on important updates and alerts from the websites you frequent. With notifications enabled, Safari becomes a powerful tool for staying informed and connected, providing a personalized browsing experience tailored to your interests and preferences.
Managing Safari Notifications
Once you have enabled notifications for Safari on your iPhone, it's essential to understand how to effectively manage and customize the notifications you receive. Managing Safari notifications allows you to tailor your browsing experience, ensuring that you receive timely updates and alerts from your preferred websites while minimizing any potential distractions. Here's how you can manage Safari notifications to suit your preferences:
Customizing Notification Settings
Safari provides comprehensive options to customize notification settings for individual websites, giving you control over the type and frequency of notifications you receive. To access these settings:
- Access Safari Settings: Open the "Settings" app on your iPhone and navigate to the "Safari" section.
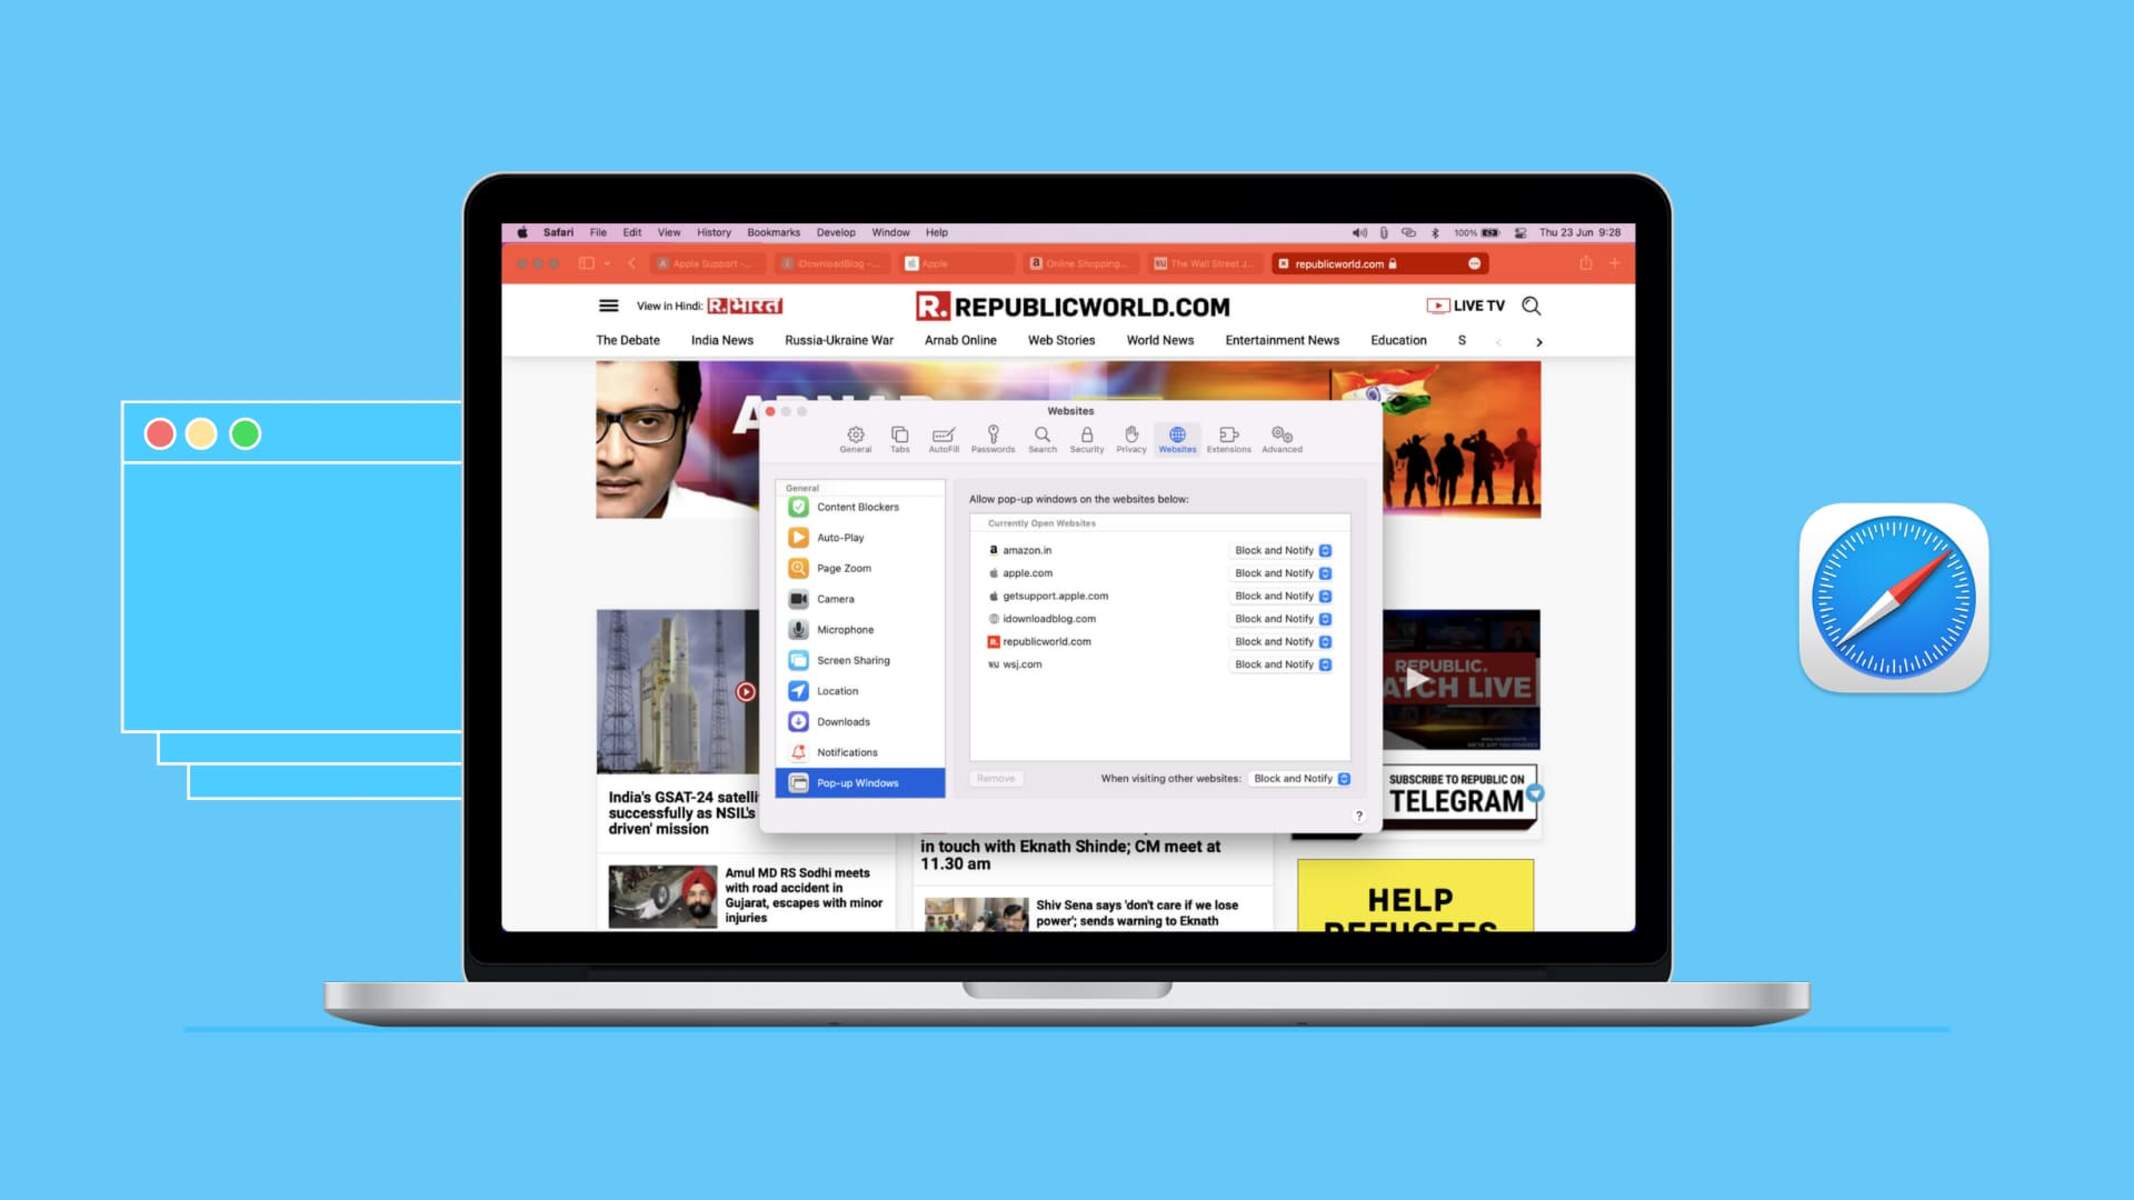
- Manage Website Notifications: Within the Safari settings, select "Websites" and then choose "Notifications." Here, you can view a list of websites that have requested to send you notifications. You can customize the notification settings for each website, including allowing or blocking notifications, and adjusting the notification style.
Notification Preferences
Safari allows you to specify your notification preferences for each website, ensuring that you receive relevant and timely updates based on your interests. You can choose to receive notifications for new articles, messages, alerts, or any other content offered by the website. By customizing these preferences, you can ensure that the notifications you receive align with your browsing habits and interests.
Managing Notification Alerts
To prevent notification overload and maintain a seamless browsing experience, it's important to manage notification alerts effectively. Safari offers options to control how notifications are displayed, including banners, alerts, or none. You can choose the notification style that best suits your preferences, ensuring that you stay informed without being overwhelmed by excessive alerts.
Reviewing Notification History
Safari maintains a notification history, allowing you to review past notifications and stay updated on the content you may have missed. By accessing the notification history, you can revisit previous alerts and ensure that you stay informed about important updates from your favorite websites.
By effectively managing Safari notifications, you can personalize your browsing experience and stay informed about the content that matters most to you. Customizing notification settings, specifying your preferences, and reviewing notification history empowers you to make the most of Safari's notification feature, ensuring that you receive relevant and timely updates while maintaining control over your browsing experience.
Troubleshooting Safari Notifications
While Safari notifications are designed to enhance your browsing experience, you may encounter occasional issues that affect the delivery or functionality of notifications. Understanding how to troubleshoot these issues can help you overcome potential obstacles and ensure that you continue to receive timely updates and alerts from your preferred websites. Here are some common troubleshooting steps to address Safari notification issues:
Check Notification Settings
Start by verifying that Safari notifications are enabled in your iPhone settings. Navigate to the "Settings" app, select "Safari," and ensure that the "Notifications" option is toggled on. Additionally, review the notification settings for individual websites within the Safari settings to confirm that notifications are allowed for the websites from which you expect to receive updates.
Clear Website Data
In some cases, accumulated website data or cache may interfere with Safari notifications. Clearing website data for specific sites or all websites can help resolve notification issues. To do this, go to "Settings," select "Safari," and choose "Advanced" followed by "Website Data." From here, you can clear data for individual websites or remove all website data to refresh Safari's notification functionality.
Update Safari and iOS
Ensuring that your Safari browser and iOS operating system are up to date is crucial for maintaining optimal performance, including notification delivery. Check for any available updates for Safari and iOS by navigating to "Settings," selecting "General," and choosing "Software Update." If updates are available, install them to benefit from the latest improvements and bug fixes that may address notification-related issues.
Restart Safari and iPhone
Sometimes, a simple restart can resolve temporary glitches affecting Safari notifications. Close the Safari app and restart your iPhone to refresh the system and potentially resolve any underlying issues that may be impacting notification delivery.
Reset Notification Permissions
If you are experiencing issues with receiving notifications from specific websites, you can reset the notification permissions for those sites. Navigate to "Settings," select "Safari," and choose "Notifications." From here, you can review and reset the notification permissions for individual websites, allowing you to refresh the notification settings and potentially resolve any issues.
By following these troubleshooting steps, you can address common Safari notification issues and ensure that you continue to receive timely updates and alerts while browsing the web on your iPhone. Implementing these measures can help you overcome potential obstacles and maintain a seamless notification experience, keeping you informed about the content that matters most to you.
Conclusion
In conclusion, Safari notifications offer a valuable means of staying informed and connected while browsing the web on your iPhone. By enabling and managing Safari notifications, users can personalize their browsing experience, receive timely updates from their favorite websites, and ensure that they stay informed about the content that matters most to them. The ability to customize notification settings, specify preferences for individual websites, and review notification history empowers users to tailor their browsing experience and make the most of Safari's notification feature.
Enabling notifications for Safari is a straightforward process that allows users to receive alerts and updates from a wide range of websites, including news sources, social media platforms, and other web applications. By accessing the Safari settings on their iPhone, users can toggle on notifications and further customize their preferences for individual websites, ensuring that they receive relevant and timely updates based on their interests.
Managing Safari notifications is equally important, as it allows users to control the type and frequency of notifications they receive. By customizing notification settings, specifying preferences, and managing notification alerts, users can prevent notification overload and maintain a seamless browsing experience. Additionally, the ability to review notification history enables users to revisit past alerts and ensure that they stay informed about important updates from their preferred websites.
Furthermore, understanding how to troubleshoot Safari notification issues is essential for overcoming potential obstacles and ensuring uninterrupted notification delivery. By checking notification settings, clearing website data, updating Safari and iOS, restarting Safari and the iPhone, and resetting notification permissions, users can address common notification-related issues and maintain a reliable notification experience.
In essence, Safari notifications on the iPhone offer a valuable tool for staying informed and connected while browsing the web. By leveraging the capabilities of Safari notifications and understanding how to manage and troubleshoot potential issues, users can enhance their browsing experience, receive timely updates, and stay connected with the content that matters most to them. Whether it's staying updated on the latest news, receiving real-time alerts from favorite websites, or staying connected with social media, Safari notifications empower users to stay informed and engaged while browsing the web on their iPhone.