Introduction
Welcome to the world of proxy servers and the endless possibilities they offer for enhancing your iPhone 4S browsing experience. Whether you want to bypass geographical restrictions, protect your online privacy, or simply access blocked websites, using a proxy server can be your ticket to internet freedom. In this article, we will explore the various methods and tools available for finding and configuring proxy servers on your iPhone 4S.
But first, let’s understand what exactly is a proxy server. In simple terms, a proxy server acts as an intermediary between your device and the internet. When you request access to a web page or resource, the request first goes through the proxy server. The server then forwards the request on your behalf, masking your original IP address and encrypting your data if necessary. This helps in hiding your identity, bypassing network restrictions, and enhancing online security.
Now you may be wondering why you need to use a proxy server on your iPhone 4S. Well, there are several reasons for that. Firstly, proxy servers can grant you access to geo-restricted content. For example, if you want to stream a movie or TV show that is only available in a specific country, you can use a proxy server located in that country to bypass the restriction and enjoy seamless streaming.
Secondly, proxy servers provide an extra layer of privacy and security. By connecting to the internet through a proxy server, your IP address and online activities remain hidden from prying eyes. This is especially useful when using public Wi-Fi networks, where your data can be vulnerable to hackers and other malicious entities. With a proxy server, you can browse the internet anonymously and protect your sensitive information.
Lastly, proxy servers also offer enhanced speed and performance. With many proxy servers optimized for faster connections, you can experience quicker loading times and smoother browsing sessions. This can be beneficial for streaming high-quality videos, downloading large files, or accessing websites that are experiencing high traffic.
Now that you understand the benefits of using a proxy server on your iPhone 4S, let’s dive into the different methods you can use to find and configure one. From manual configurations to VPN apps and third-party proxy apps, there are various options available to suit your needs. So, let’s get started and unlock the true potential of your iPhone 4S with proxy servers!
What is a Proxy Server?
Before we delve into the intricacies of finding and configuring proxy servers on your iPhone 4S, it’s important to have a clear understanding of what a proxy server actually is.
In its simplest definition, a proxy server acts as an intermediary between your device and the internet. When you request access to a web page or resource, instead of directly connecting to the target server, your request is first routed through the proxy server. The proxy server then carries out the request on your behalf, returning the requested information back to your device.
One of the primary purposes of using a proxy server is to mask your IP address. Every device connected to the internet is assigned a unique IP address that reveals its identity and location. By using a proxy server, you can replace your original IP address with the IP address of the proxy server, effectively hiding your true identity and location from the websites or services you visit.
Another key feature of proxy servers is their ability to bypass geographical restrictions. Many websites and streaming platforms restrict access to their content based on the user’s location. For example, a video streaming service may only be available in certain countries, or a website might limit access to specific regions. By connecting to a proxy server in a different location, you can trick these websites into thinking you are accessing them from a different geographic location and gain access to the restricted content.
Proxy servers also add an extra layer of privacy and security to your online activities. When you connect to a website through a proxy server, the server acts as a shield between your device and the target website. This means that the website only sees the IP address and information of the proxy server, keeping your own information hidden. Additionally, some proxy servers also provide encryption to protect your data from unauthorized access.
Beyond privacy and security benefits, proxy servers can also improve your browsing speed and performance. Proxy servers can cache data, storing frequently accessed information on the server itself. By doing so, when you request that information again, the proxy server can provide it from its own cache, eliminating the need to fetch it from the original source. This can result in faster loading times and smoother browsing experiences, especially for websites that are frequently accessed.
Overall, proxy servers offer a wide range of benefits, including anonymity, bypassing restrictions, enhanced security, and improved browsing speed. Now that you have a solid understanding of what a proxy server is, let’s explore the different methods you can use to find and configure proxy servers on your iPhone 4S.
Why Use a Proxy Server on iPhone 4S?
Using a proxy server on your iPhone 4S can offer numerous advantages and unlock a world of possibilities. Let’s explore some of the key reasons why you should consider utilizing a proxy server on your device.
1. Bypassing Geo-Restrictions: One of the primary benefits of using a proxy server is the ability to bypass geo-restrictions. Many websites, streaming platforms, and online services implement restrictions based on a user’s geographical location. By connecting to a proxy server located in a different country or region, you can effectively mask your true location and access content that is otherwise unavailable in your area. This means you can enjoy streaming services, access websites, and use online services from around the world, no matter where you are.
2. Enhanced Privacy and Security: When you connect to the internet through a proxy server, your IP address is hidden, and your online activities become anonymous. This added layer of privacy can protect you from potential threats, such as hackers or identity thieves, who may try to track or exploit your online presence. Additionally, some proxy servers offer encryption capabilities, ensuring that your data is secure and protected while transmitting over the internet.
3. Accessing Blocked Websites: In certain situations, you may find that certain websites are blocked or restricted on your network or by your internet service provider. This could be due to government-imposed censorship, workplace or school restrictions, or other limitations. By using a proxy server, you can circumvent these restrictions and gain access to blocked websites, allowing you to freely browse the internet and access the content of your choice.
4. Faster Browsing Speed: Proxy servers can also enhance your browsing speed and performance. As mentioned earlier, proxy servers can cache commonly accessed content, allowing for quicker retrieval and reducing the time it takes to load web pages. This can be particularly beneficial when accessing websites that have high traffic or when dealing with slow internet connections, ensuring a smooth and efficient browsing experience.
5. Anonymity on Public Wi-Fi: When you connect to public Wi-Fi networks, your online activities and personal information can be vulnerable to interception. By using a proxy server, your data traffic is encrypted, making it difficult for anyone on the same network to intercept and access your sensitive information. This ensures that your online activities remain private and secure even while using public Wi-Fi hotspots.
6. Testing Website Localization: If you work in web development, marketing, or localization, using a proxy server can be invaluable for testing and ensuring that your website appears and functions correctly for users in different countries or regions. By connecting to a proxy server located in the target region, you can effectively simulate the user experience from that location and make any necessary adjustments or optimizations.
These are just a few compelling reasons why using a proxy server on your iPhone 4S can greatly enhance your internet browsing experience. Now, let’s move on to explore the various methods you can use to find and configure proxy servers on your device.
Method 1: Manual Configuration
If you prefer a hands-on approach and have the necessary technical knowledge, manually configuring a proxy server on your iPhone 4S is a viable option. Here’s a step-by-step guide to help you through the process:
Step 1: Obtain Proxy Server Information: Before starting the configuration process, you need to gather the required information for the proxy server you want to use. This typically includes the proxy server address (URL or IP), port number, and any necessary authentication credentials.
Step 2: Access Wi-Fi Settings: On your iPhone 4S, navigate to the “Settings” app and tap on “Wi-Fi”. Locate the Wi-Fi network you are currently connected to and tap the “i” icon next to it.
Step 3: Configure Proxy Settings: Scroll down and tap on the “Configure Proxy” option. Select the “Manual” option to manually enter the proxy server details.
Step 4: Enter Proxy Server Details: In the fields provided, enter the proxy server address and port number obtained in Step 1. If there are any authentication requirements, you can enter the username and password in the respective fields.
Step 5: Save Changes: Once you have entered all the necessary information, tap the “Save” button to save the proxy server settings.
Step 6: Test the Connection: To ensure that the proxy server is working correctly, try accessing a website or an app that was previously inaccessible due to restrictions. If the content loads successfully, it means that the proxy server is functioning as intended.
Note: Keep in mind that manually configuring a proxy server on your iPhone 4S requires careful attention to details and the correct input of information. Any mistakes or typos in the settings can prevent the proxy server from working correctly.
This method allows you to have full control over the proxy server settings and choose the specific server you want to use. However, it can be more time-consuming and requires technical expertise. If you prefer a simpler approach, there are alternative methods available, which we will explore in the following sections.
Now that you are familiar with the manual configuration process, let’s move on to the next method: using a VPN app to set up a proxy server on your iPhone 4S.
Method 2: Using a VPN App
If you prefer a more user-friendly and hassle-free approach to configuring a proxy server on your iPhone 4S, using a VPN (Virtual Private Network) app is an excellent option. VPN apps not only provide proxy server functionality but also offer additional features such as encryption, security, and a wide range of server locations to choose from. Follow these steps to set up a proxy server using a VPN app:
Step 1: Choose a VPN App: Start by selecting a VPN app from the App Store. There are numerous options available, both free and paid, each offering different features and server locations. Look for a reputable app with positive reviews and a user-friendly interface.
Step 2: Install and Launch the App: Download the chosen VPN app and open it on your iPhone 4S. Follow the app’s instructions to create a new account if required.
Step 3: Select a Server Location: Once you have set up an account, you will usually be presented with a list of server locations. Choose a server location that aligns with your desired proxy server location or the content you want to access.
Step 4: Enable the VPN Connection: Tap the “Connect” or “Enable VPN” button in the app to establish a VPN connection. Depending on the app, you may need to grant permission for the VPN to establish a secure connection.
Step 5: Verify the Connection: After the connection is established, you should see a VPN icon in your iPhone’s status bar. This indicates that the VPN app is active and your device is using the proxy server’s IP address.
Step 6: Test the Connection: To ensure that the proxy server is working correctly, try accessing a website or service that was previously restricted in your location. If you can access the content without any issues, it means that the VPN app and proxy server are functioning as intended.
Using a VPN app simplifies the process of configuring a proxy server on your iPhone 4S and provides additional benefits like encryption and enhanced security. It also allows you to choose from a variety of server locations, making it easier to access geo-restricted content from around the world.
Now that you have learned how to set up a proxy server using a VPN app, let’s move on to the next method: using third-party proxy apps.
Method 3: Using Third-Party Proxy Apps
Another convenient approach to configuring a proxy server on your iPhone 4S is by using third-party proxy apps. These apps are specifically designed to provide proxy server functionality and allow you to easily connect to different servers with just a few taps. Here’s how you can use third-party proxy apps:
Step 1: Choose a Third-Party Proxy App: Start by browsing the App Store for reputable third-party proxy apps. Look for apps with positive reviews and a user-friendly interface. Some popular options include Proxyman, Proxifier, and Proxy Master.
Step 2: Install and Launch the App: Download and install the chosen proxy app on your iPhone 4S. Once installed, open the app to begin the setup process.
Step 3: Configure Proxy Settings: In the app, you will likely find options to enter the proxy server address, port number, and any authentication credentials if required. Fill in the necessary information based on the proxy server you wish to use.
Step 4: Connect to the Proxy Server: Once you have entered the proxy server details, tap the connect or enable button in the app to establish a connection with the selected proxy server.
Step 5: Verify the Connection: After the connection is established, you should see an indication that the proxy app is active and your device is using the proxy server. Some apps may display a notification or a specific icon in the status bar to indicate the connection status.
Step 6: Test the Connection: To ensure that the proxy server is functioning correctly, try accessing a website or service that was previously inaccessible due to restrictions. If you are able to access the content without any issues, it means that the proxy app and the chosen server are working as intended.
Using third-party proxy apps provides a straightforward way to configure a proxy server on your iPhone 4S, offering convenience and flexibility. These apps often have intuitive interfaces and allow you to switch between different proxy servers with ease.
Now that you are familiar with using third-party proxy apps, let’s move on to the next method: using browser extensions with proxy support.
Method 4: Browser Extensions with Proxy Support
If you prefer to have proxy server functionality directly integrated into your web browsing experience, using browser extensions with proxy support is a great option. These extensions can be installed on your preferred web browser and provide seamless proxy server configuration. Here’s how you can use browser extensions with proxy support on your iPhone 4S:
Step 1: Choose a Browser Extension: Start by selecting a browser extension with proxy support. Popular options include FoxyProxy, Proxy SwitchyOmega, and ZenMate VPN.
Step 2: Install the Extension: Download and install the chosen extension from the official extension store for your web browser. For example, if you use Safari, visit the App Store and search for the extension you wish to install.
Step 3: Configure Proxy Settings: Once the extension is installed, open your browser’s settings or preferences and locate the proxy settings section. Enter the proxy server address, port number, and any required authentication credentials provided by your chosen proxy service.
Step 4: Enable the Extension: After configuring the proxy settings, activate and enable the browser extension. Depending on the extension, you may need to toggle a switch or enable specific features within the extension settings.
Step 5: Verify the Connection: Once the extension is enabled, test the connection by visiting a website or service that was previously inaccessible due to restrictions. If you can access the content without any issues, it means that the proxy extension is successfully working with the chosen proxy server.
Using browser extensions with proxy support integrates proxy server functionality directly into your web browsing experience. This eliminates the need for separate proxy apps or manual configurations and provides a streamlined approach to accessing blocked content and enhancing your online privacy.
Now that you have learned about using browser extensions with proxy support, let’s move on to the final method: using Safari’s built-in proxy settings.
Method 5: Using Safari’s Proxy Settings
If you prefer to utilize the built-in features of Safari, you can configure a proxy server directly within the browser’s settings. This method allows you to harness the power of Safari’s browsing capabilities while benefiting from the functionality of a proxy server. Follow these steps to configure a proxy server using Safari’s built-in proxy settings on your iPhone 4S:
Step 1: Open Safari Settings: Launch the Safari browser on your iPhone 4S and tap the “Settings” icon at the bottom right corner of the screen.
Step 2: Scroll down and tap “Safari”: Scroll down the Settings menu and locate the “Safari” option. Tap on it to access the Safari settings.
Step 3: Tap “Advanced”: Within the Safari settings, scroll down and tap on the “Advanced” option. This will open additional advanced settings for Safari.
Step 4: Tap “Proxies”: Within the Advanced settings, locate the “Proxies” option and tap on it. This is where you can configure the proxy server settings for Safari.
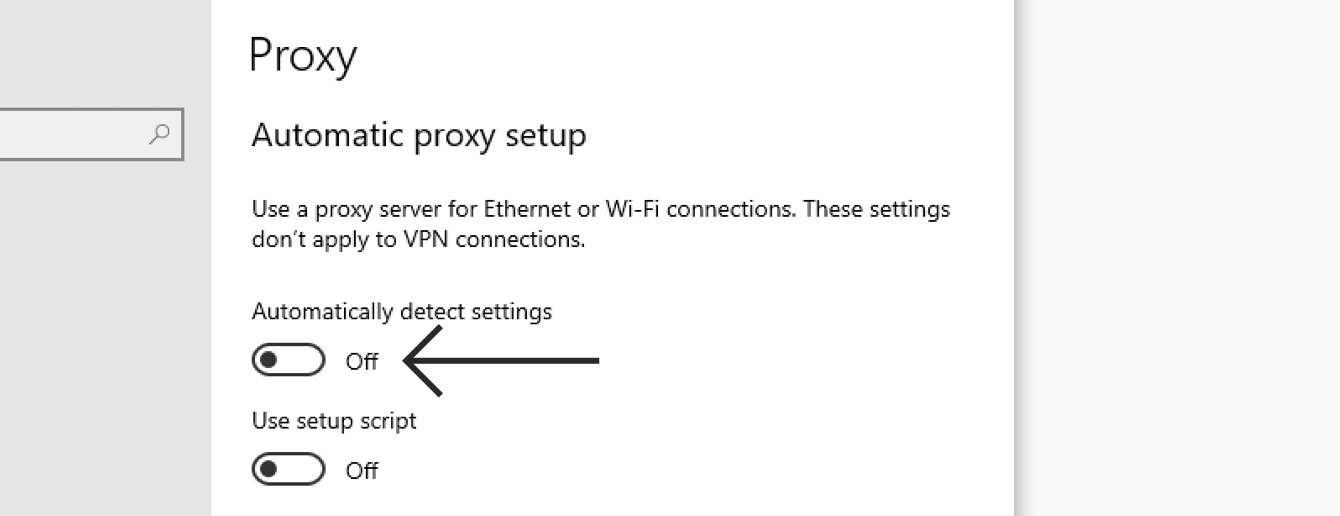
Step 5: Select a Proxy Configuration: In the Proxies settings, you will find various options for configuring the proxy server. You can choose from “Off” to disable proxy usage, “Auto,” which will automatically detect and use proxy settings, or “Manual,” which allows you to enter the proxy server details manually.
Step 6: Enter Proxy Server Details: If you select the “Manual” option, you will need to enter the proxy server address, port number, and any authentication credentials required by your chosen proxy service.
Step 7: Save the Settings: Once you have entered the proxy server details, tap “Done” or “Save” to save the proxy settings for Safari.
Using Safari’s built-in proxy settings provides a convenient way to configure a proxy server directly within your preferred browser. This eliminates the need for additional apps or extensions and allows you to seamlessly browse the internet while enjoying the benefits of a proxy server.
Now that you have learned about using Safari’s proxy settings, you are equipped with multiple methods to find and configure a proxy server on your iPhone 4S. Experiment with these methods to determine which one works best for your specific needs and preferences.
Conclusion
Congratulations! You have now explored various methods to find and configure a proxy server on your iPhone 4S. Whether you prefer manual configuration, using a VPN app, third-party proxy apps, browser extensions, or Safari’s built-in proxy settings, there is a method that suits your needs and preferences.
By using a proxy server on your iPhone 4S, you can unlock a plethora of benefits. From bypassing geo-restrictions and accessing blocked content to enhancing your privacy and security, a proxy server allows you to take control of your online experience.
Remember that while proxy servers offer many advantages, it’s important to use them responsibly and adhere to applicable laws and regulations. Choose reputable proxy services and exercise caution when sharing personal information or accessing sensitive data over a proxy connection.
Now it’s time for you to try out the methods discussed in this article and discover the power of proxy servers on your iPhone 4S. Enhance your browsing experience, access geo-restricted content, and safeguard your privacy with the help of proxy servers.
Enjoy the freedom and flexibility that proxy servers provide, and make the most out of your iPhone 4S’s capabilities. Happy browsing!