Introduction
Replacing the SIM card in an iPhone 4S is a straightforward process that allows you to upgrade your device or switch to a new mobile carrier. Whether you're a seasoned iPhone user or a newcomer to the world of mobile devices, understanding how to replace the SIM card can be a valuable skill. This step-by-step guide will walk you through the process, ensuring that you can confidently manage this task on your own.
By following this guide, you'll learn the essential steps to safely remove the existing SIM card from your iPhone 4S and insert a new one. This can be particularly useful when traveling internationally, as it allows you to use a local SIM card and avoid hefty roaming charges. Additionally, if you've upgraded to a new iPhone or obtained a new SIM card from your mobile carrier, knowing how to replace the SIM card will enable you to seamlessly transition to your new device or plan.
Understanding the intricacies of your iPhone 4S and its components empowers you to take control of your device and make necessary changes with ease. This guide aims to demystify the process of replacing the SIM card, providing clear and concise instructions that anyone can follow. Whether you're seeking to troubleshoot connectivity issues, upgrade your device, or simply explore the inner workings of your iPhone 4S, this guide equips you with the knowledge and confidence to do so.
As we delve into the step-by-step process of replacing the SIM card in your iPhone 4S, it's important to approach each task with care and attention to detail. By doing so, you can ensure that your device continues to function optimally, and you can enjoy the benefits of a seamlessly integrated SIM card. Let's embark on this journey together, as we navigate the process of replacing the SIM card in the iPhone 4S, empowering you to take charge of your device and its connectivity.
Step 1: Gather Necessary Tools
Before embarking on the process of replacing the SIM card in your iPhone 4S, it's essential to gather the necessary tools to ensure a smooth and efficient transition. The following tools are required for this task:
-
SIM Card Eject Tool: This small, metal tool is specifically designed for ejecting the SIM card tray from your iPhone 4S. It's typically included in the original packaging of the device. If you no longer have the original eject tool, a paperclip can serve as an alternative, ensuring that you can safely remove the SIM card tray without causing damage to your device.
-
New SIM Card: Whether you're upgrading your device or switching to a new mobile carrier, you'll need a new SIM card that is compatible with your iPhone 4S. Ensure that the new SIM card is activated and ready for use before proceeding with the replacement process.
-
Clean Cloth: A soft, lint-free cloth is useful for wiping the SIM card and the SIM card tray to remove any dust, dirt, or debris. Keeping these components clean is crucial to maintaining a strong and reliable connection between the SIM card and your iPhone 4S.
-
Stable Work Surface: Find a stable and well-lit work surface where you can comfortably perform the SIM card replacement process. This will minimize the risk of accidental damage to your device and allow you to focus on the task at hand.
By gathering these essential tools, you can approach the process of replacing the SIM card in your iPhone 4S with confidence and preparedness. Having the right tools at your disposal ensures that you can navigate each step of the process smoothly, safeguarding your device and enabling a successful SIM card replacement. With these tools in hand, you're ready to proceed to the next step and power off your iPhone 4S in preparation for the SIM card replacement process.
Step 2: Power Off the iPhone 4S
Before proceeding with the SIM card replacement process, it's crucial to power off your iPhone 4S to prevent any potential damage and ensure a safe transition. Powering off your device allows you to work on it without the risk of causing malfunctions or disrupting ongoing operations. Here's a detailed guide on how to power off your iPhone 4S:
-
Locate the Power Button: The power button on the iPhone 4S is situated at the top right edge of the device. It's a small, circular button that is easily accessible.
-
Press and Hold the Power Button: To initiate the power-off process, press and hold the power button until the "slide to power off" slider appears on the screen.
-
Slide to Power Off: Once the "slide to power off" slider is displayed, use your finger to slide it from left to right. This action prompts the device to begin shutting down.
-
Wait for the Device to Power Off: Allow the iPhone 4S to complete the power-off sequence. You'll notice the screen turning black, indicating that the device is powered off.
-
Verify Power Off: To ensure that the device is completely powered off, briefly press the power button. If the device remains unresponsive and the screen remains dark, it indicates that the iPhone 4S has been successfully powered off.
By following these steps, you can effectively power off your iPhone 4S, preparing it for the subsequent SIM card replacement process. Ensuring that the device is powered off minimizes the risk of electrical mishaps and allows you to handle the device safely. With your iPhone 4S powered off, you're now ready to proceed to the next step and locate the SIM card tray in preparation for the SIM card replacement.
Step 3: Locate the SIM Card Tray
Locating the SIM card tray is a crucial step in the process of replacing the SIM card in your iPhone 4S. The SIM card tray houses the SIM card and facilitates its secure insertion and removal from the device. To locate the SIM card tray, follow these steps:
-
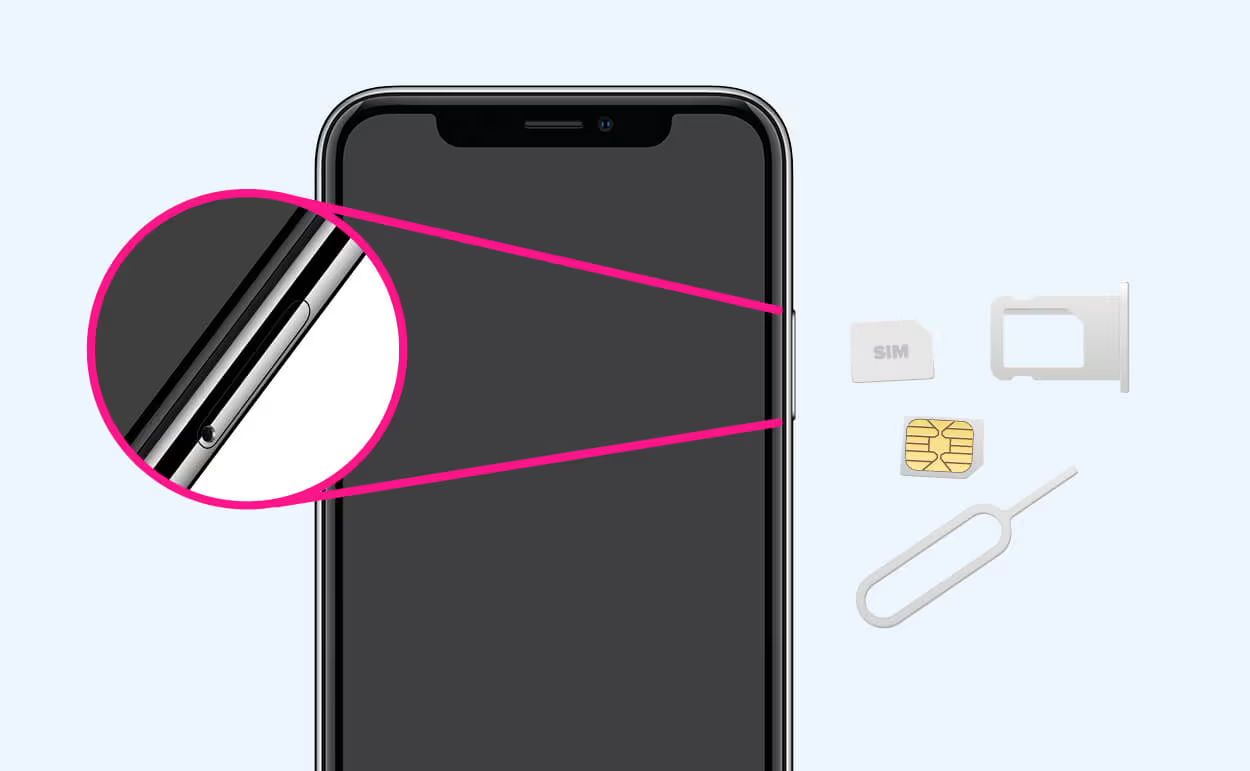
Identify the SIM Card Tray Slot: On the right side of your iPhone 4S, you'll find a small, recessed slot. This slot is designed to accommodate the SIM card tray and is typically located just below the power button. The presence of this slot indicates the positioning of the SIM card tray within the device.
-
Use Proper Lighting: To ensure clear visibility, it's advisable to perform this step in a well-lit environment. Adequate lighting can help you identify the precise location of the SIM card tray slot and avoid any potential mishandling of the device.
-
Handle the Device with Care: When locating the SIM card tray, handle your iPhone 4S with care to prevent accidental damage. Ensure a firm grip on the device and maintain a steady hand as you prepare to access the SIM card tray.
-
Familiarize Yourself with the Device's Layout: Take a moment to familiarize yourself with the layout of your iPhone 4S, particularly the right-hand side where the SIM card tray slot is situated. Understanding the physical features and orientation of the device will aid in locating the SIM card tray with precision.
By following these steps, you can successfully locate the SIM card tray in your iPhone 4S, setting the stage for the subsequent steps in the SIM card replacement process. With the SIM card tray identified, you're now prepared to proceed to the next step and remove the SIM card tray from your device, facilitating the safe removal of the old SIM card and the insertion of a new one.
Step 4: Remove the SIM Card Tray
With the SIM card tray located, the next crucial step in the process of replacing the SIM card in your iPhone 4S is to remove the SIM card tray from the device. This step requires precision and care to ensure that the SIM card tray is safely extracted without causing any damage to the device. Follow these detailed steps to successfully remove the SIM card tray:
-
Retrieve the SIM Card Eject Tool: Begin by retrieving the SIM card eject tool or a suitable alternative, such as a paperclip. Ensure that the tool is readily accessible and held securely in your hand.
-
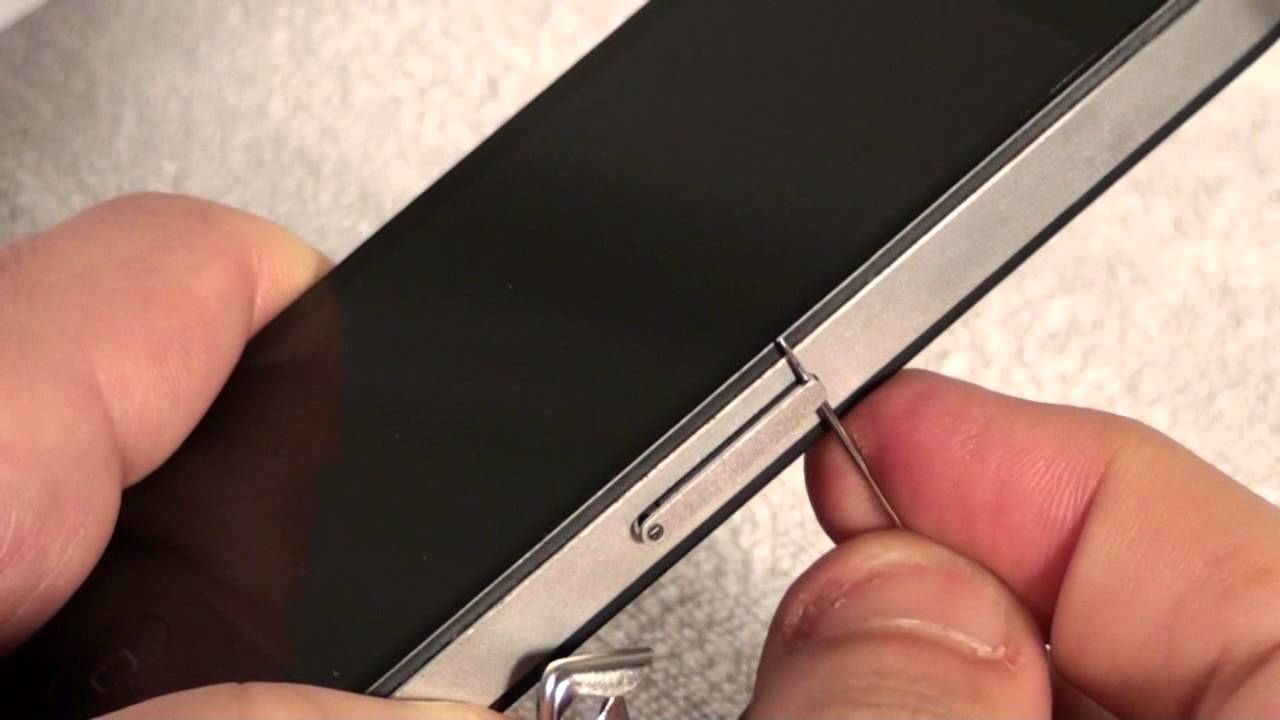
Insert the Eject Tool: Position the tip of the SIM card eject tool into the small pinhole located adjacent to the SIM card tray slot. Apply gentle pressure to insert the tool into the pinhole, ensuring that it fits snugly.
-
Apply Even Pressure: Once the eject tool is inserted, exert even pressure to gently push into the pinhole. This action activates the internal mechanism, causing the SIM card tray to protrude slightly from the device.
-
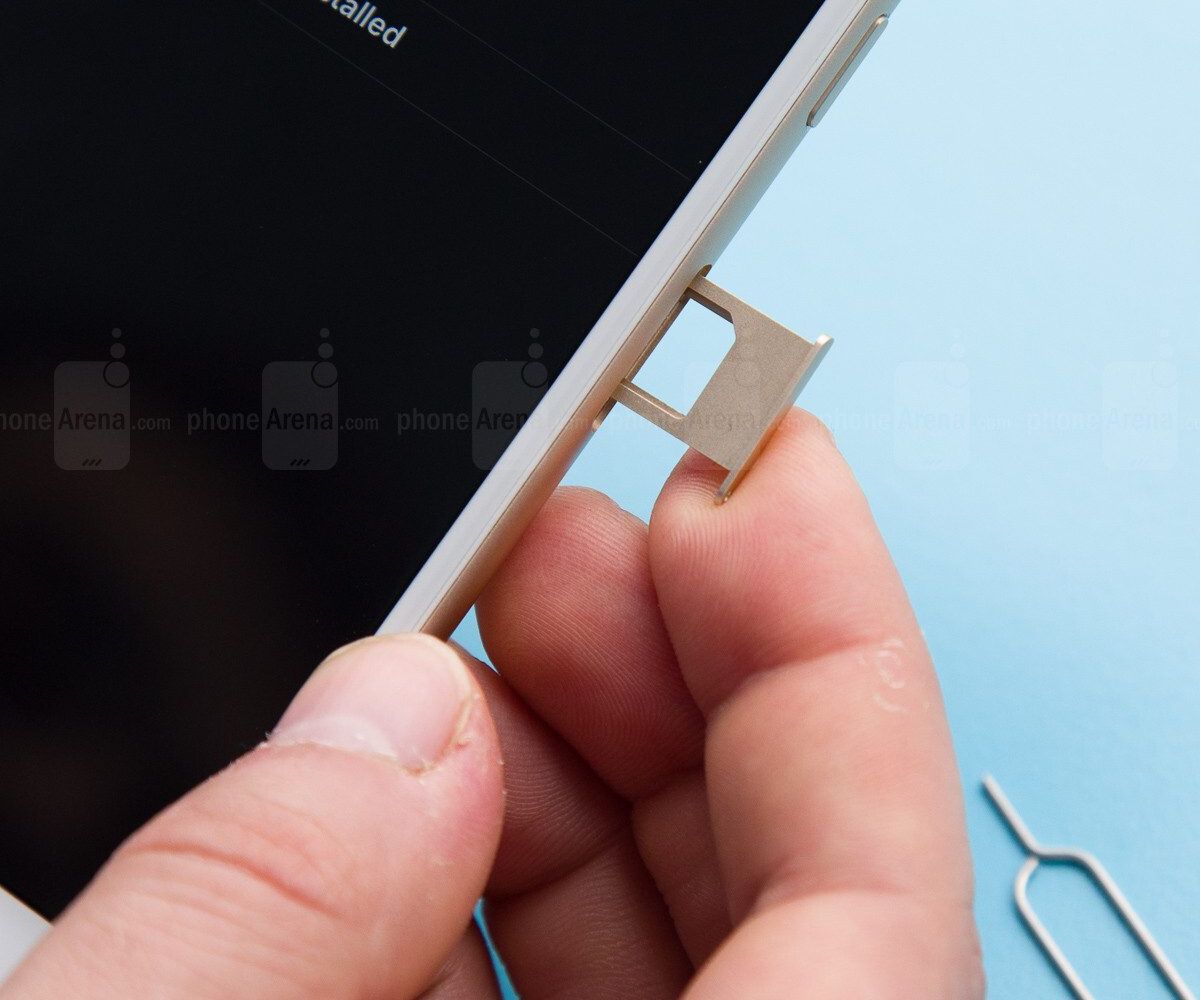
Carefully Remove the SIM Card Tray: With the SIM card tray partially ejected, carefully grasp the exposed edge of the tray and slowly pull it out of the device. Exercise caution to prevent any sudden movements that may dislodge the SIM card or cause damage to the tray.
-
Set Aside the SIM Card Tray: Upon removing the SIM card tray, place it on a clean and stable surface, ensuring that it remains free from any dust or debris. This temporary placement allows for easy access to the old SIM card and prepares the tray for the insertion of the new SIM card.
By meticulously following these steps, you can effectively remove the SIM card tray from your iPhone 4S, paving the way for the subsequent stages of the SIM card replacement process. This careful and methodical approach ensures that the SIM card tray is extracted smoothly and without any complications, setting the stage for the seamless transition to a new SIM card. With the SIM card tray successfully removed, you're now prepared to proceed to the next step and remove the old SIM card from the tray, making way for the insertion of a new one.
Step 5: Remove the Old SIM Card
With the SIM card tray in hand, the next crucial step in the process of replacing the SIM card in your iPhone 4S is to remove the old SIM card from the tray. This step requires precision and care to ensure that the old SIM card is safely extracted without causing any damage. Follow these detailed steps to successfully remove the old SIM card:
-
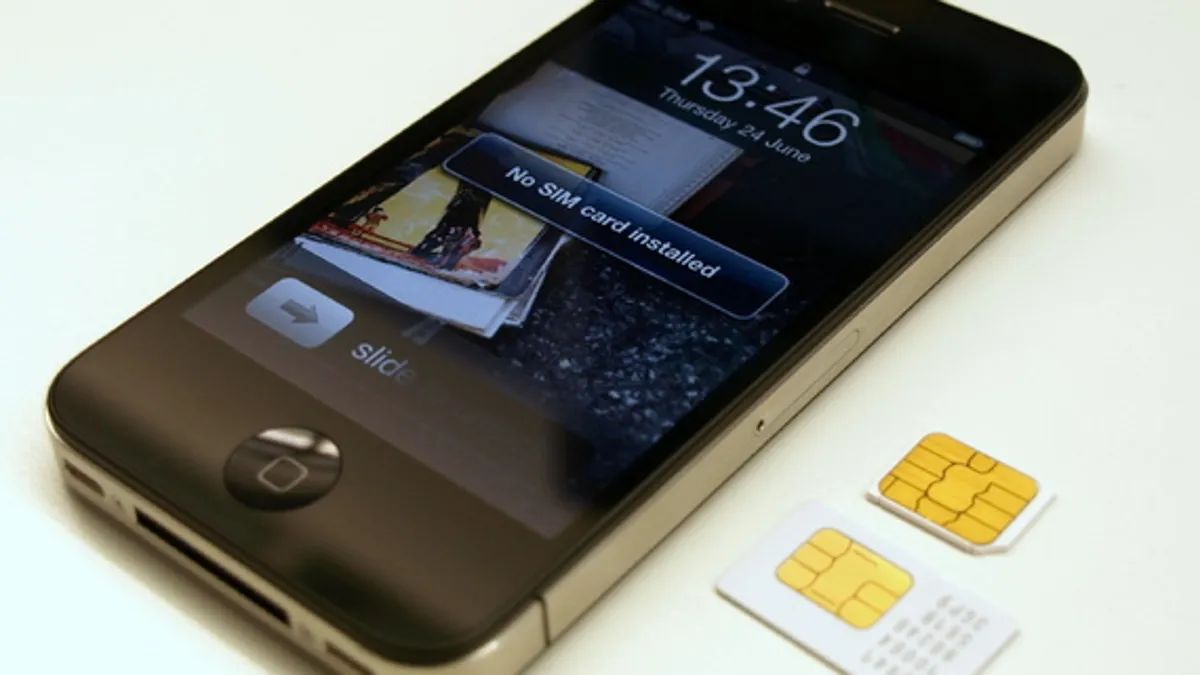
Inspect the Old SIM Card: Before proceeding with the removal, take a moment to inspect the old SIM card. Ensure that it is free from any visible damage or debris. This visual inspection allows you to identify any potential issues with the old SIM card before its removal.
-
Gently Eject the Old SIM Card: With the SIM card tray placed on a stable surface, carefully push the old SIM card from its slot within the tray. Use your fingertip or a soft, non-abrasive tool to apply gentle pressure to the SIM card, prompting it to slide out smoothly.
-
Handle with Care: As the old SIM card emerges from the tray, handle it with care to prevent any bending or damage to its delicate components. Hold the SIM card by its edges, avoiding contact with the metal contacts or the embedded chip.
-
Inspect the Tray Slot: After removing the old SIM card, take a moment to inspect the slot within the SIM card tray. Ensure that it is clean and free from any residual debris. A quick visual check allows you to confirm that the tray slot is prepared for the insertion of the new SIM card.
-
Set Aside the Old SIM Card: Once the old SIM card has been safely removed, set it aside in a secure location. It's advisable to store the old SIM card in its original packaging or a protective case, preserving it as a backup in case it is needed in the future.
By meticulously following these steps, you can effectively remove the old SIM card from the tray, ensuring a smooth transition to the insertion of a new SIM card. This careful and methodical approach guarantees that the old SIM card is extracted without any complications, setting the stage for the seamless installation of a new SIM card into your iPhone 4S. With the old SIM card safely removed, you're now prepared to proceed to the next step and insert the new SIM card into the tray, completing the SIM card replacement process.
Step 6: Insert the New SIM Card
With the old SIM card safely removed from the tray, it's time to proceed with the insertion of the new SIM card into your iPhone 4S. This step marks a pivotal moment in the SIM card replacement process, as it enables you to seamlessly integrate the new SIM card with your device. Follow these detailed steps to successfully insert the new SIM card:
-
Prepare the New SIM Card: Prior to insertion, ensure that the new SIM card is clean and free from any visible damage. Inspect the SIM card to verify that its metal contacts and chip are in pristine condition, as any debris or damage could hinder its functionality.
-
Align the New SIM Card: Position the new SIM card carefully within the designated slot on the SIM card tray. Align the notched corner of the SIM card with the corresponding notch within the tray, ensuring a proper fit that prevents any misalignment or potential damage to the card.
-
Gently Place the SIM Card: With precision and care, gently place the new SIM card into the slot within the SIM card tray. Apply even pressure to ensure that the SIM card sits securely within the tray, maintaining a stable and flush position that facilitates its seamless integration with your iPhone 4S.
-
Verify Proper Orientation: Double-check the orientation of the new SIM card within the tray to confirm that it aligns correctly with the tray's slot. This visual inspection ensures that the SIM card is positioned accurately, minimizing the risk of connectivity issues or improper insertion.
-
Handle with Care: Throughout the insertion process, handle the new SIM card with utmost care to prevent any accidental damage. Avoid touching the metal contacts or the embedded chip, and ensure that the SIM card remains free from any smudges or debris that could affect its functionality.
By meticulously following these steps, you can effectively insert the new SIM card into the tray, seamlessly integrating it with your iPhone 4S. This careful and methodical approach guarantees that the new SIM card is positioned accurately, setting the stage for a successful activation and utilization of your device with the new SIM card. With the new SIM card securely inserted, you're now prepared to proceed to the next step and reinsert the SIM card tray into your iPhone 4S, finalizing the SIM card replacement process.
Step 7: Reinsert the SIM Card Tray
With the new SIM card securely inserted into the tray, the next essential step in the process of replacing the SIM card in your iPhone 4S is to reinsert the SIM card tray into the device. This pivotal step culminates the meticulous process of transitioning to a new SIM card, ensuring that the device is fully equipped to establish a reliable connection with the chosen mobile carrier. Follow these detailed steps to successfully reinsert the SIM card tray:
-
Align the SIM Card Tray: Position the SIM card tray in alignment with the corresponding slot within your iPhone 4S. Ensure that the tray is oriented correctly, with the metal contacts and notch on the tray matching the internal components of the device.
-
Gently Insert the Tray: With precision and care, gently insert the SIM card tray back into the designated slot on the right side of your iPhone 4S. Apply even pressure to guide the tray into the slot, ensuring a smooth and seamless insertion.
-
Verify Secure Fit: Once the SIM card tray is fully inserted, verify that it sits flush with the device's exterior. A secure fit ensures that the tray is firmly in place, minimizing the risk of any connectivity issues or dislodgment.
-
Power On the iPhone 4S: After reinserting the SIM card tray, power on your iPhone 4S by pressing and holding the power button until the Apple logo appears on the screen. This action initiates the device's startup sequence, indicating that it is ready to establish a connection with the new SIM card.
By meticulously following these steps, you can effectively reinsert the SIM card tray into your iPhone 4S, completing the pivotal stage of the SIM card replacement process. This careful and methodical approach guarantees that the tray is securely integrated with the device, setting the stage for a successful activation and utilization of your iPhone 4S with the new SIM card. With the SIM card tray seamlessly reinserted, your device is now primed to establish a reliable and robust connection with the chosen mobile carrier, enabling you to enjoy seamless communication and connectivity.
Step 8: Power On the iPhone 4S
After successfully reinserting the SIM card tray, the final step in the process of replacing the SIM card in your iPhone 4S is to power on the device. This pivotal action initiates the startup sequence, allowing the iPhone 4S to establish a connection with the newly inserted SIM card and ensuring that it is ready for operation.
To power on your iPhone 4S, locate the power button situated at the top right edge of the device. Press and hold the power button until the iconic Apple logo appears on the screen, indicating that the device is booting up. As the Apple logo emerges, the iPhone 4S undergoes its startup process, initializing its internal systems and preparing to establish connectivity with the new SIM card.
Upon completion of the startup sequence, the iPhone 4S displays the familiar home screen, signaling that the device is fully powered on and ready for use. At this point, the device establishes a connection with the new SIM card, enabling you to make calls, send messages, and access mobile data using the services provided by the chosen mobile carrier.
By powering on your iPhone 4S, you complete the comprehensive process of replacing the SIM card, ensuring that the device seamlessly integrates with the new SIM card and functions optimally. This final step signifies the successful transition to a new SIM card, empowering you to utilize your iPhone 4S with confidence and reliability.
With the device powered on, you can now enjoy the benefits of seamless communication and connectivity, leveraging the capabilities of your iPhone 4S in conjunction with the new SIM card. Whether you've upgraded your device, switched to a new mobile carrier, or obtained a new SIM card for international travel, the successful power-on process marks the culmination of the SIM card replacement journey, allowing you to harness the full potential of your iPhone 4S with a renewed connectivity experience.
Conclusion
In conclusion, the process of replacing the SIM card in your iPhone 4S is a valuable skill that empowers you to manage your device's connectivity with confidence and ease. By following the step-by-step guide outlined in this article, you've gained a comprehensive understanding of the essential procedures involved in the SIM card replacement process. From gathering the necessary tools to powering on your device with the new SIM card, each step has equipped you with the knowledge and expertise to navigate this task seamlessly.
By mastering the art of replacing the SIM card, you've unlocked the potential to adapt your iPhone 4S to your evolving needs. Whether you're upgrading to a new device, switching to a different mobile carrier, or seeking to utilize a local SIM card while traveling abroad, the ability to replace the SIM card empowers you to stay connected in a manner that aligns with your preferences and requirements.
Furthermore, the meticulous approach to handling your iPhone 4S throughout the SIM card replacement process underscores the importance of care and precision when managing delicate device components. By exercising caution and attention to detail, you've safeguarded your device from potential damage and ensured that the SIM card transition occurs seamlessly, preserving the integrity of your iPhone 4S.
As you power on your iPhone 4S with the new SIM card, you embark on a journey of enhanced connectivity and communication, leveraging the capabilities of your device with renewed vigor. The successful completion of the SIM card replacement process signifies your ability to adapt and optimize your iPhone 4S, ensuring that it remains a versatile and indispensable tool in your daily life.
With the newfound knowledge and expertise gained from this guide, you're well-equipped to navigate future changes in your device's connectivity with confidence and proficiency. The ability to replace the SIM card in your iPhone 4S serves as a testament to your mastery of its inner workings and your commitment to harnessing its full potential.
In essence, the process of replacing the SIM card in your iPhone 4S transcends a mere technical task; it embodies a journey of empowerment, adaptability, and seamless integration, allowing you to stay connected on your own terms. As you embrace the possibilities that come with a new SIM card, you affirm your ability to take charge of your device and shape its connectivity experience according to your unique preferences and aspirations.