Introduction
Replacing a SIM card in a mobile device is a fundamental task that many individuals encounter at some point. Whether you've upgraded to a new phone, switched to a different mobile carrier, or encountered issues with your current SIM card, understanding the essential steps for replacing a SIM card is crucial. This process ensures that your device remains connected to the cellular network and that you can continue to make calls, send text messages, and access mobile data seamlessly.
In this guide, we will walk you through the step-by-step process of replacing a SIM card in your mobile device. By following these instructions, you can confidently navigate this task without any hassle. It's important to note that while the general process of replacing a SIM card is similar across various devices, there may be slight variations based on the specific make and model of your smartphone. Therefore, it's advisable to consult the user manual or manufacturer's guidelines for your particular device to ensure a smooth transition.
Whether you're a tech-savvy individual or someone who is new to handling mobile devices, this guide is designed to provide clear and concise instructions that anyone can follow. With a few simple steps, you'll be able to replace your SIM card and get back to using your mobile device with the new or updated connectivity it requires.
Now, let's dive into the essential steps for replacing a SIM card, starting with the crucial first step of backing up your data to ensure that no important information is lost during the process.
Step 1: Back up your data
Before embarking on the process of replacing your SIM card, it's imperative to safeguard your valuable data by performing a thorough backup. This precautionary measure ensures that none of your contacts, photos, messages, or other essential information are lost during the SIM card replacement. While the actual SIM card doesn't store this data, it's always better to err on the side of caution and take proactive steps to prevent any potential loss.
To initiate the backup process, you can utilize the built-in backup functionalities of your mobile device, which may include options such as iCloud for iOS devices or Google Drive for Android devices. These platforms offer seamless and convenient methods for backing up your data, allowing you to store your information securely in the cloud.
By backing up your data, you can rest assured that even if an unforeseen issue arises during the SIM card replacement, such as accidental data deletion or device malfunction, you'll have a reliable backup to restore your information. This not only provides peace of mind but also streamlines the overall SIM card replacement process, allowing you to proceed with confidence.
Additionally, backing up your data serves as a good practice for maintaining the integrity of your personal information. It's a proactive approach that ensures you have a safety net in place, protecting your data from potential loss or corruption. Whether you're replacing your SIM card for a specific reason or simply as a routine upgrade, taking the time to back up your data is a prudent and responsible step that can save you from unnecessary stress and inconvenience.
In essence, backing up your data before replacing your SIM card is akin to creating a safety net for your digital life. It's a simple yet crucial measure that can make a significant difference in preserving your important information and ensuring a smooth transition during the SIM card replacement process. With your data securely backed up, you're ready to proceed to the next step with confidence and peace of mind.
Step 2: Power off your device
The next critical step in replacing your SIM card is to power off your mobile device. This simple yet essential action ensures that the device is safely shut down, minimizing the risk of any potential damage during the SIM card replacement process.
To power off your device, locate the power button, which is typically situated along the sides or top of the smartphone. Press and hold the power button until the on-screen prompt appears, allowing you to shut down the device. Follow the on-screen instructions to power off your smartphone completely.
By powering off your device, you effectively mitigate the risk of any electrical interference or disruption while handling the SIM card. This precautionary measure is crucial for safeguarding both the device and the SIM card itself, as it minimizes the likelihood of any data corruption or hardware issues.
Furthermore, powering off your device sets the stage for a smooth and uninterrupted SIM card replacement process. It creates a safe environment for handling the SIM card tray and ensures that the device is in a state where the SIM card can be inserted and removed without any complications.
In addition to powering off your device, it's advisable to remove any external accessories, such as phone cases or protective covers, before proceeding with the SIM card replacement. This simple step allows for easier access to the SIM card tray and reduces the risk of accidental damage to the device or SIM card.
In summary, powering off your device is a fundamental step that sets the foundation for a successful SIM card replacement. By taking this precautionary measure, you create a safe and conducive environment for handling the SIM card, minimizing the potential for any disruptions or complications. With your device powered off and any external accessories removed, you're now ready to proceed to the next step of locating the SIM card tray and initiating the SIM card replacement process.
Step 3: Locate the SIM card tray
Locating the SIM card tray is a crucial step in the process of replacing your SIM card. The SIM card tray is the designated slot where the SIM card is inserted and secured within your mobile device. While the specific location of the SIM card tray may vary depending on the make and model of your smartphone, there are general guidelines to help you identify its position.
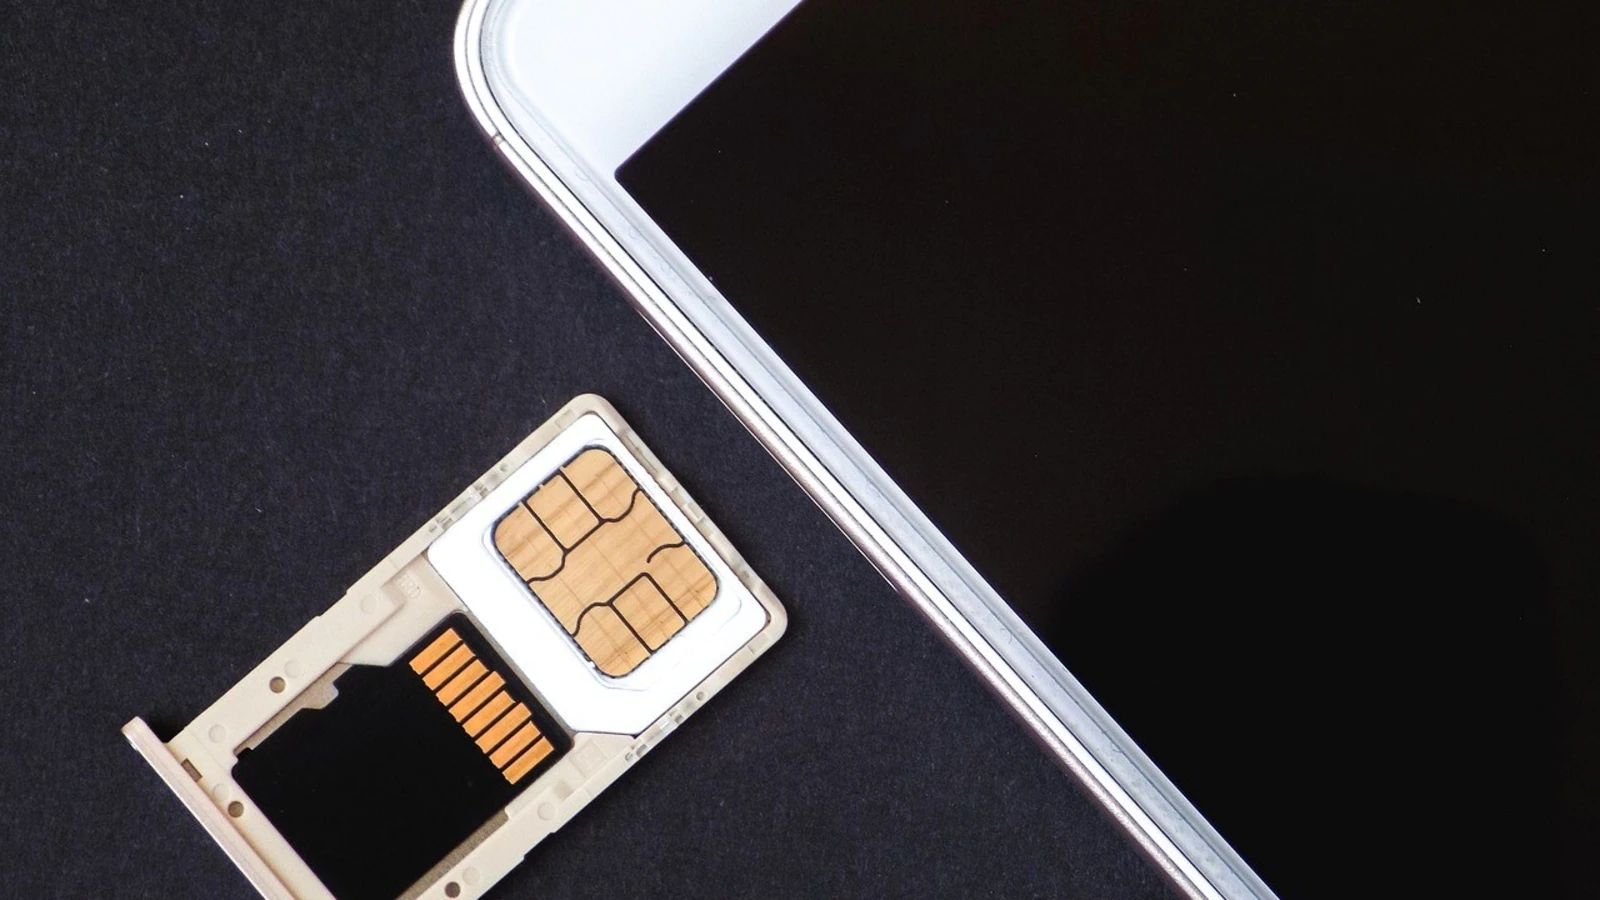
Most modern smartphones feature a SIM card tray that is typically located along the sides of the device. The exact placement can differ between devices, with some smartphones having the SIM card tray on the top edge, while others may have it on the bottom or along the sides. It's important to note that some devices may have a combined SIM and SD card tray, so it's essential to identify the specific slot for the SIM card.
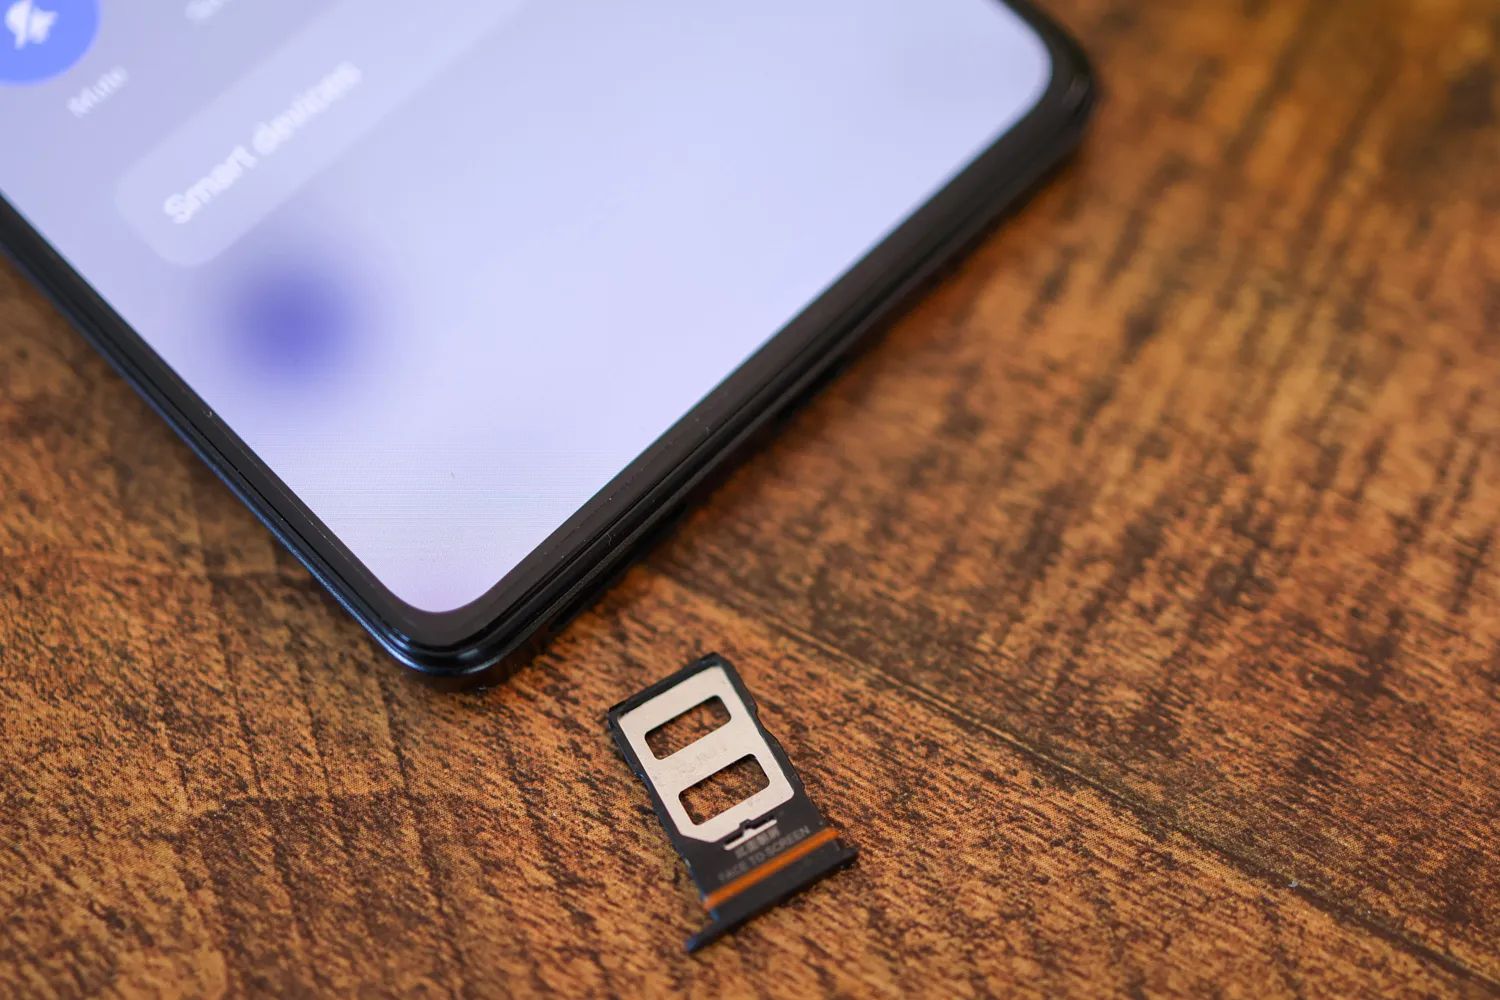
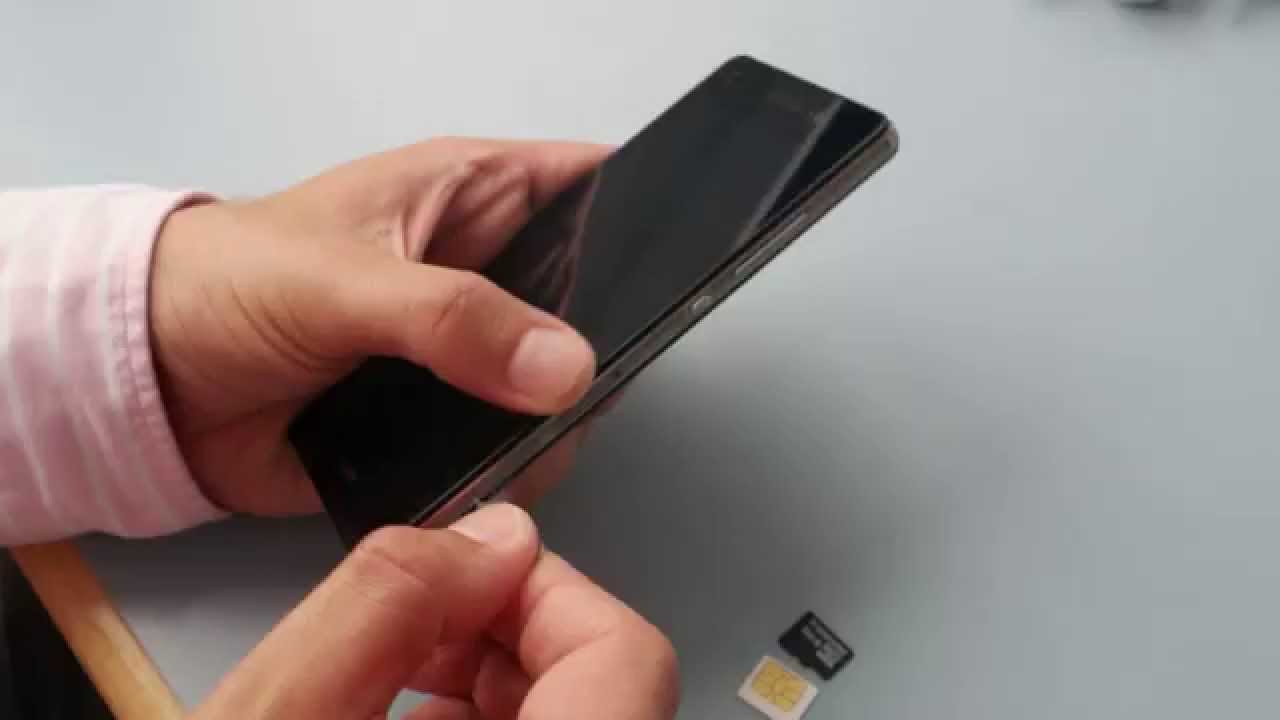
To locate the SIM card tray, visually inspect the sides of your smartphone for a small pinhole or a removable panel. The pinhole is a common indicator of the SIM card tray's position and is often accompanied by a small tool, such as a SIM ejector tool or a paperclip, which is used to access the tray. If your device has a removable panel, gently pry it open to reveal the SIM card tray.
In some cases, the user manual or manufacturer's guidelines for your smartphone may provide detailed instructions on locating the SIM card tray. If you're unable to locate the SIM card tray based on visual inspection alone, referring to the user manual can offer valuable insights into the precise location and method for accessing the tray.
Once you've successfully located the SIM card tray, take a moment to familiarize yourself with its position and orientation. The SIM card tray is designed to securely hold the SIM card in place, ensuring proper connectivity to the cellular network. Understanding the location of the SIM card tray sets the stage for the subsequent steps of removing the old SIM card and inserting the new one.
By effectively identifying and locating the SIM card tray, you pave the way for a smooth and efficient SIM card replacement process. This foundational step establishes the groundwork for the precise handling of the SIM card tray, enabling you to proceed with confidence and clarity as you progress through the subsequent stages of the replacement process. With the SIM card tray successfully located, you're now ready to move on to the next step of removing the old SIM card, marking a significant milestone in the overall SIM card replacement procedure.
Step 4: Remove the old SIM card
With the SIM card tray successfully located, the next pivotal step in the SIM card replacement process is to delicately remove the old SIM card from its designated slot. This task requires a gentle and precise approach to ensure that the SIM card is extracted without causing any damage to the device or the card itself.
To begin, carefully examine the SIM card tray to identify the specific compartment where the old SIM card is situated. In most cases, the SIM card is visibly positioned within a designated area of the tray, often accompanied by markings or diagrams that indicate the correct orientation for insertion and removal.
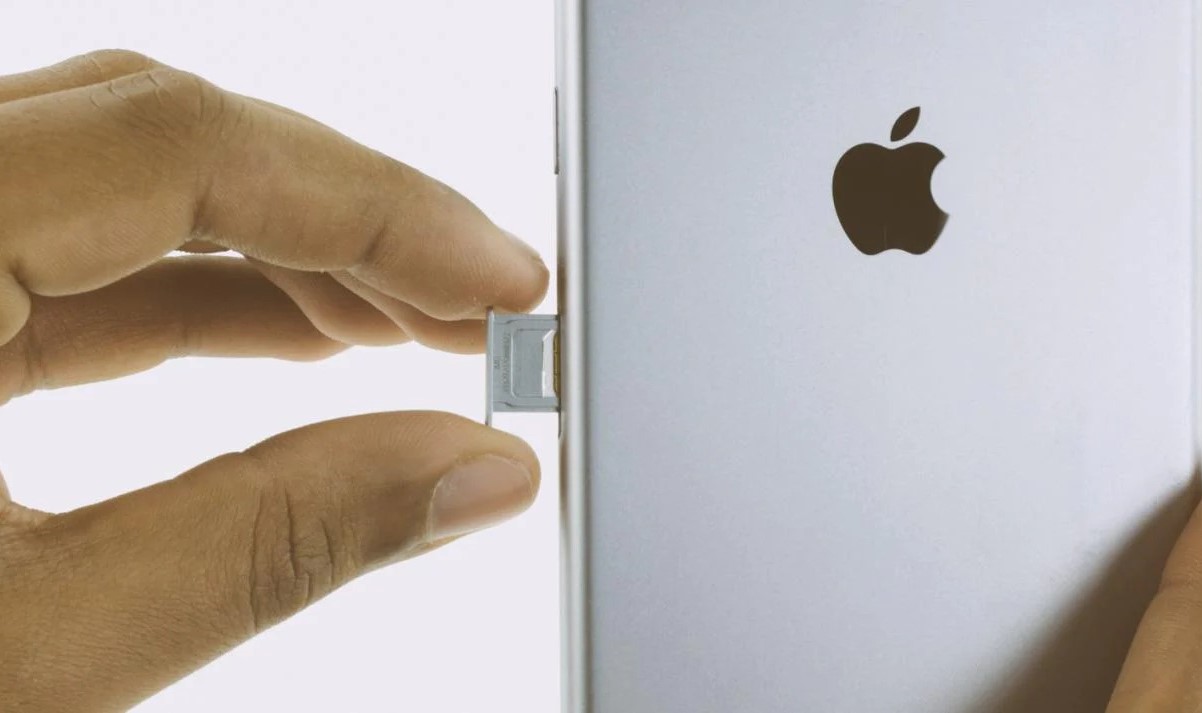
Once you've visually identified the old SIM card within the tray, you can proceed to initiate its removal. This is typically achieved by using a specialized tool, such as a SIM ejector tool or a paperclip, to gently press into the small pinhole located near the SIM card tray. Applying light pressure to the pinhole activates the release mechanism, causing the SIM card tray to partially eject from the device.
Upon the partial ejection of the SIM card tray, carefully grasp the tray and delicately slide it out from the smartphone. Exercise caution to avoid any abrupt movements or excessive force, as this could potentially dislodge the old SIM card from its position within the tray.
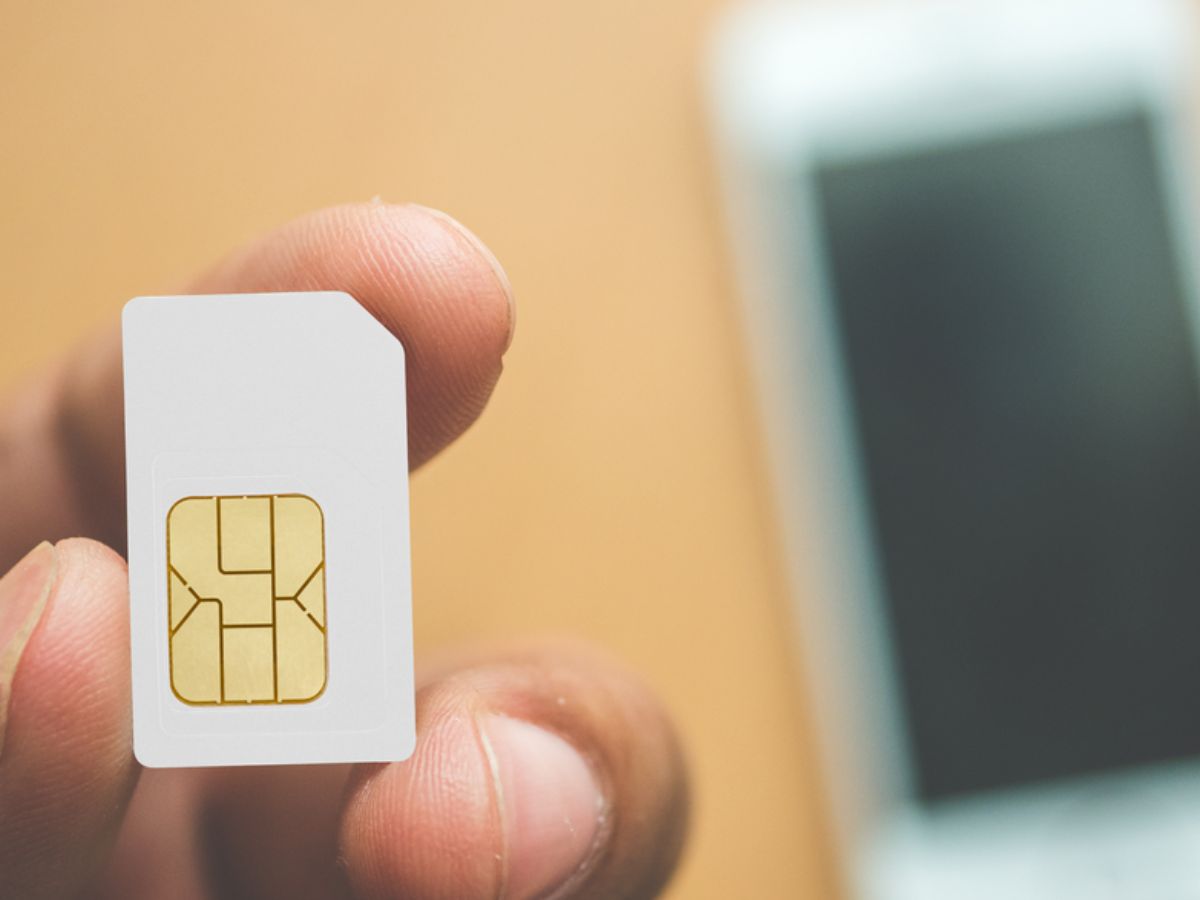
With the SIM card tray now accessible, focus your attention on the old SIM card resting within the designated compartment. Using your fingertips, carefully lift the old SIM card from its slot, ensuring a steady and controlled movement to prevent any unintended damage.
As you remove the old SIM card, take note of its orientation and position within the tray. The SIM card is designed with a specific shape and size to align with the tray, and it's essential to maintain this alignment for the subsequent insertion of the new SIM card.
Once the old SIM card has been successfully removed from the tray, set it aside in a safe and secure location. It's advisable to store the old SIM card in a protective case or sleeve, particularly if you intend to retain it as a backup or for future use.
By carefully and methodically removing the old SIM card from the tray, you've completed a crucial phase of the SIM card replacement process. This meticulous approach ensures that the old SIM card is safely extracted, setting the stage for the subsequent step of inserting the new SIM card with precision and confidence. With the old SIM card securely removed, you're now prepared to proceed to the next pivotal stage of the replacement process, marking a significant milestone in the overall transition to the new SIM card.
Step 5: Insert the new SIM card
With the old SIM card safely removed from the tray, the next pivotal step in the SIM card replacement process is to delicately insert the new SIM card into its designated slot. This task requires precision and attention to detail to ensure a seamless transition to the new SIM card without causing any damage to the device or the card itself.
Before proceeding, carefully inspect the new SIM card to familiarize yourself with its shape and size. It's essential to verify that the new SIM card aligns with the specifications required for your particular mobile device. Most SIM cards are designed with a notch or corner cut to facilitate proper orientation within the SIM card tray, ensuring a secure fit and optimal connectivity.
Once you've confirmed the compatibility of the new SIM card, orient it according to the markings or diagrams within the SIM card tray. The tray typically features a visual guide or outline that corresponds to the shape of the SIM card, indicating the correct positioning for insertion. Align the new SIM card with these indicators to ensure a proper fit within the tray.
With the new SIM card positioned correctly, gently lower it into the designated slot within the SIM card tray. Exercise caution to maintain a steady and controlled movement, ensuring that the SIM card slides smoothly into place without any resistance. Avoid applying excessive force or pressure, as this could potentially damage the SIM card or the tray.
As the new SIM card is inserted into the tray, take a moment to ensure that it sits flush and securely within the designated compartment. A properly inserted SIM card should align seamlessly with the tray, with no protrusions or misalignments that could impede its functionality.
Once the new SIM card is securely in place, carefully slide the SIM card tray back into the smartphone, ensuring a smooth and even insertion. Take note of any audible clicks or indications that signal the tray's secure positioning within the device.
By delicately inserting the new SIM card into the designated slot, you've successfully reached a pivotal stage in the SIM card replacement process. This meticulous approach ensures that the new SIM card is seamlessly integrated into the device, setting the stage for the subsequent step of powering on the device and initiating the activation of the new SIM card. With the new SIM card securely inserted, you're now prepared to proceed to the next pivotal stage of the replacement process, marking a significant milestone in the overall transition to the new SIM card.
Step 6: Power on your device
With the new SIM card securely inserted into the designated slot, the next crucial step in the SIM card replacement process is to power on your mobile device. This pivotal action initiates the activation of the new SIM card, allowing your device to establish connectivity with the cellular network and enabling essential functions such as calls, text messaging, and mobile data access.
To power on your device, press and hold the power button located on the sides or top of your smartphone. As the device boots up, you may observe the manufacturer's logo or an initial startup screen, indicating that the device is undergoing the power-on sequence.
As the device powers on, it undergoes a series of internal checks and configurations to prepare for normal operation. This includes initializing the new SIM card and establishing communication with the mobile network provider. During this process, it's normal to observe indicators such as signal strength bars or network connectivity symbols on the device's screen, signifying the successful activation of the new SIM card.
Once the device has completed the power-on sequence and established connectivity with the cellular network, you may be prompted to enter any required PIN or security code associated with the new SIM card. This additional security measure ensures that only authorized users can access the device's functionality and safeguards the integrity of the SIM card's connectivity.
Upon entering the required PIN or security code, the device proceeds to finalize the activation of the new SIM card, enabling seamless access to voice and data services. At this stage, you may observe network-specific indicators, such as the name of the mobile carrier or the availability of mobile data connectivity, confirming that the new SIM card is fully operational.
It's important to allow the device a few moments to complete the activation process, especially if it's the first time the new SIM card is being used. During this period, the device establishes a secure connection to the mobile network and synchronizes essential settings to ensure optimal performance.
By powering on your device, you've successfully initiated the activation of the new SIM card, marking a pivotal stage in the SIM card replacement process. This essential step sets the stage for the final phase of testing the new SIM card to ensure seamless connectivity and functionality, allowing you to proceed with confidence and assurance that the replacement process is nearing completion.
With the device powered on and the new SIM card activated, you're now prepared to proceed to the conclusive stage of testing the new SIM card, ensuring that it operates seamlessly within your mobile device.
Step 7: Test the new SIM card
After successfully powering on your device and activating the new SIM card, the final step in the SIM card replacement process is to thoroughly test the functionality and connectivity of the new SIM card within your mobile device. This critical phase ensures that the new SIM card seamlessly integrates with the device, allowing for uninterrupted access to voice, messaging, and data services.
To commence the testing process, begin by verifying the presence of network connectivity indicators on your device's screen. These indicators typically include signal strength bars, mobile carrier names, and network connectivity symbols, signaling the successful establishment of connectivity with the cellular network. Observing these indicators confirms that the new SIM card is operational and capable of accessing voice and data services.
Subsequently, initiate a test call to ensure that the voice functionality of the new SIM card is fully operational. Place a call to a known contact or a designated test number, and verify that the call connects seamlessly and that both parties can communicate effectively. This test validates the integrity of the voice services associated with the new SIM card, ensuring that you can make and receive calls without any issues.
Following the voice test, proceed to test the messaging functionality by sending a text message to a known recipient. Verify that the message is delivered promptly and that you receive any responses in a timely manner. This test confirms that the messaging services associated with the new SIM card are functioning as expected, allowing you to engage in text-based communication without any impediments.
In addition to voice and messaging tests, it's essential to validate the mobile data connectivity of the new SIM card. Access a web browser or a designated app that requires internet connectivity, and verify that you can successfully browse the internet, access online content, and utilize data-dependent services. This test ensures that the new SIM card enables seamless access to mobile data, allowing you to stay connected and productive while on the go.
As you conduct these tests, pay close attention to the overall performance and reliability of the new SIM card. Verify that the connectivity remains stable and consistent, and that you encounter no unexpected disruptions or limitations in accessing voice, messaging, or data services. Any anomalies or irregularities observed during the testing process should be promptly addressed to ensure a smooth and reliable experience with the new SIM card.
By rigorously testing the new SIM card for voice, messaging, and data functionality, you can confidently ascertain that the replacement process has been successful and that your mobile device is fully equipped with the new connectivity it requires. This comprehensive testing phase ensures that the new SIM card operates seamlessly within your device, enabling you to stay connected and communicative with confidence and reliability.