Importance of Cleaning Your Gaming Headset
Maintaining a clean gaming headset is crucial for several reasons. First and foremost, regular cleaning ensures that you have a hygienic and comfortable gaming experience. Over time, dirt, sweat, and oil can accumulate on the ear cups and headband, leading to an unpleasant and unhygienic environment for your ears. By cleaning your gaming headset regularly, you can prevent the buildup of grime and bacteria, thus reducing the risk of skin irritation and potential infections.
Moreover, a clean gaming headset can significantly enhance the longevity of the device. Dust and debris can infiltrate the delicate components of the headset, potentially causing malfunctions and reducing the overall audio quality. By keeping your headset clean, you can mitigate the risk of technical issues and ensure optimal performance during your gaming sessions.
In addition to personal hygiene and device maintenance, cleaning your gaming headset can also improve the overall audio experience. A buildup of dirt and grime on the ear cups and microphone can interfere with sound quality, muffling audio and distorting communication. By maintaining a clean headset, you can preserve the clarity of sound and ensure that you hear every in-game detail with precision.
Furthermore, a clean gaming headset reflects positively on your gaming setup and personal image. Whether you're gaming competitively or casually, a well-maintained headset demonstrates professionalism and attention to detail. It also contributes to a more inviting and comfortable gaming environment, enhancing your overall gaming experience.
In essence, the importance of cleaning your gaming headset cannot be overstated. By prioritizing hygiene, maintenance, audio quality, and personal presentation, regular cleaning becomes an essential aspect of being a responsible and discerning gamer.
Tools and Supplies You'll Need
When it comes to cleaning your gaming headset effectively, having the right tools and supplies at your disposal is essential. Here's a comprehensive list of items you'll need to ensure a thorough and successful cleaning process:
1. Microfiber Cloth:
A high-quality microfiber cloth is a fundamental tool for cleaning your gaming headset. Its soft and non-abrasive texture makes it perfect for wiping away dust, oils, and grime without causing any damage to the delicate surfaces of your headset.
2. Mild Cleaning Solution:
Opt for a mild cleaning solution specifically designed for electronic devices. Avoid using harsh chemicals or alcohol-based cleaners, as they can potentially damage the materials of your headset. A gentle cleaning solution will effectively remove dirt and oils while being safe for use on sensitive surfaces.
3. Cotton Swabs:
Cotton swabs are ideal for reaching small crevices and intricate areas of your headset, such as around the ear cup hinges and microphone. They allow for precise cleaning and can help remove stubborn residue that may have accumulated in hard-to-reach spots.
4. Compressed Air:
Utilizing compressed air can be highly effective in dislodging and removing dust and debris from the nooks and crannies of your headset. It's particularly useful for clearing out dust from the microphone grill and audio ports without causing any damage.
5. Soft Bristle Brush:
A soft bristle brush, such as a clean makeup brush or a specialized electronics brush, can be used to gently sweep away dust and particles from the textured surfaces of your headset without scratching or damaging the materials.
6. Optional: Disinfectant Wipes:
For an added layer of hygiene, consider using disinfectant wipes that are safe for use on electronic devices. These wipes can help eliminate bacteria and germs from the surfaces of your headset, promoting a clean and sanitary gaming environment.
By ensuring that you have these essential tools and supplies on hand, you'll be well-equipped to maintain the cleanliness and functionality of your gaming headset, ultimately enhancing your gaming experience and prolonging the lifespan of your valuable device.
Cleaning the Ear Cups and Headband
Cleaning the ear cups and headband of your gaming headset is a crucial step in maintaining hygiene and comfort during extended gaming sessions. Over time, these areas can accumulate sweat, oils, and dirt, leading to a less-than-pleasant experience. With the right approach and tools, you can effectively clean and refresh these components, ensuring a clean and comfortable gaming environment.
To begin, gently remove the ear cushions from the ear cups, following the manufacturer's instructions if necessary. Using a soft bristle brush or a clean makeup brush, carefully sweep away any visible debris and dust from the textured surfaces of the ear cups and headband. This initial step helps to dislodge loose particles, preparing the surfaces for a more thorough cleaning.
Next, dampen a microfiber cloth with a mild cleaning solution. Ensure that the cloth is only slightly damp, avoiding excessive moisture that could potentially seep into the headset's internal components. With gentle and circular motions, delicately wipe the ear cups and headband, focusing on areas where oils and sweat tend to accumulate. Take care to avoid excessive pressure, as this could damage the delicate materials.
For intricate areas and crevices, such as the seams and hinges of the ear cups, utilize a cotton swab lightly dampened with the cleaning solution. This allows for precise cleaning and ensures that hard-to-reach spots are thoroughly addressed. Pay particular attention to the areas where the ear cushions attach to the ear cups, as these areas are prone to accumulating debris and oils.
Once the surfaces have been cleaned, use a dry microfiber cloth to gently remove any residual moisture, ensuring that the ear cups and headband are completely dry before reattaching the ear cushions. It's essential to allow the headset to air dry thoroughly before use, as any remaining moisture could potentially compromise the device's functionality.
Additionally, if your headset features removable and washable ear cushions, it's advisable to follow the manufacturer's instructions for washing and drying them. This extra step can further enhance the cleanliness and comfort of your gaming headset, promoting a hygienic and enjoyable gaming experience.
By incorporating these cleaning practices into your routine maintenance, you can effectively preserve the hygiene and comfort of your gaming headset, ensuring that it remains a reliable and enjoyable companion throughout your gaming endeavors.
Cleaning the Microphone
The microphone of your gaming headset plays a pivotal role in facilitating clear communication with fellow gamers, making it essential to keep this component clean and well-maintained. Over time, the microphone can accumulate dust, oils, and debris, potentially compromising its performance and audio quality. By incorporating proper cleaning techniques, you can ensure that your microphone remains in optimal condition, enabling seamless communication and enhancing your overall gaming experience.
To initiate the cleaning process, carefully inspect the microphone for any visible debris or buildup. Utilizing a soft bristle brush or a clean makeup brush, gently sweep across the microphone's exterior, effectively dislodging any loose particles and dust. This initial step prepares the microphone for a more thorough cleaning, ensuring that the delicate components are free from surface-level debris.
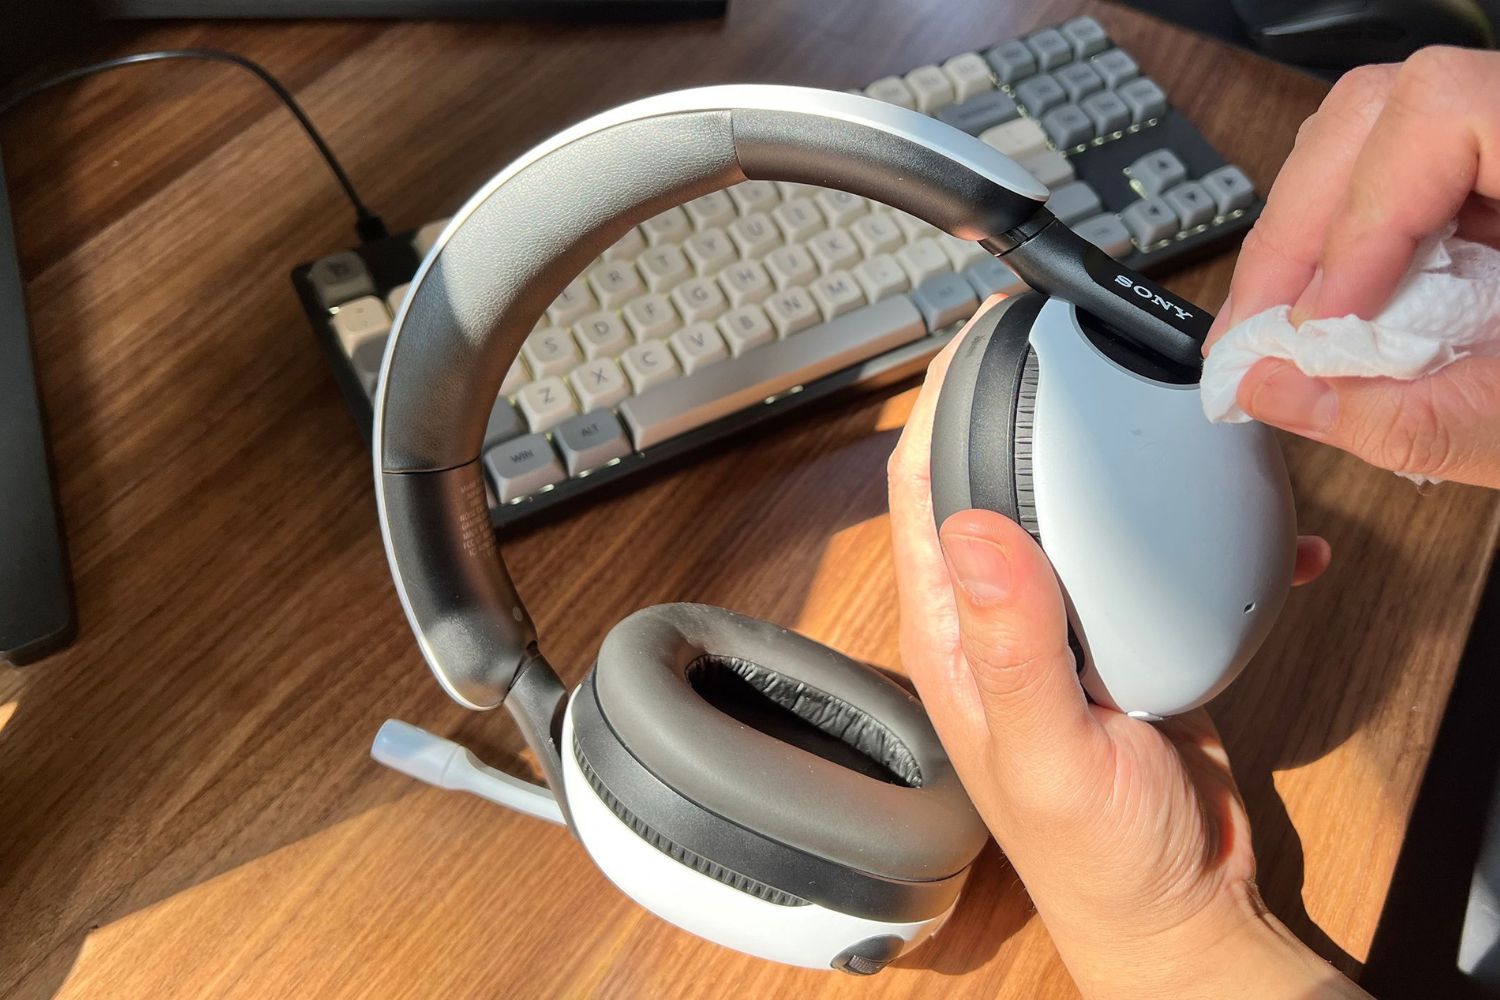
Next, dampen a microfiber cloth with a mild cleaning solution. It is crucial to ensure that the cloth is only slightly damp, as excessive moisture can potentially seep into the microphone's internal components, leading to damage. With cautious and precise movements, delicately wipe the microphone, focusing on areas where oils and grime may have accumulated. Pay particular attention to the microphone grill and the surrounding surfaces, as these areas are prone to trapping debris.
For intricate and hard-to-reach areas, such as the crevices around the microphone, employ a cotton swab lightly dampened with the cleaning solution. This allows for meticulous cleaning, ensuring that any stubborn residue is effectively addressed. Take care to avoid applying excessive pressure, as the microphone's delicate components require gentle handling to prevent damage.
Following the cleaning process, utilize a dry microfiber cloth to gently remove any residual moisture from the microphone, ensuring that it is completely dry before use. It is crucial to allow the microphone to air dry thoroughly, as any lingering moisture could potentially impact its performance and audio output.
In addition to external cleaning, it is advisable to periodically inspect the microphone grill for any blockages or obstructions. Utilizing compressed air, carefully clear the microphone grill of any accumulated dust or debris, ensuring that the airflow remains unobstructed. This step contributes to maintaining the microphone's functionality and audio clarity, promoting seamless communication during gaming sessions.
By incorporating these meticulous cleaning practices into your routine maintenance, you can effectively preserve the cleanliness and functionality of your gaming headset's microphone. This ensures that your communication remains clear and uninterrupted, allowing you to engage in immersive gaming experiences with confidence and clarity.
Cleaning the Audio Cables
Maintaining the cleanliness and functionality of the audio cables is a crucial aspect of preserving the overall performance of your gaming headset. Over time, these cables can accumulate dust, oils, and debris, potentially impacting audio quality and connectivity. By incorporating proper cleaning techniques, you can ensure that your audio cables remain in optimal condition, facilitating uninterrupted and high-quality audio transmission during your gaming sessions.
To initiate the cleaning process, carefully inspect the audio cables for any visible debris or buildup. Utilizing a soft bristle brush or a clean, dry microfiber cloth, gently sweep along the length of the cables, effectively dislodging any loose particles and dust. This initial step prepares the cables for a more thorough cleaning, ensuring that the surfaces are free from surface-level debris.
Next, dampen a clean microfiber cloth with a mild cleaning solution. It is essential to ensure that the cloth is only slightly damp, as excessive moisture can potentially damage the cables and connectors. With cautious and precise movements, delicately wipe the entire length of the audio cables, focusing on areas where oils and grime may have accumulated. Pay particular attention to the connectors and plugs, ensuring that they are thoroughly cleaned to maintain optimal connectivity.
For intricate and hard-to-reach areas, such as the grooves of the connectors, employ a cotton swab lightly dampened with the cleaning solution. This allows for meticulous cleaning, ensuring that any stubborn residue is effectively addressed. Take care to avoid applying excessive pressure, as the delicate components of the cables require gentle handling to prevent damage.
Following the cleaning process, utilize a dry microfiber cloth to gently remove any residual moisture from the cables and connectors, ensuring that they are completely dry before use. It is crucial to allow the cables to air dry thoroughly, as any lingering moisture could potentially impact their performance and connectivity.
In addition to external cleaning, it is advisable to periodically inspect the connectors and plugs for any signs of wear or damage. Ensure that the connectors are securely attached and that there are no exposed wires or fraying along the cable length. This proactive approach can help identify any potential issues early on, allowing for timely maintenance or replacement as needed.
By incorporating these meticulous cleaning practices into your routine maintenance, you can effectively preserve the cleanliness and functionality of your gaming headset's audio cables. This ensures that you experience uninterrupted and high-quality audio transmission, enabling you to immerse yourself fully in your gaming adventures without any connectivity concerns.
Storing Your Gaming Headset Properly
Proper storage of your gaming headset is essential for maintaining its longevity and performance. A well-organized and protective storage approach can safeguard the headset from damage, dust, and environmental factors, ensuring that it remains in optimal condition between gaming sessions.
When it comes to storing your gaming headset, it's crucial to prioritize protection and cleanliness. Begin by selecting a dedicated storage space that offers protection from dust, moisture, and physical impact. A clean and dry environment, such as a drawer or a specially designed headset stand, can help shield the device from environmental contaminants and potential damage.
If your gaming headset comes with a storage case or pouch, utilize it to provide an extra layer of protection. These cases are designed to fit the headset snugly, safeguarding it from dust and preventing accidental damage. Additionally, they offer a convenient and organized storage solution, minimizing the risk of misplacement or tangling of cables.
Proper cable management is also integral to storing your gaming headset effectively. Avoid leaving the cables tangled or exposed, as this can lead to unnecessary strain and potential damage. Utilize cable organizers or Velcro ties to neatly coil the cables, preventing kinks and tangles that could affect their functionality over time.
When placing the headset in storage, ensure that it is positioned in a stable and upright manner. Avoid placing heavy objects on top of the headset, as this can deform the headband or ear cups, potentially compromising comfort and fit. By maintaining the headset in its natural shape, you can preserve its ergonomic design and ensure a comfortable fit during future use.
It's advisable to store the headset away from direct sunlight and extreme temperatures, as these factors can impact the materials and internal components. Exposure to sunlight over time can cause fading and deterioration of the headset's surfaces, while extreme temperatures can affect the integrity of the electronic components.
Lastly, if you anticipate prolonged periods of non-use, consider storing the headset in its original packaging, if available. The original packaging is designed to provide optimal protection during transportation and storage, offering a secure and cushioned environment for the headset.
By adhering to these storage practices, you can effectively preserve the condition and functionality of your gaming headset, ensuring that it remains in prime condition for immersive gaming experiences. Proper storage not only protects the headset from damage and environmental factors but also contributes to its longevity, allowing you to enjoy uninterrupted gaming sessions with a well-maintained device.