Introduction
When you're engrossed in an intense gaming session, the last thing you want is a distraction, especially from an oily and grimy headset. Over time, the natural oils from your hair can accumulate on the headset pads, affecting both the comfort and hygiene of your gaming gear. Fortunately, with the right approach, you can easily restore your headset to its pristine condition. This guide will walk you through the steps to effectively wash hair oil off your gaming headset, ensuring a fresh and enjoyable gaming experience.
A well-maintained gaming headset not only enhances comfort but also contributes to a more immersive gaming experience. By keeping the headset pads clean, you can prevent discomfort and potential skin issues caused by prolonged contact with oil and dirt. Additionally, maintaining the cleanliness of your headset can prolong its lifespan, saving you the hassle and expense of frequent replacements.
In the following steps, you'll learn how to remove the headset pads, use a gentle cleanser, and properly wash and dry the pads. By following these simple yet effective techniques, you can ensure that your gaming headset remains a reliable and comfortable companion throughout your gaming adventures. Let's dive into the step-by-step process of revitalizing your headset and bidding farewell to unwanted hair oil buildup.
Step 1: Remove the Headset Pads
Before embarking on the cleaning process, it’s crucial to carefully remove the headset pads from your gaming headset. While the specific method may vary based on the design of your headset, most pads can be detached by gently pulling them away from the ear cups. Some models may have pads that can be twisted counterclockwise to unlock and then easily removed.
It’s important to handle the pads with care to avoid causing any damage during the removal process. Take note of any clips or fasteners that secure the pads in place, and ensure that they are disengaged before attempting to remove the pads. If you encounter any resistance, refer to the manufacturer’s instructions for your specific headset model to prevent accidental damage.
Once the pads are successfully detached, take a moment to inspect the headset for any loose debris or visible dirt. This is also an opportune time to assess the condition of the ear cups and the overall headset structure. If you notice any significant buildup of dirt or grime in these areas, consider using a gentle cleaning solution and a soft cloth to wipe them down before proceeding with the pad cleaning process.
By carefully removing the headset pads and inspecting the headset for any additional cleaning needs, you can ensure that the subsequent cleaning steps are carried out effectively. This initial step sets the stage for a thorough and successful cleaning process, allowing you to address any accumulated dirt or oil on the headset pads with precision and care.
Step 2: Use a Gentle Cleanser
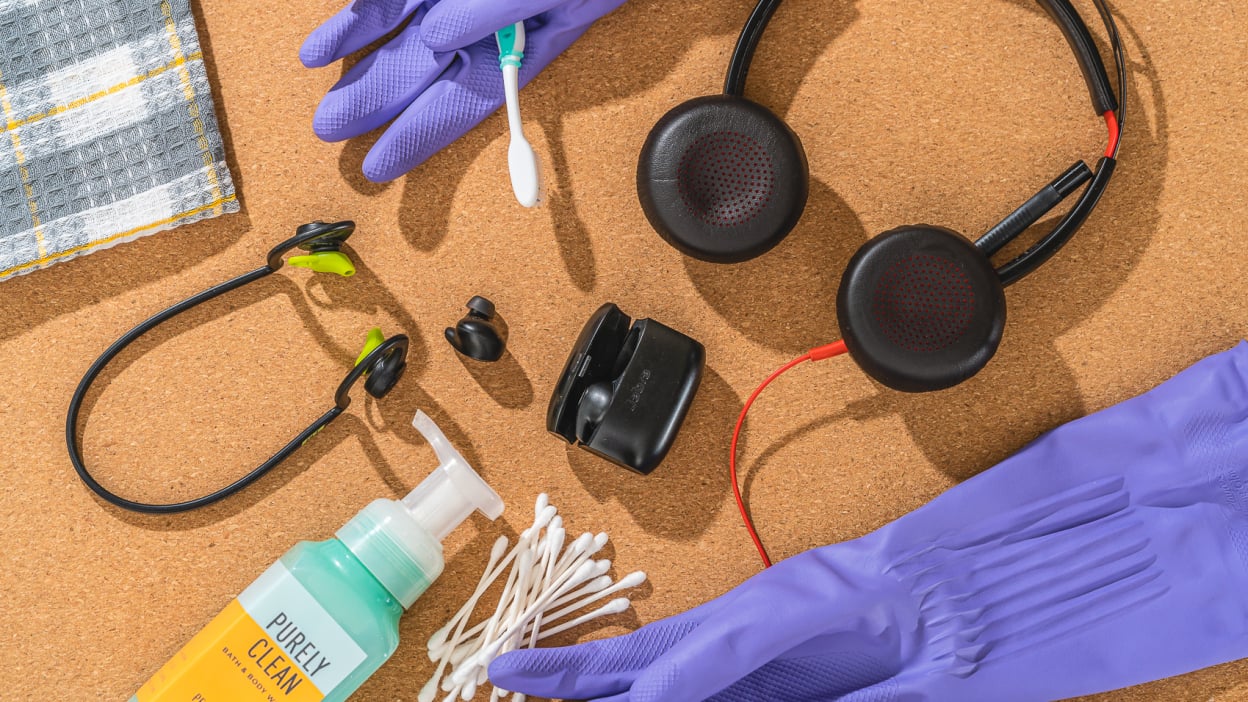
After removing the headset pads, the next crucial step in the cleaning process is to select a gentle cleanser suitable for effectively removing hair oil and dirt without compromising the integrity of the pads. Opt for a mild liquid soap or a specialized headphone cleaner, if available. Avoid using harsh chemicals, abrasive cleaners, or excessive amounts of water, as these can damage the delicate materials of the pads.
When choosing a cleanser, consider the material of the headset pads. If they are made of leather, faux leather, or fabric, ensure that the cleanser is compatible with these materials to prevent discoloration or deterioration. It’s advisable to test the cleanser on a small, inconspicuous area of the pads to ensure that it doesn’t cause any adverse effects before proceeding with the full cleaning process.
To prepare the cleansing solution, dilute a small amount of the chosen cleanser in a bowl of lukewarm water. Stir the solution gently to ensure that the cleanser is evenly distributed. The goal is to create a mild cleaning solution that effectively removes oil and dirt while being gentle on the headset pads.
By using a gentle cleanser that is suitable for the specific material of your headset pads, you can effectively eliminate accumulated hair oil and dirt without causing any damage. This careful selection and preparation of the cleansing solution are essential in ensuring that the cleaning process yields optimal results without compromising the quality and comfort of the headset pads.
Step 3: Gently Wash the Headset Pads
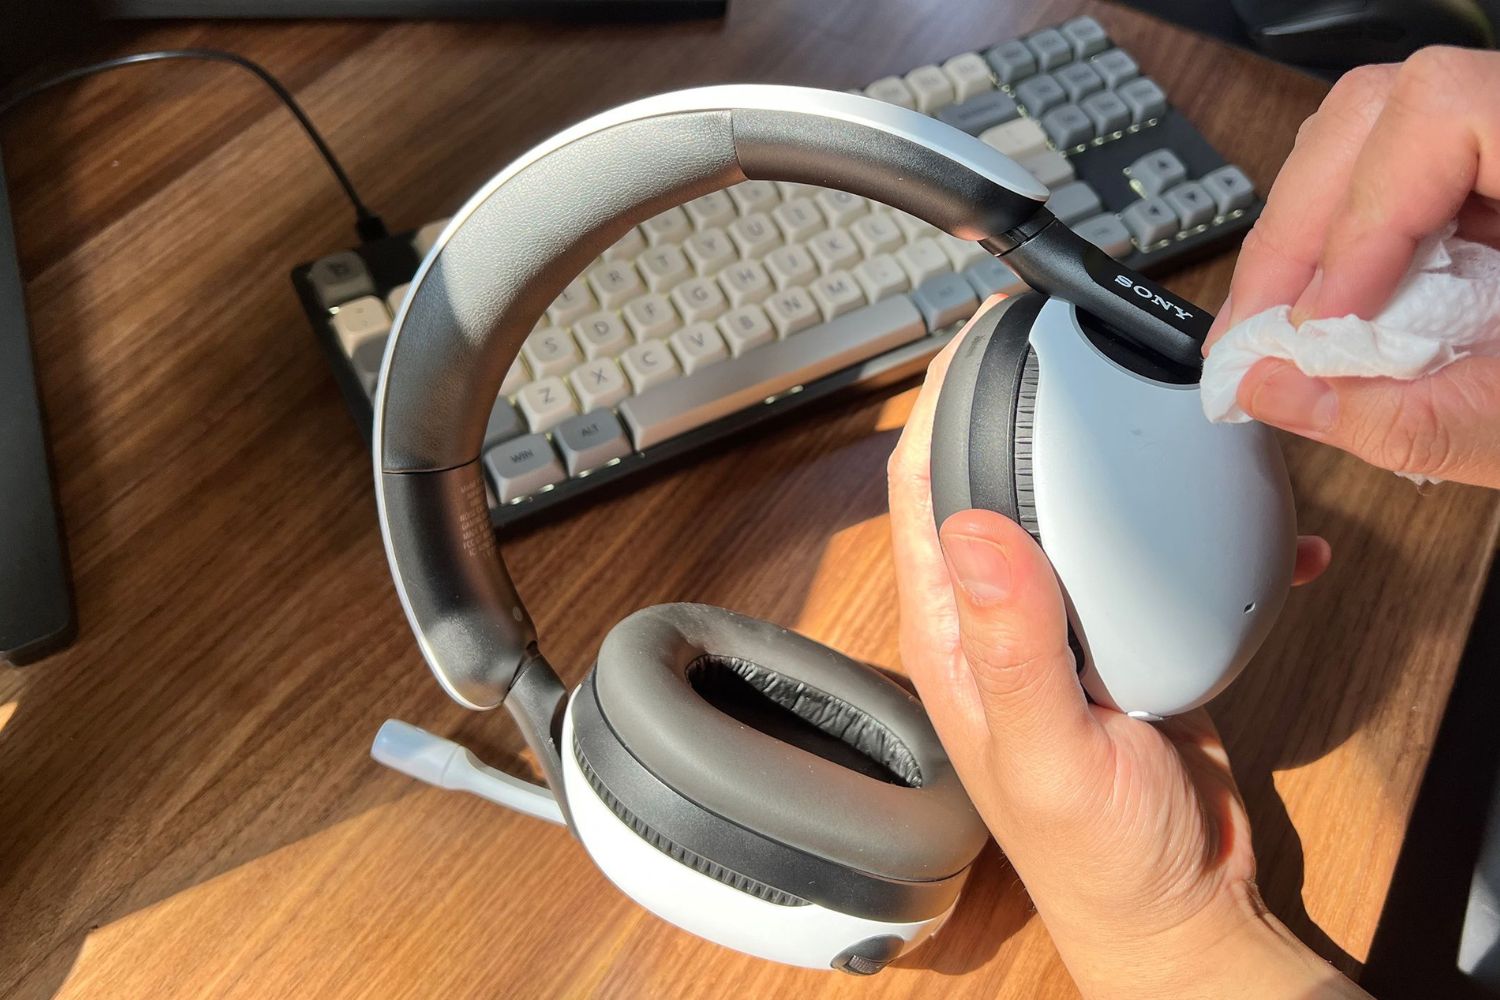
With the gentle cleanser prepared, it’s time to proceed with the careful washing of the headset pads. Submerge a soft, lint-free cloth or sponge into the diluted cleansing solution, ensuring that it is damp but not dripping wet. Gently wring out any excess liquid to prevent oversaturation, which can be detrimental to the pads.
Using the damp cloth or sponge, delicately wipe the surface of the headset pads in a smooth, circular motion. Pay particular attention to areas where hair oil and dirt are most likely to accumulate, such as the areas that come into direct contact with your skin. Approach the cleaning process with a gentle touch, avoiding excessive pressure that could potentially damage the pads.
As you cleanse the pads, periodically rinse the cloth or sponge in clean water to remove any accumulated oil and dirt. This prevents the re-deposition of grime onto the pads and ensures that the cleaning process remains effective. Take care to avoid oversaturating the pads with water, as excessive moisture can lead to prolonged drying times and potential damage to the headset pads.
After thoroughly wiping down the pads with the cleansing solution, use a separate, clean cloth dampened with plain water to gently remove any residual cleanser from the pads. This additional step helps to ensure that no soapy residue remains, preventing potential discomfort or skin irritation when the headset is used again.
By diligently and gently washing the headset pads with the prepared cleansing solution, you can effectively eliminate accumulated hair oil and dirt, restoring the pads to a clean and hygienic state. This meticulous cleaning process ensures that the headset pads are free from unwanted buildup, contributing to both comfort and overall hygiene during extended gaming sessions.
Step 4: Allow the Headset Pads to Dry
After completing the gentle washing process, it’s essential to allow the headset pads to dry thoroughly before reattaching them to your gaming headset. Proper drying ensures that the pads are free from excess moisture, preventing the development of unpleasant odors and the growth of mold or mildew.
To initiate the drying process, gently pat the headset pads with a clean, dry cloth to absorb as much moisture as possible. Avoid rubbing the pads vigorously, as this can potentially damage the delicate materials. Ensure that both the surface and any crevices of the pads are gently and thoroughly dried to expedite the overall drying time.
Once excess moisture has been removed, allow the headset pads to air dry in a well-ventilated area, away from direct sunlight and sources of heat. Placing the pads on a clean, dry towel or cloth can aid in the absorption of residual moisture and prevent any potential damage to the surface they are placed on. It’s important to ensure that the pads are positioned in a manner that allows for adequate airflow around them, facilitating a more efficient drying process.
Depending on the ambient humidity and airflow, the drying process may take several hours to complete. Exercise patience and refrain from hastening the process using artificial heat sources, as excessive heat can cause damage to the materials of the headset pads. It’s advisable to periodically check the pads during the drying process to assess their progress and ensure that they are drying evenly.
Once the headset pads are completely dry to the touch, inspect them for any remaining signs of moisture before reattaching them to your gaming headset. Ensuring that the pads are thoroughly dried not only maintains their integrity but also prevents potential discomfort and hygiene issues when using the headset.
Conclusion
Revitalizing your gaming headset by effectively removing hair oil and dirt from the headset pads is a simple yet essential maintenance task that can significantly enhance your gaming experience. By following the step-by-step process outlined in this guide, you can ensure that your headset remains clean, comfortable, and hygienic, allowing you to fully immerse yourself in your gaming adventures without the distraction of a grimy headset.
Properly maintaining your headset pads not only contributes to your comfort during extended gaming sessions but also prolongs the lifespan of your gaming gear. By regularly cleaning the headset pads and preventing the accumulation of hair oil and dirt, you can preserve the quality and functionality of your headset, ultimately saving you the inconvenience and expense of premature replacements.
Remember to handle the headset pads with care when removing them and selecting a gentle cleanser suitable for the specific material of the pads. By delicately washing the pads and allowing them to dry thoroughly, you can effectively eliminate unwanted buildup, ensuring that your gaming headset remains a reliable and comfortable companion throughout your gaming endeavors.
Incorporating this cleaning process into your regular maintenance routine can help you enjoy a consistently fresh and hygienic gaming experience, free from the discomfort and distractions caused by an oily and dirty headset. With the knowledge and techniques provided in this guide, you can confidently maintain the cleanliness and comfort of your gaming headset, allowing you to fully focus on conquering virtual worlds and achieving gaming glory.