Introduction
Welcome to the world of Minecraft Pocket Edition, where you can unleash your creativity in a block-filled sandbox adventure. While the default textures in the game are charming and nostalgic, you may eventually find yourself craving a fresh visual experience. This is where texture packs come in.
Texture packs are a fantastic way to personalize your Minecraft PE experience by changing the look and feel of the game. Whether you want to embark on a whimsical journey with a cartoon-inspired pack or dive into a hyper-realistic world, the possibilities are endless. But where do you begin? How do you download and install texture packs for Minecraft PE?
In this guide, we will walk you through the step-by-step process, helping you to find and install texture packs easily. By the end, you’ll be able to transform your Minecraft PE world into a customized masterpiece that suits your personal taste and style.
Before we dive into the technicalities, it’s worth mentioning that the process of downloading and installing texture packs for Minecraft PE may slightly vary depending on your device’s operating system (Android or iOS). However, the general approach outlined in this guide should help you regardless of your device.
So, without further ado, let’s embark on this adventure of exploring and acquiring texture packs for your Minecraft PE!
Step 1: Find a Trusted Website
The first step in downloading texture packs for Minecraft PE is finding a trusted website that offers a wide selection of high-quality packs. The internet is full of websites claiming to have the best texture packs, but not all of them can be trusted. Here are some pointers to help you find a reliable website:
- Research: Take some time to research popular websites known for providing safe and reliable texture packs. Look for websites with positive reviews, a strong community, and a track record of delivering quality content.
- Reputation: Check the reputation of the website by looking for user feedback and ratings. Websites that have been around for some time and have a large number of active users are usually safer options.
- Verification: Ensure that the website you choose verifies the texture packs it hosts. This can be done through processes such as scanning for viruses and malicious code, as well as allowing users to report any issues they encounter.
- Community Engagement: Look for websites that have an active and engaged community. User comments, forums, and discussion boards can give you insights into the reliability and quality of the website’s texture packs.
- Organized Categories: A reliable website will have a well-organized structure that allows you to easily browse and filter texture packs based on different categories such as themes, styles, or resolutions.
Once you’ve found a trusted website, you can proceed to the next step – choosing a texture pack that suits your preferences and enhances your Minecraft PE experience.
Step 2: Choose a Texture Pack
Now that you’ve found a trusted website to download texture packs for Minecraft PE, it’s time to explore the vast collection of available packs and choose one that catches your eye. Here are a few factors to consider when selecting a texture pack:
- Style: Texture packs come in a variety of styles, ranging from realistic to cartoonish and everything in between. Think about the aesthetic you want to achieve in your Minecraft PE world and choose a pack that aligns with that vision.
- Resolution: Texture packs can have different resolutions, such as 16×16, 32×32, or even higher. Higher resolution packs provide more detail, but they require a better-performing device to run smoothly. Consider the capabilities of your device and choose a resolution that strikes a balance between visual quality and performance.
- Theme: Some texture packs are designed to transform the entire Minecraft PE experience by giving it a specific theme. Whether you want a medieval, futuristic, or nature-inspired theme, look for packs that align with your desired atmosphere.
- Compatibility: Ensure that the texture pack you choose is compatible with the version of Minecraft PE you have installed on your device. Check if the texture pack’s description or download page specifies the supported Minecraft PE version.
- User Ratings and Reviews: Take the time to read user ratings and reviews of the texture pack you’re interested in. This feedback can provide valuable insights into the pack’s quality, performance, and overall user satisfaction.
Remember, choosing a texture pack is a personal preference. Take your time to explore different options and find the one that resonates with you the most. Once you’ve made your decision, it’s time to proceed to the next step – downloading the texture pack to your device.
Step 3: Download the Texture Pack
After choosing the perfect texture pack for your Minecraft PE, it’s time to download it onto your device. Follow these steps to download the texture pack:
- Locate the Download Button: On the website where you found the texture pack, look for a prominent download button or link associated with the pack. It is usually labeled with terms like “Download,” “Get,” or a downward arrow symbol.
- Click or Tap on the Download Button: Once you’ve found the download button, click or tap on it to initiate the download process. Depending on your internet connection speed and the size of the texture pack, it may take a few moments to complete the download.
- Select the Download Location: Some devices give you the option to choose where the downloaded file will be saved. Select a location that is easily accessible and remember it for the next steps.
It is important to note that some texture packs may come in a compressed (ZIP) format. If this is the case, you will need to extract the contents of the ZIP file before proceeding to the next steps. Most operating systems have built-in ZIP extraction capabilities, but you can also opt to use third-party software for this purpose.
Now that you have successfully downloaded the texture pack and, if needed, extracted its contents, you are ready to move on to the next step – opening Minecraft PE on your device.
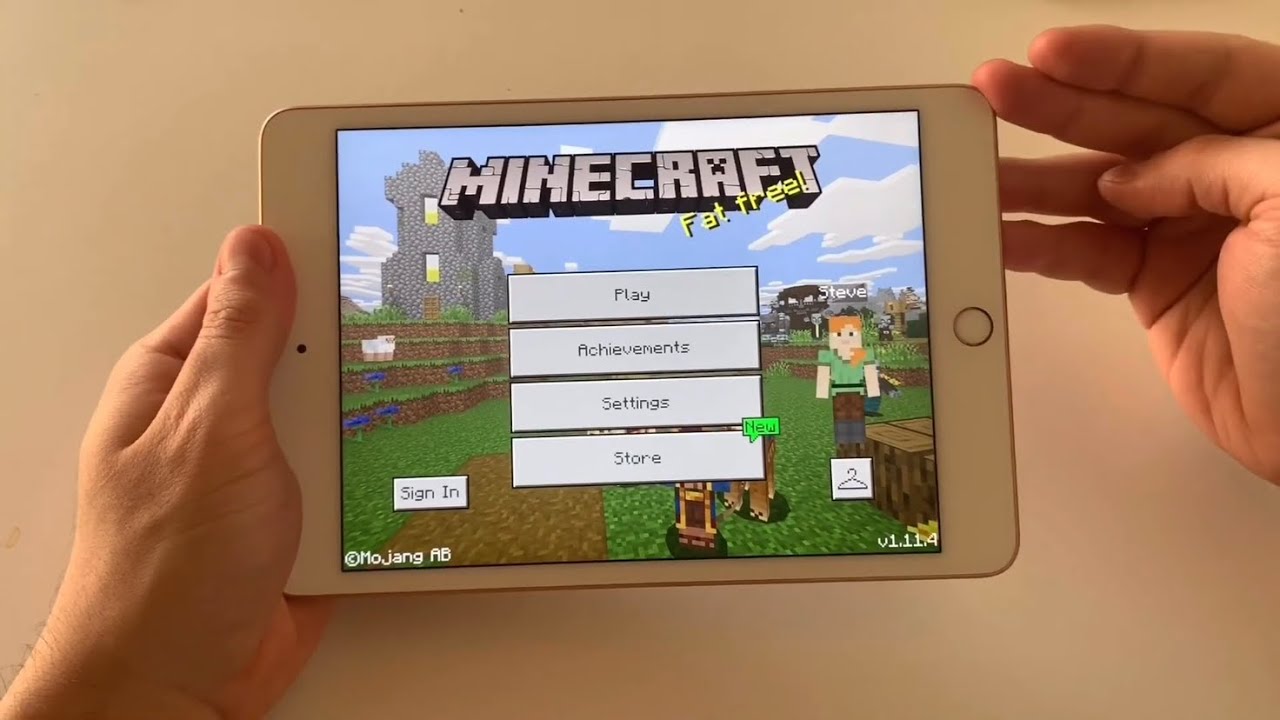
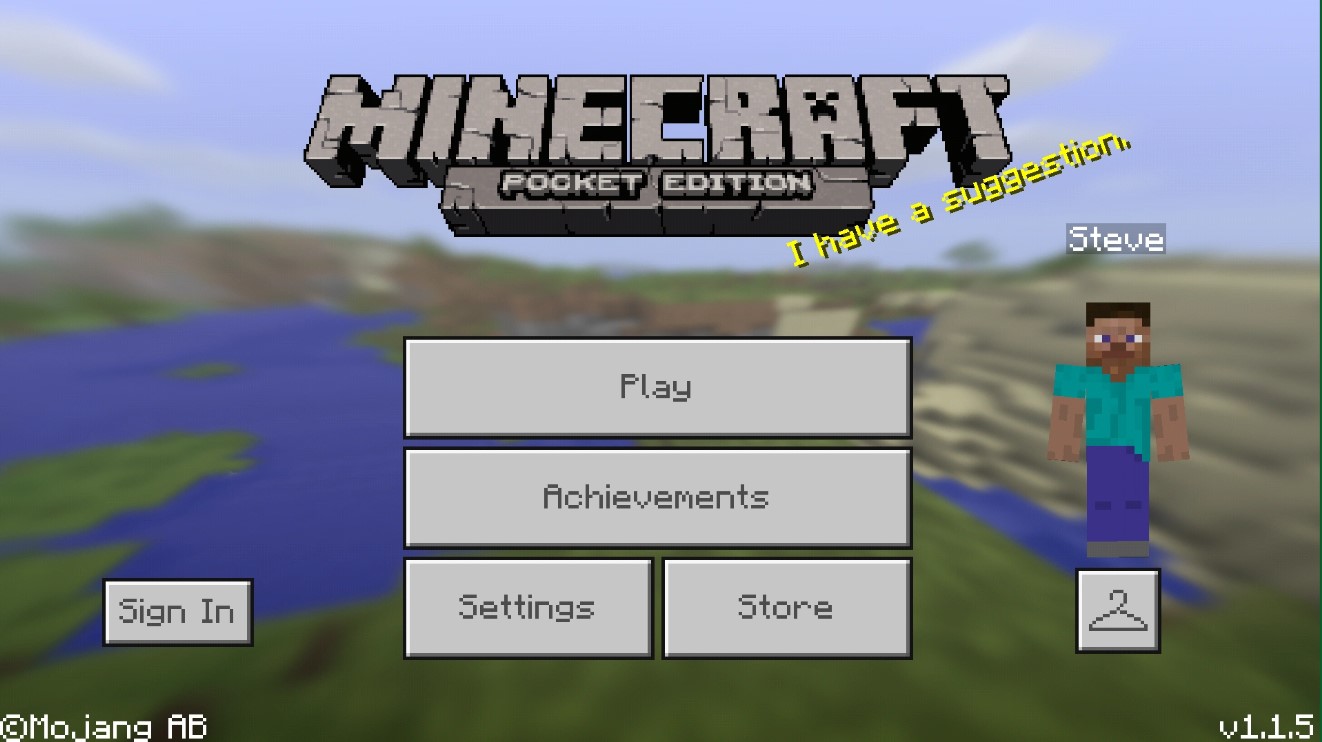
Step 4: Open Minecraft PE
With the texture pack downloaded and ready to go, it’s time to open Minecraft PE on your device. Follow these simple steps to launch the game:
- Locate the Minecraft PE App: Look for the Minecraft PE app icon on your device’s home screen or in your app library. The icon typically features the familiar Minecraft logo, comprised of a blocky grassy landscape.
- Tap or Click on the Minecraft PE App: Once you’ve located the Minecraft PE app, tap or click on it to open the game. Depending on your device’s processing power and the number of installed apps, it may take a few seconds for the game to load.
- Enter Your Minecraft PE Account Credentials: If prompted, enter your Minecraft PE account credentials, including your username and password. This step ensures that you have access to the full range of features and content within the game.
- Select “Play” or “Start”: Once you’ve logged in, you will be presented with the main menu of Minecraft PE. Look for the “Play” or “Start” button and tap or click on it to begin your Minecraft adventure.
After following these steps, you should find yourself in the Minecraft PE gameplay environment, surrounded by endless possibilities. However, we’re not done yet – the next step involves navigating to the settings menu to prepare for the installation of the downloaded texture pack.
Note: The steps to open Minecraft PE may slightly vary depending on the device you are using and any specific customizations you have made to your device’s layout. However, the general process should remain similar across devices.
Step 5: Go to the Settings Menu
Now that you have Minecraft PE open on your device, it’s time to navigate to the settings menu to prepare for the installation of the downloaded texture pack. Follow these steps to access the settings menu:
- Look for the Options Button: In the main Minecraft PE gameplay interface, locate the options button, typically represented by three horizontal lines or three dots. This button is usually found in the top-right or bottom-right corner of the screen.
- Tap or Click on the Options Button: Once you’ve located the options button, tap or click on it to open the settings menu. This menu contains various configuration options to customize your Minecraft PE experience.
- Find the Settings Icon: Within the options menu, look for the settings icon, often represented by a gear or cogwheel. This icon signifies the specific settings section where you can manage various aspects of the game.
- Tap or Click on the Settings Icon: Once you’ve found the settings icon, tap or click on it to access the settings menu. This menu is where you can modify the game’s settings to suit your preferences.
After following these steps, you should find yourself in the settings menu of Minecraft PE, ready to take the next steps towards installing the texture pack. However, don’t rush just yet – the upcoming steps will guide you through the necessary actions to apply the downloaded texture pack to your Minecraft PE world.
Keep in mind that the steps to access the settings menu may vary slightly depending on the version of Minecraft PE you are using and any device-specific interfaces. However, the general approach should remain consistent across devices.
Step 6: Select “Global Resources”
Now that you’re in the settings menu of Minecraft PE, it’s time to navigate to the specific section where you can manage your texture packs. Follow these steps to select “Global Resources”:
- Look for the “Options” or “Settings” Tab: Within the settings menu, locate the tab or section that allows you to modify and customize various aspects of the game. This tab is often labeled as “Options” or “Settings” and may be represented by an icon such as a gear or cogwheel.
- Tap or Click on the “Options” or “Settings” Tab: Once you’ve located the appropriate tab or section, tap or click on it to expand the options within that respective category. This will provide you with more specific settings to choose from.
- Find the “Global Resources” Option: Within the expanded options or settings, look for the specific category dedicated to managing your texture packs. This category is typically labeled as “Global Resources” or similar and may be represented by an icon such as a file folder or a stack of bricks.
- Tap or Click on the “Global Resources” Option: Once you’ve found the “Global Resources” option, tap or click on it to access the section where you can view and enable/disable texture packs.
After following these steps, you should find yourself in the “Global Resources” section of Minecraft PE, ready to continue with the next steps towards installing your downloaded texture pack. Stay tuned for the upcoming steps, which will guide you through the actions of selecting and applying the texture pack to enhance your Minecraft PE experience.
Keep in mind that the exact navigation and labeling of menu options may differ slightly based on the version of Minecraft PE and any device-specific interfaces. Nevertheless, the overall process should remain largely consistent across devices.
Step 7: Tap on “My Packs”
Now that you are in the “Global Resources” section of Minecraft PE, it’s time to navigate to the specific area where your downloaded texture pack is located. Follow these steps to tap on “My Packs”:
- Look for the Texture Pack Section: Within the “Global Resources” menu, locate the section that displays the available texture packs. This section is where you can manage, enable, and disable the texture packs you have downloaded.
- Scroll or Swipe to Find “My Packs”: If you have multiple texture packs downloaded or enabled, you may need to scroll or swipe through the available options to find the section labeled “My Packs.” Look for this specific section, as it contains the texture packs that you have personally downloaded.
- Tap on “My Packs”: Once you have located the “My Packs” section, tap on it to access the list of texture packs that you have downloaded and stored on your device.
After following these steps, you will now be in the “My Packs” section of Minecraft PE, where you can view all the texture packs you have downloaded and are ready to be applied. The next steps will guide you through selecting the downloaded texture pack and preparing to apply it to your Minecraft PE world.
Keep in mind that the specific design and layout of the “Global Resources” menu may vary slightly depending on the version of Minecraft PE and any device-specific interfaces. However, the general process of accessing the “My Packs” section should remain consistent across devices.
Step 8: Select the Downloaded Texture Pack
Now that you’re in the “My Packs” section of Minecraft PE, it’s time to select the downloaded texture pack from the list. Follow these steps to choose the desired texture pack:
- Scan the List of Texture Packs: In the “My Packs” section, you will see a list of texture packs that you have downloaded and are ready to be applied. Scan through the list and look for the specific texture pack that you want to use.
- Tap on the Downloaded Texture Pack: Once you’ve found the desired texture pack, tap on it to select it. This action will highlight the texture pack and prepare it for installation to your Minecraft PE world.
- Review Texture Pack Details: After selecting the texture pack, take a moment to review any relevant details or information provided. This may include the pack’s resolution, creator, style, or any additional notes that could enhance your understanding and appreciation of the texture pack.
By completing these steps, you have successfully selected the downloaded texture pack from your “My Packs” list. However, there are a few more steps to go before you can fully enjoy the new textures in your Minecraft PE world. The upcoming steps will guide you through applying the texture pack and setting it as the primary visual style for your gameplay.
Please note that the exact appearance and layout of the “My Packs” section may vary slightly depending on the version of Minecraft PE and any device-specific interfaces. Nonetheless, the general process of selecting the downloaded texture pack remains consistent across devices.
Step 9: Apply the Texture Pack
Now that you have selected the desired texture pack from your “My Packs” list in Minecraft PE, it’s time to apply the texture pack and bring your new visual experience to life. Follow these steps to apply the texture pack:
- Look for the “Activate” or “Apply” Button: Within the selected texture pack’s details page, locate the button or option that allows you to activate or apply the texture pack to your Minecraft PE world. This button is typically labeled as “Activate,” “Apply,” or a similar term.
- Tap or Click on the “Activate” or “Apply” Button: Once you have located the appropriate button, tap or click on it to initiate the process of applying the texture pack. This action will set the selected texture pack as the primary visual style for your Minecraft PE gameplay.
- Wait for the Texture Pack to Load: After tapping or clicking the “Activate” or “Apply” button, be patient as Minecraft PE loads the textures and applies them to your world. Depending on the size and complexity of the texture pack, this process may take a few moments.
- Confirm the Applied Texture Pack: Once the texture pack has finished loading, you will be redirected back to the “My Packs” section. Here, you should see a visual confirmation that the selected texture pack has been successfully applied and is now active in your Minecraft PE world.
By following these steps, you have successfully applied the downloaded texture pack to your Minecraft PE world. Get ready to experience Minecraft with a fresh new visual perspective! Now, it’s time to dive into your Minecraft PE gameplay and enjoy the transformed aesthetics brought by the applied texture pack.
Keep in mind that the actual appearance and placement of the “Activate” or “Apply” button may vary slightly depending on the version of Minecraft PE and any device-specific interfaces. Nevertheless, the general process of applying the texture pack remains consistent across devices.
Step 10: Start Playing Minecraft PE with the New Texture Pack
Now that you have successfully applied the downloaded texture pack to your Minecraft PE world, it’s time to dive into the gameplay and experience the exciting changes and enhancements that the pack brings. Follow these steps to start playing Minecraft PE with the new texture pack:
- Exit the Settings Menu: Once you have confirmed that the selected texture pack is successfully applied, you can exit the settings menu by tapping the back button or navigating back to the main Minecraft PE gameplay interface.
- Start a New World or Load an Existing World: Within the main Minecraft PE interface, you have the option to start a new world or load an existing world. Select the desired world to begin your Minecraft adventure.
- Explore the New Visuals: As you start playing in your chosen world, take the time to explore and appreciate the new visuals offered by the texture pack. Notice how the textures of blocks, items, and even the environment have been transformed to match the style of the pack you downloaded.
- Enjoy the Enhanced Experience: Let the new texture pack enhance your Minecraft PE experience as you build, mine, explore, and interact with the world around you. Embrace the unique atmosphere and visual aesthetics that the pack provides.
- Experiment and Customize: Feel free to experiment with different game elements and explore how the texture pack affects various aspects of Minecraft PE. Customize your world and see how the pack’s textures interact with different biomes, structures, and objects.
By following these steps, you are now fully immersed in the Minecraft PE world with the newly applied texture pack. Enjoy the enhanced visuals, immerse yourself in creativity, and have fun exploring your customized Minecraft PE experience!
Remember, texture packs can be disabled, changed, or updated at any time. Feel free to explore other texture packs and discover new ways to customize and elevate your Minecraft PE gameplay.
Conclusion
Congratulations! You have successfully learned how to download and install texture packs for Minecraft PE. By following the step-by-step process outlined in this guide, you were able to find a trusted website, choose a texture pack, download it, open Minecraft PE, navigate to the settings menu, select “Global Resources,” tap on “My Packs,” choose the downloaded texture pack, apply it, and start playing Minecraft PE with the new visuals.
Texture packs are an excellent way to personalize and enhance your Minecraft PE experience. Whether you prefer a realistic, whimsical, or themed look, the wide range of texture packs available allows you to transform your Minecraft world to suit your preferences and style. By selecting the right texture pack, you can create a truly unique and visually stunning gameplay environment.
Remember to periodically check for updates to your texture packs and explore new options to keep your Minecraft PE gameplay fresh and exciting. Experiment with different packs, themes, and resolutions to find the perfect combination that brings your imagination to life in the blocky world of Minecraft PE.
Now that you have the knowledge and understanding of how to download and install texture packs for Minecraft PE, it’s time to unleash your creativity and embark on countless adventures in your customized world. So go ahead, dive back into the game, and enjoy the immersive experience of Minecraft PE with your new texture pack!