Introduction
Are you looking to download Python for your Mac computer? Python is a versatile and powerful programming language that is widely used for various applications, from web development to data analysis and scientific computing. It is highly compatible with Mac OS, making it a popular choice among developers and programmers.
In this guide, we will walk you through the step-by-step process of downloading Python for Mac. Whether you are a beginner or an experienced developer, this guide will help you get started with Python on your Mac machine.
Python offers numerous advantages, including its simplicity, readability, and a vast collection of libraries and modules. With Python, you can create programs that are both efficient and easy to understand. Whether you are a student learning programming or a professional developer, Python provides a solid foundation for building a variety of applications.
To download Python for your Mac, you don’t need any prior experience or technical knowledge. Just follow our instructions, and you’ll have Python up and running on your Mac in no time.
So, let’s dive in and see how you can download Python for your Mac computer.
Step 1: Go to the Python website
The first step in downloading Python for your Mac is to visit the official Python website. Open your preferred web browser and enter the following URL in the address bar: https://www.python.org.
Once you’re on the Python website, you will see a navigation menu at the top of the page. Here, you can access various resources, documentation, and download Python itself. Take a moment to explore the website and familiarize yourself with the available options.
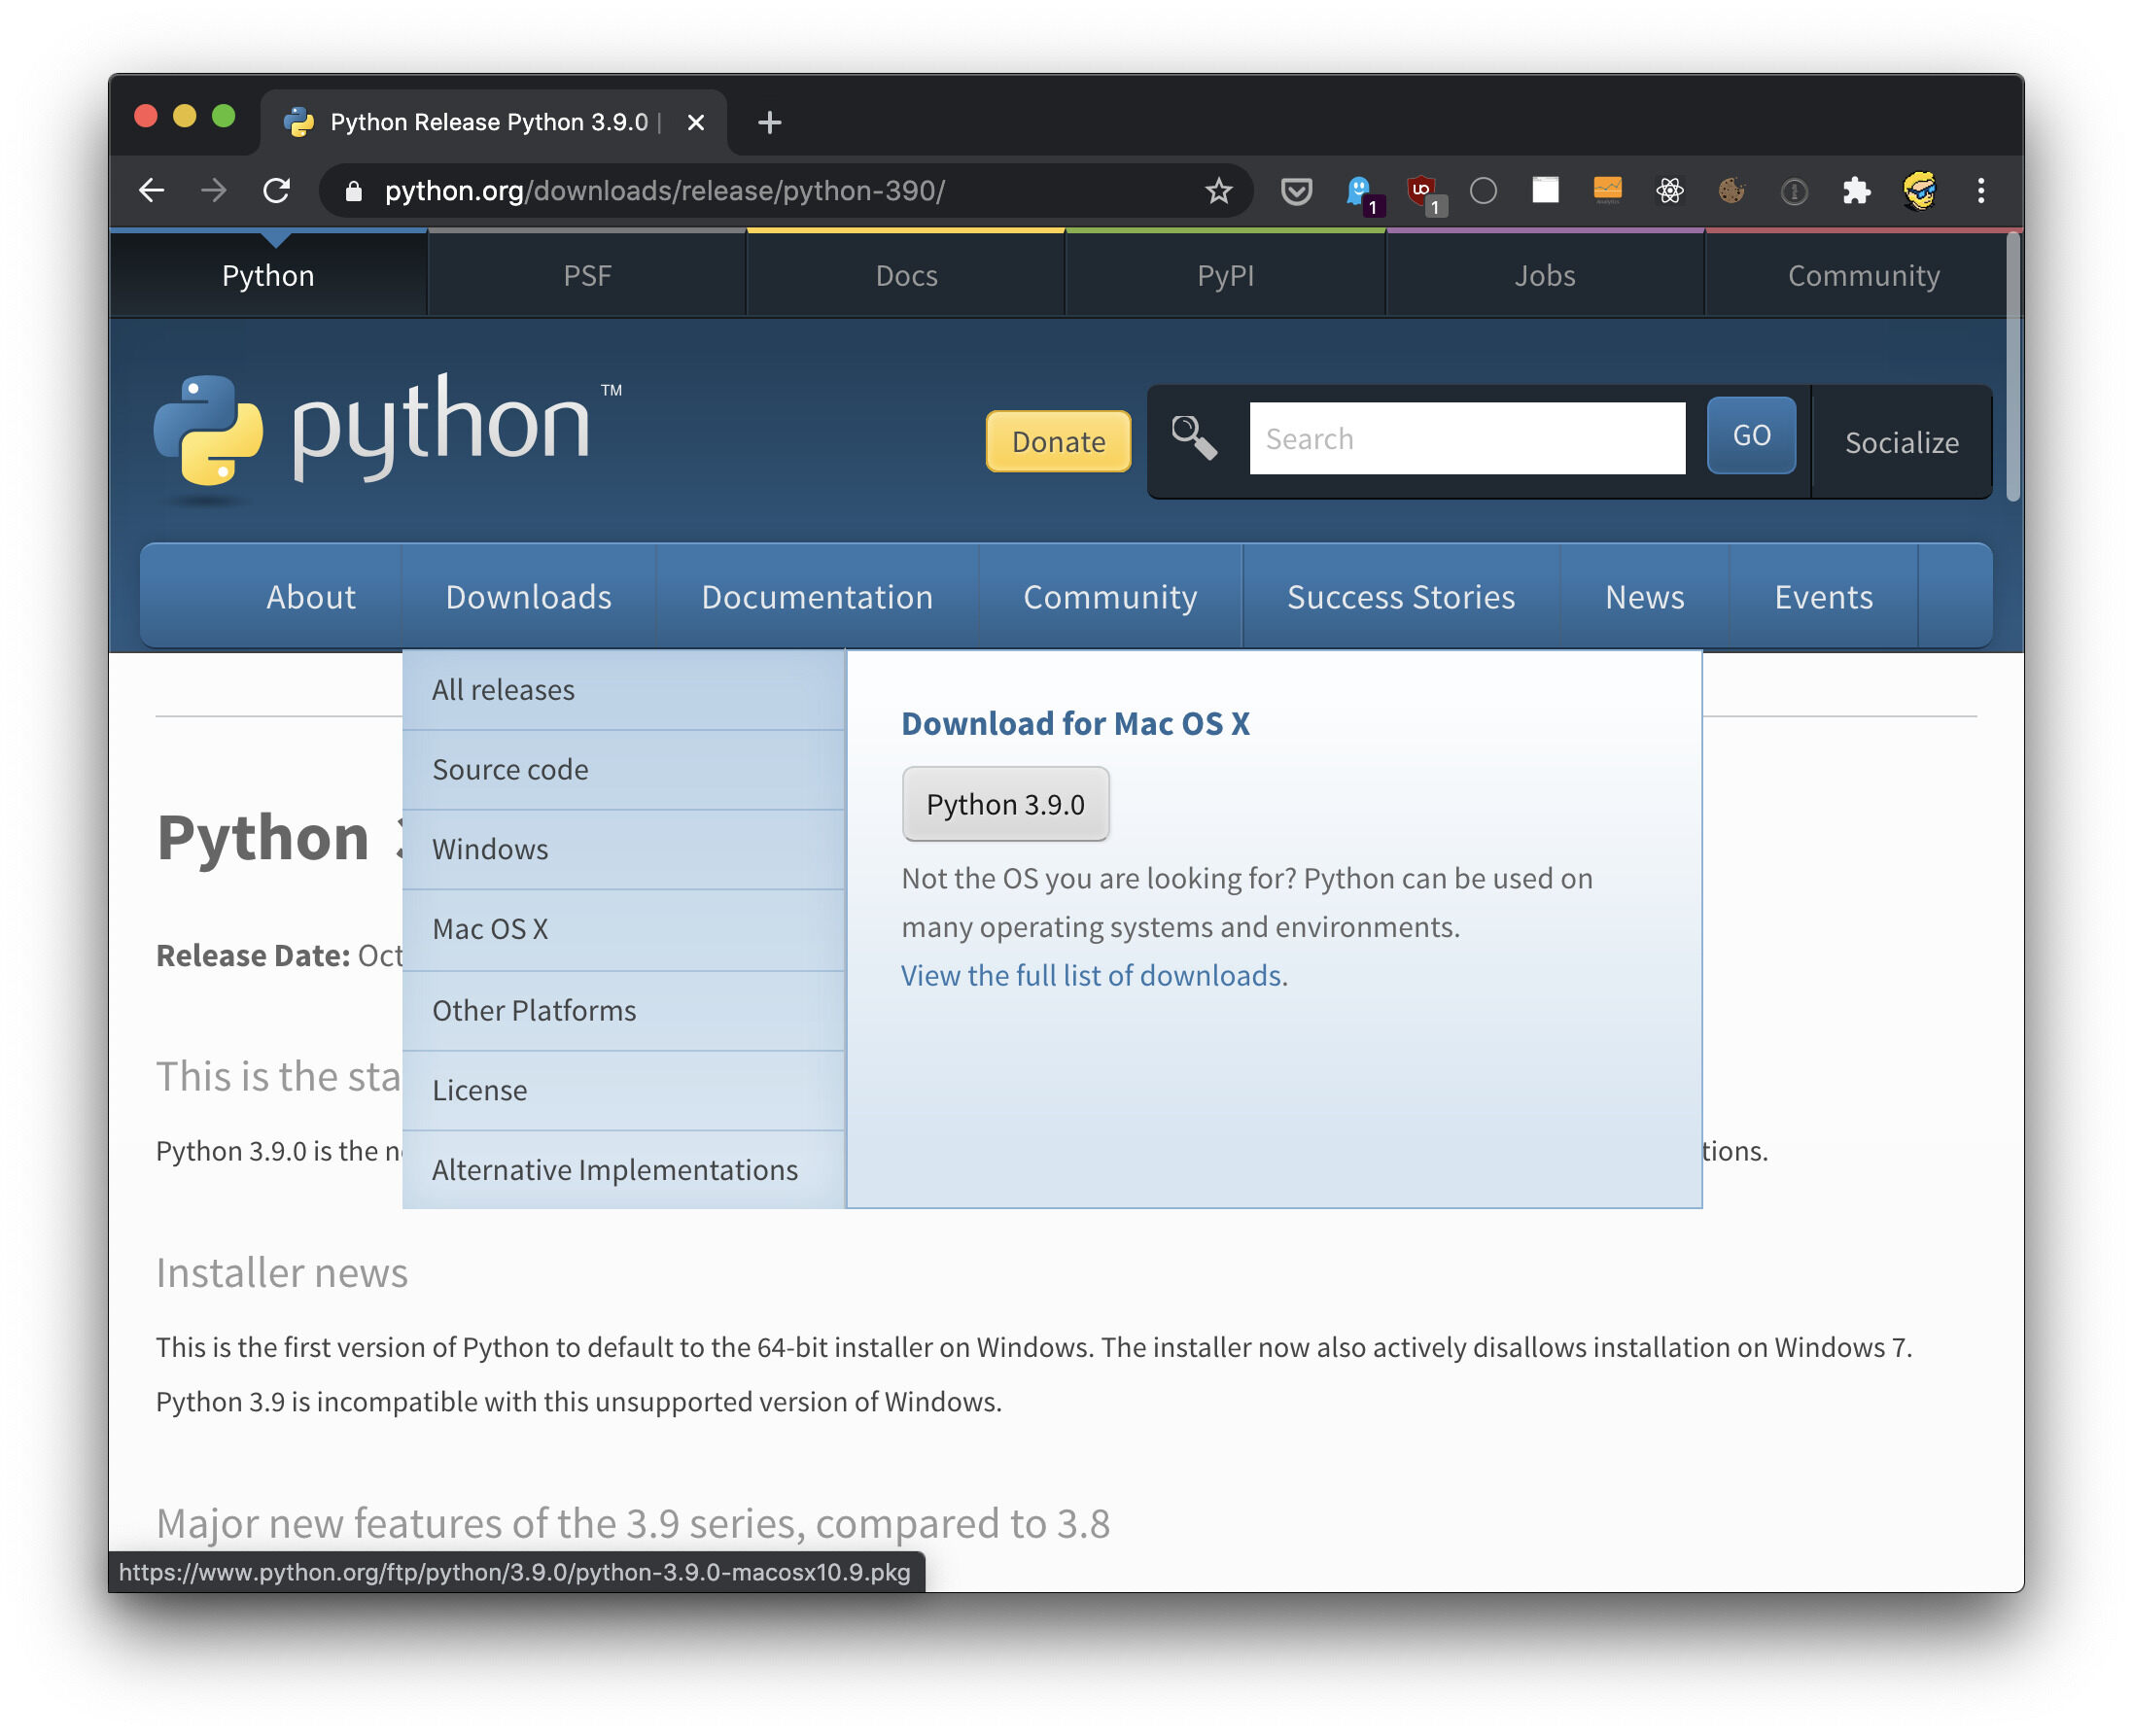
Python offers different versions, and it’s important to choose the appropriate version for your Mac operating system. At the top of the Python website, you will find the “Downloads” tab. Click on it to proceed to the download page.
On the download page, you will see two major versions of Python: Python 2 and Python 3. Python 2 has reached its end of life and is no longer actively supported, so it is recommended to download Python 3 for new projects.
Under each major version, you will find several release versions. It is recommended to download the latest stable release, as it includes the most recent bug fixes and improvements. However, if you have specific requirements for an older version, you can choose to download that instead.
Python also provides a “Latest Python 3 Release” section, which displays the most recent stable release of Python 3. This section is helpful if you want to stay updated with the latest features and enhancements offered by Python.
Once you have selected the version of Python you want to download, you’re ready to move on to the next step: downloading the Python installer.
Step 2: Select the Python version for Mac
After reaching the Python website and accessing the download page, the next step is to select the appropriate Python version for your Mac. Python offers different versions that are compatible with various Mac operating systems.
Scroll through the list of available Python versions and locate the one that is compatible with your Mac. It is important to choose the version that matches your Mac’s operating system version to ensure compatibility and optimal performance.
For example, if you’re using the latest version of macOS, such as macOS Catalina or macOS Big Sur, you will need to choose a Python version specifically designed for these operating systems. These versions will have the necessary adaptations and updates to work seamlessly on your Mac.
If you’re unsure about the version of macOS you’re using, you can check it by clicking on the Apple menu in the top-left corner of your screen, selecting “About This Mac,” and finding the information under the “Overview” tab.
Python’s official website often provides guidance on which Python version is compatible with specific macOS versions. If you’re not sure which version to choose, refer to the documentation or community forums on the Python website for assistance.
Once you’ve identified the correct Python version for your Mac, it’s time to proceed to the next step: downloading the Python installer that corresponds to your chosen version.
Step 3: Download the Python installer
Once you have selected the appropriate Python version for your Mac, the next step is to download the Python installer. The installer contains the necessary files and components to install Python on your Mac.
On the Python download page, locate the download button or link that corresponds to your chosen Python version. Click on it to start the download process.
Depending on your web browser settings, you may be prompted to choose a location to save the installer file. Select a location on your Mac where you can easily find the file, such as the Downloads folder.
The download process may take a few moments, depending on your internet connection speed. Once the download is complete, you will have a file with a “.pkg” extension. This is the Python installer file.
Before proceeding to the next step, it is recommended to verify the integrity of the downloaded file. You can do this by checking the checksum provided on the Python website. The checksum is a unique value that ensures the file has not been modified or corrupted during the download process.
Compare the checksum value on the Python website with the one calculated for the downloaded installer file. If the checksums match, it means the file is intact, and you can proceed to the installation step.
Once you have successfully downloaded the Python installer and verified its integrity, you’re ready to move on to the next step: running the installer on your Mac.
Step 4: Run the installer
Now that you have downloaded the Python installer for your Mac, it’s time to run the installer and begin the installation process. The installer will guide you through the necessary steps to install Python on your Mac.
Locate the Python installer file that you downloaded in the previous step. Double-click on the file to launch the installer. If prompted, enter your administrator password to proceed with the installation.
Once the installer opens, you will be presented with various options and settings. It is recommended to go with the default settings unless you have specific requirements or preferences.
Read through the installation instructions provided by the installer and follow the on-screen prompts to proceed. The installer will display the progress of the installation, and it may take a few moments to complete.
During the installation process, the installer will copy files, configure settings, and set up Python on your Mac. It will ensure that all the necessary components are installed correctly and ready to use.
Once the installation is complete, the installer will notify you. At this point, you have successfully installed Python on your Mac. Congratulations!
Remember to keep track of the installation location and any additional instructions provided by the installer. This information may be useful later when working with Python and accessing its features and tools.
Now that Python is installed on your Mac, it’s time to explore its capabilities and start using it for your programming and development needs.
In the next step, we will cover optional customization settings that you can apply to your Python installation if desired.
Step 5: Customize the Python installation (optional)
While the default settings of the Python installer are perfectly suitable for most users, there may be instances where you want to customize the installation based on your specific needs. In this step, we will explore some optional customization settings that you can apply to your Python installation.
During the installation process, the Python installer provides various options that allow you to customize your installation. These options may include selecting additional components, adjusting installation paths, or configuring advanced settings.
For example, you may have specific requirements for certain Python modules or libraries. In this case, you can choose to install additional components that are not included in the default installation. The installer may provide a list of available components for you to select from or allow you to specify a custom list of modules to install.
Additionally, you may have preferences for the installation path of Python on your Mac. By default, Python is installed in the system’s “Applications” or “Program Files” directory. However, if you prefer a different location, such as a specific folder on your system, you can choose a custom installation path during the installation process.
Some installers also offer advanced settings that allow you to configure various aspects of your Python installation, such as the default version of Python to use, the inclusion of additional tools or utilities, or the integration with other software or development environments.
It is important to note that not all installers may offer the same customization options. The available settings may vary depending on the specific installer version and the configuration choices made by the Python development team.
If you’re unsure about which customization options to choose, it is generally safe to go with the default settings. You can always make further adjustments and modifications to your Python installation after it has been completed.
Once you have selected and configured the desired customization settings, proceed with the installation as instructed by the installer. The changes will be applied during the installation process, and you will have a customized Python installation on your Mac.
Now that the installation is complete, it’s time to move on to the next step: adding Python to your PATH (optional).
Step 6: Add Python to your PATH (optional)
Adding Python to your PATH is an optional step but can be beneficial if you want to easily run Python scripts or access Python’s command-line interface (CLI) from any directory in your Mac’s terminal.
By adding Python to your PATH, you allow your operating system to locate the Python executable file without specifying its full path. This means that you can simply type “python” in the terminal, and your system will know where to find the Python interpreter.
To add Python to your PATH on Mac, follow these steps:
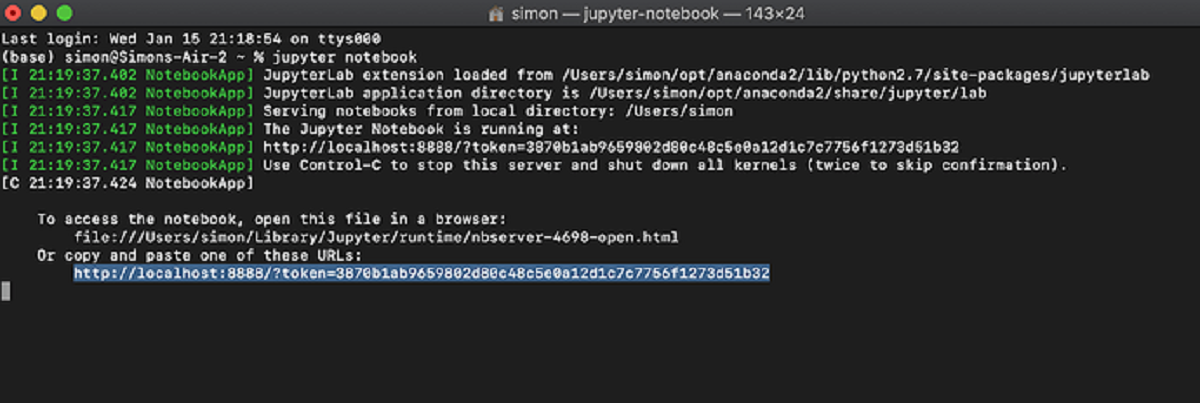
- Open the Terminal application on your Mac. You can do this by searching for “Terminal” in the Applications folder or using the Spotlight search.
- In the terminal, type the following command and press Enter:
echo $PATH - The command will display a list of directories where your system looks for executable files. Look for a directory that contains the Python executable. It should look something like
/usr/local/binor/usr/bin. - To add Python to your PATH, you need to modify the
~/.bash_profilefile. In the terminal, typenano ~/.bash_profileand press Enter. This will open the file in the nano text editor. - In the nano editor, scroll to the bottom of the file and add the following line:
export PATH="/path/to/python:$PATH"
Replace/path/to/pythonwith the actual path to where your Python executable is located, which you identified in step 3. For example, if Python is in/usr/local/bin, the line should be:export PATH="/usr/local/bin:$PATH" - Press
Ctrl + Xto exit nano, then pressYfollowed by Enter to save the changes. - Close the terminal and open a new terminal window for the changes to take effect.
- To verify that Python has been added to your PATH, type
python --versionin the terminal. It should display the version of Python installed on your Mac.
By adding Python to your PATH, you can now conveniently run Python scripts or use Python’s CLI from any directory in the terminal, without having to specify the full path to the Python executable.
In the next step, we will cover how to verify the Python installation on your Mac.
Step 7: Verify the Python installation
After successfully installing Python on your Mac and potentially making any desired customizations, it is important to verify that the installation was successful. This step ensures that Python is functioning correctly on your system and ready to be used for development and programming tasks.
To verify the Python installation on your Mac, follow these simple steps:
- Open the Terminal application on your Mac.
- In the terminal, type
python --versionand press Enter. - The terminal will display the version of Python installed on your Mac. For example, if you installed Python 3.9.2, it will display something like:
Python 3.9.2 - If the command displays the Python version without any errors, it means the installation was successful, and Python is ready to use.
Additionally, you can verify the installation by running a simple Python script. Here’s how:
- Create a new file with a .py extension using a text editor.
- Write a simple Python script, such as:
print("Hello, Python!") - Save the file with a .py extension, for example,
hello.py. - In the terminal, navigate to the directory where you saved the file.
- Run the script by typing
python hello.pyand press Enter. - If the script prints “Hello, Python!” in the terminal, it means Python is running correctly and executing the script.
By verifying the Python installation and running a simple script, you can ensure that Python is installed and functioning as expected on your Mac. Any issues or errors during this process may indicate a problem with the installation and may require further troubleshooting.
Now that you have successfully verified the Python installation, you are all set to start using Python and exploring its vast capabilities on your Mac.
Conclusion
Congratulations! You have successfully downloaded and installed Python on your Mac. Python is a powerful and versatile programming language that opens up a world of possibilities for development and programming tasks.
By following the step-by-step guide outlined in this article, you have learned how to go to the Python website, select the appropriate Python version for your Mac, download the Python installer, run the installer, optionally customize the installation, add Python to your PATH (optional), and verify the installation. These steps ensure that you have a properly functioning Python installation on your Mac.
With Python installed, you are now ready to explore its various libraries, modules, and tools to create impressive applications, perform data analysis, automate tasks, and much more. Python’s simplicity and readability make it an ideal programming language for both beginners and experienced developers.
Remember to stay up to date with the Python community and regularly check for updates and new releases. Python has a vibrant and active community that contributes to the language’s growth and offers valuable resources, tutorials, and support.
Now that you have Python at your fingertips, let your creativity and problem-solving skills shine in the world of programming. Start coding, build projects, and enjoy the fantastic journey of Python development on your Mac!
Happy coding!